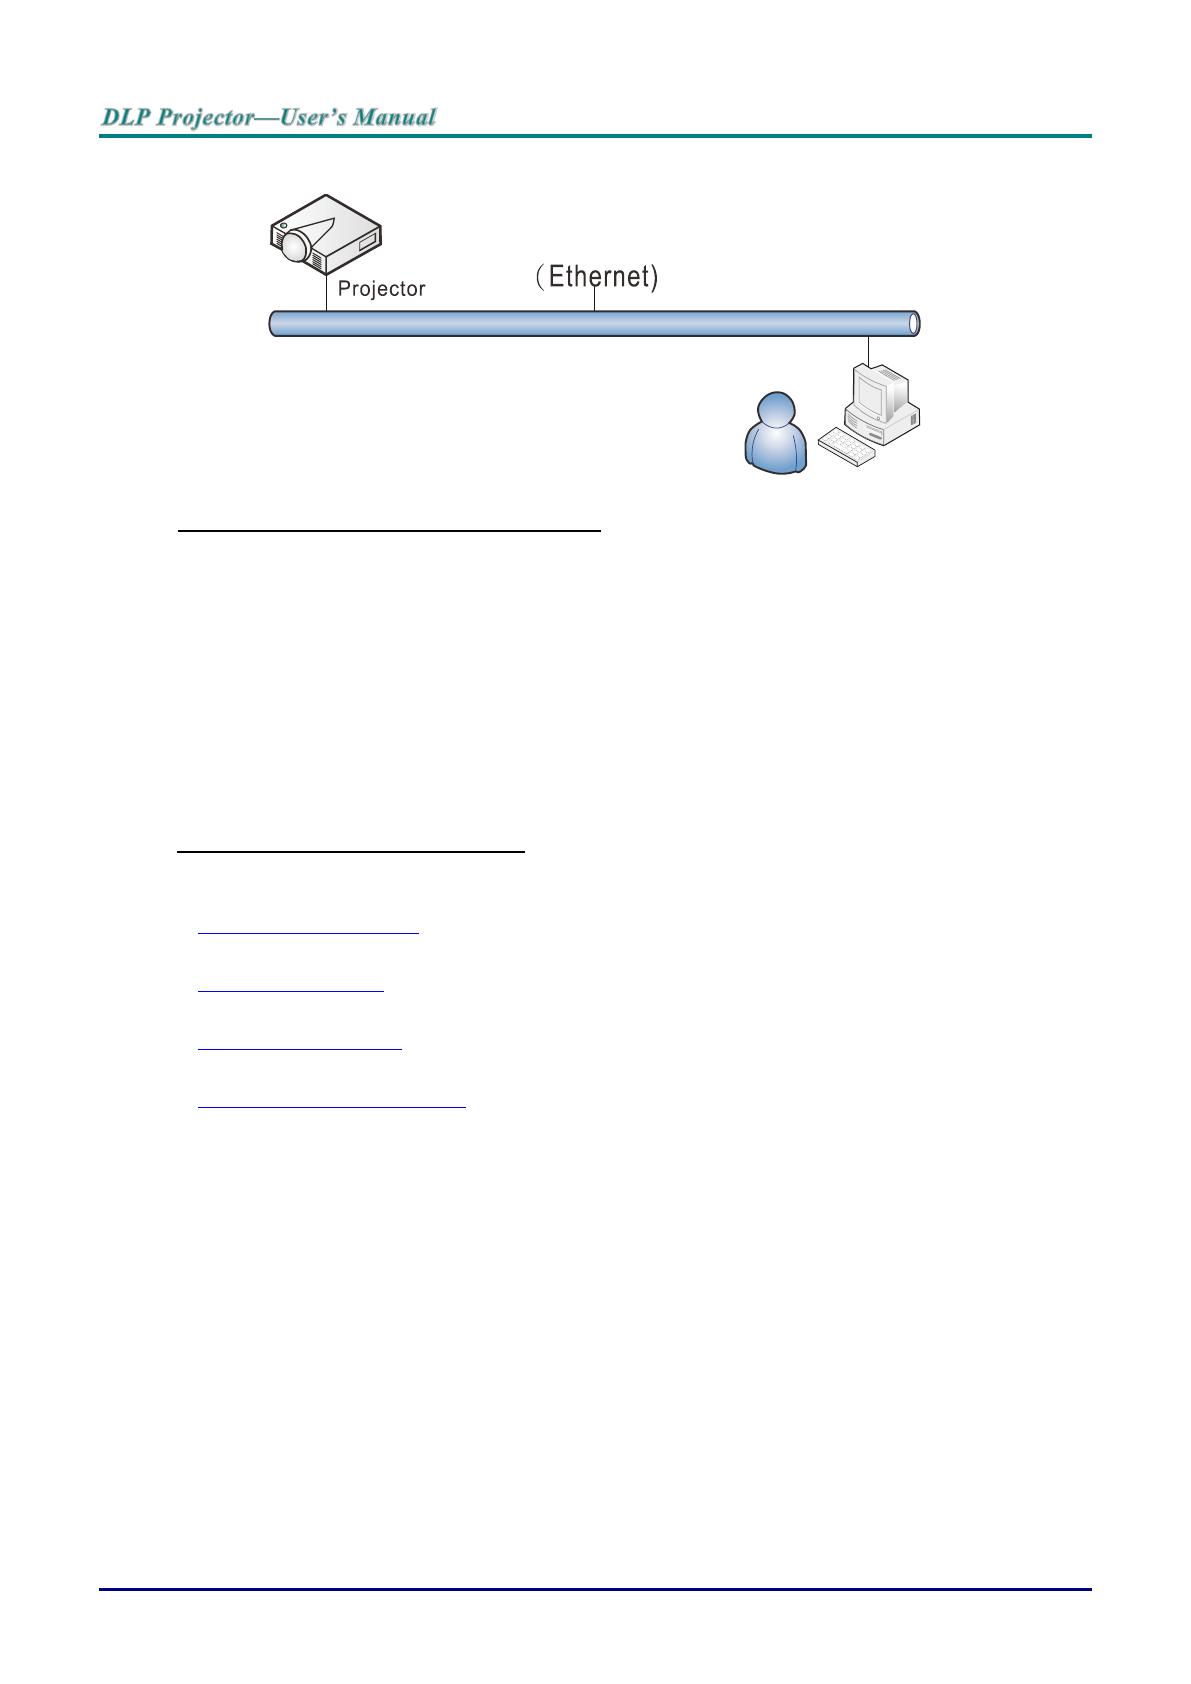
Vivitek DU7095Z User manual

Category
Data projectors
Type
User manual

The Vivitek DU7095Z is a versatile and feature-rich multimedia projector that offers a wide range of capabilities for both business and educational use. With its high brightness of 7000 lumens and XGA resolution, it delivers crisp and clear images even in well-lit rooms. The projector also boasts a long lamp life of up to 10,000 hours, ensuring minimal maintenance and cost savings.

The Vivitek DU7095Z is a versatile and feature-rich multimedia projector that offers a wide range of capabilities for both business and educational use. With its high brightness of 7000 lumens and XGA resolution, it delivers crisp and clear images even in well-lit rooms. The projector also boasts a long lamp life of up to 10,000 hours, ensuring minimal maintenance and cost savings.

42
Advanced 1 Feature
Press the Menu button to open the OSD menu. Press ◄► to move to the Settings 2 menu. Press ▲▼ to
move to the Advanced 1 menu and then press Enter or ►. Press ▲▼ to move up and down in the
Advanced 1 menu. Press ◄► to enter and change values for setting.
ITEM
DESCRIPTION
Menu Position
Press the cursor ◄► button to enter and select different OSD location.
Translucent Menu
Press the cursor ◄► button to enter and select OSD background translucent level.
Low Power Mode
Press the cursor ◄► button to enter and turn Low Power Mode Off/On or On By Lan.
Fan Speed
Press the cursor ◄► button to enter and toggle between Normal and High fan
speeds.
Note: We recommend selecting high speed in high temperatures, high humidity, or
high altitude (higher than 1500m/4921ft) areas.
Light Info
Press (Enter) / ► to enter the Light Info menu to display the light hours for each
light mode.
Projector ID
Press the cursor ◄► button to enter and adjust a two digit projector ID from 00
through 98.
Remote ID
Press the cursor ◄► buttons to select remote ID to fit the current remote ID settings.
Network
Press (Enter) / ► to enter the Network menu. See page 43 for more information on
Network.
Note:
About “On By Lan, RJ45 will support to be waked up in this mode(Under 3W) but scalar won’t.
Note:
1. Remoter with Default customer code will be available for any Remote ID setting on the OSD.
2. Status key will be available for any Remote ID setting on the OSD
3. IF users forget the current Remote ID setting, please press the Status key to call out the
INFORMATION OSD to check the current Remote ID setting and then adjust the ID on the remoter
to meet the OSD setting.
4. After adjusting Remote ID from OSD, only if the OSD Menu has been closed then the new ID value
can be taken effected and memorized.
5. The setting value “Default” means ID 0 on the remoter.
43
Network
ITEM
DESCRIPTION
Network State
Displays the network connection status.
DHCP
Press ◄► to turn DHCP On or Off.
Note: If you select DHCP Off, complete the IP Address, Subnet Mask, Gateway, and
DNS fields.
IP Address
Enter a valid IP address if DHCP is turned off.
Subnet Mask
Enter a valid Subnet Mask if DHCP is turned off.
Gateway
Enter a valid Gateway address if DHCP is turned off.
DNS
Enter a valid DNS name if DHCP is turned off.
Apply
Press (Enter) / ► to confirm settings.
44
LAN_RJ45
Wired LAN Terminal functionalites
Remote control and monitoring of a projector from a PC (or Laptop) via wired LAN is also possible.
Compatibility with Crestron / AMX (Device Discovery) / Extron control boxes enables not only collective
projector management on a network but also management from a control panel on a PC (or Laptop)
browser screen.
Crestron is a registered trademark of Crestron Electronics, Inc. of the United States.
Extron is a registered trademark of Extron Electronics, Inc. of the United States.
AMX is a registered trademark of AMX LLC of the United States.
PJLink applied for trademark and logo registration in Japan, the United States of America, and
other countries by JBMIA.
Supported External Devices
This projector is supported by the specified commands of the Crestron Electronics controller and
related software (ex, RoomView ®).
http://www.crestron.com/
This projector is supported by AMX ( Device Discovery ).
http://www.amx.com/
This projector is compliant to support Extron device(s) for reference.
http://www.extron.com/
This projector supports all commands of PJLink Class1 (Version 1.00).
http://pjlink.jbmia.or.jp/english/
For more detail of information about the diverse types of external devices which can be connected to the
LAN/RJ45 port and remote/control the projector, as well as the related control commands supporting for
each external device, kindly please get contact with the Support-Service team directly.
45
LAN_RJ45
1. Connect an RJ45 cable to RJ45 ports on the projector and the PC (Laptop).
2. On the PC (Laptop), select Start Control Panel Network and Internet.
46
3. Right-click on Local Area Connection, and select Properties.
4. In the Properties window, select the Networking tab, and select Internet Protocol (TCP/IP).
5. Click Properties.
6. Click Use the following IP address and fill in the IP address and Subnet mask, then click OK.
47
7. Press the Menu button on the projector.
8. Select Settings2→ Advanced1 → Network
9. After getting into Network, input the following:
DHCP: Off
IP Address: 10.10.10.10
Subnet Mask: 255.255.255.0
Gateway: 0.0.0.0
DNS Server: 0.0.0.0
10. Press (Enter) / ► to confirm settings.
Open a web browser
(for example, Microsoft Internet Explorer with Adobe Flash Player 9.0 or higher).
11. In the Address bar, input the IP address: 10.10.10.10.
12. Press (Enter) / ►.
The projector is setup for remote management. The LAN/RJ45 function displays as follows.
48
CATEGORY
ITEM
INPUT-LENGTH
Crestron Control
IP Address
15
IP ID
3
Port
5
Projector
Projector Name
10
Location
10
Assigned To
10
Network Configuration
DHCP (Enabled)
(N/A)
IP Address
15
Subnet Mask
15
Default Gateway
15
DNS Server
15
User Password
Enabled
(N/A)
New Password
10
Confirm
10
Admin Password
Enabled
(N/A)
New Password
10
Confirm
10
For more information, please visit http://www.crestron.com.
49
Preparing Email Alerts
1. Make sure that user can access the homepage of LAN RJ45 function by web browser (for ex-ample,
Microsoft Internet Explorer v6.01/v8.0).
2. From the Homepage of LAN/RJ45, click Alert Settings.
3. By default, these input boxes in Alert Settings are blank.
50
4. For Sending alert mail, input the following:
SMTP field is the mail server for sending out email (SMTP protocol). This is a required field.
To field is the recipient’s email address (for example, the projector administrator). This is a
required field.
Cc field sends a carbon copy of the alert to the specified email address. This is an optional field
(for example, the projector administrator’s assistant).
From field is the sender’s email address (for example, the projector administrator). This is a
required field.
e alert conditions by checking the desired boxes.
Note: Fill in all fields as specified. User can click Send Test Mail to test what setting is correct. For
successful sending an e-mail alert, you must select alert conditions and enter a correct e-mail address.
51
RS232 by Telnet Function
Besides projector connected to RS232 interface with “Hyper-Terminal” communication by dedicated
RS232 command control, there is alternative RS232 command control way, so called “RS232 by TELNET”
for LAN/RJ45 interface.
Quick Start-Guide for “RS232 by TELNET”
Check and get the IP-Address on OSD of the projector.
Make sure that laptop/PC can access the web-page of the projector.
Make sure that “Windows Firewall” setting to be disabled in case of “TELNET” function filtering out by
laptop/PC.
Start => All Programs => Accessories => Command Prompt
52
Input the command format like the below:
telnet ttt.xxx.yyy.zzz 23 (“Enter” key pressed)
(ttt.xxx.yyy.zzz: IP-Address of the projector)
If Telnet-Connection ready, and user can have RS232 command input, then “Enter” key pressed, the
RS232 command will be workable.
How to have TELNET enabled in Windows VISTA / 7 / 8
By default installation for Windows VISTA / 7 / 8, “TELNET” function is not included. But end-user can
have it by way of “Turn Windows features On or Off” to be enabled.
Open “Control Panel” in Windows VISTA / 7 / 8
Open “Programs”
53
Select “Turn Windows features on or off” to open
Have “Telnet Client” option checked, then press “OK” button.
Specsheet for “RS232 by TELNET” :
1. Telnet: TCP
2. Telnet port: 23
(for more detail, kindly please get contact with the service agent or team)
3. Telnet utility: Windows “TELNET.exe” (console mode)
4. Disconnection for RS232-by-Telnet control normally: Close Windows Telnet utility directly after
TELNET connection ready
5. Limitation 1 for Telnet-Control: there is less than 50 bytes for successive network payload for
Telnet-Control application.
Limitation 2 for Telnet-Control: there is less than 26 bytes for one complete RS232 command for
Telnet-Control.
Limitation 3 for Telnet-Control: Minimum delay for next RS232 command must be more than 200
(ms).
(*, In Windows built-in “TELNET.exe” utility, “Enter” key pressed will have “Carriage-Return” and
“New-Line” code.)
74
APPENDIX I
RS-232C Protocol
RS232 Setting
Baud rate:
Parity check:
Data bit:
Stop bit:
Flow Control
UART16550 FIFO
Minimum delay for next command: 1ms
Control Command Structure
Header code
Command code
Data code
End code
HEX
Command
Data
0Dh
ASCII
‘V’
Command
Data
CR
Operation Command
Note:
"CR" mean Carriage Return
XX=00-98, projector's ID, XX=99 is for all projectors
Return Result P=Pass / F=Fail
n: 0:Disable/1: Enable/Value(0~9999)
Command Group 00
ASCII
HEX
Function
Description
Return Result
VXXS0001
56h Xh Xh 53h 30h 30h 30h 31h 0Dh
Power On
P/F
VXXS0002
56h Xh Xh 53h 30h 30h 30h 32h 0Dh
Power Off
P/F
VXXS0003
56h Xh Xh 53h 30h 30h 30h 33h 0Dh
Resync
P/F
VXXG0004
56h Xh Xh 47h 30h 30h 30h 34h 0Dh
Get Light Hours
Pn/F
VXXS0005n
56h Xh Xh 53h 30h 30h 30h 35h nh 0Dh
Set Air filter timer
n=0~60000
P/F
VXXG0005
56h Xh Xh 47h 30h 30h 30h 35h 0Dh
Get Air filter timer
n=0~60000
Pn/F
VXXS0006
56h Xh Xh 53h 30h 30h 30h 36h 0Dh
System Reset
P/F
VXXG0007
56h Xh Xh 47h 30h 30h 30h 37h 0Dh
Get System Status
0:Reset
1:Standby
2:Operation
3:Cooling
Pn/F
VXXG0008
56h Xh Xh 47h 30h 30h 30h 38h 0Dh
Get F/W Version
Pn/F
VXXG0009
56h Xh Xh 47h 30h 30h 30h 39h 0Dh
Get Alter EMail
Pn/F
VXXS0009n
56h Xh Xh 53h 30h 30h 30h 39h nh 0Dh
Set Alter Email
P/F
75
Command Group 01
ASCII
HEX
Function
Description
Return Value
VXXG0101
56h Xh Xh 47h 30h 31h 30h 31h 0Dh
Get Brightness
n=0~100
Pn/F
VXXS0101n
56h Xh Xh 53h 30h 31h 30h 31h nh 0Dh
Set Brightness
n=0~100
P/F
VXXG0102
56h Xh Xh 47h 30h 31h 30h 32h 0Dh
Get Contrast
n=0~100
Pn/F
VXXS0102n
56h Xh Xh 53h 30h 31h 30h 32h nh 0Dh
Set Contrast
n=0~100
P/F
VXXG0103
56h Xh Xh 47h 30h 31h 30h 33h 0Dh
Get Color
n=0~100
Pn/F
VXXS0103n
56h Xh Xh 53h 30h 31h 30h 33h nh 0Dh
Set Color
n=0~100
P/F
VXXG0104
56h Xh Xh 47h 30h 31h 30h 34h 0Dh
Get Tint
n=0~100
Pn/F
VXXS0104n
56h Xh Xh 53h 30h 31h 30h 34h nh 0Dh
Set Tint
n=0~100
P/F
VXXG0105
56h Xh Xh 47h 30h 31h 30h 35h 0Dh
Get Sharpness
0~31
Pn/F
VXXS0105n
56h Xh Xh 53h 30h 31h 30h 35h nh 0Dh
Set Sharpness
0~31
P/F
VXXG0106
56h Xh Xh 47h 30h 31h 30h 36h 0Dh
Get Color
Temperature
0=Warm
1=Normal
2=Cold
Pn/F
VXXS0106n
56h Xh Xh 53h 30h 31h 30h 36h nh 0Dh
Set Color
Temperature
0=Warm
1=Normal
2=Cold
P/F
VXXG0107
56h Xh Xh 47h 30h 31h 30h 37h 0Dh
Get Gamma
0:1.8
1:2.0
2:2.2
3:2.4
4:B&W
5.Linear
Pn/F
VXXS0107n
56h Xh Xh 53h 30h 31h 30h 37h nh 0Dh
Set Gamma
0:1.8
1:2.0
2:2.2
3:2.4
4:B&W
5.Linear
P/F
VXXG0108
56h Xh Xh 47h 30h 31h 30h 38h 0Dh
Get Display Mode
0:Presentation
1:Bright
2:Game
3:Movie
4.Vivid
5:TV
6:sRGB
8:DICOM SIM
9:User
10:User2
Pn/F
VXXS0108n
56h Xh Xh 53h 30h 31h 30h 38h nh 0Dh
Set Display Mode
0:Presentation
1:Bright
2:Game
3:Movie
4.Vivid
5:TV
6:sRGB
8:DICOM SIM
9:User
10:User2
P/F
76
Command Group 02
ASCII
HEX
Function
Description
Return Value
VXXS0201
56h Xh Xh 53h 30h 32h 30h 31h 0Dh
Select RGB
P/F
VXXS0203
56h Xh Xh 53h 30h 32h 30h 33h 0Dh
Select DVI
P/F
VXXS0204
56h Xh Xh 53h 30h 32h 30h 34h 0Dh
Select Video
P/F
VXXS0206
56h Xh Xh 53h 30h 32h 30h 36h 0Dh
Select HDMI
P/F
VXXS0207
56h Xh Xh 53h 30h 32h 30h 37h 0Dh
Select BNC
P/F
VXXS0209
56h Xh Xh 53h 30h 32h 30h 39h 0Dh
Select HDMI 2
P/F
VXXS0213
56h Xh Xh 53h 30h 32h 31h 33h 0Dh
Select HDBaseT
P/F
VXXG0220
56h Xh Xh 47h 30h 32h 32h 30h 0Dh
Get Current Source
Return
1:RGB
3:DVI
4:Video
6:HDMI
7:BNC
9:HDMI2
13:HDBaseT
Pn/F
Command Group 03
ASCII
HEX
Function
Description
Return Value
VXXG0301
56h Xh Xh 47h 30h 33h 30h 31h 0Dh
Get Scaling
0:Fill
1:4:3
2:16:9
3:Letter Box
4:Native
5:2.35:1
Pn/F
VXXS0301n
56h Xh Xh 53h 30h 33h 30h 31h nh 0Dh
Set Scaling
0:Fill
1:4:3
2:16:9
3:Letter Box
4:Native
5:2.35:1
P/F
VXXG0302
56h Xh Xh 47h 30h 33h 30h 32h 0Dh
Blank
Pn/F
VXXS0302n
56h Xh Xh 53h 30h 33h 30h 32h nh 0Dh
Blank
P/F
VXXG0304
56h Xh Xh 47h 30h 33h 30h 34h 0Dh
Freeze On
Pn/F
VXXS0304n
56h Xh Xh 53h 30h 33h 30h 34h nh 0Dh
Freeze On
P/F
VXXG0305
56h Xh Xh 47h 30h 33h 30h 35h 0Dh
Volume
n=0~10
Pn/F
VXXS0305n
56h Xh Xh 53h 30h 33h 30h 35h nh 0Dh
Volume
n=0~10
P/F
VXXG0308
56h Xh Xh 47h 30h 33h 30h 38h 0Dh
Projection Mode
0:Front
1:Rear
2:Ceiling
3:Rear+Ceiling
Pn/F
VXXS0308n
56h Xh Xh 53h 30h 33h 30h 38h nh 0Dh
Projection Mode
0:Front
1:Rear
2:Ceiling
3:Rear+Ceiling
P/F
VXXG0309
56h Xh Xh 47h 30h 33h 30h 39h 0Dh
Set vertical keystone
value
n=-30~+30
Pn/F
VXXS0309n
56h Xh Xh 53h 30h 33h 30h 39h nh 0Dh
Set vertical keystone
value
n=-30~+30
P/F
VXXG0310
56h Xh Xh 47h 30h 33h 31h 30h 0Dh
Set horizontal
keystone value
n=-25~+25
Pn/F
VXXS0310n
56h Xh Xh 53h 30h 33h 31h 30h nh 0Dh
Set horizontal
keystone value
n=-25~+25
P/F
77
Command Group 03
ASCII
HEX
Function
Description
Return Value
VXXG0311
56h Xh Xh 47h 30h 33h 31h 31h 0Dh
Adjust the zoom
n=-10~+10
Pn/F
VXXS0311n
56h Xh Xh 53h 30h 33h 31h 31h nh 0Dh
Adjust the zoom
n=-10~+10
P/F
VXXG0315
56h Xh Xh 47h 30h 33h 31h 35h 0Dh
3D
0:Off
1:DLP-Link
2:IR
Pn/F
VXXS0315n
56h Xh Xh 53h 30h 33h 31h 35h nh 0Dh
3D
0:Off
1:DLP-Link
2:IR
P/F
VXXG0316
56h Xh Xh 47h 30h 33h 31h 36h 0Dh
3D Sync Invert
0:Off
1:On
Pn/F
VXXS0316n
56h Xh Xh 53h 30h 33h 31h 36h nh 0Dh
3D Sync Invert
0:Off
1:On
P/F
VXXG0317
56h Xh Xh 47h 30h 33h 31h 37h 0Dh
3D Format
0:Frame Sequential
1:Top/Bottom
2:Side-By-Side
3:Frame Packing
Pn/F
VXXS0317n
56h Xh Xh 53h 30h 33h 31h 36h nh 0Dh
3D Format
0:Frame Sequential
1:Top/Bottom
2:Side-By-Side
3:Frame Packing
P/F
VXXG0319
56h Xh Xh 47h 30h 33h 31h 38h 0Dh
Light Mode
0:Normal
1:Eco
2.Eco Plus
3:Dimming
4.Extreme Dimming
5.Custom Light
Pn/F
VXXS0319n
56h Xh Xh 53h 30h 33h 31h 38h nh 0Dh
Light Mode
0:Normal
1:Eco
2.Eco Plus
3:Dimming
4.Extreme Dimming
5.Custom Light
P/F
VXXG0321
56h Xh Xh 47h 30h 33h 32h 31h 0Dh
Logo Select
0:Std
1:Black
2:Blue
Pn/F
VXXS0321n
56h Xh Xh 53h 30h 33h 32h 31h nh 0Dh
Logo Select
0:Std
1:Black
2:Blue
P/F
VXXG0322
56h Xh Xh 47h 30h 33h 32h 32h 0Dh
Fan Speed
0:Normal
1:High
Pn/F
VXXS0322n
56h Xh Xh 53h 30h 33h 32h 32h nh 0Dh
Fan Speed
0:Normal
1:High
P/F
VXXG0330
56h Xh Xh 47h 30h 33h 33h 30h 0Dh
Sleep Timer
(min = n*5)
0~120
Pn/F
VXXS0330n
56h Xh Xh 53h 30h 33h 33h 30h nh 0Dh
Sleep Timer
(min = n*5)
0~120
P/F
  • Page 1 1
  • Page 2 2
  • Page 3 3
  • Page 4 4
  • Page 5 5
  • Page 6 6
  • Page 7 7
  • Page 8 8
  • Page 9 9
  • Page 10 10
  • Page 11 11
  • Page 12 12
  • Page 13 13
  • Page 14 14
  • Page 15 15
  • Page 16 16

Vivitek DU7095Z User manual

Category
Data projectors
Type
User manual

The Vivitek DU7095Z is a versatile and feature-rich multimedia projector that offers a wide range of capabilities for both business and educational use. With its high brightness of 7000 lumens and XGA resolution, it delivers crisp and clear images even in well-lit rooms. The projector also boasts a long lamp life of up to 10,000 hours, ensuring minimal maintenance and cost savings.

Ask a question and I''ll find the answer in the document

Finding information in a document is now easier with AI