
Safety Information Installation
Pre-Operation
Package Contents
IMPORTANT SAFETY
INSTRUCTIONS
When using electrical products, basic precautions should
always be followed, including the following:
a.
READ AND FOLLOW ALL
SAFETY INSTRUCTIONS.
b. This is an electrical product - not a toy! To avoid risk of fire,
burns, personal injury, and electric shock, it should not be
played with or placed where small children can reach it.
c. Do not use seasonal products outdoors unless marked
suitable for indoor and outdoor use. When products are
used in outdoor applications, connect the product to a
Ground Fault Circuit Interrupting (GFCI) outlet. If one is
not provided, contact a qualified electrician for proper
installation.
d. This seasonal use product is not intended for permanent
installation or use.
e. Do not mount or place near gas or electric heaters,
fireplaces, candles, or other similar sources of heat.
f. Do not secure product wiring with staples or nails or place on
sharp hooks or nails.
g. Do not let lamps rest on the supply cord or on any wire.
h. Unplug the product when leaving the house, when retiring
for the night, or if left unattended.
i. Do not use this product for other than its intended purpose.
j. Do not hang ornaments or other objects from cord, wire, or
light string.
k. Do not close doors or windows on the product, or extension
cords, as this may damage the wire insulation.
l. Do not cover the product with a cloth, paper, or any material
not part of the product when in use.
m. Do not place the product against carpeting, furniture, or any
other fabric when in use.
n. This product has a polarized plug (one blade is wider than
the other) as a feature to reduce the risk of electric shock.
This plug will fit in a polarized outlet only one way. If the plug
does not fit fully in the outlet, reverse the plug. If the plug
still does not fit, contact a qualified electrician. Do not use an
extension cord unless the plug can be fully inserted. Do not
alter or replace the plug.
o. This product employs overload protection (fuse). A blown
fuse indicates an overload or a short-circuit condition. If the
fuse blows, unplug the product from the outlet. Also unplug
any additional string or products that may be attached to
the product. Replace the fuse as per the user servicing
instructions (follow product markings for proper fuse rating)
and check the product. If replacement fuse blows, a short-
circuit may be present and the product should be discarded.
p. Read and follow all instructions that are on the product or
provided with the product.
q.
SAVE THESE
INSTRUCTIONS
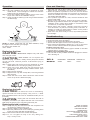
Preparing for Installation
Step 1. Lay the inflatable unit (A) on the ground with the bottom
side up in a clear area.
Step 2. Locate the four clips attached to the bottom of the unit
and attach to the plastic legs of the inflatable unit (A).
Securing the unit to the ground
Step 1. Turn the inflatable unit (A) over so that the bottom is on
the ground.
Step 2. Ensure that the air intake on the inflatable unit (A)
is clear of fabric and other obstructions and that the
zipper is fully closed.
Step 3. Insert the base stakes (B) through the plastic legs of
the inflatable unit (A) and into the ground.
CAUTION:
Do not attempt to inflate this unit during
unusually strong winds. If it becomes too windy for safe
operation, allow the unit to deflate and wait for safer conditions.
CAUTION:
Protect the fan and power cord from
direct exposure to water. This reduces the risk of electrical
shock.
CAUTION:
When the outdoor temperature is
below 14°F (-10°C), the motor may temporarily stop running.
The motor will begin to function again with higher outdoor
temperatures. Before you use or re-use this product, inspect
it carefully. Discard if the product has cuts, damage, frayed
wire insulation or cords, cracks in the socket enclosures, loose
connections, or exposed copper wire.
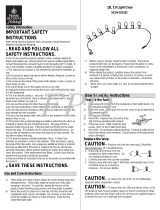
Part Description Quantity
A Inflatable unit 1
B Base stakes 4
C Tether stakes 4
D Tethers 4
E Spare bulb 1
F Spare fuse 1
A
A
B
ANIMATED INFLATABLE
INSTRUCTIONS

Inflating the unit
Step 1. Plug the inflatable unit (A) into a receptacle or other
outlet device. The unit begins to inflate and remains
inflated until you unplug the unit.
Step 2. Once fully-inflated, clip the tethers (D) to each of the
loops on the side of the inflatable unit (A).
Step 3. Insert the tether stakes (C) into the ground and attach
the tethers (D).
NOTE: To deflate, unplug the unit. For faster deflation, unzip
the zipper on the unit after you unplug it.
For indoor and outdoor use.
120 V 60 Hz.
Replacing the fuse
CAUTION:
Risk o f F ire: Replace only with same
size and type of fuse.
CAUTION:
Risk of Fire: Do not replace the
attachment plug. Contains a safety device (fuse) that should
not be removed. Discard product if attachment plug is
damaged.
Step 1. Grasp plug and remove from the receptacle or other
outlet device. Do not unplug by pulling on the cord.
Step 2. Open fuse cover. Slide open the fuse access cover
on top of the attachment plug towards blades. (See
illustration)
Step 3. Remove fuse carefully.
Step 4. Replace fuse only with 5 Amp Max, 125 Volt (provided
with product).
Step 5. Close the fuse cover. Slide closed the fuse access
cover on top of the attachment plug.
Replacing the bulb
CAUTION:
To reduce the risk of overheating,
replace burned-out bulbs promptly. Only use C7, 7-Watt
Max Candelabra-base 120 Volt UL-Classified bulbs (one is
provided).
C AUTION:
Unplug the unit and allow the bulb to
completely cool before you replace the bulb. Do not touch the
bulb when the power is On. The bulb is extremely hot.
Replacing the bulb (continued)
Step 1. Grasp the plug and remove it from the receptacle. Do
not unplug by pulling on the cord.
Step 2. Open the zipper on the inflatable unit.
Step 3. Open the protective bulb cover carefully by pressing down
on the two locking side tabs simultaneously.
Step 4. Remove the bulb from the socket and replace.
Step 5. Do not over-tighten the lamp as this may damage the
lamp or lamp holder.
a. Wipe the unit with a damp cloth and allow the unit
to dry
before storing. If necessary, you can use a mild detergent.
b. When the product is placed on a live tree, the tree should
be well maintained and fresh. Do not place on live trees in
which the needles are brown or break off easily. Keep the
tree holder filled with water.
c. If the product is placed on a tree, the tree should be well
secured and stable.
d. Before using and reusing, inspect the product carefully.
Discard any products that have cut, damaged or frayed wire
insulation cords, cracks, lamp holders or enclosures, loose
connections, or exposed copper wire.
e. When storing the product, carefully remove the product
from wherever it is placed, including trees, branches, or
bushes, to avoid any undue strain or stress on the product
conductors, connections and wires.
f. When not in use, store neatly in a cool, dry location protected
from sunlight.
Problem: The unit is not inflating.
a. Ensure that the unit is plugged in.
b. Check for and remove any debris from the motor.
c. Ensure that the zipper on the unit is completely closed.
d. If the outdoor temperature is below 14° F (-10° C), the motor
does not work until the outdoor temperature increases.
Problem: The unit is torn.
a. You can hand sew tears with any type of thread or use clear
packing tape to cover the tear.
Problem: The unit deflates after unplug.
a. The unit will not stay inflated unless it is plugged in and the
fan is blowing air.
A
D
C
Operation Care and Cleaning
Troubleshooting
MADE IN CHINA
PRINTED IN CHINA
DISTRIBUTED BY:
HOME DEPOT
2455 PACES FERRY RD., N.W.
ATLANTA, GA 30339
FOR ASSISTANCE, CALL:
1-877-527-0313
HOMEACCENTSHOLIDAY.COM
Model #:
23623 26431 55731
SKU #:
1000006825 1000006828 1000050118
-
 1
1
-
 2
2


Gemmy 36696 Operating instructions
- Type
- Operating instructions
Ask a question and I''ll find the answer in the document
Finding information in a document is now easier with AI
Related papers
-
Home Accents Holiday G-73804 User manual
-
Gemmy 13205X Installation guide
-
Gemmy 36755 Installation guide
-
-
-
-
-
-
-
Other documents
-
-
Home Accents Holiday 36726 Installation guide
-
-
-
-
-
 Show Home W14N0150 Installation guide
-
-
-
Sterling 6442--40C Operating instructions
