Page is loading ...

Item# 3005
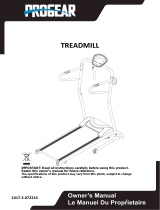
IMPORTANT: Read all instructions carefully before using this product.
Retain this owner’s manual for future reference.
The specifications of this product may vary from this photo, subject to change
without notice.
Manual Treadmill

3005.2-082715

SERVICE ------------------------------------------------------------------------ 2
LABEL PLACEMENT --------------------------------------------------------- 3
PRODUCT SAFETY ---------------------------------------------------------- 4
OVERVIEW DRAWING ------------------------------------------------------ 6
HARDWARE LIST & TOOL ------------------------------------------------- 7
PARTS LIST --------------------------------------------------------------------- 8
ASSEMBLY --------------------------------------------------------------------- 10
COMPUTER -------------------------------------------------------------------- 12
STORAGE ----------------------------------------------------------------------- 15
ADJUSTMENT --------------------------------------------------------------- 16
LUBRICATION ---------------------------------------------------------------- 18
MAINTENANCE & TROUBLESHOOTING ----------------------------- 19
WARM UP ----------------------------------------------------------------------- 20
WARRANTY -------------------------------------------------------------------- 21
PART REQUEST FORM ----------------------------------------------------- 22
TABLE OF CONTENTS
1

IMPORTANT: FOR NORTH AMERICA ONLY
For damaged or defective product, questions, replacement parts
or any other service support, please contact our customer
service department (8:00 AM - 5:00 PM Pacific Standard Time,
Daily) by the below methods:
For Best Service, please Email:
Service@paradigmhw.com *
Response Time: 1-2 Business Days
Website:
www.paradigmhw.com
Toll-Free:
1-844-641-7920
Response time may vary.
Please have the following information ready when requesting for service:
Your name
Phone number
Model number
Serial number
Part number
Proof of Purchase
For damaged or defective product please contact our customer
service before returning to the store.
Paradigm Health & Wellness, Inc.
1189 Jellick Ave.
City of Industry, CA 91748, USA
SERVICE
2

3
LABEL PLACEMENT

Basic precautions should always be followed, including the following safety
instructions when using this treadmill: Read all instructions before using this
treadmill.
DANGER: To reduce the risk of electric shock, please read the following:
Always unplug the treadmill from the electrical outlet immediately after using
and before cleaning, assembling, or servicing.
NOTE: Failure to follow these instructions may lead to personal injury and
cause damage to the treadmill.
WARNING: To reduce the risk of burns, fire, electric shock or injury to
any persons, please read the following:
Never leave the treadmill unattended when plugged in. Disconnect by turning
off the master power switch, and unplugging from outlet when not in use and
before putting on or taking off parts.
Use this appliance only for its intended use as described in this manual. Do
not use attachments not recommended by the manufacturer.
Never operate this treadmill if it has a damaged cord or plug, or if it is not
working properly. If it has been dropped or damaged, or been exposed to
water, do not use and consult an Authorized Service Representative at
1-844-641-7920. Do not attempt any maintenance or adjustments other than
those described in this manual. Should any problems arise, discontinue use
and consult an Authorized Service Representative.
Never operate the appliance with the air openings blocked. Keep the air
openings free of lint, hair, and the like.
Do not use the treadmill outdoors.
Do not pull the treadmill by its power cord or use the cord as a handle.
Keep children and pets away from the equipment while in use. This machine
is designed for adults only. Close supervision is necessary when this
treadmill is used by on, near those with disabilities.
Do not operate where aerosol (spray) products are being used or where
oxygen is being administered.
Keep Dry - do not operate in a wet or moist condition. Save these
instructions.
PRODUCT SAFETY
4

Do not operate the treadmill near a blanket. Excessive heating can occur and
cause fire, electrical shock, or injury to user.
Keep electrical cord away from heated surfaces.
Never insert any object into any opening.
Keep the treadmill on a solid, level surface with the minimum safety area
clearance of 78.74 inch x 39.37 inch of the treadmill. Be sure the area around
the treadmill remains clear during use and has adequate clearance.
This treadmill is for household use only.
Only one person should be on the treadmill while in use.
Wear comfortable and suitable clothing when using the treadmill. Do not use
the treadmill barefoot, in only socks or in sandals, always wear athletic shoes.
Never wear loose clothing because it could run the risk of getting caught in the
treadmill.
Always hold on to the handrails while using the treadmill.
Always make sure the storage latch is in place when folding and moving the
treadmill.
Do not leave children who are under 12 year-old unsupervised near or on the
treadmill.
To disconnect, turn all controls to the off position, then remove plug from outlet.
This appliance is not intended for use by persons (including children) with
reduced physical, sensory or mental capabilities, or lack of experience and
knowledge, unless they have been given supervision or instruction concerning
use of the appliance by a person responsible for their safety. Children should
be supervised to ensure that they do not play with the appliance.
Pull up the Safety Tether Key for emergency stop. Reinstall the Safety Tether
Key onto the Computer Console. Press the START/STOP button to begin
exercise again.
Maximum Weight Capacity is 275 lbs.
This treadmill is designed for WALKING only.
CAUTION: Risk of Injury to Persons –To Avoid Injury, use extreme caution
when stepping onto or off of a moving belt. Read Instruction Manual Before
Using.
Note: It is the obligation of the owner to review and explain these safety
precautions to all users of this treadmill.
PRODUCT SAFETY
5

6
OVERVIEW DRAWING

7
HARDWARE LIST & TOOLS
(#4)Allen Bolt M8X50
2 PCS
(#5) Flat Washer Φ8
2 PCS
(#6) Allen Bolt M8X20
2 PCS
(#7) Curve Washer
Φ8
2 PCS
(#22) Allen Bolt M6X15
2 PCS
(#21) Curve Washer
Φ6
2 PCS
S5 Allen Wrench
1PCS
(#33) Philips screw
ST4.0x12
4 PCS

No.
Description
Qty
No.
Description
Qty
001
Base tube
1
029
Computer
1
002
Philips screw ST4.2*20
6
030
Handle bar
1
003
Foot pad
4
031
Left handle bar cover
2
004
Allen bolt M8x50
4
032
Right handle bar cover
2
005
Flat washer Φ8
10
033
Philips screw ST4.0x12
4
006
Allen bolt M8x20
2
034
Running belt
1
007
Curve washer Φ8
2
035
Foam for handle bar
2
008
Nylon nut M8
8
036
Round inner plug
2
009
Rear support tube
2
037
Right motor cover
1
010
Round inner plug
2
038
Left motor cover
1
011
Allen bolt M8x35
2
039
Nylon nut M6
2
012
Hang ring pin Φ8x35
2
040
Allen bolt M6x35
2
013
Foot cover
2
041
Cushion pad
4
014
Front roller
1
042
Running board support tube
2
015
Front roller shaft
1
043
Philips screw M6*30
4
016
Spacer
2
044
Philips screw ST4.8*25
2
017
Locking knob M10*70
1
045
Running board
1
018
Allen bolt M10x60
2
048
Right upright
1
019
Flat washer M10
2
050
Allen bolt M6x60
2
020
Left upright
1
51
Flat washer M6
2
021
Curve washer Φ6
2
52
Right cap
1
022
Allen bolt M6x15
2
53
Spacer
2
023
Sensor wire 1
1
54
Rear roller
1
024
Sensor wire 2
1
55
Rear roller shaft
1
025
Hand pulse connector
2
56
Left cap
1
PARTS LIST
8

No.
Description
Qty
No.
Description
Qty
59
Transport wheel
2
65
Side rail
2
60
Allen bolt M8x40
4
66
Support tube
1
61
Main frame
1
67
Plug
1
62
Square inner plug
3
68
Inner adjustment tube
1
63
Sensor
1
69
Square inner plug
1
64
Philips screw ST4.2*12
1
PARTS LIST
9

Step 1
Loosen and pull the locking knob (17), insert the left upright (20) and right upright
(48) to the main frame (61) secure with Allen bolt (6) and arc washer (7); then
insert Allen bolt (4) and flat washer (5) through the left and right uprights and
secure. Connect the main frame (61) and base tube (1) with the locking knob
(17).
Hardware:
ASSEMBLY
10
(#4)Allen Bolt M8X50
2 PCS
(#5) Flat Washer D8
2 PCS
(#6) Allen Bolt M8X20
2 PCS
(#7) Curve Washer
Φ8
2 PCS
S5 Allen Wrench
1PCS
Tool:

Step 2
Fold up the handle bar (30) then secure the handle bar with Allen bolt (22)
and curve washer (21) into the left upright (20), and right upright (48). Put the
left handle bar cover (31), and right handle bar cover (32) onto the left
upright (20) and right upright (48) secure with screw (33).
Hardware:
ASSEMBLY
11
(#22) Allen Bolt M6X15
2 PCS
(#21) Curve Washer
Φ6
2 PCS
(#33) Philips screw
ST4.0x12
4 PCS
S5 Allen Wrench
1PCS
Tool:

Step 3
Connect computer (29) with the sensor wire (24) and two hand pulse connector
(25), then install the computer (29) into the computer plate on handle bar (30).
ASSEMBLY
12

SCAN SPEED DISTANCE TIME
TOTAL DIST CALORIE PULSE ML
Please load 2pcs of 1.5V “AAA” batteries before operating the console.
SPECIFICATIONS
TIME--------------------------------------------------0:00~99:59MIN
SPEED------------------------------------------------0.0~999.9ML/H
DISTRANCE----------------------------------------0.0~999.9ML
TOTAL DIST --------------------------------------- 0.00~99.99ML
CALORIE--------------------------------------------0.0~999.9KCAL
PULSE -----------------------------------------------40~240BPM
.
COMPUTER
13

KEY FUNCTIONS:
MODE: This key lets you to select and lock on to a particular function you want.
Reset the value to zero by pressing the key for 4 seconds.
FUNCTIONS:
1.TIME : Press the MODE key until pointer lock in to TIME. The total working time
will be shown when starting exercise.
2.SPEED: Press the MODE key until pointer lock on to Display current speed
during working time .
3.DISTANCE : Press the MODE key until pointer lock on to DISTANCE . The
distance of each workout will be displayed when starting exercise.
4.CALORIE :Press the MODE key until pointer lock on to CALORIE The calorie
burned will be displayed when starting exercise.
5.TOTAL DIST :Automatically accumulates workout distance when starting
exercise.
6.PULSE: Press the MODE key until the pointer advance to PULSE function and
put hands on sensor part of the handlebar about 3 seconds, then the heart rate
will show out.
SCAN : Display changes according to the next diagram every 4 seconds.
Automatically display of the following functions in the order shown:
TIME---SPEED---DISTANCE---CALORIE---TOTAL DIST ---PULSE---SCAN
NOTE:
1. Without any signal coming in for 4-5 minutes, the LCD display will be shut off
automatically.
2. The monitor automatically turns on when signal came in.
3. Replace the batteries if the signal is getting improper on the LCD.
COMPUTER
14

FOLDING UP THE TREADMILL
To fold up the treadmill, place one hand on the back end of the treadmill and
the other hand to pull the Locking Knob (17). Carefully lift the end of the
treadmill up into the upright position and turn the Locking Knob (17) lock into
the locked position.
Make sure the deck is securely locked before moving the treadmill.
(See diagrams A and B.)
The unit can be carefully tilted onto its transport wheels for easy moving and
storage. Store the treadmill in a clean and dry environment away from
children.
SETTING DOWN THE TREADMILL
To set down the treadmill, place one hand on the back end of the treadmill
and the other hand to pull the Locking Knob (17), then carefully lower the
deck to the ground until the Locking Knob (17) "pops" down into the locked
position. (See diagrams C and D.)
Note: Do not stand under the deck when setting down the treadmill.
TO PREVENT INJURY PLEASE MAKE SURE YOU HAVE A FIRM HOLD
WHEN LIFTING UP OR SETTING DOWN THE DECK.
STORAGE
15

Adjusting the Incline Adjuster
Place one hand on the rear end of the Main Frame,
Then lift the rear end of the Main Frame up and use the other hand to remove
the Hang Ring Pin (12)
Adjust the Incline Adjuster to the desired position and insert the Hang Ring Pin
(12) into the holes on the Main Frame and Incline. Adjuster locks the Incline
Adjuster in place.
NOTE: Make sure when adjusting the incline angle of the Incline Adjuster that
both Incline Adjusters should be adjusted to the same angle. Using the Incline
Adjusters at different angles can cause the treadmill to be unstable and cause
injury.
Adjusting the Running Belt
1. The running belt is initially set and adjusted at the factory. However it
may come loose during transportation and/or during use. After prolonged use,
the belt will begin to stretch out.
2. If the running belt begins to shift to either left or right side, the user can
stand on the main frame and hold the handlebars with both hands. Then use
your right or left foot to run on the side of the running belt that is opposite to the
direction of the slip.
16
ADJUSTMENTS

3. If the belt begins to slip to the left use your right foot on the right side.
You should see the belt start to correct itself by moving back towards the
center.
However, if the running belt is still shifting away from center, use the S5 Allen
Wrench provided and turn the left or right Allen Bolts (50) turn in a clockwise
direction (turn the same side bolt that matches the direction of the slip).
Then try running on the center of the running belt again. If the running belt is
still shifting away from center, turn the same Allen Bolt another 1/4 turn in the
clockwise direction. You should see the belt start to correct itself by moving
back towards the center. Repeat this procedure until the running belt is
centered.
If the running belt is slipping during use, then use the S5 Allen Wrench
provided and turn both the left and right rear Allen Bolts (50) 1/4 turn in the
clockwise direction. You should now run on the running belt to determine if
the running belt is still slipping. Repeating the above procedure until the
running belt is not slipping.
ADJUSTMENTS
17

The treadmill has already been spread with "Silicone Oil" in advance before
leaving the manufacturing plant. Silicone oil is without volatility and has
gradually permeated through the running belt. There will be no need to
re-spread the oil in normal circumstances. "Silicone Oil" may be re-spread
once the resistance has been increased and the running belt starts rubbing
against the running deck. To hold open the running belt from two sides, apply
the silicone oil with an even motion on the center of the running deck. Allow
the silicone oil to „set‟ for one minute before using the magnetic treadmill.
Attention: Only use "Silicone Oil" lubricants for this equipment. In addition, do
not add any other oil ingredient; otherwise the magnetic treadmill will be
damaged. Do not over-lubricate the running deck. Excess lubricant should
be wiped off with a clean towel.
LUBRICATION
18
/