Page is loading ...

JAMBS
HEAD
INSTALLATION INSTRUCTIONS
REQUIRED TOOLS TO INSTALL
LOS INSTRUMENTOS REQUERIDOS PARA INSTALAR
INSTRUCCIONES DE INSTALACION
1. Measure the rough opening:
• Mida la abertura
WIDTH (ANCHURA):
• If necessary, trim length
of header accordingly to
fit rough opening width
(the header supplied is
for a standard 3/0 frame -
accepts 36” wide standard door). The rough opening
width (stud-to-stud) should be at least 1” greater than
overall frame width.
HEIGHT (LA ALTURA):
• ALWAYS MEASURE FROM THE SUBFLOOR TO THE
FRAMING HEADER. The subfloor is either a cement slab
or the wood surface beneath the underlayment (surface
over which your carpet or finished floor is applied). Jamb
supplied is 83", therefore requiring a rough opening of 83
1/2" minimum. For rough openings less than 83 1/2",
simply subtract 1/2" from height of opening and cut jambs
(FROM WOOD END OF JAMB, DO NOT TRIM PVC END
OF JAMB) to that measurement.
Note: Some door panel & sill assemblies may require
specific jamb dimensions.
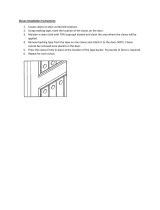
5. Wedge shims into place,
first a pair on each
bottom side to stabilize
the frame. Insert shims
as shown until jambs are
exactly vertical. Three to
four sets of shims per
jamb is recommended.
Be sure to shim behind
hinges and lock placement.
6. Use 16 p finish nails to
fasten your EverMark
jamb through the shims
and into studs. Use a nail
punch to countersink nail
heads below frame
surface. Apply wood
putty, sand surface and
clean as necessary prior
to finishing.
Congratulations on your purchase of a
ready-to-install EverMark exterior door frame. In
addition to the components in this frame kit, you will
need one casing set to trim out your door opening.
Safety Glasses
Gafas de seguridad
Hammer
Martillo
Hand Saw
Sierra de mano
Nail Punch
Punzon de clavos
Tape Measure
Cinta me medir
Level
Nivel
Framing Square
Encuadra de ajustar
(Cuadro)
8 p Finish Nails
Clavos tamañio #8
16 p Finish Nails
Clavos tamañio #16
Wood Shims
Plancha para relleno
(Madera)
Wood Putty
Masilla de madera
Sandpaper
Papel de arena
©2015 Evermark, LLC. Evermark reserves the right to make changes in design, materials and specifications as
well as discontinue products without notice. 4/15
©2015 Evermark, LLC. Evermark reserva el derecho de hacer cambios en el diseño, las materias y las
especificaciones así como discontinúa productos sin nota. 4/15
shims shims
3. Nail frame head to
jambs using 8 p finish
nails. If a sill is to be
used (must purchase
separately), you may
nail or screw sill into
place now (be sure to
apply to PVC end of
jambs) or wait and put sill in place after installing frame.
Please note, though jambs are prepped to fit with a standard
inswing sill, some detail prep of the frame and/or sill may be
necessary. If you have a concrete slab, you can opt to use a
threshold only.
4. You are now ready to place your EverMark jamb into the
rough opening.
width
height
subfloor
rough
opening
1-1/4” DADO
2. Dado the wood end of
jambs to accept the frame
head. Cut 1-1/4” from the
stop portion of each jamb
to ensure proper assembly
(see illustration above).
Las felicitaciones en su compra de puerta, listo para
instalar EverMark exterior de la puerta. Además de los
componentes en este encuadre de juego, usted necesitará
el materàl conjunto de cubierto para recubrir el hueco por la
parte de afrente del la puerta.
• Si necesario, recorte la longitud de encabezamiento
appropiadamente para que el marco se pueda encajar en la
apertura (el encabezamiento suministrado es para un puerta
estándar de 3/0 - acepta hasta 36” de ancho). La anchura (de
montantes - a - montantes) debe ser por lo menos 1” más que
anchura general de marco.
• SIEMPRE MIDE DEL SUPERFICIE AL ENCABEZAMIENTO
QUE ENCUADRA El superficie es o un trozo de cemento o la
superficie de madera abajo el reforzamiento (superficie sobre
que su alfombra o piso terminado se aplican). La jamba
suministrada es 83", por lo tanto requiriendo una apertura
áspera de 83 1/2" mínimo. Para aperturas ásperas menos de
83 1/2", simplemente restar 1/2" de la altura de jambas de
apertura y corte (DE EL FIN DE MADERA DE JAMBA, NO
RECORTA EL FIN DE PVC DE JAMBA) a esa medida.
La nota: Algún entrepaño de la puerta & las asambleas de
alféizar pueden requerir las dimensiones específicas de jamba.
• Corte carril de canel (Dado) en el fin de madera de jambas para
aceptar la cabeza del marco. Corte la porción de la parada de
cada jamba para asegurar la asamblea apropiada (ve la
ilustración arriba).
• Clave cabeza de marco a jambas utilizan #8 clavos de terminar
(finishing). Si un alféizar deberá ser utilizado (debe comprar
separadamente), usted puede clavar o puede enroscar alféizar
en el lugar ahora (estè seguro de aplicar el fin de PVC de
jambas) o espera y pone alféizar en el lugar después de
instalar marco. Favor de notar, aunque jambas seá preparadas
para quedar con un alféizar uniforme de abier para dentro,
alguna preparacció del detalle del marco y/o el alféizar puede
ser necesario. Si usted tiene un trozo de concreto, usted puede
optar por utilizar un umbral sólo.
• Usted está ahora listo para colocar su EverMark jamba en la
apertura áspera.
• Ponga la plancha para relleno en el lugar, primero un par en
cada lado inferior para estabilizar la estructura. Ponga la
plancha para relleno mostrado hasta que jambas sean
exactamente verticales. Tres a cuatro plancha para relleno por
jamba se recomiendan. Esté seguro de poner plancha para
relleno detrás de la bisagras y cerradura.
• Usé clavos #16 de terminar (finishing) para asegurar su
EverMark jamba por los plancha y en montantes. Utilice un
puñetazo del clavo para avellanar cabezas de clavo debajo de
superficie de marco. Aplique masilla de madera, superficie de
arena y limpie como sea necesario antes de terminar.
This Product incorporates the patented FRAMESAVER
®
technology, under license from Endura
Products, Inc., of Colfax, NC, and may be covered by one or more of the following U.S. Patent
Nos. 5,661,943; 5,873,209; 5,950,391; 6,122,882; 6,425,222; 6,446,410; 7,100,339 and foreign
equivalent patents.
Este Producto integra el FRAMESAVER patentado
®
la tecnología, bajo licencia de Productos
de Endura, S.a., de Colfax, NC, y puede ser cubierto por uno o por más de la Patente siguiente
de EEUU no. 5.661.943; 5.873.209; 5.950.391; 6.122.882; 6.425.222; 6.446.410; 7.100.339 y
equivalente extranjero patentan.
/


