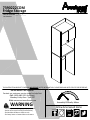
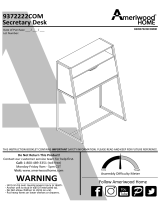
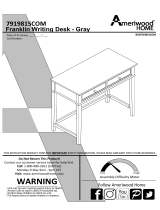
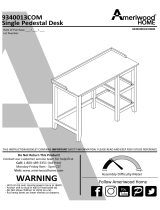
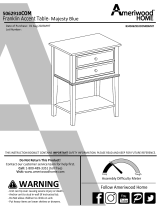
Ameriwood HD76880 is a storage cabinet with a sturdy back panel that is an integral part of the unit's structure. It features adjustable shelves and a fixed shelf, providing ample and customizable storage space. The cabinet has a lockable door, ensuring the security of your belongings. Additionally, an anti-tip safety bracket is included for added stability. The unit's overall dimensions are not specified in the provided document, but it is likely designed to fit in a variety of spaces.
Ameriwood HD76880 is a storage cabinet with a sturdy back panel that is an integral part of the unit's structure. It features adjustable shelves and a fixed shelf, providing ample and customizable storage space. The cabinet has a lockable door, ensuring the security of your belongings. Additionally, an anti-tip safety bracket is included for added stability. The unit's overall dimensions are not specified in the provided document, but it is likely designed to fit in a variety of spaces.


-
 1
1
-
 2
2
-
 3
3
-
 4
4
-
 5
5
-
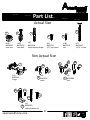 6
6
-
 7
7
-
 8
8
-
 9
9
-
 10
10
-
 11
11
-
 12
12
-
 13
13
-
 14
14
-
 15
15
-
 16
16
-
 17
17
-
 18
18
-
 19
19
-
 20
20
-
 21
21
-
 22
22
-
 23
23
-
 24
24
-
 25
25
-
 26
26
-
 27
27
-
 28
28
-
 29
29


Ameriwood HD76880 is a storage cabinet with a sturdy back panel that is an integral part of the unit's structure. It features adjustable shelves and a fixed shelf, providing ample and customizable storage space. The cabinet has a lockable door, ensuring the security of your belongings. Additionally, an anti-tip safety bracket is included for added stability. The unit's overall dimensions are not specified in the provided document, but it is likely designed to fit in a variety of spaces.
Ask a question and I''ll find the answer in the document
Finding information in a document is now easier with AI
in other languages
- français: Ameriwood HD76880 Guide d'installation
- español: Ameriwood HD76880 Guía de instalación
Related papers
-
 Dorel Home HD48953 Installation guide
-
 Dorel Home HD01375 Operating instructions
-
 Dorel Home HD91306 Operating instructions
-
 Dorel Home HD87660 Operating instructions
-
 Dorel Home 9340013COM Installation guide
-
Ameriwood HD75812 Operating instructions
-
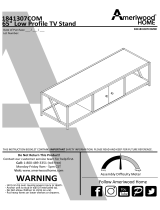 Dorel Home 1841307COM Installation guide
-
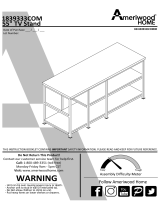 Dorel Home 1839333COM Installation guide
-
Dorel Home 9712196COM Installation guide
-


Other documents
-
Ameriwood Home 3616296WCOM Operating instructions
-
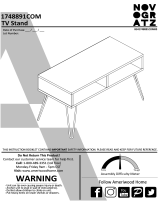 Novogratz Athena TV Stand Assembly Instructions
-
-
 Dorel Home 5062837COM Assembly Manual
-
 Dorel Home 5062910COM Assembly Manual
-
 Dorel Home 2636000COM Assembly Manual
-
 Dorel Home 3770408COM Assembly Manual
-
 Dorel Home 5728872COM Instruction Booklet
-
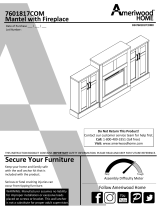 Dorel Home 7601817COM1 Assembly Manual
-
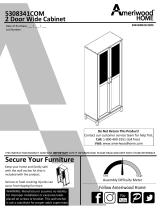 Dorel Home 5308341COM Assembly Manual


