Page is loading ...

1
Important: Retain these instructions for future use.
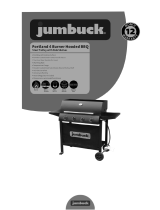
Powerful 28MJ/h stainless steel burners for true
BBQ performance
Rotary ignition for easy lighting
Removable grill circular section for wok cooking
Substantial cooking area of 2130cm
2
, satin enamel
cast iron cooking surface – ²/
³
grill and ¹/
³
hotplate
Durable die cast aluminium bowl and hood
Integrated temperature gauge – a must when roasting
Convenient side shelves for easy food preparation and
cooking – when not in use, they can be dropped down
High dome hood – 21cm – allows you to roast easily
Integrated trolley features wheels, BBQ tool hooks and
screen to discreetly hide gas cylinder and storage area
Supplied with hose and regulator so it’s ready to use
with a POL gas cylinder
Gas certified to Australian Standards
Model No. BQ10622
03397 07/20
Gasmate® is a registered trademark of:
Sitro Group Australia Pty Ltd www.gasmate.com.au
Aber Living, N.Z. www.gasmate.co.nz

32
READ ME FIRST
GAS LEAK TESTING
It is important that you leak test the BBQ before first use and every time the gas cylinder is refilled and
reconnected to the BBQ.
To Complete Leak Test
• Make sure all the control knobs are OFF.
• In a small container, mix up a solution of water and detergent/soap.
• Mix the solution well (about the same concentrate as washing up water).
• Turn the cylinder ON by rotating the knob to open position.
• Using a brush or spray bottle apply the soap solution to the gas line and each join in the gas line including:
- the gas connection at the inlet of the BBQ
- all gas hose connections
- the gas connection at the gas cylinder
• If bubbles appear, there is a gas leak.
• If the leak is at the connection, re-tighten and re-seal.
• If the leak is anywhere else or you cannot resolve the leak by tightening the connection DO NOT PROCEED.
• Replace gas hose and regulator.
• Replacement hose and regulators can be purchased from your local BBQ retail specialist.

32
GENERAL INFORMATION
Gas Installation Codes
• Barbecues must be used in accordance with the
installation requirements of your gas supply authority,
or the Australian Standard AS 5601.
• Barbecues for use with bottled gas are labelled
‘propane gas’ or ‘Universal L.P.G’.
• Barbecues for use with natural gas are labelled
‘natural gas’ and must be installed by an authorised
person. Check the gas type sticker attached to the
barbecue.
Clearances
Minimum Clearances from combustible materials
must be:
Rear - 300mm Sides - 300mm Above - 1000mm
Specifications
Barbecue specifications can be found on the data label
attached to the barbecue body.
Hose connection thread is 5/8”-18 UNF.
IMPORTANT
Read these instructions carefully prior to use.
Familiarise yourself with the appliance before
connecting it to it’s gas container. Keep these
instructions for future reference.
IF YOU SMELL GAS
1. Shut off gas to the barbecue at its source,
if possible.
2. Extinguish any open flame.
3. Open hood.
4. If odour continues immediately call your gas
supplier or fire department.
Hose & Regulator Safety
The regulator and hose assembly supplied with the
barbecue are suitable for Propane Gas or Universal
L.P.G. only.
A gas regulator adjusted to have an outlet pressure of
2.75kPa is supplied for connection to the propane gas
cylinder. The pressure regulator and hose assembly
supplied with the barbecue must me used. Replacement
pressure regulators and hose assemblies must be those
specified by the barbecue manufacturer.
When connecting the hose and regulator assembly to the
gas cylinder, take care to avoid unnecessary twisting of
the flexible hose.
After the assembly has been secured, turn on the gas
and check for leaks by brushing a soap and water
solution over all connections.
If you are unable to correct the leak by tightening the
connections, turn off the gas and contact the supplier
immediately.
Always ensure the barbecue is kept away from flammable
materials and the gas cylinder clear of any heat source.
When changing over from an empty gas cylinder to a
full one make sure this procedure is carried out in a well
ventilated location, preferably outside, away from people
and away from any sources of ignition; such as naked
flames, pilot flames, electric heaters/equipment.
Gas Cylinder Use & Safety
While changing over empty gas cylinder check hose
and regulator for damage and if necessary replace.
Replacement pressure regulators and hose assemblies
must be those specified by the barbecue manufacturer.
This is a low pressure barbecue and must only be used
with the regulator supplied. Your barbecue is designed
for use with 4.5Kg or 9Kg propane gas cylinders certified
to AS 2469.
The gas cylinder should be filled by a reputable gas
supplier and visually inspected and re-qualified at each
filling.
Always keep cylinder in an upright position. Always close
the cylinder valve when the barbecue is not in use.
Do not subject gas cylinder to excessive heat.
NEVER STORE YOUR GAS CYLINDER INDOORS.
If you store your barbecue indoors, ALWAYS disconnect
the gas cylinder first and store the cylinder safely outside.
Cylinders must be stored outdoors in a well ventilated
area out of reach of children, and must not be stored in a
building, garage or any other enclosed area.

54
FOR YOUR SAFETY
Failure to comply with these instructions could
result in a fire or explosion which could cause
serious bodily injury, death or property damage.
CAUTION: Accessible parts may be very
hot.
Keep young children away.
DO NOT modify this appliance.
DO NOT move this barbecue during use.
Turn off gas supply at the gas cylinder after use.
Parts sealed by the manufacturer or their agent
must not be manipulated by the user. This barbecue
is only to be used and stored outdoors.
• Never operate this barbecue without a regulator.
• Do not test for gas leaks with an open flame.
• If this information is not followed exactly a fire
causing death or serious injury may occur. Do not
store a spare gas cylinder under or near this
barbecue. This barbecue is only to be used and
stored outdoors.
• If there is a leak on your appliance (smell of
gas) immediately attempt to turn off the cylinder
valve. Remove the appliance to a well ventilated
location away from any ignition source. Only
check for leaks outdoors using soapy water. DO
NOT try to detect leaks using a flame.
• Check for leaks by brushing a soap and water
solution over all connections. If you are unable to
correct the leak by tightening the connections,
turn off the gas and contact customer service
immediately.
• Only use the hose assembly as supplied with
this appliance for connection to the cylinder -
DO NOT USE ADAPTERS.
• Maximum hose length - 600mm.
• After use turn the gas cylinder valve off, wait
for the flame to go out, then turn the
appliance control valve off.
• Avoid twisting or kinking the flexible hose.
• Do not store or use petrol or other flammable
liquids in the vicinity of this or any other
appliance.
• Do not store empty or full spare gas cylinders
under or near this or any other appliance.
• Never test for gas leaks with a lit match or open
flame. Never light barbecue with hood closed or
before checking to ensure the burner tubes are
fully seated over gas valve orifices.
GENERAL INFORMATION
• Never lean over cooking surface when lighting.
• Never alter or modify the regulator or gas supply
assembly.
• This barbecue must not be used indoors.
• Only use in well ventilated areas.
• CARBON MONOXIDE HAZARD - USING THIS
APPLIANCE IN AN ENCLOSED SPACE MAY
CAUSE DEATH. DO NOT USE IN CARAVANS,
TENTS, MARINE CRAFT, CARS, MOBILE
HOMES OR SIMILAR LOCATIONS.
• This appliance shall only be used in an above
ground open-air situation with natural ventilation,
without stagnant areas, where gas leakage and
products of combustion are rapidly dispersed by
wind and natural convection.
• Ensure the barbecue is set up on a level and
stable surface.
• Do not move the barbecue while in use or when
hot. Remove the drip tray before moving.
• DO NOT replace the grill with an extra hotplate.
The warranty will be voided and it violates the gas
approval, the grill provides the ventilation needed
for the BBQ to operate safely. It is not designed
to be a solid hotplate device.
• Do not spray aerosols in the vicinity of this
appliance while it is in operation.
• Do not place or lean articles on or against this
appliance.
IF THERE IS A LEAK
• Turn the cylinder off.
• Ventilate the area to disperse gas.
• Check all connections.
• If leak persists, keep the cylinder upright. Keep
skin away from any gas or liquid escaping from
the cylinder.
• Keep the cylinder at least 20 metres away from
any sparks or ignition sources, including electrical
equipment, camera flashes, engines and motors.
• Disperse gas by encouraging maximum
ventilation and spraying with a fine water spray.
IF THERE IS A FIRE
• If the fire is at the barbecue, turn the gas off at
the cylinder. Smother the flames with a wet cloth,
fire blanket or extinguish using a fire extinguisher.
• If the fire is at the cylinder, or you can not get
to the valve to turn the gas off, contact the fire
brigade immediately.
• Using a garden hose, direct the water to the
middle of the cylinder to keep it cool. Try not to
extinguish the flame. At least if the gas is burning,
it won’t be able to build up pressure and explode.

54
Location of your Barbecue
DO NOT use your barbecue in garages, porches, sheds,
breezeways, or other enclosed areas. Your barbecue is to
be used OUTDOORS. The barbecue is not intended to be
installed in or on recreational vehicles and/or boats and
should not be placed under any surface that will burn. Do
not obstruct the flow of combustion and ventilation air
around the barbecue housing.
Protect Children
Keep children away from barbecue during use and until
barbecue has cooled after you have finished. Do not
allow children to operate barbecue.
Always ensure that no sporting or physical activities are
carried out in close proximity to the barbecue during use
and while still hot.
Tools You Will Need
Adjustable spanner, Philips head screwdriver.
Check Barbecue for any Damage
Inspect barbecue parts as you proceed. Contact your
supplier for assistance regarding replacement of any
damaged or missing parts. Do not assemble or operate a
barbecue that appears damaged. Barbecues for use with
gas cylinders are labelled ‘Propane Gas’ or ‘Universal
LPG’. Check labelling at the gas connection on your
barbecue.
Nominal Hourly Gas Consumption
Main Burner
Gas Type U.L.P.G
Inj. Size 1.05 mm
Gas Cons. 14 MJ/h per burner
Gas Pressure 2.75 kPa

76
EXPLODED DIAGRAM
V
W
C
D
B
E
S
F
X
G
A
I
U
T
R
O
P
Q
K
M
N
J
L
H

76
Part Description QTY
A Body 1
B Hot Plate 1
C Grill Plate 1
D Wok Grill Plate 1
E Fat Cup 1
F Heat Shield 1
G/X Side Shelf 2
H Side Panel 2
I Back Panel 1
J Front Panel 1
K Front Skirt 1
Part Description QTY
L Leg 2
M Foot 2
N Base 1
O Axle 1
P Wheel 2
Q Hub Cap 2
R Plugs 6
S Fat Tray Support 1
T Upper Leg Plugs 4
U Knobs 2
V Hood 1
W Lid Handle 1
PARTS LIST
HARDWARE
AA : 21PCS
M6 x 15
BB : 13PCS
M6
CC : 13PCS
M6
DD : 2PCS
M8
EE : 1PC
M5
FF: 1PC
M5
GG : 1PC
M5
HH : 4PCS
M6
II : 2PCS JJ : 2PCS KK : 2PCS

98
N
CC x 4
BB x 4
AA x 4
Pre installed screw (4)
STEP 2
Place the feet on the legs as shown and secure with the
self tapping screw. Plug the holes as shown on these
legs only.
ASSEMBLY INSTRUCTIONS
Remove any transit protection material.
STEP 1
Loosen the pre installed screws. Position the legs as
shown and secure with the fasteners.
L
Self Tapping Screw
M
R
L
MM x 2

98
K
CC x 4
BB x 4
AA x 4
STEP 3
Attach the front skirt with the fasteners as shown.
CC x 2
BB x 2
AA x 2
Pre installed
screw (4)
J
STEP 4
Loosen the pre installed screws. Position the front panel
and secure with the fasteners as shown.

1110
I
Pre installed screw (4)
STEP 5
Loosen the pre installed screws. Position the
back panel, DO NOT retighten the fasteners.
STEP 6
Loosen the screws. Position the side panels
as shown, then tighten the fasteners.

1110
STEP 7
Locate the axle through the legs as shown, attach the
wheels using the nuts then push on the hub caps. Plug
the holes as shown.
DD x 2
O
R
P
Q
STEP 8
Attach the hood handle with the fasteners as shown.
W V
CC
BB
AA

1312
STEP 10
Place the hood onto the body and secure it with the pins
and clips as shown.
JJ x 2
KK x 2
A
U
STEP 9
Align the ‘D’ shape on the knob with the ‘D’ shape
on the spindle and push on the control knobs.

1312
AA x 4
S
STEP 11
Attach the fat tray support as shown.
AA x 4
A
STEP 12
Locate the barbecue body as shown and secure
with the four fasteners.
Plug the holes as shown.
T
Plug is tapered ensure the
long edge is to the bottom

1514
STEP 13
Secure the front panel with the fastener as shown.
CC x 1
BB x 1
AA x 1
STEP 14
Position the heat shield tabs as shown.
F

1514
STEP 15
Secure the heat shield with the fasteners.
EE x 1
FF x 1
GG x 1

1716
STEP 16
Position the folding side shelves
with the short offset facing the front.
X
G
X

1716
HH x 4
STEP 17
Secure with the fasteners as shown.
STEP 18
Position the cooking plate
and grate as shown.
B
C
D
X

1918
STEP 19
Slide the fat tray in from the rear.
E

1918

2120
GENERAL INFORMATION
CONNECTING & DISCONNECTING
TO GAS SOURCE
Familiarise yourself with the general information and
safety guidelines located at the front of this manual.
Check
1. Gas cylinder is filled. A sloshing sound will be heard
when shaken.
2. The burner control is in the ‘OFF’ position
Connecting
1. Ensure valve is in OFF position.
2. Check for any damage to the cylinder connection.
3. Attach the regulator to the cylinder valve.
4. Use a soapy water solution to check the joint. If
bubbles appear the connection will need to be re-
tightened.
Overall Barbecue Dimensions
Length Width Height
1230mm 500mm 1000mm
IMPORTANT
•
IMPORTANT: Before connecting and disconnecting
barbecue to gas source, make sure burner
controls are in ‘OFF’ position.
• CAUTION: When the barbecue is not in use, the
gas cylinder must be disconnected.
• Check that the seals between the appliance
and the gas cylinder are in place and in good
condition before connecting the gas cylinder.
• Do not use this appliance if it has damaged or
worn seals.
• NOTE: If for some reason, ignitor fails to produce
a spark at the electrode, barbecue can be lit by
a long barbecue match with hood open insert
the match into a hole on the underside of the
barbecue and turn gas control to high.
• Check performance of burner prior to installing
barbecue plates.
• Do not smoke when attempting to ignite
barbecue.
• Never use volcanic rock, heat beads or other
material.
• Always use protective gloves when handling hot
components.
LIGHTING PROCEDURE
Burner Operation & Ignition System Check
1. With cylinder valve in ‘OFF’ position check the piezo
igniter by pushing in and rotating the control knob
anti-clockwise. Lift the flame tamer up and check for
sparking to the burner.
2. If spark is not evident at the burner ignition point,
check that the ignition lead is firmly attached to the
control and sparker tip.
3. Ensure the hood is always open before lighting the
burner. With sparking established push and turn the
control knob to ‘HIGH’.
4. If the burner fails to light after several attempts turn off
gas and inspect for obstructions to gas flow.
If re–ignition is necessary while the gas barbecue is still
hot, you must wait for a minimum of 5 minutes before
commencing to re–ignite (this allows accumulated gas
fumes to clear).
PUSH AND TURN
ANTI-CLOCKWISE
/