Page is loading ...


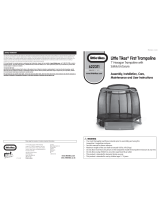
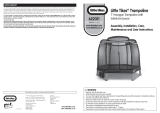
BUILDING YOUR TRAMPOLINE
Description:
Safety glasses
Description:
Cross-head screwdriver
Description:
Mallet
Description:
Gloves
WHAT YOU WILL NEED
1. This is a 2 person build.
2. Time for build is approximately 2 hours.
3. Choose a good location:
(wood chippings, sand or grass).
(7.3m) from ground level, away from
wires, trees and other possible hazards.
(2.5m) around sides, away from walls, fences, structures, roads
and other hard surfaces and play areas.
15


STEP 1 : ASSEMBLING THE FRAME
You will need the following parts to complete
section 1:
6 x Top Tubes with T-connector A - Part A
6 x Top Tubes with T-connector B - Part B
6 x Legs centers
- Part C12 x Leg extensions
- Part D
First we will complete one of the four sections of
the trampoline frame.
Slot the narrow end of the top tube with
T-connector A into T-connector B.
Insert the leg extensions into the leg center.
Insert one of the leg extensions from the complete
leg into the T-connector.
A
B
Top tube
Top tube
Leg center
Leg extension
A
B
17

18
Important: The frame is held together under
tension so you will have to use some force to
insert certain parts.
Place your feet on the top tubes and grip the leg
extension with both hands.
Pull the extension until it can be slotted into the
T-connection (1
Slot the end of leg extension into the T-connection
(2
Push down on the end of the leg center to fully
inset the leg extension into the T-connection.
Repeat the last six steps until you have
assembled the four sections of the trampolines
frame.
You have now completed step 1.

STEP 2 : ASSEMBLING THE FRAME
This step will require 2 people who must be
wearing gloves.
Slot two of the frame section together as shown in
the diagram.
Whilst one person holds the assembled sections
upright, the other person can slot a third section
onto the end of the assembled sections.
You will now need to slot the frame together, this
will take some force. The easiest method is if the
two people face each other.
Hold the top tubes either side of the T-connectors
and push towards each other until the loose end of
the frame can be inserted into the T-connector.
Important: Ensure all of the top tubes, leg
extensions and centre legs are fully inserted.
The frame is now fully assembled and you have
now completed step 2.
19

/