Page is loading ...

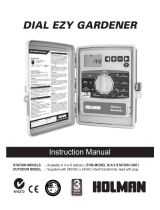
Installation,
Programming,
& Operation
ESP-4TM
ESP-6TM
ESP-8TM

Special Upgrade Oer
Save an extra 15% o new sprinkler timers and
irrigation controllers at the Rain Bird Online Store.*
Enter discount code:
UPGRADE15
at checkout to save an extra 15% o*
* Additional discount not valid on clearance items, bundles or store specials.
Discount applies to controller products only. Cannot be combined with
other store discount codes. Valid at the Rain Bird Online Store only.
Subject to change without notice.
Still struggling with your old sprinkler
timer? Having a hard time complying
with local watering restrictions?
Upgrading to a new Rain Bird sprinkler
timer is easier than you might think.
New timers are easier to program than
ever before, with powerful features to
help save you time and water while
keeping your yard healthy and vibrant.
There are lots of models to meet your
needs, including indoor and outdoor
versions, exible modular timers and
even smart controllers that
automatically adjust themselves
based on the weather.
Shop Now at store.rainbird.com and
enjoy exclusive upgrade savings!
® Registered trademark of Rain Bird Corporation.

Contents
INTRODUCTION OPERATING THE CONTROLLER
PROGRAMMING THE CONTROLLER REPLACING THE BATTERY AND FUSE
TROUBLESHOOTING
HAVE A QUESTION, PROBLEM, OR COMMENT?
Our toll-free Technical Services phone number is 1-800-247-3782
Quick Reference Guide
Controller Stations
Sample Station Layout
Controls and Switches
Turn Controller On and Off
Adjust Water Budget Percent
Use Manual Start / Advance
Run Test Program
INSTALLING THE CONTROLLER
Select Location
Mount Controller
Connect Field Wiring
19
25
36
19
21
23
24
27
27
28
30
31
31
32
33
34
35
Station Valve Wiring
Master Valve Wiring
Pump Start Relay Wiring
Install Battery
Install Transformer
Install Wiring Skirt
Default Program
Programming Checklist
Fill Out Program Schedule Sheet
Select Watering Schedule
Set Current Time
Set Current Day
1
5
1
2
3
4
5
6
7
10
11
12
12
13
14
15
16
17
Custom Schedule
Fixed Schedule
Select Program
Set Station Watering Days
Set
Station Run Times
Set Watering Start Times

ESP-TM Installation and Operation Page 1
INTRODUCTION
Congratulations on purchasing a Rain Bird ESP-TM
solid state controller. This manual describes how to
install, operate, and maintain your controller. Please
read these instructions carefully.
Quick Reference Guide
If you want to:
For your convenience, we have included a Quick
Reference Guide below, so you can quickly find
instructions for common tasks.
Change the time of day
Tu r n the controller off and on
(for example, because of rain)
Adjust watering times for all stations (for
example, during a hot or cool period)
Start the sprinkler system manually
Install a new battery
Replace the fuse
Troubleshoot a controller problem
page 11
page 19
page 21
page 23
page 25
page 25
page 36

The controller has several stations as shown in the
illustration on the following page. Each station is
connected to a remote control sprinkler valve.
The valve opens when it receives a signal from the
controller, and the sprinklers connected to the valve
turn on. When these sprinklers have run for their
allotted time, the
controller shuts off the valve and
opens the next valve in sequence.
For example, the illustration shows that station 1 is
currently watering.
When station 1 is finished, the controller will shut it
off and start station 2.
In the same way, station 3 will begin watering when
station 2 is finished.
ESP-TM Installation
and Operation Page 2
Controller Stations

Sample Station Layout
ESP-TM Installation and Operation Page 3

Controls and switches
LCD Display - during normal operation, displays the
time of day; during programming, shows the results of
your commands; during watering, shows the station that
is running and the minutes remaining in its run time.
Arrow ON-OFF Buttons - used to set times and days,
and to make program changes.
A /
B Program Button - used to select watering
program A or B. (On some ESP models, this button is
labeled PGM.)
Manual Start / Advance Button - used to start the
irrigation program manually or to manually advance
watering from one station to the next.
Programming Dial - used to turn
controller off and on,
and for programming.
Schedule Slide Switch - used to select one of the
fixed-interval watering schedules or a custom watering
schedule.
The illustration shows the programming controls on the face
of the ESP-TM. These controls include:
1
2
3
4
5
6
ESP-TM Installation and Operation Page 4

The ESP-TM series controllers have a backup, or default,
program that takes over if your program is lost because of an
extended power outage.
When the default program is running, all stations revert to
Program A, with 10 minutes of run time per station. The default
starting time is 8:00 AM.
The
default program will water every day if the Schedule Slide
Switch is set to "Custom."
If the Schedule Slide Switch is set to one of the fixed
intervals, the default program will run every two, three,
or five days, depending on where the switch is set.
The Program A default settings will
be in operation until you
enter your desired settings for Program A. As you enter your
settings in Program A, the default settings are pushed into
reserve status as a backup program. If you are using only
one of the two programs, make sure you use Program A.
Your ESP-TM controller
is an electronic clock that controls when
your sprinkler system turns on, and how long the sprinklers run.
Programming is the process of telling the controller exactly when
and how long you want to water. The controller opens and closes
the remote control valves according to the program you set.
Each program
contains: Watering days - the specific
days of the week on which watering takes place (for
example,
Default Program
PROGRAMMING THE CONTROLLER
Monday, Wednesday, Friday), or the watering interval
(for example, every third day).
Start time - the time of day that the program begins; this
is the time that the first station in the program begins
watering; all other stations then follow in sequence.
Run time - the number of minutes that each
station runs.
ESP-TM Installation and Operation Page 5

Fill out Program Schedule Sheet
Select watering schedule
Set the current time
Set the current day
Select the program (A or B)
Set station watering days (custom
schedule only)
Set station run times
Set watering start times
Set controller to automatic operation
page 7
page 10
page 11
page 12
page 14
page 15
page 16
page 17
page 19
Programming Checklist
To program the ESP-TM controller for the first time, we
recommend that you complete the following steps in order:
ESP-TM Installation and Operation Page 6

Station
Notes:
Description Run TimeRun Time
2 Days 3 Days 5 Days
Fixed Day Cycle
(applies to all programs)
Water Budget
(applies to all programs)
Custom Day Cycle Custom Day Cycle
Watering
Days
Program
Start Times
Technical Services for U.S. and Canada only: 1-800-247-3782
www.rainbird.com
ESP-TM Controller
PROGRAMMING CHART
MT
W
TFSS MT
W
TFSS
1
11
2
22
3
33
4
5
6
7
8
Program A Program B
P/N 632989A
am pm am pm
am pm am pm
am pm am pm
........................................
Fill Out Programming Chart
1
2
3
4
5
Enter a brief description of each station on
the controller.
In the Program A column, circle the Watering
Days schedule. Either choose one of the "Fixed
Day Cycle" intervals, or choose the desired
watering days in the "Custom Day Cycle" row.
Enter the starting time(s) for Program A. You
may have up to three
separate start times
for each program.
Enter the run time for each station assigned
to Program A. Enter "0" for stations that are
not used in Program A.
Repeat steps 2 - 4 for Program B. If you are
using a fixed schedule, Program B will have
the same watering days as Program A.
ESP-TM Installation and Operation Page 7
Before you begin programming, fill out the ESP-TM Controller Programming Chart and keep it for reference. A sample
Programming Chart is shown in this illustration. Several blank Charts are provided for your use on the following pages.
1
4
23 5

ESP-TM Installation and Operation Page 8
Station
Notes:
Description Run TimeRun Time
2 Days 3 Days 5 Days
Fixed Day Cycle
(applies to all programs)
Water Budget
(applies to all programs)
Custom Day Cycle Custom Day Cycle
Watering
Days
Program
Start Times
Technical Services for U.S. and Canada only: 1-800-247-3782
www.rainbird.com
ESP-TM Controller
PROGRAMMING CHART
MT
W
TFSS MT
W
TFSS
1
11
2
22
3
33
4
5
6
7
8
Program A Program B
P/N 632989A
am pm am pm
am pm am pm
am pm am pm
........................................

ESP-TM Installation and Operation Page 9
Station
Notes:
Description Run TimeRun Time
2 Days 3 Days 5 Days
Fixed Day Cycle
(applies to all programs)
Water Budget
(applies to all programs)
Custom Day Cycle Custom Day Cycle
Watering
Days
Program
Start Times
Technical Services for U.S. and Canada only: 1-800-247-3782
www.rainbird.com
ESP-TM Controller
PROGRAMMING CHART
MT
W
TFSS MT
W
TFSS
1
11
2
22
3
33
4
5
6
7
8
Program A Program B
P/N 632989A
am pm am pm
am pm am pm
am pm am pm
........................................

Select Watering Schedule
To use a fixed schedule, move the Schedule Slide
Switch to one of the FIXED positions:
2 = every other day
3 = every third day
5 = every fifth day
To use the custom schedule, move the Schedule
Slide Switch to the "C" position.
1
2
The ESP-TM has two types of watering schedules, either fixed
or custom. The fixed schedule sets watering to occur every
second, third, or fifth day. The custom schedule lets you select
specific days of the week on which watering is to occur.
The type of schedule you select applies to both
programs, A
and B. For example, you cannot set Program A to a fixed
schedule and Program B to a custom schedule.
ESP-TM Installation and Operation Page 10

Set Current Time
Turn the dial to "HR."
The display shows the hour that is currently set,
either AM or PM.
Press or to set the current hour.
Turn the dial to "MIN."
The display shows the minute currently set.
Press or to set the
current minute.
1
2
3
4
5
6
ESP-TM Installation and Operation Page 11

Set Current Day
Setting the current day varies somewhat depending on
whether you are using a custom schedule or a fixed
schedule.
Custom Schedule
Make sure the Schedule Slide switch is set to "C."
Turn the dial to "DAY."
The display shows the day of the week that is
currently set (for example, "MO" for Monday).
Press or to change the display to the current
day of the week.
3
2
1
4
ESP-TM Installation and Operation Page 12

Fixed Schedule
Make sure the Schedule Slide switch is set to a fixed-
day schedule: 2, 3, or 5.
Turn the dial to "DAY."
The display shows "1" for the first day of the watering
cycle. Day 1 is always the watering day.
Press or to change the current
day from 1.
If you want tomorrow to be the watering day, change
the current day to the last day in your fixed schedule.
For example, if you're using a two-day schedule and
you want to start watering tomorrow, set the current
day to "2." If you're using a three-day schedule and
you want
to start tomorrow, set the current day to "3."
1
2
3
4
ESP-TM Installation and Operation Page 13

Select Program
The program that is currently selected appears in the
far left corner of the display. The display will show
either "PGM A" or "PGM B."
To select the program, press the A / B (or PGM)
button until the program you want appears in the
display. Pressing the A / B button switches
back and
forth between the two programs.
The ESP-TM controller has two programs, A and B. Each
program operates independently.
If you are using the custom watering schedule, each
program can have different watering days. For example,
Program A might run on Monday, Wednesday, and Friday;
Program B on Tuesday, Thursday, and Saturday.
If you are using a fixed
watering schedule, both programs
will have the same "ON" days. For example, if you are
using the three-day fixed schedule, Program A and
Program B will both run every third day.
You can assign any station to Program A, Program B, or
both.
2
1
ESP-TM Installation and Operation Page 14

Set Station Watering Days
NOTE: Yo u must set station watering days ONLY if you
are using the CUSTOM Schedule. If you are using one of
the FIXED schedules, skip to page 16.
1
2
3
4
Turn the dial to "MON."
The display shows the day of the week (for example,
"MO" for Monday) and either "ON" or "OFF." ON
means the selected day is a watering day. OFF
means watering doesn't take place on the selected
day.
Press the ON or OFF button to set the
selected day
of the week on or off.
Turn the dial to the next day of the week. Repeat
steps 2 and 3 until you have set each day of the
week either on or off.
ESP-TM Installation and Operation Page 15

Set Station Run Times
Tu r n the dial to Station 1.
The display shows the selected station and its run
time. If you are programming the controller for the
first time, or after a long power outage, the built-in
run time of 10 minutes will appear.
change the display to the run
time you want (up to 99 minutes).
Set any unused
stations to 0 minutes.
Tu r n the dial to the next station in sequence.
Repeat steps 2 through 4 until you have set the run
time for each station.
Press or to
3
4
2
1
ESP-TM Installation and Operation Page 16

Set Watering Start Times
Make sure the program you want appears in the
display. Either "PGM A" or "PGM B" will appear.
To switch to the other program, press the A / B
(or PGM) button.
Turn the dial to 1 in the "Watering Start Times"
section.
The display shows the start time currently set for
this program
section.
Each program on the ESP-TM can have up to three
watering start times, which tell the controller when to
begin the watering program. The start time applies to all
watering days for that program.
If you want to water more than once a day, you can set
the second and third
watering start times. For example, if
you are growing new lawn seed, you might want to water
several times a day. To do so, you could set a program to
run at 6:00 AM, 11:00 AM, and 4:00 PM.
1
2
3
ESP-TM Installation and Operation Page 17
/