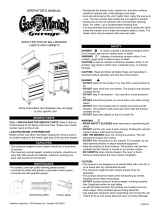
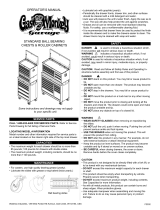
Craftsman 5-Drawer Owner's manual

Type
Owner's manual

Craftsman 5-Drawer: Store and organize your tools and equipment with ease in this versatile and durable storage solution. Its sturdy construction, customizable drawer configurations, and secure locking system make it ideal for workshops, garages, and other workspaces. Keep your tools within reach and maintain a clutter-free environment for efficient and organized work.

Craftsman 5-Drawer: Store and organize your tools and equipment with ease in this versatile and durable storage solution. Its sturdy construction, customizable drawer configurations, and secure locking system make it ideal for workshops, garages, and other workspaces. Keep your tools within reach and maintain a clutter-free environment for efficient and organized work.

F 1849
CHESTS
Please indicate the following
information from the service
part drawing provided.
Model Number: _________________________
Model Description: ______________________
CAUTION:
Read and follow all Safety Rules and Operating Instructions before rst use
of this product. Retain this document for future reference.
Sears, Roebuck and Co., Homan Estates, IL 60179 USA
2
SAFETY
SAFETY WARNINGS AND CAUTIONS:
DO NOT stand on this product. You may fall which may cause personal injury.
Stacked products should be bolted together. The products could become unstable
and tip, which may cause personal injury or product damage.
WEAR SAFETY GLASSES when removing or repositioning the slides. The tool
could slip which may cause personal injury.
BE CAREFUL when closing the cover. Remove hands before the cover closes
completely to prevent personal injury.
BE CAREFUL when opening more than one drawer. The product may become
unstable and tip, which may cause personal injury or product damage.
DO NOT mount this product on a truck bed or any other moving object. This may
cause personal injury or product damage.
DO NOT step in the drawers. You may fall which may cause personal injury.
Appropriately secure this product before moving it with a f
orklift.
WEAR SAFETY GLASSES AND BE CAREFUL when repairing or servicing the
product. The spring loaded parts may cause personal injury.
Close the cover and lock the drawers and doors before moving this product. The
drawers or doors could come open and make the product unstable and tip, which
may cause personal injury or product damage.
DO NOT alter this product in any manner. For example, do not weld external
lockbars or attach electrical equipment. This may cause product damage or
personal injury.
Use adequate manpower to lift the chest.
Keep the product on level surfaces. The product may become unstable and tip if
stored or moved on an un-level surface, which may cause personal injury or
product damage.
Call 1-800-366-7278 for Service Parts
Refer to Service Parts Drawing for full listing of Service Parts
3
ASSEMBLY
HARDWARE:
CHEST AND INTERMEDIATE
CHEST ATTACHMENT:
NOTE: Use adequate manpower to lift
the chest in this operation.
C Remove the top two drawers of the cart
(refer to the drawer removal
instructions).
C Lift the chest onto the cart. Line up the
holes in the bottom of the chest with the
holes in the top of the cart.
C Remove the wooden top from the cart
before mounting the chest.
C Attach the chest using four 5/16-18 x 1
hex screws inserted from the underside
of the top of the cart.
C Wrench tighten all screws.
C Replace the drawers (refer to drawer
installation instructions).
C To remove, reverse procedure.
DIVIDER INSTALLATION:
NOTE: Before installing the dividers in
the drawers, decide which position and
in which drawers they would best serve
your needs.
C The dividers are cut to fit right to left in
the drawers . If you prefer to run them
front to back, they may be trimmed in
length to do so.
C Position the dividers in the desired
locations.
C Thread the #10-24 x 5/16 hex screws
through the bottom of the drawer and
into each divider. Tighten all the screws.
DRAWER LINER:
C Remove the non-slip drawer liner from
the roll. The drawer liner may be cut with
scissors to fit each drawer and around
the drawer dividers, if necessary.
4
OPERATION
TO UNLOCK UNIT:
C Pull handle lever out.
C Insert the key into the lock and turn it
clockwise.
C Release lever.
C If the drawers do not open, push all the
drawers completely closed to release
the lockbars.
TO LOCK UNIT:
C Always check the unit to make sure all
the drawers are completely closed
before locking.
C Pull the handle lever.
C Insert the key into the lock and turn it
counterclockwise.
C Release Lever.
REMOVING AND INSTALLING
DRAWERS:
NOTE: The drawers in these units can
be rearranged to fit your specific
needs. This means that drawers may
be moved or replaced as desired. For
example, a 6-inch drawer may be
replaced by a 2-inch and a 4-inch
drawer, or three 2-inch drawers.
C Empty the drawer.
C Fully extend the drawer.
C Lever Style-Lift the release lever on the
right side, while depressing the lever on
the left side, (this allows the slides to
ride over the stops). Pull out to remove.
Tab Style-Depress the release tab on
both sides, (this allows the slides to
ride over the stops). Pull out to remove.
C To reinstall, push the drawer into the
slides until the drawer stops.
REMOVING AND INSTALLING
SLIDES:
NOTE: To remove the slide from the
unit, first remove the drawer.
C Lift and hold the spring retainer, and
push the slide toward the rear of the
unit. The slide may now be removed.
C To reinstall the slide, place the slide in
the appropriate position in the unit and
pull toward the front of the unit until the
spring retainer snaps into position and
secures the slide.
C For smooth operation, make sure that
the drawers are matched with their
original slides.
5
LOCK SYSTEM TROUBLE SHOOTING
PROBLEM CAUSE SOLUTION
The unit unlocks but
the drawers still will
not open.
One or more of the
drawers are holding
the lockbars from
releasing.
Completely close all the drawers
and the lockbars will release to open
the drawers.
The cover on the
chest is holding the
lockbars from
releasing.
Apply a downward pressure to the
top of the cover to let the lockbars
release.
The release cables
are not working.
In an UNLOCKED position, pull the
lock lever several times.
The unit is leaning
too far forward.
Position the unit on a level area.
The unit locks but
some drawers still
are not locked.
One or more of the
drawers are not
completely closed.
Unlock unit. Close all drawers
completely. Relock unit.
MAINTENANCE
With proper care, your Craftsman tool storage unit will give you a lifetime of service. Use the
recommended lubrication chart and care instructions listed below to maintain the investment you have
made.
6
PART LUBRICATION INSTRUCTIONS
KEY GREASE GRAPHITE SPRAY
Lockbar Pivot A TWICE YEARLY
Lockbar brackets
(Top & Bottom)
B TWICE YEARLY
Lock Mechanism C TWICE YEARLY
Cable ends D TWICE YEARLY
Lock E YEARLY
Slide F TWICE YEARLY
Casters Not shown YEARLY
1. For casters, use High Extreme Pressure #2 Gun Grease, or equivalent. There is one zerk on
each rigid caster and two zerks on each swivel caster.
2. For slides, grease with petroleum jelly or equivalent.
CARE FOR THE FINISH:
C Periodically the drawer fronts, drawer trim, and other chest and cart surfaces should be cleaned with
a mild detergent and water to keep them looking new.
C Auto wax will preserve the storage unit’s high luster finish. Apply the wax as to a car. The wax will
help protect the unit against scratches.
C Grease and oil can be removed with most standard cleaning fluids. For safety, use a nonflammable
cleaning fluid.
C Drawer liners are supplied and recommended to protect the finish inside the drawers and make them
easier to clean. Drawer liners may be cleaned with soap and water.
  • Page 1 1
  • Page 2 2
  • Page 3 3
  • Page 4 4
  • Page 5 5
  • Page 6 6

Craftsman 5-Drawer Owner's manual

Type
Owner's manual

Craftsman 5-Drawer: Store and organize your tools and equipment with ease in this versatile and durable storage solution. Its sturdy construction, customizable drawer configurations, and secure locking system make it ideal for workshops, garages, and other workspaces. Keep your tools within reach and maintain a clutter-free environment for efficient and organized work.

Ask a question and I''ll find the answer in the document

Finding information in a document is now easier with AI

in other languages