Candy FCP686KX/E User manual

Category
Kitchen & houseware accessories
Type
User manual
USER INSTRUCTIONS
OVENS
EN
FR
NOTICE D'EMPLOI ET D'INSTALLATION
DES FOURS ENCASTRABLES
02
15
CANDY HOOVER GROUP S.R.L. • Via Privata Eden Fumagalli • 20047 Brugherio Milano Italy
Safety Indications
WARNING: the appliance and accessible parts become hot during use.
Be careful not to touch any hot parts.
•WARNING: the accessible parts can become hot when the grill is in
use. Children should be kept at a safe distance.
•WARNING: ensure that the appliance is switched off before replacing
the bulb, to avoid the possibility of electric shocks.
•WARNING: in order to avoid any danger caused by the accidental
resetting of the thermal interruption device, the appliance should not
be powered by an external switching device, such as a timer, or be
connected to a circuit that is regularly switched on and off.
•WARNING: before initiating the automatic cleaning cycle:
- clean the oven door;
- remove large or coarse food residues from the inside of the oven using
a damp sponge. Do not use detergents;
- remove all accessories and the sliding rack kit (where present);
- do not place tea towels.
•Children under 8 should be kept at a safe distance from the appliance
if not continuously supervised.
•Children should not play with the appliance. The appliance can be
used by those aged 8 or over and by those with limited physical,
sensorial or mental capacities, without experience or knowledge of the
product, only if supervised or provided with instruction as to the
operation of the appliance, in a safe way with awareness of the possible
risks.
•Cleaning and maintenance should not be carried out by unsupervised
children.
•Do not use rough or abrasive materials or sharp metal scrapers to
clean the oven door glasses, as they can scratch the surface and cause
the glass to shatter.
The oven must be switched off before removing the removable parts
and, after cleaning, reassemble them according the instructions.
•Only use the meat probe recommended for this oven.
EN 02
•Do not use a steam cleaner.
•Put the plug into a socket equipped with a third contact which
corresponds to the earth and which must be connected and in
operation. For models without a plug, attach a standard plug to the
cable that is able to bear the load indicated on the tag. The earth
conductor is yellow-green in colour. This operation should be carried
out by a suitably qualified professional. In case of incompatibility
between the socket and the appliance plug, ask a qualified electrician to
substitute the socket with another suitable type. Connection to the
power source can also be made by placing an omnipolar breaker
between the appliance and the power source that can bear the
maximum connected load and that is in line with current legislation. The
yellow-green earth cable should not be interrupted by the breaker. The
socket or omnipolar breaker used for the connection should be easily
accessible when the appliance is installed.
•If the power cable is damaged, it should be substituted with a cable or
special bundle available from the manufacturer or by contacting the
customer service department.
If the cable is damaged, replace it promptly in accordance with the
following instructions:
- open the cover of the terminal block;
- remove the power cable and substitute it with a similar cable which is
compatible with the appliance (type ).
•This operation should be carried out by a suitably qualified
professional. The earth conductor (yellow-green) must be
approximately 10 mm longer than the other conductors. For any
repairs, refer only to the Customer Care Department and request the
use of original spare parts.
•Failure to comply with the above can compromise the safety of the
appliance and invalidate the guarantee.
•Any excess of spilled material should be removed before cleaning.
•During the pyrolytic cleaning process, surfaces can heat up more than
usual, children should therefore be kept at a safe distance.
H05VV-F , HO5V2V2-F
EN 03
EN 04
Summary
General Instructions
5
1.1 Safety indications
1.2 Electrical safety
1.3 Recommendations
1.4 Installation
1.5 Waste management
1.6 Conformity declaration
2.1 Overview
2.2 Accessories
2.3 First use
Product Description
7
3.1 Display description
3.2 Cooking modes
Use of the Oven
8
4.1 General notes on cleaning
4.2 Pyrolysis
4.3 Maintenance
• Removal and cleaning of grills
• Removal of the oven window
• Removal and cleaning of the glass
door
• Changing the bulb
Oven Cleaning and Maintenance
11
5.1 F.A.Q.
Troubleshooting
14
1. General Instructions
We thank you for choosing one of our products. For the
best results with your oven, you should read this
manual carefully and retain it for future reference.
Before installing the oven, take note of the serial
number so that you can give it to customer service staff
if any repairs are required. Having removed the oven
from its packaging, check that it has not been damaged
during transportation. If you have doubts, do not use
the oven and refer to a qualified technician for advice.
Keep all of the packaging material (plastic bags,
polystyrene, nails) out of the reach of children. When
the oven is switched on for the first time, strong
smelling smoke can develop, which is caused by the glue on the insulation panels surrounding the oven
heating for the first time. This is absolutely normal and, if it occurs, you should wait for the smoke to
dissipate before putting food in the oven. The manufacturer accepts no responsibility in cases where
the instructions contained in this document are not observed.
NOTE: the oven functions, properties and accessories cited in this manual will vary, depending on the
model you have purchased.
1.1 Safety Indications
Only use the oven for its intended purpose, that is only for the cooking of foods; any other use, for
example as a heat source, is considered improper and therefore dangerous. The manufacturer cannot
be held responsible for any damage resulting from improper, incorrect or unreasonable usage.
The use of any electrical appliance implies the observance of some fundamental rules:
- do not pull on the power cable to disconnect the plug from the socket;
- do not touch the appliance with wet or damp hands or feet;
- in general the use of adaptors, multiple sockets and extension cables is not recommended;
- in case of malfunction and/or poor operation, switch off the appliance and do not tamper with it.
1.2 Electrical Safety
ENSURE THAT AN ELECTRICIAN OR QUALIFIED TECHNICIAN MAKES THE ELECTRICAL CONNECTIONS.
The power supply to which the oven is connected must conform with the laws in force in the country of
installation. The manufacturer accepts no responsibility for any damage caused by the failure to observe
these instructions. The oven must be connected to an electrical supply with an earthed wall outlet or a
disconnector with multiple poles, depending on the laws in force in the country of installation. The
electrical supply should be protected with suitable fuses and the cables used must have a transverse
section that can ensure correct supply to the oven.
CONNECTION
The oven is supplied with a power cable that should only be connected to an electrical supply with 220-
240 Vac 50 Hz power between the phases or between the phase and neutral. Before the oven is
connected to the electrical supply, it is important to check:
- power voltage indicated on the gauge;
- the setting of the disconnector.
The grounding wire connected to the oven's earth terminal must be connected to the earth terminal of
the power supply.
WARNING
Before connecting the oven to the power supply, ask a qualified electrician to check the continuity of the
power supply's earth terminal. The manufacturer accepts no responsibility for any accidents or other
problems caused by failure to connect the oven to the earth terminal or by an earth connection that has
defective continuity.
EN 05
1.3 Recommendations
After each use of the oven, a minimum of cleaning will help keep the oven perfectly clean.
Do not line the oven walls with aluminium foil or single-use protection available from stores. Aluminium
foil or any other protection, in direct contact with the hot enamel, risks melting and deteriorating the
enamel of the insides. In order to prevent excessive dirtying of your oven and the resulting strong
smokey smells, we recommend not using the oven at very high temperature. It is better to extend the
cooking time and lower the temperature a little. In addition to the accessories supplied with the oven,
we advise you only use dishes and baking moulds resistant to very high temperatures.
1.4 Installation
The manufacturers have no obligation to carry this out. If the assistance of the manufacturer is required
to rectify faults arising from incorrect installation, this assistance is not covered by the guarantee. The
installation instructions for professionally qualified personnel must be followed. Incorrect installation
may cause harm or injury to people, animals or belongings. The manufacturer cannot be held
responsible for such harm or injury.
The oven can be located high in a column or under a worktop. Before fixing, you must ensure good
ventilation in the oven space to allow proper circulation of the fresh air required for cooling and
protecting the internal parts. Make the openings specified on last page according to the type of fitting.
NOTE: as the oven could require maintenance work, it is advisable to keep another wall socket available
so that the oven can be connected to this if it is removed from the space in which it is installed. The
power cable must only be substituted by technical service staff or by technicians with equivalent
qualifications.
1.5 Waste management and environmental protection
This appliance is labelled in accordance with European Directive 2012/19/EU regarding
electric and electronic appliances (WEEE). The WEEE contain both polluting substances
(that can have a negative effect on the environment) and base elements (that can be
reused). It is important that the WEEE undergo specific treatments to correctly remove and
dispose of the pollutants and recover all the materials. Individuals can play an important
role in ensuring that the WEEE do not become an environmental problem; it is essential to
follow a few basic rules:
- the WEEE should not be treated as domestic waste;
- the WEEE should be taken to dedicated collection areas managed by the town council or a registered
company.
In many countries, domestic collections may be available for large WEEEs. When you buy a new
appliance, the old one can be returned to the vendor who must accept it free of charge as a one-off, as
long as the appliance is of an equivalent type and has the same functions as the purchased appliance.
SAVING AND RESPECTING THE ENVIRONMENT
Where possible, avoid pre-heating the oven and always try to fill it. Open the oven door as infrequently
as possible, because heat from the cavity disperses every time it is opened. For a significant energy
saving, switch off the oven between 5 and 10 minutes before the planned end of the cooking time, and
use the residual heat that the oven continues to generate. Keep the seals clean and in order, to avoid any
heat dispersal outside of the cavity. If you have an electric contract with an hourly tariff, the "delayed
cooking" programme makes energy saving more simple, moving the cooking process to start at the
reduced tariff time slot.
1.6 Declaration of compliance
The parts of this appliance that may come into contact with foodstuffs comply with the provisions of EEC
Directive 89/109.
By placing the mark on this product, we are confirming compliance to all relevant European safety,
health and environmental requirements which are applicable in legislation for this product.
EN 06
2. Product Description
2.1 Overview
1
2
3
5
4
6
1. Control panel
2. Shelf positions
(lateral wire grid if included)
3. Metal grill
4. Drip pan
5. Fan (behind the steel plate)
6. Oven door
2.2 Accessories
Metal grill
1
Drip pan
2
Holds baking trays and plates.
Collects the residues that drip during the cooking
of foods on the grills.
EN 07
2.3 First Use
PRELIMINARY CLEANING
Clean the oven before using for the first time. Wipe over external surfaces with a damp soft cloth. Wash
all accessories and wipe inside the oven with a solution of hot water and washing up liquid. Set the
empty oven to the maximum temperature and leave on for about 1 hour, this will remove any lingering
smells of newness.
3. Use of the Oven
3.1 Display description
1. Timer/automatic mode
2. Fan function
3. Defrost mode
4. Temperature or clock display
5. LCD display adjustment controls
6. Function selector knob
7. Programme selector knob
WARNING!
The first operation to carry out after installation,
or after a power cut, is to set the time of day (a
power cut has occured if the display is flashing
12:00).
200°-> The temperature LED “°” flashes until the
displayed temperature is reached.
HOT -> When a programme finishes, if the oven is
still hot, the display shows "HOT", alternating with
the time, even if the knobs are positioned to OFF.
EN 08
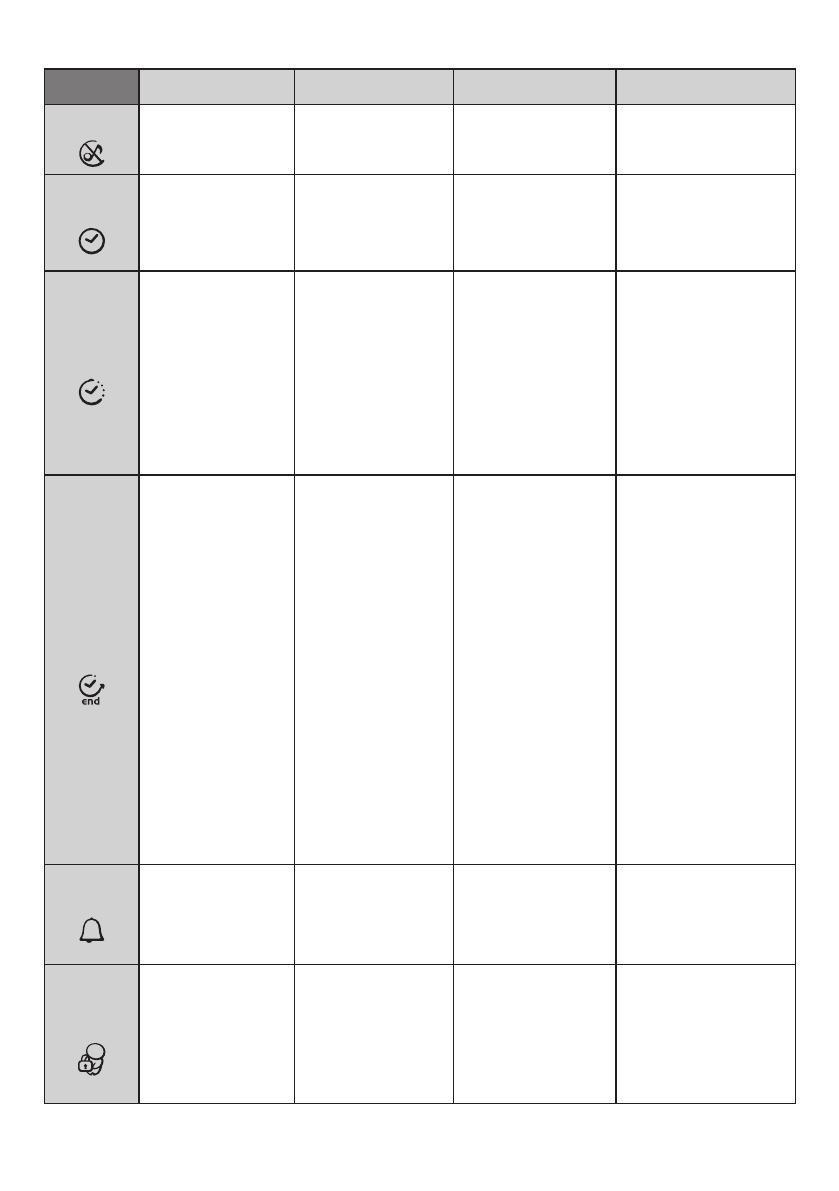
FUNCTION HOW TO ACTIVATE
HOW TO
DEACTIVATE
WHAT IT DOES WHY IT IS NEEDED
• Enables you to turn off
the sound of the minute
minder.
• Rotate the function
selector to the position
OFF.
• To turn off the sound of the
minute minder
• Enables you to set the
time which appears on
the display
• Rotate the function
selector to the position
OFF.
• Turn the right function
selector to a cooking
function
• Rotate the left function
selector to the position
"End of cooking"
• Set the end time of
cooking by using buttons
" + " and " - "
• Lighting Auto appears
• It allows to preset the end
of cooking time you want.
• When the cooking time is
set, turn the function
selector to OFF to go back
to actual time.
• To view the cooking time
selected, turn the left
function selector to End of
cooking Time
• When the cooking time
has elapsed, the oven
switch off automatically.
• To stop the cooking
functions early, turn the
function control to OFF
• Turn the left function
selector to the position
Minute Minder.
• Set the time of cooking
by using buttons
“+”and “-”
• Allow to use the oven as
alarm even if the oven is
switch off
• The oven cannot be used.
SILENCE
MODE
COOKING
DURATION
END OF
COOKING
MINUTE
MINDER
CHILD
SAFETY
LOCK
• Rotate the left function
selector to the position
" Silence mode “
• To set the time
NB : Set the time when you
first install your oven or just
after a black out (the clock is
showing a pulsating 12.00)
• Turn the right function
selector to a cooking
function
• Rotate the left function
selector to the position
"Cooking Time Duration”
• Set the time of cooking
by using buttons " + " and
" - "
• Lighting Auto appears
•When the cooking time
has elapsed, the oven
switch off automatically
and the alarm rings for
few seconds To stop the
cooking functions early,
turn the function control
to OFF or set the time on
00.00; by rotating the
function selector to
Cooking Time Duration
and by using the buttons "
+ " and " - “
• It allows to preset the
cooking time required for
the recipe chosen.
• When the cooking time is
set, turn the function
selector to OFF to go back
to actual time.
• To view the cooking time
selected, turn the left
function selector to
Cooking Time duration.
•This function is normally
used with the COOKING
DURATION function
•For example, the desired
food needs to cook for 45
minutes and I want it to be
ready for 12.30; in this case: at
the end of the set time, the
oven automatically switches
off and an alarm sounds.
Select the desired cooking
function. Set the cooking
duration to 45 minutes (“-”
“+”). Set the end of cooking to
12:30 (“-” “+”). Cooking will
automatically begin at 11:45
(12:30 minus 45 minutes), at
the end of the set cooking
time, the oven will
automatically switch off.
WARNING: by setting only the
end of cooking time, and not
the cooking duration, the oven
will immediately switch on
and switch off at the end of
the set cooking time.
• Set the time on 00.00 by
turning the left function
selector to the position
Minute Minder, and using
the button " - “
• Turn the left function
selector to the position
Child lock.
• Press the button " + "
during 5 seconds
• Child lock is available
when " STOP " appears
on display
• Turn back the left
function selector to Child
lock and press button " +
" during 5 seconds.
• Indication STOP
disappears.
• Rotate the left function
selector to the position
“Set the time”.
• Use the buttons " + " or
" - " to set the time
• For cooking the desired
recipes.
•Emits an audible signal at
the end of a set time.
•During operation, the
display shows the
remaining time.
• This function is useful
when there are children in
the house.
SET
THE TIME
EN 09
*Tested in accordance with the CENELEC EN 60350-1
**Tested in accordance with the CENELEC EN 60350-1 used for definition of energy class.
3.2 Cooking Modes
EN 10
Function
Dial
T °C
default
Function (Depends on the oven model)
LAMP: Turns on the oven light.
PYROLYSIS
GRILL
The top heating element is used alone and you can adjust the temperature.
Five minutes preheating is required to get the elements red-hot. Success is
guaranteed for grills, kebabs and gratin dishes. White meats should be put at a
distance from the grill; the cooking time is longer, but the meat will be tastier.
You can put red meats and fish fillets on the shelf with the drip tray
underneath. The oven has two grill positions:
Grill: 2140 W
: use the grill with the door closed.
FAN ASSISTED GRILL :
The top heating element is used with the fan circulating the air inside the oven.
Preheating is necessary for red meats but not for white meats. Ideal for
cooking thick food items, whole pieces such as roast pork, poultry, etc. Place
the food to be grilled directly on the shelf centrally, at the middle level. Slide
the drip tray under the shelf to collect the juices. Make sure that the food is not
too close to the grill. Turn the food over halfway through cooking.
use the turbo-grill with the door closed.
FAN COOKING:
and vegetables. Heat penetrates into the food better and both the cooking and
preheating times are reduced. You can cook different foods at the same time
with or without the same preparation in one or more positions. This cooking
method gives even heat distribution and the smells are not mixed.
Allow about ten minutes extra when cooking foods at the same time.
We recommend you use this method for poultry, pastries, fish
CONVENTIONAL COOKING:
Preheat the oven for about ten minutes. This method is ideal for all traditional
roasting and baking. For seizing red meats, roast beef, leg of lamb, game, bread,
foil wrapped food (papillotes), flaky pastry. Place the food and its dish on a shelf
in mid position.
Both top and bottom heating elements are used.
DEFROST:
temperature around the frozen food so that it defrosts in a few minutes
without the protein content of the food being changed or altered.
When the dial is set to this position. The fan circulates air at room
FAN + LOWER ELEMENT:
circulating the air inside the oven. This method is ideal for juicy fruit flans, tarts,
quiches and pâté.
It prevents food from drying and encourages rising in cakes, bread dough and
other bottom-cooked food.
Place the shelf in the bottom position.
The bottom heating element is used with the fan
180
220
210
200
*
**
SUPER GRILL: the oven has two grill positions
Grill: 2200 W Super Grill : 3000 W
KEEP WARM: This is recommended to reheat precooked foodstuff, positioning
the shelf on the second level from top, or to defrost bread pizza or pastry by
positioning the shelf on the lower level. The temperature is preset in 60°C
constant, no regulation is possible.
210
ECO
40
L3
210
L3
T °C
range
40 ÷ 40
50 ÷ 240
50 ÷ 280
50 ÷ 230
150 ÷ 220
50 ÷ 240
ECO÷SUPER
L1 ÷ L5
50 ÷ 240
L1 ÷ L5
EN 11
4. Oven cleaning and maintenance
4.1 General notes on cleaning
The lifecycle of the appliance can be extended through regular cleaning. Wait for the oven to cool before
carrying out manual cleaning operations. Never use abrasive detergents, steel wool or sharp objects for
cleaning, so as to not irreparably damage the enamelled parts. Use only water, soap or bleach-based
detergents (ammonia).
GLASS PARTS
It is advisable to clean the glass window with absorbent kitchen towel after every use of the oven. To
remove more obstinate stains, you can use a detergent-soaked sponge, well wrung out, and then rinse
with water.
OVEN WINDOW SEAL
If dirty, the seal can be cleaned with a slightly damp sponge.
ACCESSORIES
Clean accessories with a wet, soapy sponge before rinsing and drying them: avoid using abrasive
detergents.
DRIP PAN
After using the grill, remove the pan from the oven. Pour the hot fat into a container and wash the pan in
hot water, using a sponge and washing-up liquid.
If greasy residues remain, immerse the pan in water and detergent. Alternatively, you can wash the pan
in the dishwasher or use a commercial oven detergent. Never put a dirty pan back into the oven.
4.2 Pyrolysis
The oven is equipped with a pyrolyser cleaning system, which destroys food residues at high
temperature. The operation is carried out automatically by means of the programmer. The resulting
fumes are rendered “clean” by passing over a Pyrolyser wich starts as soon as cooking begins. As very
high temperatures are required by the Pyrolyser, the oven door is fitted with a safety lock. The pyrolyser
can be stopped at any time. The door cannot be opened until the safety lock is displayed.
NOTE : If a hob has been fitted above the oven, never use the gas burners or the electric hot-plates while
the Pyrolyser is working, this will prevent the hob from overheating.
TWO PYROLYTIC CYCLE are pre-set:
ECO PYROCLEAN : Cleans a moderately stained oven. Operates for a period of 65 minutes.
SUPER PYROCLEAN : Cleans a heavily stained oven. Operates for a period of 90 minutes.
Never use commercially available cleaning products on a Pyrolytic oven!
Tip : Carrying out Pyrolytic cleaning immediately after cooking allows you to take advantage of residual
heat, thus saving energy.
Before executing a pyrolytic cycle:
•Remove all the accessories from the oven because they are not able to tolerate the high
temperatures used during the pyrolytic cleaning cycle ; in particular removing grids, side racks and
the telescopic guides (refer to the chapter REMOVING GRIDS AND SIDE RACKS) . In ovens with meat
probe it is necessary, before making the cleaning cycle , close the hole with the nut provided.
•Remove any large spillages or stains as it would take too long to destroy them. Also excessively
large amounts of grease could ignite when subject to the very high temperatures of the Pyrolytic
cycle.
•Close the oven door.
•Excess spillage must be removed before cleaning.
Clean the oven door;
Remove large or coarse food residues from the inside of the oven using a damp sponge. Do not use
detergents;
Remove all accessories and the sliding rack kit (where present);
Do not place tea towels.
Using the pyrolitic cycle:
1- Rotate the function selector to the position " ". On the display, appears the indication " ECO " or
" SUP ". The preset time is 65 min, this can be varied from 65 min (Eco mode) to 90 min (Sup mode) via
the programmer (setting button " + " or " - "). If the oven is very dirty, it is recommend o increase the time
to 90 min, if the oven is moderately dirty reduce the cleaning cycle time to 65 min.
2- It is possible to defer the start time of the pyroclean cycle by changing the END time via the
programmer.
3- After few minutes, when the oven reaches a high temperature, the door locks automatically. The
pyroclean cycle can be stopped at any time by turning the function selector back to '0' (the word OFF will
be displayed for 3 seconds).
4 - Once the pyroclean cycle is finished, the pyrolysis will switch off automatically. On the display
appears the indication "END" until the door is locked then "0--n".
5- You can turn the function selector back to " 0 " but if the temperaure is still high, the "0--n " indication
appears to inform that the door is locked.
Use of the pyrolytic cycle in Touch Control ovens:
1- Rotate the function selector into position pyrolisys. The display will show either "ECO" or "SUP“
2- The pre-set time is 65 minutes but it can be varied from 65 min. (Eco mode) to 90 min. (Sup mode)
using the programmer (" +" or "-" key). If the oven is very dirty, the time should be increased to 90 min.,
while if the oven is only a slightly dirty, reduce the cleaning cycle to 65 min.
EN 12
REMOVAL AND CLEANING OF THE SIDE RACKS
1. Unscrew the bolt in an anti-clockwise direction.
2. Remove the side racks by pulling them towards you.
3. Clean the side racks in a dishwasher or with a wet sponge and then dry them immediately.
4. Having cleaned the side racks, put them back in and reinsert the bolts, ensuring that they are fully
tightened.
4.3 Maintenance
A
REMOVAL OF THE OVEN WINDOW
1. Open the front window.
2. Open the clamps of the hinge housing on the right and left side of the front window by pushing them
downwards.
3. Replace the window by carrying out the procedure in reverse.
1
2
3
1.
2.
3.
4.
5.
6.
7.
REMOVAL AND CLEANING OF THE GLASS DOOR
1. Open the oven door.
2.3.4. Lock the hinges, remove the screws and remove the upper metal cover by pulling it upwards.
5.6. Remove the glass, carefully extracting it from the oven door (NB: in pyrolytic ovens, also remove
the second and third glass (if present)).
7. At the end of cleaning or substitution, reassemble the parts in reverse order.
On all glass, the indication "Pyro" must be legible and positioned on the left side of the door, close to the
left-hand lateral hinge. In this way, the printed label of the first glass will be inside the door.
EN 13
LOW-E
CHANGING THE BULB
1. Disconnect the oven from the mains supply.
2. Undo the glass cover, unscrew the bulb and replace it with a new bulb of the same type.
3. Once the defective bulb is replaced, replace the glass cover.
5.
5.1 FAQ
Troubleshooting
PROBLEM POSSIBLE CAUSE SOLUTION
The oven does not heat up
The clock is not set Set the clock
The child lock is on
A cooking function and
temperature has not been set
Deactivate the child lock
Ensure that the necessary
settings are correct
The oven does not heat up
EN 14
Conseils De Securite
ATTENTION: l'appareil et les parties accessibles deviennent chauds
pendant l'utilisation. Veillez à ne pas toucher les élements chauffants.
MISE EN GARDE: les parties accessibles peuvent devenir chaudes
lorsque le gril est en cours d'utilisation. Les enfants doivent être
maintenus à une distance de sécurité.
• ATTENTION: le four doit éteint avant de changer l'ampoule, de
manière à éviter tout risque de .
ATTENTION: pour éviter tout danger à une réinitialisation
accidentelle, cet appareil ne doit pas être alimenpar un dispositif de
commutation externe, comme une minuterie, ou connecté à un circuit
qui est régulièrement allumé et éteint par .
ATTENTION: avant d’activer la fonction de nettoyage automatique :
- nettoyer la porte du four
- enlever avec une éponge humide les résidus les plus gros. Ne pas
utiliser de détergents;
- sortir tous les accessoires ainsi que le kit éventuel de glissières
coulissantes ;
- ne pas placer de torchons ou de maniques sur la poignée du four.
Les enfants de moins de 8 ans doivent être tenus à l'écart à moins
d'être surveillés continuellement.
Les enfants ne doivent pas jouer avec l'appareil. Cet appareil n'est pas
destiné à être utilisé par des personnes (y compris les enfants) dont les
capacités physiques, sensorielles ou mentales sont réduites, ou ayant
un manque d'expérience et de connaissances, à moins qu'elles n'aient
été formées à l'utilisation de l'appareil, par une personne responsable
de leur sécurité.
Le nettoyage et entretien ne doivent pas être effectués par des
enfants sans surveillance.
Ne pas utiliser de matériaux rêches, abrasifs, ou de racloirs
métalliques tranchants pour nettoyer les portes en verre du four car ils
peuvent rayer la surface entrainant des risques d'exposions
être
choc électrique
l'utilisateur
Le four doit être éteint avant le démontage des accessoires. Après
nettoyage, remonter les accessoires en suivant les instructions.
FR 15
Utilisez uniquement la sonde thermique recommandée pour ce four.
Ne pas utiliser un nettoyeur à vapeur.
Brancher la fiche dans une prise de courant équipée d’un troisième
contact correspondant à la prise de terre. Montez sur le fil une prise
capable de supporter la charge indiquée sur la plaquette. Le
fil conducteur de masse à la terre est identifié par les couleurs jaune et
vert. Veiller à ce que votre installation soit capable de supporter toute la
puissance absorbée par le four. Si votre installation électrique n’est pas
conforme faites la modifier par un électricien afin de prévenir tous
risques. On peut également effectuer le branchement au réseau en
interposant entre l’appareil et le réseau un interrupteur omnipolaire
dimensionnée en fonction de la charge et conforme aux normes en
vigueur. Le fil de terre jaune et vert ne doit pas être interrompu par
l’interrupteur. La prise et l’interrupteur omnipolaire utilisés doivent
être facilement accessibles une fois l’appareil électroménager installé.
Si le cordon d'alimentation est endommagé, il doit être remplacé par
un cordon spécial disponible auprès du fabricant ou de stations de
dépannage agrées.
Si le câble est endommagé, remplacez-le rapidement en conformité
avec les indications suivantes:
- Ouvrir le couvercle de la boîte à bornes;
- Retirer le câble d'alimentation et le remplacer par un câble similaire
adaptée à l'appareil (type ).
Cette opération doit être effectuée par du personnel qualifié. Le
conducteur de terre (jaune-vert) doit être environ 10 mm plus long que
les conducteurs de ligne. Pour toute réparation, reportez-vous
seulement à un centre de service technique agréé et demander
l'utilisation de pièces de rechange d'origine.
Le non respect de ce qui précède peut compromettre la sécurité de
l'appareil.
• Tout excédent de produit déver doit être enlevé avant de le
nettoyer.
Pendant la pyrolyse, les surfaces peuvent chauffer plus que
d'habitude: les enfants doivent donc être maintenus à une distance de
sécurité.
normalisée
H05VV-F , HO5V2V2-F
FR 16
FR 17
SOMMAIRE
Instructions Générales
18
1.1 Indications de sécurité
1.2 Sécurité électrique
1.3 Recommandations
1.4 Installation
1.5 La gestion des déchets et la
protection de l'environnement
1.6 Déclaration de conformité
2.1 Vue d'ensemble
2.2 Accessoires
2.3 Première utilisation
Description du produit
20
3.1 Description de l'affichage
3.2 Mode de cuisson
Utilisation du Four
22
4.1 Remarques générales concernant
le nettoyage
4.2 Pyrolyse
4.3 Entretien
• Retrait et nettoyage des gradins fils
• Retrait de la porte du four
• Retrait et nettoyage des vitres
• Remplacement de l'ampoule
Nettoyage du four et
maintenance
25
5.1 F.A.Q.
Dépannage
28
1. Instructions Générales
Nous vous remercions d'avoir choisi un de nos produits.
Pour obtenir les meilleurs résultats avec votre four, vous
devez lire attentivement ce manuel et le conserver pour
toute consultation ultérieure. Avant d'installer le four,
notez le numéro de série, il vous sera demandé par le
support technique si des réparations sont nécessaires.
Après avoir enlevé le four de son emballage, vérifiez
qu'il n'a pas été endommagé pendant le transport. Si
vous avez des doutes, ne pas utiliser le four et se référer
à un technicien qualifié pour obtenir des conseils.
Conservez tous les matériaux d'emballage (sacs en
plastique, polystyrène, clous) hors de la portée des
enfants.Lors de la première utilisation du four, il peut se produire un dégagement de fumée âcre
provoqué par le premier échauffement de la colle des panneaux d’isolation enveloppant le four. Ce
phénomène est normal. Attendez que la fumée cesse avant de cuire des aliments. Le fabricant décline
toute responsabilité dans les cas où les instructions contenues dans le présent document ne sont pas
respectées.
REMARQUE: les fonctions du four, les propriétés et les accessoires cités dans ce manuel peuvent varier
selon les modèles.
1.1 Indications de sécurité
Utilisez uniquement le four à sa destination, qui est seulement pour la cuisson des aliments; toute autre
utilisation, par exemple comme une source de chaleur, est considérée comme impropre et donc
. Le fabricant ne peut être tenu responsable de tout dommage lié à une mauvaise utilisation
ou a des modifications techniques du produit.
L'utilisation de tout appareil électrique implique le respect de certaines règles fondamentales:
- Ne pas tirer sur le fil électrique pour débrancher la prise.
- Ne pas toucher l'appareil avec les mains ou les pieds mouillés ou humides;
- En général l'utilisation d'adaptateurs, de prises multiples et de rallonges est déconseillé;
- En cas de dysfonctionnement et / ou de mauvais fonctionnement, éteindre l'appareil et ne pas y
toucher.
dangereuse
1.2 Sécurité électrique
LE BRANCHEMENT ELECTRIQUE DOIT ÊTRE REALISE PAR UN INSTALLATEUR AGREE OU UN
TECHNICIEN DE E.
L'alimentation électrique à laquelle le four est connecté doit être conforme aux lois en vigueur dans le
pays d'installation. Le fabricant décline toute responsabilité pour tout dommage causé par le non
respect de ces instructions. Le four doit être raccordé à l'alimentation électrique avec une prise murale
reliée à la terre ou par l'intermédiaire d'un dispositif à coupure omnipolaire, selon les lois en vigueur
dans le pays d'installation. L'alimentation électrique doit être protégée par des fusibles appropriés et les
câbles utilisés doivent avoir une section transversale qui peut assurer une alimentation normale du four.
CONNEXION
Le four est livré avec un câble d’alimentation permettant le raccordement sous une tension électrique
de 230 V entre les phases ou entre phase et neutre. Le raccordement devra être effectué après avoir
vérifié:
- La tension d'alimentation indiquée sur le compteur;
- Le réglage du dijoncteur.
Le fil de protection du cordon (vert/jaune) relié à la Borne Terre de l’appareil doit être relié à la Borne
Terre de l’installation.
QUALIFICATION SIMILAIR
FR 18
1.3 Recommandations
Après chaque utilisation du four, réaliser un petit entretien qui favorisera le nettoyage parfait du four.
Ne pas tapisser les parois du four avec des feuilles en aluminium ou des protections jetables du
commerce. La feuille d'aluminium ou toute autre protection, en contact direct avec l'émail chauffé,
risque de fondre et de détériorer l'émail du moufle. Avant installation de l'appareil, il faut relever le
numéro de série et le noter ci-dessous en cas d'éventuelle demande d'intervention.
Afin d'éviter les salissures excessives de votre four ainsi que les fortes odeurs de fumée pouvant en
résulter, nous recommandons de ne pas utiliser le four à trop forte température. Il est préférable de
rallonger le temps de cuisson et de baisser la température. Nous vous conseillons de n'utiliser que des
plats, des moules à pâtisserie résistants à de très hautes températures.
1.4 Installation
La mise en service de l’appareil est à la charge de l’acheteur, le constructeur est dégagé de ce service.
Les pannes liées à une mauvaise installation ne seront pas couvertes par la garantie. Une mauvaise
installation peut provoquer des dommages aux personnes, aux animaux domestiques; dans ce cas la
responsabilité du constructeur ne peut être engagée. L'installation du four doit être réalisée par un
installateur agréé ou un technicien de qualification similaire.
Le four peut être placé en hauteur dans une colonne ou enchâssé sous un plan de travail. Avant sa
fixation: il est indispensable d'assurer une bonne aération dans la niche d'encastrement afin de
permettre la bonne circulation de l'air frais nécessaire au refroidissement et à la protection des organes
intérieurs. Pour cela, réaliser les ouvertures spécifiées selon le type d'encastrement (dernière page).
ATTENTION
Faire vérifier la continuité de la terre de l’installation avant de procéder au raccordement. Le fabricant
décline toute responsabilité en cas d'accidents ou d'autres problèmes qui pourraient survenir à l'usage
d'un appareil non relié à la terre, ou relié à une terre dont la continuité serait défectueuse.
REMARQUE: Le four peut nécessiter une opération de S.A.V. Aussi, placez la prise de courant de façon à
pouvoir brancher le four une fois sorti de sa niche. Câble d'alimentation: si le changement du câble
d'alimentation s'avère nécessaire, nous vous demandons de faire réaliser cette opération par le service
après-vente ou une personne de qualification similaire.
1.5 La gestion des déchets et la protection de l'environnement
Le présent appareil est marqué conformément à la directive 2012/19/UE relative aux
déchets d'équipements électriques et électroniques
(DEEE). Les DEEE contiennent à la fois des substances polluantes (qui peuvent avoir des
conséquences négatives sur l'environnement) et des éléments de base (réutilisables). Il est
important de soumettre les DEEE à des traitements spécifiques, en vue d'extraire et
d'éliminer de façon appropriée toutes les substances polluantes, puis de récupérer et
recycler tous les matériaux.
Chacun peut jouer un rôle important quant à la protection de l'environnement contre les DEEE. Pour
atteindre cet objectif, il est impératif de suivre quelques règles élémentaires :
Les DEEE ne doivent pas être traités comme des déchets ménagers.
• Ils doivent être remis aux points de collecte appropriés gérés par la municipalité ou par des sociétés
immatriculées. Dans plusieurs pays, il est possible de collecter à domicile les DEEE volumineux.
• Lorsque vous achetez un nouvel appareil, vous devez retourner l'ancien au vendeur qui le récupère
gratuitement, au cas par cas, à condition que l'équipement soit de type équivalent et possède les
mêmes fonctions que celui fourni.
FR 19
1.6 Declaration De Conformité
Les parties de cet appareil pouvant être en contact avec des substances alimentaires sont conformes à
la prescription de la Dir. CEE 89/109.
En utilisant le symbol sur ce produit, nous déclarons sur notre propre responsabilité que ce produit
est conforme à toutes les normes Européennes relatives à la sécurité, la santé et à l’environnement.
2. Description du produit
2.1 Vue d'ensemble
1
2
3
5
4
6
1. Panneau de commande
2. Positions des gradins
(gradins fils si inclus)
3. Grille métalique
4. Léchefrite
5. Ventilateur
(derrière la plaque d'acier)
6. Porte du four
ÉCONOMIE ET R󰜌󰜌 ESPECT DE L'ENVIRONNEMENT
FR 20
Lorsque cela est possible, éviter le préchauffage du four et éviter de le faire tourner à vide. N'ouvrez la
porte du four que lorsque cela est nécessaire, car il y a des déperditions de chaleur à chaque fois qu'il est
ouvert. Pour une économie d'énergie significative, éteindre le four entre 5 et 10 minutes avant la fin de
cuisson prévue, et utiliser la chaleur que le four continue de générer. Gardez les joints propres et en bon
état, pour éviter toute déperdition d'énergie. Si vous avez un contrat électrique avec un tarif heure
creuse, le programme "cuisson différée" peut vous faire réaliser des économies d'énergie en déplaçant
le début du programme à un intervalle de temps à tarif réduit.
1 / 1

Ask a question and I''ll find the answer in the document

Finding information in a document is now easier with AI

Ask the document