Pelgrim GVW556RVS/P03 User manual
- Category
- Dishwashers
- Type
- User manual
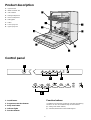
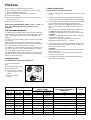
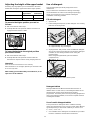
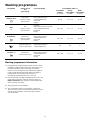
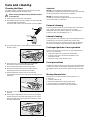
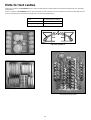
Pelgrim GVW556RVS/P03 dishwasher offers a range of features to make dishwashing easier and more efficient. With its adjustable upper basket, you can accommodate dishes of various sizes and shapes. The cutlery basket ensures safe and organized placement of your silverware. Its water softener and rinse aid dispenser optimize cleaning results, leaving your dishes sparkling clean. Choose from various washing programs tailored to different types of loads, including delicate items and heavily soiled pots and pans. The audible signals keep you informed about the progress of the washing cycle.
Pelgrim GVW556RVS/P03 dishwasher offers a range of features to make dishwashing easier and more efficient. With its adjustable upper basket, you can accommodate dishes of various sizes and shapes. The cutlery basket ensures safe and organized placement of your silverware. Its water softener and rinse aid dispenser optimize cleaning results, leaving your dishes sparkling clean. Choose from various washing programs tailored to different types of loads, including delicate items and heavily soiled pots and pans. The audible signals keep you informed about the progress of the washing cycle.


-
 1
1
-
 2
2
-
 3
3
-
 4
4
-
 5
5
-
 6
6
-
 7
7
-
 8
8
-
 9
9
-
 10
10
-
 11
11
-
 12
12
-
 13
13
-
 14
14
-
 15
15
-
 16
16
-
 17
17
-
 18
18
-
 19
19
-
 20
20


Pelgrim GVW556RVS/P03 User manual
- Category
- Dishwashers
- Type
- User manual
Pelgrim GVW556RVS/P03 dishwasher offers a range of features to make dishwashing easier and more efficient. With its adjustable upper basket, you can accommodate dishes of various sizes and shapes. The cutlery basket ensures safe and organized placement of your silverware. Its water softener and rinse aid dispenser optimize cleaning results, leaving your dishes sparkling clean. Choose from various washing programs tailored to different types of loads, including delicate items and heavily soiled pots and pans. The audible signals keep you informed about the progress of the washing cycle.
Ask a question and I''ll find the answer in the document
Finding information in a document is now easier with AI