Page is loading ...

IMPORTANT INSTRUCTIONS
When using electrical heating appliances, basic precautions should always be followed to
reduce the risk of fire, electric shock and injury to persons, including the following:
1. Read all instructions before wiring or using this heater.
2. Heaters outlet grill is very hot when in use. To avoid burns, do not touch hot surfaces with bare skin.
Keep combustible materials, including furniture, pillows, bedding, papers, clothes, curtains, and boxes at least three feet (.9 m)
from the front of the heater and keep them away from the sides and rear.
3. Do not use outdoors.
4. Heater is not intended for use in bathrooms, laundry areas or similar indoor locations.
Never locate heater where it may fall into a bathtub or other water container.
5. Do not insert or allow foreign objects to enter any inlet or outlet openings as this may cause an electric shock,
fire, or damage to the heater.
6. To prevent a possible of fire, do not block air intakes or exhaust in any manner.
7. Heater has hot surfaces. Internal thermostat and limiting parts will arcing or create sparks inside. Do not use this heater in areas
where gasoline, paint, or flammable liquids or gases are used or stored.
8. Use this heater only as described in this manual. Any other use is not recommended by the manufacturer
and may cause fire, electric shock, explosion or injury to people and or property.
9. If heater shows signs of overheating immediately turn the circuit breaker off to the heater. Remove and inspect for any objects
on or adjacent to the heater that may cause the high temperatures. Have a professional Inspect the internals until the reason
is clear why the heater is overheating. Do not reinstall until it has been professionally serviced.
10. Do not operate heater after it malfunctions. Disconnect heater at service panel and have heater inspected by a reputable
electrician before reusing. To disconnect heater, turn controls to off position, and turn off power to heater circuit at main
electrical panel or operate internal disconnect switch to off if provided.
11. Extreme caution is necessary when any heater is used by or near children or invalids and whenever the heater is left
operating and unattended too.
SAVE THESE INSTRUCTIONS
Important Instructions
ELECTRIC SHOCK OR FIRE HAZARD
DANGER
!
!
WARNING
!
!
Read Carefully - These instructions are written in an effort to prevent potential difficulties that might arise during installa-
tion. Studying the instructions first may save you considerable time and money later. Observing the following procedures
will keep installation time to a minimum. Save these instructions for future use.
1
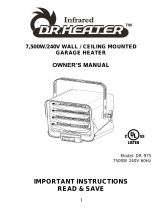
Covers all EKB Models
From: 120, 208, and 240 Volt
From:1000 watt to 5000 watt.
EKB Series
Electric Unit Heater
For Garage and Shop
Fig 1.1

General information and Guidelines:
Heater is intended for garage shop and studio heating of large areas from 400 to 1250 square feet depending on your location and
climate. Colder climates require more heat or wattage per square foot than warmer climates. In some cases it may be necessary to
use multiple units to obtain ideal temperature control. If more than one unit is required. Arrange the heaters so they create a circular
air pattern around the outside of the room, or across the coldest walls.
Insulation will aid in retaining heat provided by your new heating system, and will reduce energy costs associated with heating.
The thermostat in the EKB has a range from 40 to 90 degrees with a freeze protection setting of approximately 50 degrees. Freeze
protection temperature is approximate and should be verified with the digital thermometer if is important that freeze protection is
critical or a potential freeze could cause damage. The heater is equipped with a bracket that allows it to be mounted to either the
ceiling or the wall. The heater can then be tilted 25 degrees to direct heated air towards the floor. Never point at the ceiling, toward
other appliances or objects that obstruct the airflow, or toward objects that could be damaged by excessive heat or have the poten-
tial to catch fire due to prolonged exposure to heat. Following these simple guidelines will have provide you with a comfortable safe
heating system for years to come.
Heater inner workings:
The EKB cast aluminum motor incorporates a large oil reservoir that is maintenance free and recirculates the oil across the shaft at a
rate of 5 drops per minute. The motor is Thermally protected for safety. The 80/20 Ni-Chrome elements allow for quick heating and
cooling type leaving all the heat in the room by time the fan stops. A self-holding over-temp limit is provided on each element as well
as one main self holding limit located between the elements for total shut off. If the total heater shut off limit trips the heater is disa-
bled until the power to the heater is shut off for 10 minutes at which point it will reset. There is no fan delay on start up or shut off
so no special complicated feed wiring is required for remote thermostat connections. (i.e. switch loops circuits).
Operation:
The EKB heater requires mounting in a clear, open-air location for optimal performance.
Heater should be installed in a location that is clear and will remain of storage items. The heat outlet of the unit should be able to
push warmed air to the far side of the room. Ample space should be left behind the heater to allow air to be drawn in through the
back of the unit. Clearance recommendations within these instructions are the minimum, providing more space will result in improved
airflow and safer operation.
Maintenance instructions:
Turn off circuit breaker to heater.
Motors are maintenance free and do not need to be oiled. Heater will need to be blown out and cleaned every year, in order to be
kept free of all dust, dirt and fibers that may accumulate. Use compressed air to free up any particles that may have entered the
heater. Fan blades should be clean and able to move freely. Wipe both the front and rear grills and continue to keep clear all debris
and wiped clean with a soft towel.
General Operatation
EKB Unit Heater
2
10 3/8 in / 26.35 cm wide
Heater case size
w/o bracket
Height:13 5/8 in. / 34.6 cm
Width: 10 3/8 in./ 26.35 cm
Depth: 9 3/4 in. / 24.76 cm
Maximum Outside Dims
W/bracket and stat
Height:18 3/4 in / 47.62 cm
Width: 11 3/8 in. / 28.90 cm
Depth: 10 5/8 in./26.98 cm
Hole Sizes
* 1/2” in./1.27 cm 3 Holes
+ 1/4 in. /.63 cm 4 Holes
11” in./27.9 cm
2” in./5.0 cm
6 5/8 in./16.8 cm
8 3/4 in./22.2 cm
+
*
1 1/8 in./2.85 cm
2 1/8 in./5.4 cm
Bracket Information
Fig 2.1
Fig 2.2
*
*
+
+
+
2 3/8 in./6.0 cm
10 1/2 in./27.6 cm
Pivot to top of bracket
King Electrical Mfg. Co. 9131 10th Ave So. Seattle, Wa 98108 206-762-0400 www.king-electric.com

Heater Location Instructions:
Arrange the heater so the hot discharge air is:
1. Free of interference from any items that could block or disrupt the
airflow reaching the farthest point of the area being heated.
2. Direct the airflow along the coldest part of the garage area without
blowing the heat directly at the wall or warming the items in any way.
Typically a distance of 3 to 4 feet is away from walls or cabinets is
acceptable.
3. Do not blow directly on stationary people in the room or work
areas.
4. Smaller rooms will be comfortably heated with one unit. Larger
rooms may require multiple heaters Moves the air in a circular, wall
wiping pattern around the room. This configuration aids in pre-
heating the incoming air of the next heater and will raise the room
temperature faster. See Fig 3.4 and 3.5
Thermostat:
The inbuilt thermostat has a range of 40 to 90 degrees F and when
set will keep the room at a comfortable temperature. We recommend
experimenting with settings to determine ideal room temperature
while occupied and unoccupied. Once those ideals are identified,
mark the settings on the label with a felt tip marker.
If a remote line voltage thermostat is used it should be rated for
higher than the amp load of the heater connected. Locate the ther-
mostat 5 ft. (1.5 m) above the floor on an interior wall away from cold
drafts, cold steel posts, outside walls, hot water pipes, hot lights and
away from the discharge air stream of the heater.
Ceiling Mount
Mounting Instructions
3
Wall Mount
Typical garage with 2 or 3 outside walls
Larger garage with all outside walls
or colder climate
Heater may be mounted to the wall or ceiling. For best performance and sat-
isfactory results the heater should not be mounted over 10 feet high off the
floor. Minimum distance off the floor is 6 ft. per UL standards 2021.
For wall installation the bracket must have the hook end pointing up so if the
heater were to loosen over time it would not fall out. See Fig 3.3
Wall stud and ceiling joists are typically wider than our mounting bracket
which is 11 inches wide. The heater weighs 14 lbs. and should be mounted
onto at least one stud to be properly supported.
Your fasteners penetrating a stud is critical to supporting the weight. A gyp-
sum wall board fastener is not strong enough. But if your ideal location has no
solid backing. You can fasten with large screw fasteners a 2 x 6 across the
studs or ceiling joists and attach the heater then to the 2 x 6. This works for
ceiling or wall mounting. Attach with appropriate lag bolts with proper depth
for the 14 lbs. Install hex fasteners into both sides of heater with washer on
the outside of the bracket and star washer between the heater and bracket.
Minimum clearances from walls and ceiling
6 inches / 15.24 cm to the side
5 inches / 12.7 cm from the back
2 inches / 5.08 cm from ceiling
Never point heater at ceiling
Maintain clearance of at least 3 ft. in front of heat outlet
Fig 3.3
Fig 3.1
Fig 3.4
Fig 3.5
Fig 3.2
UP
SAVE THESE INSTRUCTIONS
After bracket is mounted, place washers
on bolts and then in heater sides. Drop
onto bracket slots placing lock washer
between heater and bracket and washer
between bracket and bolt. Adjust to the
preferred angle and tighten bolts to 30 ft.
lbs. of torque minimum.
Mounting bolt
Flat washer
outside bracket
Star Washer
Inside bracket

Installation
4
Model Volts Watts Amps Wire Breaker size
EKB2450 240 5000 20 10-2 w/ground 30 Amp 2 pole
EKB2050 208 5000 24 10-2 w/ground 30 Amp 2 pole
EKB2440 240 3850 16 12-2 w/ground 20 Amp 2 pole
EKB2040 208 3750 18 10-2–w/Ground 30 Amp 2 pole
EKB2430 240 2850 12 14-2 w/ground 15 Amp 2 pole
EKB2030 208 2850 14 12-2 w/ground 20 Amp 2 pole
EKB1230 120 2850 24 10-2 w/ground 30 amp 1 pole
EKB1220 120 1920 16 12-2 w/ground 20 amp 1 pole
Wire and Breaker sizing
The wire and breaker sizing chart will give a general rule of installation
size. If you have long distance wire runs, larger size wire is required
due to voltage drops. Consult an electrician if you are not knowledgea-
ble about wiring codes.
Wiring
Branch Circuit Connection
1. Connect heater only to the voltage, amperage and frequency
specified on the nameplate.
2. Wiring procedures and connections shall be in accordance with all
National and local codes having jurisdiction.
3. Removing the two screws on the bottom of the heater will allow
you to gain access to the wiring compartment.
4. A knock of 1/2 inch (12.7 mm) conduit size (7/8 inch) is provided
in the back of the heater for power to enter. Provide proper con-
duit connectors for your flexible connections.
5. Wires will be placed in the terminal block lugs labeled L1 and L2
and tightened to 35 lbs. of torque. Lugs are approved for copper
or aluminum conductors from # 14 to #2 AWG. Minimum 600 volt
60 degree C wire is required. Copper wire is recommended. Fig.
4.2
6. Attach ground to the green wire with a wire nut.
7. Assemble all covers on electrical and apply power. Test unit by
turning thermostat up past room temperature. You will see a puff
of smoke as the elements are energized and the fan turns on. This
is a normal burn off of manufacturing lubricants and will dissapate
in 5 minutes.
8. Heater will continue to run until the room temperature you set is
reached and then turn itself off until the temperature drops again.
9. CAUTION - High temperature. Risk of fire, keep electrical
cords, drapery, furnishings, and other combustibles at least 3 feet
(0.9 m) from the front of the heater as well as away from the side
and rear. To reduce the risk of fire, do not store or use gasoline or
other flammable vapors and liquids in the vicinity of the heater.
Other manufacturing options to add to EKB
Pilot light– Add Suffix -P
Circuit breaker– Add Suffix -CB
Disconnect switch -Add Suffix -DS
Add Suffix to end of EKB model number
ELECTRIC SHOCK OR FIRE HAZARD
DANGER
!
!
Fig 4.1
SAVE THESE INSTRUCTIONS
CAUTION!
Turn off all electrical power to install wiring
Rating Label on back of heater
Fig 4.0
Fig 4.2
King Electrical Mfg. Co. 9131 10th Ave So. Seattle, Wa 98108 206-762-0400 www.king-electric.com
/