Hunter 30546 Owner's manual

Category
Air purifiers
Type
Owner's manual

This manual is also suitable for

www.hunterfan.com
Model 30546 & 30547
(remote included)
41959-01 03/30/2006 © 2006 Hunter Fan Company
Replacement Filter Information
MODEL PRE-FILTER
30546 30901
30547 30901
41959-01_3.30.06.pmd 3/30/06, 3:15 PM1
41959-01 2
Table of Contents
Safety Instructions ..................................................................................................3
Introduction ............................................................................................................3
Description of Air Filtration System
How the PermaLife™ Air Purifier System Works .........................................4
Air Purifier Components ................................................................................4
Display and Control Keys ..............................................................................5
Operation
Initial Operation .............................................................................................6
Remote Operation...........................................................................................8
Display Modes ................................................................................................ 9
Manual and Auto Operating Modes .............................................................10
Using the Ionizer .......................................................................................... 11
Override of Auto Mode ................................................................................12
Filter Run-Time Counters ............................................................................ 13
Programming
Setting Day and Time ...................................................................................14
Pre-set Programming ....................................................................................15
User Programming .......................................................................................16
Reviewing Programs .................................................................................... 18
Locking/Unlocking the Keypad ...................................................................18
Resetting the Air Purifier ............................................................................. 19
Air Purifier Maintenance
Cleaning Your Air Purifier............................................................................20
Changing the Pre-Filter ................................................................................20
Cleaning the Filter ........................................................................................ 21
Obtaining Replacement Filters.....................................................................22
Troubleshooting
Problem and Solutions .................................................................................23
Technical Support .........................................................................................23
Warranty Information ......................................................................................... 24
41959-01_3.30.06.pmd 3/30/06, 3:15 PM2
3 41959-01
SAFETY INSTRUCTIONS
IMPORTANT!
READ ALL INSTRUCTIONS BEFORE USING THIS AIR PURIFIER.
1. This air purifier is designed for use on a flat level floor and may not work properly on an
uneven floor. ALWAYS place the air purifier on a firm level floor. ALWAYS place the air
purifier at least six (6) inches away from walls and heat sources such as stoves, radiators,
or heaters.
2. Place the air purifier in an area that is out of the reach of children.
3. Before using the air purifier, extend the cord and inspect for any signs of damage. DO NOT use
the product if the cord has been damaged.
4. This product has a polarized plug (one blade is wider than the other) as a safety feature. This
plug will fit into a polarized outlet only one way. If the plug does not fit fully into the outlet,
reverse the plug. If the plug still does not fit, contact a qualified electrician. DO NOT attempt to
defeat or override this safety feature.
5. ALWAYS UNPLUG the air purifier while it is being cleaned.
6. DO NOT move or tilt the air purifier while it is in operation. Turn off and unplug before moving.
7. DO NOT immerse the air purifier in water at any time because permanent damage will occur.
To properly clean your air purifier, follow the instructions in the Maintenance section of this
manual (pg. 20).
READ AND SAVE ALL INSTRUCTIONS.
Introduction
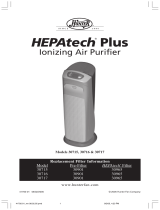
Thank you for purchasing the PermaLife
Air Purifier from Hunter Fan Company. You have pur-
chased our latest development in portable air purification which has been designed to improve the
quality of the air that you breathe. The following innovative features are included in your Hunter
Air Purifier.
High Particulate Efficiency: The cleanable filter will remove 99.5% of 0.5 micron particles
from the air that passes through the filter.
Odor Removal: The activated carbon pre-filter helps remove odors such as cooking, smoke, and
pet smells from the air. It also traps lint, hair, and other large particles to help extend the life and
performance of the cleanable filter.
Remote Control: This air purifier may also be controlled by the included remote. Using the re-
mote, you can turn off the air purifier or change the speed to sleep (1), active (2), or turbo clean (3).
Ionizer: The ionizer improves the quality of air in the room by releasing negative ions into the
air that attract positively charged dust, smoke, and pollen particles.
Quiet: The air purifier has been designed to operate quietly and efficiently. You can choose
among three speeds to best meet your needs at different times.
•Filter Counters: Filter maintenance is critical to the performance of the air purifier. To help you
determine when to change or clean the pre-filter and cleanable filter, the unit has built in life
counters that keep track of the life remaining of each filter.
41959-01_3.30.06.pmd 3/30/06, 3:15 PM3
41959-01 4
Description of Air Filtration System
Air Purifier Components
Fig. 1 - Illustration of the Air Filtration System
Fig. 2 - Air Purifier Components
Dust & Irritants
Pollen & Allergens Odors Bacteria Pet Hair & Dander
Carbon
Pre-filter
PermaLife™
Cleanable
Filtration System
99.5% – .5 Microns
Ionizer
How the PermaLife
Air Purifier System Works
As the air is pulled into the purifier, the activated carbon pre-filter absorbs odors and catches
large particles. Then, the air travels through the PermaLife™ Cleanable Filtration System
where the smaller particles are collected. Then, the ionizer releases negative ions into the air
that attract positively charged dust, smoke, and pollen particles. Finally, the clean purified
air is released back into the room.
Fig. 3 - Inside Surface
of Front Grill
CLEANABLE
FILTER
PRE-FILTER
FRONT
GRILL
HOOK
TAPE
HOOK
TAPE
CONTROL
AREA
41959-01_3.30.06.pmd 3/30/06, 3:15 PM4
5 41959-01
Description of Air Filtration System
Display and Control Keys
The display and control keys allow for easy operation of the air purifier.
Fig. 4 - Air Purifier Control Area and Alpha-numeric Display
IONIZER: Turns the ionizer on and off.
ON/OFF: Turns the unit on and off.
AUTO: Toggles between manual and auto
modes. (Manual mode and Auto mode on
page 10.)
UP/DOWN KEYS: Adjusts the blower speed
and changes values in clock setting and pro-
gramming modes.
FILTER RESET: Resets the pre-filter and
filter counters. (FIlter run-time counters on
page 13.)
DISPLAY: Selects the clock, pre-filter, or fil-
ter display. (Display modes on page 9.)
DAY/TIME: Used to set the day and time.
(Setting day and time on page 14.)
PROGRAM: Allows you to enter program
mode and define user programs. (User pro-
gramming on page 16.)
RESET: Returns unit to factory settings. (Re-
setting the air purifier on page 19.)
UP/DOWN
KEYS
ANIMATED
BLOWER
DAY OF
THE
WEEK
CLOCK TIME,
FILTER COUNTER,
AND OTHER
INFORMATION
FILTER AND
PRE-FILTER
INDICATORS
BLOWER
SPEED
CURRENT
PROGRAM
NUMBER
OPERATING
MODE
41959-01_3.30.06.pmd 3/30/06, 3:15 PM5
41959-01 6
Operation
Initial Operation
This section provides basic instructions on the use of your air purifier. After following these
initial directions, please continue reading this booklet to learn how to operate the more
advanced features of your air purifier.
Basic Operation of the Air Purifier:
1. Take the air purifier out of the box and remove the clear plastic protective bag.
Place the unit on a firm level floor.
2. Before turning on the air purifier, you need to confirm that the filters are firmly
in place and have not become loose during shipping. To check the filters, first
open the front grill by placing your fingers under the handle and pulling the
front grill towards you. The front grill will rest open at about 45º. You can re-
move the front grill by placing your fingers under the handle and pulling the
front grill towards you and then up. Refer to Fig. 5.
Fig. 5
PULL FORWARD,
THEN UP
HANDLE
3. Next, check the cleanable filter by pressing firmly on all four corners of the filter
to ensure that it is fully inserted into the filter opening.
4. The carbon pre-filter is mounted inside the front grill with hook tape. Confirm
that it properly covers the grill vents. You may notice a few black particles com-
ing off the pre-filter. Those particles are part of the odor-removing activated car-
bon and will be collected on the filter during use.
5. Place the front grill back onto the unit. First, line up the tabs on the bottom of
the grill with the openings on the purifier base and then push the top of the
grill forward until it is closed. NOTE: This unit will not operate unless the
grill is in the correct position. The display will read “door” if the grill is not
attached properly.
41959-01_3.30.06.pmd 3/30/06, 3:15 PM6
7 41959-01
Operation
Fig. 6
6. Plug the unit into a 120V electrical outlet and press
the ON/OFF key. The air purifier will start with a low
blower speed.
7. Use the UP/DOWN keys to adjust the blower speed to
the desired level.
If this is the first time you have used the air purifier or if the air purifier has been without
power for over 12 hours, you will need to set the day and time. The day and time will flash
to indicate that it should be set.
Fig. 7
Fig. 8
Fig. 9
Fig. 10
Adjusting Day and Time: (For example, Wednesday at 3:45 pm)
1. To set the day or time, press the DAY/TIME key. All dis-
play features except the day and time will go blank and
the hour will flash.
2. Use the UP/DOWN keys to adjust the hour. Tapping
the key will advance the hour by increments of one.
Holding down the key will change the hour rapidly.
Note the AM/PM indicator as you cycle through a 24
hour period.
3. Press the DAY/TIME key again. Now, the minutes will
be flashing. Use the UP/DOWN keys to adjust the
minute. Tapping the key will change the minute by in-
crements of one and holding the key will change the
minute rapidly.
4. Press the DAY/TIME key to accept the minute setting
and go to the day of the week. Use the UP/DOWN keys
to set the current day.
5. Press the DAY/TIME key a final time to accept the day
setting and return to Normal mode.
41959-01_3.30.06.pmd 3/30/06, 3:15 PM7
41959-01 8
Operation
Remote Operation
For your convenience, a remote control is provided with this air purifier. The remote may be
used to turn the air purifier on or off and adjust the fan speed.
Operating the Air Purifier with the remote:
1. Install two AAA batteries (UM-4 or IEC R03 or equivalent). Refer to the
graphics in the battery compartment for proper orientation of the batteries.
WARNING: Do not mix old and new batteries. Do not mix alkaline, stan-
dard (carbon-zinc), or rechargeable (nickel cadmium) batteries.
2. To use the remote, point it at the air purifier, then press and release the
appropriate key. The key functions are as follows: 0 - OFF, 1 - LOW,
2 - MEDIUM, and 3 - HIGH.
When using the remote, the air purifier remains in the mode that it is currently set for.
When the keypad is locked, the remote may still be used to adjust the speed or turn off the
air purifier.
If the remote is not working properly, first be sure that the remote is facing the air purifier
when pressing the key. If it still does not work, check the batteries.
41959-01_3.30.06.pmd 3/30/06, 3:15 PM8
9 41959-01
Operation
Display Modes
Your air purifier has 3 display modes – Clock Display, Pre-Filter Display, and Filter Dis-
play. When the unit is running, the display also provides additional information about the
settings of the air purifier. The features for each mode and how to change modes is de-
scribed below.
Clock Display: The default mode of the unit is the Clock Display.
In this mode, the day indicator, time, and AM/PM indicator will be
lit. If military time has been chosen (See Setting Day and Time, pg.
14), the AM/PM indicator will not be visible.
Pre-Filter Display: This display shows the number of hours that
the pre-filter has been in use. In addition to the run hours, you will
see the Pre-Filter indicator. If the run hours have reached 1400 hours
(approximately 3 months of use), the Pre-Filter indicator will flash
to show that the pre-filter should be changed. Refer to Filter Run-
Time Counters for additional information (pg. 13).
Filter Display: The Filter Display mode tells you how many hours
the filter has been in use. In addition to the run hours, you will see
the Filter indicator. If the run-hours have reached 2800 hours (ap-
proximately 1 year of use), the Filter indicator will flash to remind
you to check the filter. Refer to Filter Run-Time Counters for more
details (pg. 13).
Changing Display Mode:
1. To toggle from Clock Display to Pre-Filter Display to Filter Display, press the
DISPLAY key.
2. The DISPLAY key is active any time that the display is visible.
When the air purifier is turned on, the following features are also shown. If the unit is turned
off by the On/Off key, these features are not displayed.
Speed Indicator to show blower setting (0, 1, 2, or 3).
Animated Blower Wheel will rotate when blower is on.
Control Mode is indicated by AUTO or MANUAL.
•The Current Program number is visible when the unit is in Auto Mode.
Fig. 11
Clock Display
Fig. 12
Pre-Filter Display
Fig. 13
Filter Display
41959-01_3.30.06.pmd 3/30/06, 3:15 PM9
41959-01 10
Operation
Manual and Auto Operating Modes
Your Hunter Air Purifier has two distinct operating modes – Manual and Auto. The Manual
Mode allows you to override the control programs that have been set and to hold the settings
until you adjust them. In Manual Mode, the automatic programs are not active. You select
whether the unit is on or off and choose the blower speed. In Auto Mode, your air purifier is
capable of running 4 separate programs for the weekdays and an additional 4 programs for
the weekend. You can choose to have the same programs for every day or you can have
different programs for the weekdays and the weekend. The air purifier is pre-programmed
for all 7 days of the week as shown below. Refer to User Programming on pg. 16 for instruc-
tions on changing the programs.
When using the remote, the air purifier remains in the mode that it is currently set for.
Table 1: Pre-set Programming Provided for Each Air Purifier
To switch between Manual and Auto Modes:
1. To change operating modes, press the AUTO key. The
current operating mode will appear on the display (ei-
ther AUTO or MANUAL).
2. When changed to Auto Mode, the unit will automati-
cally adjust its controls to the appropriate program for
the day and time. When Manual Mode is active, the unit
will maintain current settings until you change them.
Program Setpoint Time Blower Speed
1 8:00 am 2 (Medium)
2 3:00 pm 3 (High)
3 5:00 pm 2 (Medium)
4 10:00 pm 1 (Low)
Fig. 14
Auto Mode
Fig. 15
Manual Mode
41959-01_3.30.06.pmd 3/30/06, 3:15 PM10
11 41959-01
Operation
Using the Ionizer
Using the ionizer improves the quality of air in the room. Negative ions are released into the
air and positively charged dust, smoke, and pollen particles are attracted to the negative
ions. These particles settle out of the air and can be vacuumed up during normal cleaning.
These particles are also more easily captured by the cleanable filter as they pass through the
PermaLife™ Cleanable Filtration System. To ensure the best air circulation in the room, we
recommend that you place your air purifier six (6) inches away from any walls.
To turn the ionizer on or off:
1. To turn the ionizer on, press the IONIZER key. The word IONIZER will appear
in the lower-left corner of the display.
2. To turn the ionizer off, press the IONIZER key. The word IONIZER will disap-
pear from the display.
41959-01_3.30.06.pmd 3/30/06, 3:15 PM11
41959-01 12
Operation
Override of Auto Mode
You can use two different methods to override Auto Mode. If you choose temporary over-
ride, the air purifier will run at the temporary setting until the next scheduled program change.
Permanent override will remain in effect until you return the unit to auto mode.
When in Auto Mode, remote use acts as a temporary override.
Temporary Override
•To temporarily override the settings:
1. While the Auto Mode is active, use the UP/DOWN
keys to adjust the blower speed. To temporarily turn
the blower off, turn the blower speed to 0. This will
allow the program to automatically continue at the
next scheduled program change.
2. The air purifier will automatically adjust to the new
setting. The current program number will flash to
signify the temporary override.
•To end the temporary override:
1. The temporary override will autmatically end at the
next scheduled program change.
2. To immediately end the temporary override and re-
turn to the program, press the AUTO key twice. The
air purifier will return to Auto Mode and the sched-
uled program.
Permanent Override
•To begin permanent override:
1. Press the AUTO key to enter manual mode. On the
display, you will see the word MANUAL illumi-
nated. This indicates that the programs are no longer
active and the unit is in Manual Mode.
2. Use UP/DOWN keys to adjust the blower speed.
•To end the permanent override:
1. Press the AUTO key. The display will now show
the word AUTO.
2. The unit will automatically adjust its controls to the
appropriate program for the day and time.
Fig. 16
Fig. 17
41959-01_3.30.06.pmd 3/30/06, 3:15 PM12
13 41959-01
Operation
Filter Run-Time Counters
The pre-filter and filter are critical to the proper operation of the air purifier. To help you
know when to change the filters, your Hunter Air Purifier has Filter Run-Time Counters that
will monitor the number of hours your filters have been in use. Although the exact life of the
filters depends on the environment, the table below gives typical usage times of the filters.
Table 2: Typical Usage Times of the Filters
To check the run-hours for each filter:
1. Press the DISPLAY key to toggle among the 3 display modes – Clock, Pre-Filter,
and Filter. The Filter or Pre-Filter indicator will illuminate when the run hours
for that filter are displayed.
2. The display shows the number of run hours since the counter was reset.
Although the maximum display value is 9,999 hours, the counters can go indefinitely. To
indicate that the counter is over 9,999 hours, the display will flash. For example, a run time
of 12,000 hours is represented by a flashing 2,000 hours.
The values of the Pre-Filter and Filter Counters are stored in the air purifier’s memory.
The unit may be unplugged and moved without losing the pre-filter and filter counter
values.
To properly track filter usage, the Pre-Filter and Filter Counters should be reset each time
the filters are changed. Refer to Changing the Pre-Filter (pg. 20) or Cleaning the Filter (pg.
21) for instructions on how to reset the counters.
Filter Type Typical Usage
Activated Carbon Pre-Filter 1400 hours
Cleanable Filter 2800 hours
41959-01_3.30.06.pmd 3/30/06, 3:15 PM13
41959-01 14
Programming
Setting Day and Time
Setting the correct day and time allows the programs to work effectively and provides a
clock for your reference. Although the instructions for setting the day and time are listed
under Initial Operation, they are repeated below for your convenience.
Fig. 18
Fig. 19
Fig. 20
Fig. 21
Adjusting Day and Time: (For example, Wednesday at 3:45 pm)
1. To set the day or time, press the DAY/TIME key. All
display features except the day and time will go blank
and the hour will flash.
2. Use the UP/DOWN keys to adjust the hour. Tapping
the key will advance the hour by increments of one.
Holding down the key will change the hour rapidly.
Note the AM/PM indicator as you cycle through a 24
hour period.
3. Press the DAY/TIME key again. Now, the minutes will
be flashing. Use the UP/DOWN keys to adjust the
minute. Tapping the key will change the minute by in-
crements of one and holding the key will change the
minute rapidly.
4. Press the DAY/TIME key to accept the minute setting
and go to the day of the week. Use the UP/DOWN keys
to set the current day.
5. Press the DAY/TIME key a final time to accept the day
setting and return to Normal mode.
41959-01_3.30.06.pmd 3/30/06, 3:15 PM14
15 41959-01
Programming
Program Setpoint Time Blower Speed
1 8:00 am 2 (Medium)
2 3:00 pm 3 (High)
3 5:00 pm 2 (Medium)
4 10:00 pm 1 (Low)
NOTES:
The clock flashes when the time has not been set.
At any time while you are setting the Day/Time, you can press the PROGRAM key to
toggle between AM/PM format and military time format.
•To quickly exit the Day/Time setting mode, you can press the DISPLAY key or wait 15
seconds without pressing any keys.
•The time displayed will be frozen in Day/Time setting mode; however, the internal clock
is still running. If no value is changed, then the frozen time will be replaced by the
internal clock when you exit the Day/Time setting mode.
If the power is lost to the unit, the memory will maintain the clock for at
least 12 hours.
Pre-set Programming
As discussed in the Manual and Auto Operating Modes section of the manual (pg. 10), your
air purifier comes with pre-set programs. For your reference, these programs are listed again
below. When you turn your air purifier to Auto Mode, these programs are active unless you
override them with your personalized programs. Refer to the next section, User Program-
ming, to learn how to input your own programs.
Table 3: Pre-set programming provided for each air purifier.
41959-01_3.30.06.pmd 3/30/06, 3:15 PM15
41959-01 16
Programming
User Programming
User programming allows you to set when the air purifier is on and what blower speed to
use. You may define up to 4 programs for the weekdays and up to 4 programs for the week-
end. Before starting the programming process, first you should determine what times and
blower speeds will best fit your needs. Use the charts below to organize and record the
programs that you desire. Use a pencil so you can revise your records each time you change
the programs.
Table 4
NOTES:
Setpoint time is the time at which the blower speed will change. The specified blower
speed will be active until the next setpoint time is reached.
The setpoint time can only be set in 10 minute increments.
Blower speed ranges from 0 to 3. Zero indicates that the blower is turned off, a setting of
1 is low, 2 is medium, and 3 represents a blower speed of high.
If you want the weekdays and the weekends to be identical, you should program both the
weekday programs and the weekend programs with the same values.
If you use less than 4 programs, set the unused programs identical to one of the other
programs. Table 5 below gives an example where programs 3 and 4 are identical.
Table 5: Using 3 of the 4 Available Programs
Program Setpoint Time Blower Speed
1 8:00 am 3
2 5:00 pm 2
3 9:30 pm 1
4 9:30 pm 1
WEEKENDS
Program Setpoint Blower
Time Speed
1
2
3
4
WEEKDAYS
Program Setpoint Blower
Time Speed
1
2
3
4
41959-01_3.30.06.pmd 3/30/06, 3:15 PM16
17 41959-01
Programming
To set or change the programs:
1. Press the PROGRAM key. Program 1 for weekdays will
be shown with the hour position flashing to denote that
you should set that value now.
2. Use the UP/DOWN keys to adjust the hour setting. Once
set, press the PROGRAM key again.
3. Now, the minute position will be flashing. Use the UP/
DOWN keys to adjust the minute setting in 10 minute
increments. Press PROGRAM to accept the value.
4. Finally, the blower speed will be flashing. Use the UP/
DOWN keys to adjust the blower speed setting from 0 to
3. Zero indicates that the blower is turned off, a setting
of 1 is low, 2 is medium, and 3 represents a blower speed
of high. Press PROGRAM to accept the blower speed set-
ting. This completes the first program for weekdays.
5. The display will advance to the second program for
weekdays with the hour position flashing. Follow steps
2 to 4 to set the second program. After setting each pro-
gram, the display will advance to the next program num-
ber. After going through all four weekday programs, the
unit will advance through each of the four weekend pro-
grams. The adjustment procedure (steps 2 to 4) is the
same for each program.
NOTES:
•For fast advance of the values, press and hold the UP/DOWN keys for 2 seconds. The
values for program time or blower speed will advance quickly.
•To exit programming mode and return to normal operating mode, either wait 15
seconds without any key presses or press DISPLAY to immediately return to normal
operating mode.
Once entered, the programs are active and stored in the unit’s memory. You can
unplug and move the air purifier and still retain the programs.
Fig. 22
Fig. 23
Fig. 24
41959-01_3.30.06.pmd 3/30/06, 3:15 PM17
41959-01 18
Programming
Reviewing Programs
You may want to review the programs to confirm that the settings are still acceptable. The
following steps show you how to review the programs.
To review programs:
1. With the air purifier On, press and hold the PROGRAM key. After 2 seconds, the
display will advance through the 4 programs for weekdays and then the 4 pro-
grams for the weekend. You must hold the PROGRAM key as the display re-
views the programs.
2. After viewing all programs, the display will return to normal operating mode and
you can release the key.
NOTE:
If you review a program that you want to change, simply release the PROGRAM key.
The display will stop on that program and allow you to make changes. Refer to User
Programming (pg. 16) for more details on how to change the values.
Locking/Unlocking the Keypad
Once you enter the desired programs, you may want to lock the keypad to prevent accidental
changing of the programs. When the keypad is locked, all keys will be disabled. If you press
a key, “Lock” will be displayed on the screen for 1-2 seconds.
When the keypad is locked, the remote may still be used to adjust the speed or turn off the
air purifier.
To Lock or Unlock the Keypad:
1. To lock the keypad, press and hold the UP/DOWN keys
simultaneously for 2-3 seconds. The display will read
“Lock” for 1-2 seconds.
2. To unlock the key pad, press and hold the UP/DOWN
keys simultaneously for 2-3 seconds. The keypad will
be functional.
Fig. 25
41959-01_3.30.06.pmd 3/30/06, 3:15 PM18
19 41959-01
Programming
Resetting the Air Purifier
In the unusual situation that the unit or the display is exhibiting erratic behavior, you may
want to reset the air purifier. Since you will lose all of your programmed settings when the
unit is reset, you should consult the Troubleshooting section (pg. 23) of the manual to re-
solve the problem before using the Reset Feature. When the unit is reset, the clock, day of
the week, and programs will default to their factory settings and the unit will turn off. The
only information that will be saved is the pre-filter and filter counter values. If you still
have problems after resetting the air purifier, please contact Hunter for additional assistance
(refer to Technical Assistance pg. 23).
To Reset the Air Purifier:
1. Using a small pin or paperclip, hold down the RESET key for 2 seconds or until
the display goes blank.
2. Follow the directions in the Programming section of the manual (pg. 14) to up-
date the day, time, and programs of the unit.
RESET
41959-01_3.30.06.pmd 3/30/06, 3:15 PM19
41959-01 20
Air Purifier Maintenance
Cleaning Your Air Purifier
Proper maintenance of your Hunter Air Purifier will help ensure years of trouble free
service.
Follow these steps to properly maintain your air purifier:
1. Approximately every 90 days, the outside of the unit should be cleaned with a soft,
damp cloth.
2. If needed, the front grill can be removed from the unit and cleaned with soapy water.
Simply remove the pre-filter before exposing the grill to water.
3. Follow the instructions in Changing the Pre-Filter and Cleaning the Filter (pgs. 20 and
21) to determine when and how to replace the filters.
NOTES:
•The air purifier must be unplugged during the cleaning process.
Be sure the unit is completely dry before plugging in and using.
•Never immerse unit in water.
Changing the Pre-Filter
When the Pre-Filter Counter exceeds 1400 hours (refer to Filter Run-time Counters for
additional information pg. 13), the display will automatically switch to the Pre-Filter Dis-
play and the Pre-Filter indicator will flash as a reminder that you should replace the pre-
filter. To maintain proper odor-removing capability and overall filtration performance, the
pre-filter should be changed every 1400 hours (approximately 3 months of use). If neces-
sary, the pre-filter can be changed more often. Proper maintenance of the pre-filter will help
extend the life of the cleanable filter. Refer to Obtaining Replacement Filters (pg. 22) if you
need help finding replacement filters.
To change the pre-filter and reset the pre-filter counter:
1. First, turn off and unplug the air purifier.
2. Next, remove the front grill. Place your fingers under the handle of the front grill
and pull towards you and up.
3. The pre-filter is attached to the inside of the grill with hook tape. Pull gently on
the pre-filter to removed it.
4. If needed, use a soft damp cloth to wipe off the grill.
5. Install the new pre-filter by placing it in the grill and pressing gently on the pre-
filter so that it adheres to the hook tape. You may notice a few black particles
coming off the pre-filter. Those particles are part of the odor-removing activated
carbon and will be collected on the filter during regular use.
41959-01_3.30.06.pmd 3/30/06, 3:15 PM20
  • Page 1 1
  • Page 2 2
  • Page 3 3
  • Page 4 4
  • Page 5 5
  • Page 6 6
  • Page 7 7
  • Page 8 8
  • Page 9 9
  • Page 10 10
  • Page 11 11
  • Page 12 12
  • Page 13 13
  • Page 14 14
  • Page 15 15
  • Page 16 16
  • Page 17 17
  • Page 18 18
  • Page 19 19
  • Page 20 20
  • Page 21 21
  • Page 22 22
  • Page 23 23
  • Page 24 24
  • Page 25 25
  • Page 26 26

Hunter 30546 Owner's manual

Category
Air purifiers
Type
Owner's manual
This manual is also suitable for

Ask a question and I''ll find the answer in the document

Finding information in a document is now easier with AI