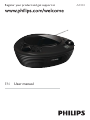
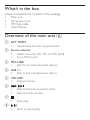
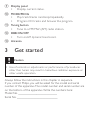
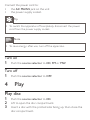
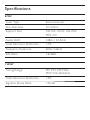
Philips AZ204 combines the convenience of a traditional CD player with the versatility of a modern sound system. Enjoy your favorite audio CDs and MP3s with rich, dynamic sound, thanks to the Dynamic Bass Boost feature. Listen to FM/MW radio stations with ease, or connect external devices like MP3 players via the MP3 Link input for a wider range of audio options. With its intuitive controls, programmable track playback, and compact design, the Philips AZ204 offers a versatile and user-friendly audio experience.
Philips AZ204 combines the convenience of a traditional CD player with the versatility of a modern sound system. Enjoy your favorite audio CDs and MP3s with rich, dynamic sound, thanks to the Dynamic Bass Boost feature. Listen to FM/MW radio stations with ease, or connect external devices like MP3 players via the MP3 Link input for a wider range of audio options. With its intuitive controls, programmable track playback, and compact design, the Philips AZ204 offers a versatile and user-friendly audio experience.


-
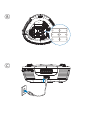
 1
1
-
 2
2
-
 3
3
-
 4
4
-
 5
5
-
 6
6
-
 7
7
-
 8
8
-
 9
9
-
 10
10
-
 11
11
-
 12
12
-
 13
13
-
 14
14
-
 15
15
-
 16
16
-
 17
17
-
 18
18
-
 19
19
-
 20
20


Philips AZ204 combines the convenience of a traditional CD player with the versatility of a modern sound system. Enjoy your favorite audio CDs and MP3s with rich, dynamic sound, thanks to the Dynamic Bass Boost feature. Listen to FM/MW radio stations with ease, or connect external devices like MP3 players via the MP3 Link input for a wider range of audio options. With its intuitive controls, programmable track playback, and compact design, the Philips AZ204 offers a versatile and user-friendly audio experience.
Ask a question and I''ll find the answer in the document
Finding information in a document is now easier with AI