the Candery B09TV7MVPZ User manual

Type
User manual

The Candery B09TV7MVPZ Cotton Candy Maker transforms granulated sugar and hard candies into cotton candy in minutes. It's easy to operate and clean, making it perfect for parties or family gatherings. The extractor head spins at high speed, creating a web of spun sugar fibers that can be collected on a cone. It features a powerful heating element that quickly melts the sugar or candy, and an adjustable temperature setting for different types of sugar. With its compact design and lightweight construction, the Candery B09TV7MVPZ is easy to store and transport.

The Candery B09TV7MVPZ Cotton Candy Maker transforms granulated sugar and hard candies into cotton candy in minutes. It's easy to operate and clean, making it perfect for parties or family gatherings. The extractor head spins at high speed, creating a web of spun sugar fibers that can be collected on a cone. It features a powerful heating element that quickly melts the sugar or candy, and an adjustable temperature setting for different types of sugar. With its compact design and lightweight construction, the Candery B09TV7MVPZ is easy to store and transport.

Your party is
our priority.
If you have any problem at all
please reach out to us directly..
An expert candy guy is standing by ready to help!
amazon messaging system
833-226-3379 (CAN-DERY)
Get ready for some
fun times...
3
WAYS TO
REACH US
congrats onon
d
youryour
newnewcotton candy
maker!
FOR HOUSEHOLD USE ONLY.
SAVE THESE INSTRUCTIONS FOR FUTURE
REFERENCE.
IMPORTANT SAFEGUARDS
WARNING: When using electrical appliances, basic safety precautions should always
be followed.
READ ALL INSTRUCTIONS BEFORE OPERATING.
1. Do not touch hot surfaces.
2. To protect against electrical shock, do not immerse cord, plugs or appliance in
water or other liquid.
3. Unit is not intended for use by persons (including children) with reduced physical,
sensory or mental capabilities, or lack of experience and knowledge, unless they
have been given supervision or instruction concerning use of the appliance by a
person responsible for their safety.
4. NOT A TOY. Children should be supervised around unit at all times.
5. Unplug from outlet when not in use and before cleaning. Allow to cool completely
before putting on and taking off parts.
6. Do not operate any appliance with a damaged cord or plug or after the appliance
malfunctions or has been damaged in any manner. Return to the nearest qualified
appliance repair technician for examination, repair or adjustment.
7. The use of accessory attachments may cause injuries and is not recommended by
the appliance manufacturer.
8. Do not use outdoors.
9. Do not let cord hang over edge of table or counter, or touch hot surfaces.
10. Do not place on or near a hot gas or electric burner, or in a heated oven.
11. Extreme caution must be used when moving this unit.
12. To disconnect, press the ON/OFF button OFF (O) before removing plug from wall
outlet.
13. Check to make sure the ON/OFF button is in the OFF (O) position before plugging
into or unplugging from the electrical outlet.
14. Always check inside the heating element compartment for foreign objects before
pressing the ON/OFF button ON (I).
15. CAUTION: The extractor head gets hot! Avoid contact with the extractor head
until cool.
16. CAUTION: The extractor head rotates at high speed. Keep hands, face and
loose objects clear from the extractor head to avoid possible injury.
17. Do not use this unit for other than intended use.
ADDITIONAL IMPORTANT SAFEGUARDS
CAUTION–HOT SURFACES: This appliance generates heat and escaping steam
during use. Proper precautions must be taken to prevent the risk of burns, fires or
other injury to persons or damage to property.
1. If unit falls or accidentally becomes immersed in water, unplug it from the wall
outlet immediately. Do not reach into the water!
2. When operating, provide adequate air space above and on all sides for air
circulation. Do not operate unit while it is touching or near curtains, wall coverings,
clothing, dish towels or other flammable materials.
3. Do not leave unit unattended when the plugged into an electrical outlet and ON/
OFF button is ON(I).
4. lf unit begins to malfunction during use, immediately unplug the cord. Do not use
or attempt to repair a malfunctioning unit!
5. The cord to this unit should be plugged into a 120V AC electrical wall outlet.
6. Do not operate unit in an unstable position. Operate only on a flat, level surface.
NOTES ON THE PLUG
This unit has a polarized plug (one blade is wider than the other). To reduce the risk of
electric shock, this plug will fit into a polarized outlet in only one direction. If the plug
does not fit into the outlet properly, reverse the plug. If it still does not fit, contact a
qualified electrician. Do not modify the plug in any way.
NOTES ON THE CORD
The provided short power-supply cord should be used to reduce the risk resulting from
becoming entangled in or tripping over a longer cord. Do not use an extension cord with
this product. Always plug directly into a wall outlet/receptacle.
PLASTICIZER WARNING
CAUTION: To prevent Plasticizers from migrating to the finish of the counter top or
table top or other furniture, place NON-PLASTIC coasters or place mats between the
appliance and the finish of the counter top or table top. Failure to do so may cause the
finish to darken; permanent blemishes may occur or stains can appear.
ELECTRIC POWER
If the electrical circuit is overloaded with other appliances, your appliance may not
operate properly. It should be operated on a separate electrical circuit from other
appliances.
CREATE A COTTON CANDY PARTY IN YOUR OWN HOME!
Your Cotton Candy Maker transforms both granulated sugar and hard candies into your
favorite flavored cotton candy in minutes! You can also use sugar-free candies to create
a low calorie treat. Simple to operate and easy to clean, your Cotton Candy Maker will
be the hit of any party or family occasion.
GETTING TO KNOW YOUR COTTON CANDY MAKER
Product may vary slightly from illustration
BEFORE USING FOR THE FIRST TIME
1. Carefully unpack the Cotton Candy Maker and
remove all packaging materials.
2. Before using your Cotton Candy Maker for
the first time, wipe down the unit with a non-
abrasive cloth or sponge to clean any dust or
loose materials.
3. To attach the extractor head, align the grooves
to fit over the pegs on the stem and gently push
down. (Figure 2)
Figure 2
4. To attach the bowl, carefully push the bowl down and turn it clockwise to lock it
into place.
5. Attach the clear rim by snapping it in place. Your Cotton Candy Maker is now ready
to use.
OPERATING INSTRUCTIONS
1. Place the Cotton Candy Maker on a dry, clean, and level surface.
2. Check to make sure the power ON/OFF button is in the (O) OFF position. Plug the
fully assembled Cotton Candy Maker into a 120V AC electrical outlet.
3. Press the power ON/OFF button to ON ( I ) position. The extractor head will begin to
spin and the element will begin to heat.
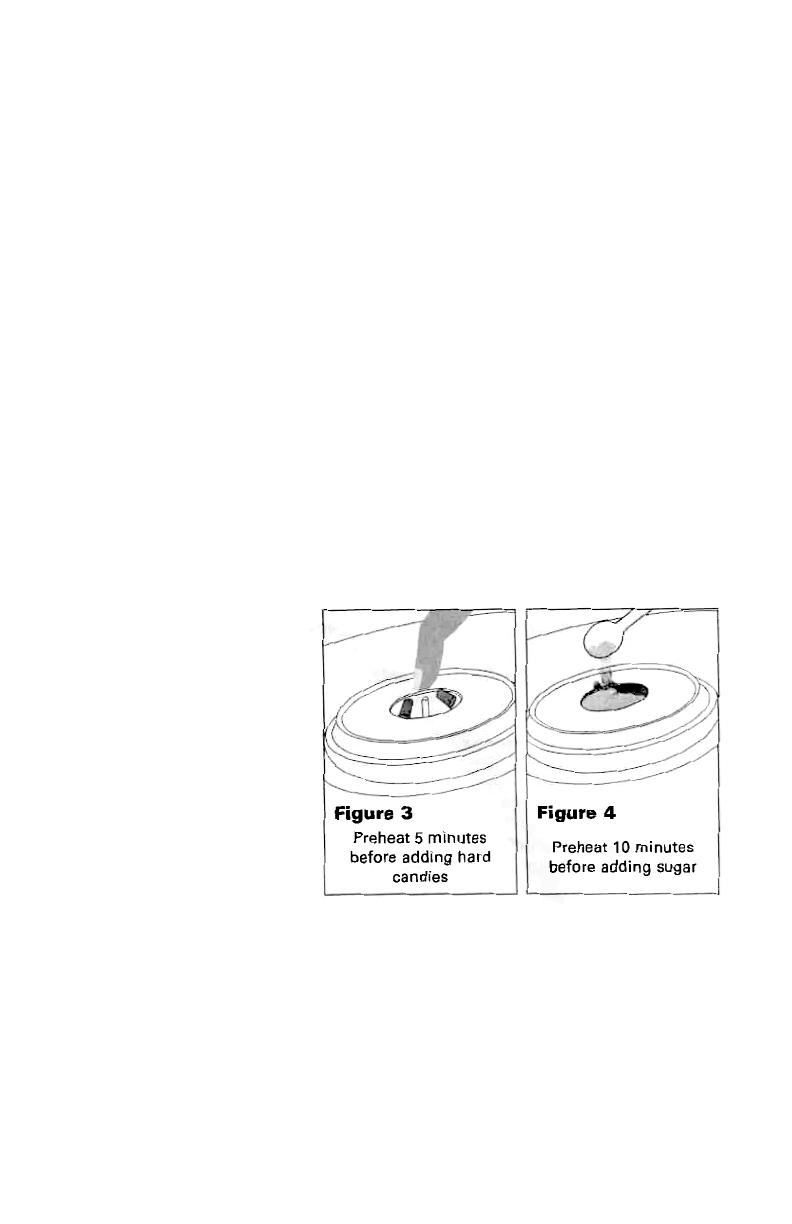
4. When using hard candies, run the Cotton Candy Maker for 5 minutes to allow the
extractor head to preheat. When using granulated or superfine sugar, allow the
Cotton Candy Maker to run for 10 minutes to allow the extractor head to preheat.
5. After preheating, press the power ON/OFF button to OFF (O). CAUTION: After
preheating, extractor head is hot! Avoid contact. Make sure the extractor
comes to a complete stop before adding candy or sugar to the extractor head.
6. Place no more than 2 pieces of hard candy (Figure 3) or 1 scoop
of granulated or superfine sugar (1 tablespoon) into the extractor head (Figure
4). Make sure the hard candies are evenly spaced. For a list of preferred candies
or suggested flavor combinations, see the “Tips For Best Results” section of this
booklet.
7. WARNING: To ensure
the Cotton Candy Maker
functions optimally, do
not use more than 2
pieces of hard candy or
1 scoop of granulated
or superfine sugar at
one time. Overfilling the
extractor head will clog
the unit.
8. Press the power ON/OFF
button to ON (I) position.
The extractor head will
spin and the element will
begin to heat.
9. When the web of spun sugar fibers begin to collect around the bowl, slowly spin
the cone in your fingers while circling the bowl.
10. Once the cotton candy begins to collect on the cone, hold it horizontally over the
extractor head and continue to spin the cone, moving from side to side, collecting
all of the candy from inside the bowl.
WARNING: Do not leave the Cotton Candy Maker unattended when ON/OFF button is ON (I).
11. When no more cotton candy fibers are emitted from the extractor head, press the
power ON/OFF button to the (O) OFF position. Additional servings can be prepared
by repeating the instructions previously described. Allow the extractor head to
come to a complete stop before adding more candy or sugar.
12. Press the power ON/OFF button to ON (I) position and resume spinning. CAUTION:
When the Cotton Candy Maker has been powered ON (I), the extractor head gets
hot! To avoid burns or personal injury, avoid contact with the extractor head.
NOTE: As the extractor head heats making cotton candy, spun fibers will flow more
quickly.
13. When you are finished making cotton candy, press the power ON/OFF button to
the OFF (O) position and unplug the Cotton Candy Maker from the electrical outlet.
TIPS FOR BEST RESULTS
Here are a few tips if the unit is not producing cotton candy or if the candy’s texture
is brittle.
Always use the Cotton Candy Maker on a stable and level surface.
Make sure the extractor head is clean and free of candy residue before use.
Do not add more than 2 pieces of hard candy or more than 1 sugar scoop (1
tablespoon) of granulated or superfine sugar to the extractor head at one time.
To avoid clumps of sugar, it may be necessary to break the candies into smaller
pieces and distribute evenly around the extractor head.
Create your own favorite cotton candy flavors by combining several hard candies.
Stand your finished cotton candy cones in a drinking glass until you are ready to
serve.
PREFERRED SUGAR AND SUGAR-FREE CANDY LIST
Fruit flavors such as cherry, strawberry, mixed fruits, grape, lime, orange.
Cinnamon
Root Beer
Peppermint
Coffee
NOT RECOMMENDED SUGAR/SUGAR-FREE CANDY
Candy shaped in balls
Cream flavors or cream-based hard candies
Gummy or chewy candies
Sugar-pressed candies
Hard-shelled candies
Sugar and sugar-free drink mix packets
FLAVOR COMBINATIONS: THE POSSIBILITIES ARE ENDLESS!
Fruit Punch = Any fruit flavors or combination
Candy Apple = Green Apple+ Cinnamon
Red Berry = Cherry + Strawberry
Red Melon = Cherry+ Watermelon
Hot Toddy = Butterscotch + Cinnamon
Blue Raspberry = Blueberry or Wildberry + Raspberry
Monkey Business= Banana + Chocolate
Afternoon Refresher = Orange or Lemon + Mint
Mocha Sensation = Chocolate + Coffee
USER MAINTENANCE INSTRUCTIONS
This unit contains no user serviceable parts. Do not try to repair it yourself. Any servicing
requiring disassembly other than cleaning, must be performed by a qualified appliance
repair technician.
CARE & CLEANING INSTRUCTIONS
CAUTION: NEVER IMMERSE BASE UNIT OR CORD IN WATER OR OTHER LIQUID.
1. The Cotton Candy Maker comes apart for easy cleaning.
2. Always unplug and allow to cool completely before cleaning.
3. When fully cooled, unlock and remove the bowl by turning counter clockwise.
4. Remove the extractor head by gripping both sides firmly and pulling straight up.
5. The clear lid, bowl and extractor head are top rack dishwasher-safe. To clean by
hand, wash the clear lid, bowl and extractor head in warm, soapy water. Never use
abrasive cleansers or scouring pads, as they may damage the surfaces. Rinse and
dry thoroughly.
6. If sugar sticks to the extractor head, allow it to soak it in warm soapy water for a
couple of hours to overnight before cleaning with a non abrasive cloth or sponge.
Rinse and dry thoroughly.
7. Wipe the exterior of the motor base with a soft, slightly damp cloth or sponge.
Never use abrasive cleansers or scouring pads to clean the motor base, as they
may damage the surfaces.
STORING INSTRUCTIONS
Never store unit while it is hot or wet.
Be sure unit is clean and dry and fully assembled before storing.
Store unit in its box or in a clean, dry place.
Never wrap cord tightly around unit; keep it loosely coiled.
www.thecandery.com
  • Page 1 1
  • Page 2 2
  • Page 3 3
  • Page 4 4
  • Page 5 5
  • Page 6 6
  • Page 7 7
  • Page 8 8

the Candery B09TV7MVPZ User manual

Type
User manual

The Candery B09TV7MVPZ Cotton Candy Maker transforms granulated sugar and hard candies into cotton candy in minutes. It's easy to operate and clean, making it perfect for parties or family gatherings. The extractor head spins at high speed, creating a web of spun sugar fibers that can be collected on a cone. It features a powerful heating element that quickly melts the sugar or candy, and an adjustable temperature setting for different types of sugar. With its compact design and lightweight construction, the Candery B09TV7MVPZ is easy to store and transport.

Ask a question and I''ll find the answer in the document

Finding information in a document is now easier with AI