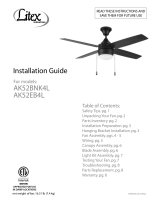
Lowe s C-ST52BNK5D1 User manual

Category
Household fans
Type
User manual
1
ATTACH YOUR RECEIPT HERE
Purchase Date
SOUTH RIVER CEILING FAN
MODEL #C-ST52BNK5D1
Français p. 18
ITEM #0835141
Questions, problems, missing parts? Before returning to your retailer, call our customer
service department at 1-800-527-1292, 8:30 a.m. - 5 p.m., CST, Monday - Friday
2
Safety Information ...............................................................................................................
.
. 2
Package Contents ..............................................................................................................
.
. 4
Hardware Contents
...........................................................................................................................
5
Preparation ........................................................................................................................... 5
Initial Installation ................................................................................................................... 5
Installing Safety Cable .......................................................................................................... 9
Wiring .................................................................................................................................. 10
Final Installation .................................................................................................................. 12
Operating Instructions ......................................................................................................... 14
Care and Maintenance ...................................................................................................
.
.... 15
Troubleshooting ..................................................................................................................
16
Limited Lifetime Warranty ...................................................................................................
17
Replacement Parts List .......................................................................................................
17
TABLE OF CONTENTS
WARNING
SAFETY INFORMATION
READ AND SAVE THESE INSTRUCTIONS
• Do not discard fan carton or foam inserts. Should this fan need to be returned to the factory for
repairs, it must be shipped in its original packaging to ensure proper protection against damage
that might exceed the initial cause for return.
Make sure all electrical connections comply with local codes, ordinances, the Canadian Electrical
Code and ANSI/NFPA 70-1999.
Make sure the installation site you choose allows a minimum clearance of 7 ft. from the blades to
the floor and at least 30 in. from the end of the blades to any obstruction.
After you install the fan, make sure all connections are secure to prevent the fan from falling.
The net weight of this fan, including the light kit, is: 24.53 lbs.
To reduce the risk of fire, electrical shock or personal injury, mount fan to outlet box
marked "ACCEPTABLE FOR FAN SUPPORT OF 35 LBS. (15.9 KG) OR LESS" and
use mounting screws provided with the outlet box. Most outlet boxes commonly used
for the support of lighting fixtures are not acceptable for fan support and may need to
be replaced. Consult a qualified electrician if in doubt.
WARNING
3
SAFETY INFORMATION
When mounting fan to a ceiling outlet box, use a METAL octagonal outlet box; do NOT use a
plastic outlet box. Secure the outlet box directly to the building structure. The outlet box and its
support must be able to support the moving weight of the fan (at least 35 lbs.).
To avoid personal injury, the use of gloves may be necessary while handling fan parts with
sharp edges.
To reduce the risk of fire, electrical shock or personal injury, wire connectors provided with this fan
are designed to accept only one 12-gauge house wire and two lead wires from the fan.
To reduce the risk of fire or electrical shock, do not use the fan with any solid-state speed control
device or control fan speed with a full range dimmer switch.
To reduce the risk of fire, electrical shock or personal injury, do not insert objects between the
rotating fan blades.
To reduce the risk of personal injury, use ONLY parts provided with this fan. The use of parts
OTHER than those provided with this fan will void the warranty.
This fan MUST be installed with the safety cable provided with the fan. Failure to use the
safety cable provided may result in personal injury, damage to the fan or damage to other property.
Before installation, be sure to shut off electricity at main switch or circuit breaker in order to avoid
electrical shock.
NOTE: This equipment has been tested and found to comply with the limits for a Class B digital
device, pursuant to Part 15 of the FCC Rules. These limits are designed to provide reasonable
protection against harmful interference in a residential installation. This equipment generates,
uses and can radiate radio frequency energy and, if not installed and used in accordance with
the instructions, may cause harmful interference to radio communications. However, there is no
guarantee that interference will not occur in a particular installation. If this equipment does cause
harmful interference to radio or television reception, which can be determined by turning the
equipment off and on, the user is encouraged to try to correct the interference by one or more of
the following measures:
* Reorient or relocate the receiving antenna.
* Increase the separation between the equipment and receiver.
* Connect the equipment into an outlet on a circuit different from that to which the
receiver is connected.
Consult the dealer or an experienced radio/TV technician for help.
WARNING
CAUTION
Be sure outlet box is properly grounded and that a ground wire (green or bare) is present.
Before beginning installation, carefully check all screws, bolts and nuts on fan motor assembly to
ensure they are secure.
NOTE: Dimmable to 10% with select dimmers. See Lowes.com for more information.
L LED Light Kit Screw 3
(preassembled)
M Fitter Plate 1
N Threaded Rod 1
O Hex Nut (preassembled) 1
P Finial Plate (preassembled) 1
Q Finial (preassembled) 1
R Safety Cable (preassembled) 1
S Vice (preassembled) 1
T Star Washer (preassembled) 4
U LED Light Kit 1
(preassembled)
V Pull Chain Extension 2
J
PACKAGE CONTENTS
4
D
B
F
C
4
E
N
QUANTITY
DESCRIPTIONPART QUANTITY
IMPORTANT REMINDER: You must use the
parts provided with this fan for proper installation
and safety.
G
K
L
P
O
M
Q
R
AH
I
S
T
A Downrod 1
B Canopy 1
C Mounting Bracket 1
(preassembled)
D Motor Housing 1
E Yoke Cover 1
F Canopy Mounting Screw 4
(preassembled)
G Blade 5
H Pin (preassembled) 1
I Clip (preassembled) 1
J Glass Shade 1
K Balancing Kit 1
DESCRIPTIONPART
U
V
5
HARDWARE CONTENTS (shown actual size)
Before beginning assembly of product, make sure all parts are present. Place motor on carpet or on foam
to avoid damage to nish. Compare parts with package contents list and hardware contents list. If any part
is missing or damaged, do not attempt to assemble the product.
Estimated Assembly Time: 120 minutes
Tools Required for Assembly (not included): Electrical Tape, Phillips Screwdriver, Pliers, Safety Glasses,
Stepladder and Wire Strippers
Helpful Tools (not included): AC Tester Light, Tape Measure and Wire Cutters.
PREPARATION
CC
Wire
Connector
Qty. 4
AA BB CC
INITIAL INSTALLATION
ON
OFF
ON
OFF
1
Turn off circuit breakers and wall switch to the fan
supply line leads.
DANGER: Failure to disconnect power supply
prior to installation may result in serious injury or
death.
1.
Fiber
Blade
Washer
Qty. 15
+ 1 extra
Blade
Screw
Qty. 15
+ 1 extra
INITIAL INSTALLATION
6
4. Partially loosen two canopy mounting screws (F)
in slotted holes of canopy (B). Remove the other
two canopy mounting screws (F) and star
washers (T) --save for later use. Twist canopy (B)
and remove mounting bracket (C).
2. Determine mounting method to use.
A. Standard mount
B. Angle mount
Note: Flushmount and closemount options are not
available for this fan.
IMPORTANT: If using the angle mount, ensure the
ceiling angle is not steeper than 19°.
*Helpful Hint: Downrod-style mounting is best
suited for ceilings 8 ft. high or higher. For taller
ceilings you may want to use a longer downrod
(sold separately). Angle-style mounting is best
suited for angled or vaulted ceilings. A longer
downrod is sometimes necessary to ensure proper
blade clearance.
2
B
A
19° max.
3.
7 ft.
min.
30 in.
min.
3
G
4
C
B
F
F
T
T
Check to make sure blades (G) will be at least
30 in. from any obstruction and at least 7 ft. above
the floor.
INITIAL INSTALLATION
7
Secure mounting bracket (C) to outlet box (not
included) using screws, spring washers and flat
washers provided with the outlet box.
*NOTE: It is very important you use the proper
hardware when installing the mounting bracket
(C) as this will support the fan.
IMPORTANT: If using the angle mount, make
sure open end of mounting bracket (C) is
installed facing the higher point of the ceiling, and
ensure the ceiling angle is not steeper than 19°.
5.
Remove vice (S) from safety cable (R)
preassembled to motor housing (D) by loosening
preassembled screw and nut on vice (S).
Set
Screw
and Nut
6a.
6b 6c
Nut
Screw
6a
6b.
6c.
Remove pin (H) and clip (I) from downrod (A).
Partially loosen preassembled set screws and
nuts in yoke at top of motor housing (D).
R
S
A
HID
Yoke
Open End
4
C
C
ANGLE MOUNTSTANDARD
MOUNT
5
D
INITIAL INSTALLATION
8. Slip downrod (A) into yoke of motor housing
(D), align holes and re-install pin (H) and clip
(J). Tighten set screws in yoke and then tighten
preassembled nuts on the set screws. Then,
slide yoke cover (E) down until it rests on top of
motor housing (D).
8A
D
E
H
Yoke
Set Screw
and Nut
Side view
Depending on the length of downrod you use,
you may need to cut the lead wires back to
simplify the wiring. If you decide to cut back the
lead wires, it is suggested you do so in the
following manner:
Take the lead wires and make sure you have
pulled them all the way through the top of the
downrod. Start at the TOP of the hanging ball on
the downrod and measure 8 in. of lead wire, and
then cut the excess wire off with wire cutters (not
included). IMPORTANT: Do NOT cut safety
cable (R).
NOTE: If you do not cut back the lead wires,
Steps 9 and 10 are not necessary and you
may proceed to Step 11 instead.
9.
7. Insert downrod (A) through canopy (B) and yoke
cover (E). Thread wires and safety cable (R)
from motor housing (D) through downrod (A).
7
E
B
R
Hanging
Ball
9
A
8 in.
R
I
H
I
A
8
D
9
INITIAL INSTALLATION
11. Install hanging ball of downrod (A) into opening of
mounting bracket (C). Align one of the slots in
hanging ball with the tab in mounting bracket (C).
DANGER: Failure to align slot in hanging ball
with the tab in mounting bracket (C) may cause the
fan to fall, which could result in serious injury or
death.
10. If you cut back the lead wires in Step 9, strip 1/2 in.
of insulation from end of each wire -- WHITE,
BLACK and BLUE. Twist stripped ends of each
strand of wire within the insulation with pliers (not
included).
10
1. 1
Replace vice (S) on safety cable (R) and adjust
length of safety cable (R) by pulling on the safety
cable (R). Adjust slack in safety cable (R) to a
hand’s length and then tighten screw and nut on
vice (S) securely. The loop at the end of the
safety cable (R) should just fit over the threads on
the wood screw (not included) used to secure it.
Test safety cable (R) by pulling on loose end of
cable with pliers. If the safety cable (R) slips, then
screw and nut on vice (S) must be set tighter.
S
Screw
Nut
Loop
Wood
Screw
INSTALLING SAFETY CABLE
R
C
Slot
11
A
Tab
10
WARNING: To reduce the risk of fire, electrical shock or personal injury, wire connectors
provided with this fan are designed to accept only one 12-gauge house wire and two lead wires
from the fan.
CAUTION: Be sure outlet box is properly grounded and that a ground (GREEN or BARE)
wire is present.
WARNING: If house wires are different colors than referred to in the following steps, stop
immediately.
WARNING: Using a full range dimmer switch (not included) to control fan speed will cause a
loud humming noise from fan. To reduce the risk of fire or electrical shock, do NOT use a full
range dimmer switch to control fan speed.
WIRING
INSTALLING SAFETY CABLE
2. Find a secure attachment point (wood ceiling joist
recommended) and secure safety cable (R) using
a heavy-duty wood screw, washer and lock
washer (none included).
NOTE: Extra cable slack can be left in ceiling
area.
Choose wiring diagram (Fig. 1A, Fig. 1B or Fig. 1C)
that fits your situation and make appropriate wiring
connections as follows: [IMPORTANT: Use one of the
wire connectors (CC) provided to make each wire
connection, making sure to screw wire connector (CC)
on in a clockwise direction.]
1a. FAN AND LIGHT CONTROLLED BY PULL
CHAINS: Connect BLACK and BLUE wire from fan
to BLACK wire from ceiling. Connect WHITE wire
from fan to WHITE wire from ceiling. Connect
GROUND (GREEN) wires from (downrod (A) and
mounting bracket (C) to BARE/GREEN wire from
ceiling.
1.
R
Wood Screw,
Washer and
Lock Washer
Wood
Joist
2
Loop
FAN AND LIGHT CONTROLLED BY TWO WALL SWITCHES
1a
FAN AND LIGHT CONTROLLED BY PULL CHAINS
120V POWER
FROM CEILING
BLACK (POWER)
WHITE (NEUTRAL)
GROUND/GREEN (BARE)
GREEN
WHITE BLACK
BLUE
11
WIRING
Wrap electrical tape (not included) around each
individual wire connector down to the wire.
WARNING: Make sure no bare wire or wire
strands are visible after making connections. Place
GREEN and WHITE connections on opposite side of
the outlet box from the BLACK and BLUE
connections.
2. 2
1c. FAN AND LIGHT CONTROLLED BY TWO
WALL SWITCHES: Connect BLACK wire from fan
to BLACK wire from the independent wall switch for
the fan. Connect BLUE wire from fan to the BLACK
wire from the other independent wall switch for the
light. Connect WHITE wire from fan to WHITE wire
from ceiling. Connect GROUND (GREEN) wires
from downrod (A) and mounting bracket (C) to
BARE/GREEN wire from ceiling.
NOTE: BLACK wire is hot power for fan. BLUE wire
is hot power for light kit. WHITE wire is common for
fan and light kit. GREEN or BARE wire is ground.
1b. FAN CONTROLLED BY PULL CHAIN, LIGHT
BY WALL SWITCH: Connect BLACK wire from fan
to BLACK wire from ceiling. Connect BLUE wire
from fan to the BLACK wire from the independent
wall switch for the light. Connect WHITE wire from
fan to WHITE wire from ceiling. Connect GROUND
(GREEN) wires from (downrod (A) and mounting
bracket (C) to BARE/GREEN wire from ceiling.
Wire Connector x 4
Hardware Used
CC
FAN AND LIGHT CONTROLLED BY TWO WALL SWITCHES
1c
GREEN
WHITE BLACK
120V POWER
FROM CEILING
BLACK (WALL SWITCH)
BLACK (WALL SWITCH FOR LIGHT)
WHITE (NEUTRAL)
GROUND/GREEN (BARE)
BLUE
FAN AND LIGHT CONTROLLED BY TWO WALL SWITCHES
FAN CONTROLLED BY PULL CHAIN, LIGHT BY WALL SWITCH
1b
WHITE BLACK
BLUE
120V POWER
FROM CEILING
BLACK (POWER)
BLACK (WALL SWITCH)
WHITE (NEUTRAL)
GROUND/GREEN (BARE)
GREEN
CC
CC
CC
12
FINAL INSTALLATION
1.
2.
Hardware Used
WARNING: To reduce the risk of serious bodily
injury, DO NOT use power tools to assemble the
blades. If overtightened, blades may crack and
break.
Insert a blade (G) through one of the slots on
the band on the motor housing (D). Align holes
and attach the blade (G) to the motor with blade
screws (AA) and fiber blade washers (BB).
Then, tighten each blade screw (AA), starting
with the one in the middle. Repeat for remaining
blades (G).
AA Blade Screw x 15
Fiber Blade Washer x 15
BB
Lift canopy (B) to mounting bracket (C) and align
slotted holes in canopy (B) with loosened canopy
mounting screws (F) in mounting bracket (C).
Twist canopy (B) to lock, then re-insert the two
canopy mounting screws (F) and star washers
(T) previously removed (Step 4, page 6). Tighten
all canopy mounting screws (F) securely.
1
G
AA
BB
2
(View from Underside)
D
T
F
B
13
FINAL INSTALLATION
4. 4
5. 5
3. 3
Remove finial (Q), finial plate (P) and hex nut (O)
from threaded rod (N). Save all for later use.
Attach threaded rod (N) to motor housing (D),
ensuring it is completely secure.
Align hole in center of glass shade (J) with
threaded rod (N), allowing pull chains to come
through corresponding holes in glass shade (J).
Push up gently on glass shade (J) until threaded
rod comes through hole, then secure with hex
nut (O).
Align hole in center of finial plate (P) with
threaded rod, allowing the pull chains to come
through appropriate holes in finial plate (P) and
push up. Secure glass shade (J) by tightening
finial (Q).
CAUTION:
Do NOT overtighten hex nut (O)
as glass may crack or break.
Red
Dot
O
D
J
Locate LED light kit screw (L) from LED light kit (U)
(on underside of motor housing (D)) with a red dot
beside it; remove this LED light kit screw (L) from
LED light kit (U). Partially loosen the other LED light
kit screws (L). Align slotted holes in center of fitter
plate (M) with loosened LED ligt kit screws (L). Twist
fitter plate (M) to lock. Re-insert LED light kit screw
(L) that was removed and secure all LED light kit
screws (L).
D
L
U
L
L
M
D
O
P
Q
N
D
O
P
Q
N
14
6
(For Fan)
(For Light)
V
V
Attach applicable pull chain extensions (V) or
custom pull chain extensions (not included) to
the fan and light pull chains.
Assembly is now complete.
NOTE: This fan is remote control adaptable
(remote control not included).
6.
The light pull chain labeled LIGHT is used to turn the
light ON or OFF.
FINAL INSTALLATIONS
The fan pull chain labeled FAN has four
positions to control fan speed. One pull is HIGH,
two is MEDIUM, three is LOW and four turns the
fan OFF.
1.
2.
1
2
OPERATING INSTRUCTIONS
15
OPERATING INSTRUCTIONS
3.
4a 4b
4c
In warmer weather, setting the reverse switch in
the LEFT position will result in downward airflow
creating a wind chill effect.
In cooler weather, setting the reverse switch in the
RIGHT position will result in upward airflow that can
help move stagnant, hot air off the ceiling area.
IMPORTANT: Reverse switch must be set either
completely LEFT or completely RIGHT for fan to
function. If the reverse switch is set in the middle
position, fan will not operate.
4a.
4b.
4c.
Use the fan reverse switch, located on LED light kit
(U), to optimize your fan for seasonal performance.
To use the reverse switch, remove pull chain
extensions (V), then finial (Q), finial plate (P) and
hex nut (O) from threaded rod (N). Remove glass
shade (J).
A ceiling fan will allow you to raise your thermostat
setting in summer and lower your thermostat
setting in winter without feeling a difference in your
comfort.
NOTE: Wait for fan to stop before moving the
reverse switch.
Reverse Switch
3
Q
U
OP
N
J
V
16
WARNING: Before beginning work, shut off the power supply to avoid electrical shock.
PROBLEM POSSIBLE CAUSE CORRECTIVE ACTION
Fan does not move. 1. Power is off or fuse is blown.
2. Faulty wire connection.
1. Turn power on or check fuse.
2. Turn power off. Loosen canopy
and check all connections.
Noisy operation. 1. Blades are loose.
2. Cracked blade.
3. Fan is new.
1. Tighten all blade screws.
2. Replace blade.
3. Allow fan a “break in” period of a
few days, especially when
running the fan at Medium and
High speeds.
Excessive wobbling. 1. Blades are loose.
2. Unbalanced blades.
3. Fan not securely mounted.
4. Fan too close to vaulted ceiling.
5. Set screw(s) on motor housing yoke
is (are) not tightened properly.
1. Tighten all blade screws.
2. Switch one blade with a blade
from the opposite side or use
balancing kit (K).
3. Turn power off. Carefully loosen
canopy and verify mounting
bracket is secure.
4. Use a longer downrod or move
fan to another location.
5. Tighten yoke set screw(s)
securely.
NOTE: A small amount of "wobble" is normal and should not be considered a defect.
TROUBLESHOOTING
Fan operates but
light fails.
1. Wires in outlet box not wired
properly.
2. Wall switch to fan is off.
1. Check wires in outlet box and, if
necessary, re-wire according to
instructions on pages 10 - 11.
2. Make sure wall switch to fan is on.
At least twice each year, lower canopy (B) to check downrod (A) assembly, and then tighten all
screws. Clean motor housing (D) with only a soft brush or lint-free cloth to avoid scratching the finish.
Clean blades (G) with a lint-free cloth. You may occasionally apply a light coat of furniture polish to
wood blades for added protection.
IMPORTANT: Shut off main power supply before beginning any maintenance. Do not use water or a
damp cloth to clean the ceiling fan.
• Total wattage for this fixture is 18 watts; do not attempt to replace the LEDs.
CARE AND MAINTENANCE
17
JMLI1801 Printed in China
LITEX LIFETIME LIMITED WARRANTY
LITEX INDUSTRIES, LTD. warrants this fan to the original household purchaser for indoor use under
the following provisions:
1-YEAR WARRANTY: LITEX INDUSTRIES, LTD. will replace or repair any fan which has faulty
performance due to a defect in material or workmanship. Contact Customer Service at
1-800-527-1292 to arrange for return of fan. Return fan, shipping prepaid, to Litex Industries, Ltd. We
will repair or ship you a replacement fan, and we will pay the return shipping cost.
5-YEAR WARRANTY: LITEX INDUSTRIES, LTD. will repair or replace, at no charge to the original
purchaser, any fan motor that fails to operate satisfactorily when failure results from normal use.
RETURN FAN MOTOR ONLY, shipping prepaid, to Litex Industries. We will repair or ship purchaser a
replacement motor and Litex will pay the return shipping cost.
6-YEAR to LIFETIME LIMITED WARRANTY: LITEX INDUSTRIES, LTD. will repair the fan, at no
charge to the original purchaser for labor only, if the fan motor fails to operate satisfactorily when
failure results from normal use. Parts used in the repair will be billed to the purchaser at prevailing
prices at time of repair.
The purchaser shall be responsible for all costs incurred in the removal, reinstallation and shipping of
the product for repairs.
This warranty does not apply when damage from mechanical, physical, electrical or water abuse
results in causing the malfunction. Deterioration of finishes or other parts due to time or exposure to
salt air is specifically exempted under this warranty.
Neither Litex Industries nor the manufacturer will assume any liability resulting from improper
installation or use of this product. In no case shall the company be liable for any consequential
damages for breach of this, or any other warranty expressed or implied whatsoever. This limitation as
to consequential damages shall not apply in states where prohibited.
VENTILATEUR DE PLAFOND
SOUTH RIVER
MODÈLE #C-ST52BNK5D1
ARTICLE #0835141
JOIGNEZ VOTRE REÇU ICI
Date d’achat
18
Des questions, des problèmes, des pièces manquantes? Avant de retourner l’article au
détaillant, appelez notre service à la clientèle au 1 800 527-1292, entre 8 h et 18 h (HNE),
du lundi au jeudi, ou entre 8 h et 17 h (HNE) le vendredi.
19
Consignes de sécurité ................................................................................................ 19
Contenu de l’emballage .............................................................................................. 21
Quincaillerie incluse .................................................................................................... 22
Préparation ................................................................................................................. 22
Installation initiale ....................................................................................................... 22
Installation du câble de sécurité ................................................................................. 26
Câblage ...................................................................................................................... 27
Installation définitive ................................................................................................... 30
Mode d’emploi ............................................................................................................ 31
Entretien ..................................................................................................................... 32
Dépannage ................................................................................................................. 33
Garantie à vie limitée .................................................................................................. 34
Liste des pièces de rechange ..................................................................................... 34
TABLE DES MATIÈRES
WARNING
CONSIGNES DE SÉCURITÉ
VEUILLEZ LIRE ET CONSERVER CES INSTRUCTIONS.
AVERTISSEMENT
• Ne jetez pas l’emballage du ventilateur ni les garnitures en mousse. Si des réparations sont
nécessaires, le ventilateur doit être retourné à l’usine dans son emballage original afin de le
protéger pendant le transport.
• Assurez-vous que tous les branchements électriques sont conformes aux codes du bâti-
ment locaux, aux règlements locaux, au Code canadien de l’électricité et à la norme
ANSI/NFPA 70-1999.
• Assurez-vous qu’à l’emplacement choisi, les pales se trouvent à au moins 2,13 m du sol et
que leur extrémité est à au moins 76,2 cm de tout obstacle.
• Après avoir installé le ventilateur, assurez-vous que tous les raccords sont bien fixés pour
éviter que le ventilateur ne tombe.
• Le poids net de ce ventilateur, y compris l’ensemble de luminaire, est de 11,13 kg.
Afin de réduire les risques d’incendie, de choc électrique et de blessure, installez le
ventilateur sur une boîte de sortie qui porte la mention « ACCEPTABLE FOR FAN
SUPPORT OF 35 LBS (15,9 KG) OR LESS » (convient à un ventilateur de 15,87 kg
[35 lb] ou moins) à l’aide des vis de montage fournies avec la boîte de sortie. La
plupart des boîtes de sortie le plus fréquemment utilisées pour soutenir les luminaires
ne conviennent pas pour un ventilateur et doivent être remplacées. Consultez un
électricien qualifié en cas de doute.
20
CONSIGNES DE SÉCURITÉ
AVERTISSEMENT
ATTENTION
Lorsque vous fixez le ventilateur à une boîte de sortie au plafond, utilisez une boîte de
sortie octogonale en MÉTAL; n’utilisez PAS de boîte de sortie en plastique. Fixez la boîte
de sortie directement à la structure du bâtiment. La boîte de sortie et sa fixation doivent
pouvoir supporter le poids du ventilateur en mouvement (au moins 15,87 kg).
Portez des gants au besoin pour manipuler les pièces aux bords coupants afin de prévenir
les blessures.
Afin de réduire les risques d’incendie, de choc électrique ou de blessure, les capuchons de
connexion fournis avec ce ventilateur sont conçus pour n’accepter qu’un fil de la maison de
calibre 12 et deux fils de connexion du ventilateur.
Afin de réduire les risques d’incendie ou de choc électrique, n’utilisez pas ce ventilateur
avec un appareil électronique de réglage de vitesse, ni avec un gradateur pleine bande.
Afin de réduire les risques d’incendie, de choc électrique ou de blessure, n’insérez aucun
objet entre les pales en mouvement.
Afin de réduire les risques de blessure, utilisez UNIQUEMENT les pièces fournies avec ce
ventilateur. L’utilisation de pièces AUTRES que celles fournies avec ce ventilateur annule la
garantie.
Ce ventilateur DOIT être installé avec le câble de sécurité fourni. Le non-respect de cette
consigne peut entraîner des blessures et des dommages au ventilateur ou d’autres
dommages matériels.
Avant de commencer l’installation, assurez-vous de couper l’électricité à partir de
l’interrupteur principal ou du disjoncteur afin de prévenir les chocs électriques.
REMARQUE : Cet appareil a été testé et déclaré conforme aux limites imposées aux
appareils numériques de classe B, conformément à l’alinéa 15 du règlement de la FCC.
Ces limites sont destinées à assurer une protection raisonnable contre les interférences
nuisibles dans un environnement résidentiel. Cet appareil génère, utilise et peut émettre de
l’énergie radiofréquence et, s’il n’est pas installé et utilisé conformément aux instructions,
risque de provoquer des interférences nuisibles aux communications radio. Cependant, tout
risque d’interférence ne peut être totalement exclu. S’il constate des interférences lors de la
réception d’émissions de radio ou de télévision (il suffit, pour le vérifier, d’allumer et
d’éteindre successivement l’appareil), l’utilisateur devra prendre les mesures nécessaires
pour les éliminer. À cette fin, il devra :
* réorienter ou déplacer l’antenne réceptrice;
* accroître la distance entre l’appareil et le récepteur;
* brancher l’appareil sur une prise de courant appartenant à un autre circuit que
celui du récepteur.
Consultez le détaillant ou un technicien en radio ou en télévision expérimenté pour obtenir de
l’aide.
Assurez-vous que la boîte de sortie est correctement mise à la terre et qu’un fil de mise à la
terre (vert ou dénudé) est disponible.
Avant de commencer l’installation, vérifiez soigneusement les vis, les boulons et les écrous de
l’ensemble moteur du ventilateur afin de vous assurer qu’ils sont bien fixés.
REMARQUE : Intensité réglable à 10 % avec certains gradateurs. Pour en savoir plus, consultez le
site Lowes.com.
  • Page 1 1
  • Page 2 2
  • Page 3 3
  • Page 4 4
  • Page 5 5
  • Page 6 6
  • Page 7 7
  • Page 8 8
  • Page 9 9
  • Page 10 10
  • Page 11 11
  • Page 12 12
  • Page 13 13
  • Page 14 14
  • Page 15 15
  • Page 16 16
  • Page 17 17
  • Page 18 18
  • Page 19 19
  • Page 20 20
  • Page 21 21
  • Page 22 22
  • Page 23 23
  • Page 24 24
  • Page 25 25
  • Page 26 26
  • Page 27 27
  • Page 28 28
  • Page 29 29
  • Page 30 30
  • Page 31 31
  • Page 32 32
  • Page 33 33
  • Page 34 34

Lowe s C-ST52BNK5D1 User manual

Category
Household fans
Type
User manual

Ask a question and I''ll find the answer in the document

Finding information in a document is now easier with AI

in other languages