Page is loading ...

www.afxpower.com /// 877-881-3699 /// info@afxpower.com
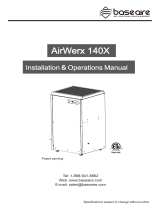
OWNER’S
MANUAL
WARNING: To reduce the risk of injury, the user must read and understand the Owner’s
Manual before using this product. Save these instructions for future reference.
EVAP
COMMERCIAL DEHUMIDIFIER
OWNER’S
MANUAL

2
CONTENTS + SPECS
Heavy Duty
Quiet Operation
Stackable
Portable
SPECIFICATIONS
Model
EVAP
Water Removal AHAM (86F
80%RH) (pints/day)
95
Refrigerant R410a
Refrigerant Volume (g) 230
High Side Pressure (psig) 480
Low Side Pressure (psig) 240
Operating Range (°F) 33-100
Net Weight (Lbs) 57
Cable Length 17’
Rated Current (amps) 4.2
Voltage 115
Hertz 50
Daisy Chain No
EVAP
CONTENTS
Specications ............................. 2
Safety Instructions
...................... 3
Description
................................. 4
Operation
.................................... 5
Setup
..................................... 5
Drain Hose
............................. 5
Control Panel
.............................. 6
Buttons
.................................. 6
Power
.................................... 6
Time
...................................... 6
Humidity Control
.................... 7
Key Lock
................................ 7
Manual Drainage
.................... 7
Defrost Indicator
.................... 7
Maintenance
............................... 7
Before Use
............................. 7
Filter Maintenance
.................. 8
Coil Maintenance
.................... 8
Pump Maintenance
................. 8
Storage
.................................. 8
Limited Warranty
......................... 11

3
SAFETY
SAFETY INSTRUCTIONS
The user of electrical products may create hazards that include, but are not limited to injury, re,
electrical shock. Failure to follow these instructions may damage and/or impair its operation and void
the warranty.
• Before operating, remove all packaging materials and check for any damage that may have occurred
during shipping or any missing items.
• Check household power supply to ensure it matches the appliance’s specication.
• Do not operate the appliance with a damaged cord or plug. discard or return to an authorized service
facility for examination and/or repair.
• Do not use an extension cord with this appliance.
• Do not run cord under carpeting furniture or appliances or cover cord with throw rugs, runners, or
similar coverings.
• Arrange the cord away from trac areas and where it will not be tripped over.
• To reduce the risk of re or electric shock, do not use this appliance with any solid state speed
control device.
• Do not touch this appliance or the plug with wet hands or while standing in water. Do not operate the
appliance near any pooled water.
• Do not use the product in areas where gasoline, paint or other ammable goods and objects are used
or stored.
• Do not insert or allow objects to enter any ventilation or exhaust opening as this may damage the
appliance and void the warranty.
• Do not cover the air inlet or outlet on the appliance.
• Do not direct the air ow at human faces or bodies. Do not allow children to play with this appliance.
• Do not attempt to repair or adjust any electrical or mechanical functions of this appliance, as this
may cause danger and void the warranty.
• If the appliance is damaged or it malfunctions, do not continue to use it. Unplug the product from the
electrical outlet. Refer to troubleshooting guide or contact AFX POWER.
• Do not stack this appliance to more than three units.

4
DESCRIPTION
DESCRIPTION
The EVAP dehumidier utilizes its integral humidistat to monitor the conditioned space. Once conditions
are outside the desired setpoint, the compressor energizes and air is drawn across the evaporator
coil. The evaporator coil is cooler than the dew point of the air so the water vapor will turn into liquid
condensation. The air is then reheated through the condenser coil and distributed back into the room.
AFX Power LGR (Low Grain Refrigerant) Commercial Dehumidiers are designed to maximize water
extraction while combining the highest eciency in performance and portability. Latest technology and a
high eciency extraction process ensures peak performance in even the most challenging environments,
such as extreme temperature and low environmental humidity. With high ecient water removal
capacity, the LGR (Low Grain Refrigerant) Dehumidier allows an extreme dry zone in the working
area and water migration to the air from all the surfaces. It is ideal for water damage restoration and
industrial applications where maximum air drying performance is needed.

5
OPERATION
OPERATION
SETUP
! IMPORTANT
Before using the dehumidier, place the unit UPRIGHT for at least 30 minutes before use to allow the
refrigerant to stabilize. If the unit was tilted on its side or upside-down during transportation, set the
unit UPRIGHT for at least 4 hours before use. The dehumidier must be positioned UPRIGHT on a level
surface during use.
Place the dehumidier in the center of the room away from walls and furnishings. DO NOT allow the
airow to be obstructed.
• Enclosed Area: For optimal eciency, the dehumidier must be operated in an enclosed area. Keep
all doors, windows and other outside entrances to the room closed. Turn off the air conditioning.
You may also nd that installing multiple dehumidiers may be required for larger enclosed areas.
For extremely high humidity, use a plastic pipe with diameter larger than 6. in, and tie the pipe to the
Exhaust for faster drying.
• Air Circulation: It’s suggested to have a constant ecient air circulation inside the area that you are
going to work in, for example, setting up a circulation with AFX Power Air Mover combinations.
• Environment Temperature/Humidity: The dehumidier is designed to work in an environment with
a temperature of 33°F to 100°F (1°C to 37°C) and relative humidity level of 20% and higher. The
dehumidier may not function normally or eciently if the room temperature and humidity level
exceed this temperature and humidity level range.
DRAIN HOSE
The dehumidier pump connects to a plastic drainage hose. The hose is stored on the side of the
appliance.
Uncoil the entire hose, ensuring there are no kinks or blockages prior to use.
Attach the drain hose inlet to the drain outlet of the machine.
Place the other end of the hose outside or into any sink, drain, or separate container to collect the
outgoing water. Water vessels must be checked regularly. The position of the drainage hose should not
be placed over 15 feet high to prevent water backup.

6
CONTROL PANEL
CONTROL PANEL
BUTTONS
1. POWER
2. UP
3. DOWN
4. LED Display
5. PURGE
6. TIME
7. Purging Indicator
8. Defrosting Indicator
9. Running Indicator
POWER
If the unit is plugged in but not in operation, the LED Display will display nothing. Press the POWER key
to turn the unit on. It will begin working automatically. The display will show the desired humidity on the
left and relative humidity on the right.
To turn the unit off, press POWER. The water pump will turn on automatically for 40 seconds to drain in
the remaining water and turn off automatically. Do not switch the power off by disconnecting the Power
Cord from the outlet. To avoid water spillage, do not move the dehumidier for at least three minutes
after turning the power off.
TIME
Press TIME to display current working time in hours and minutes. For example, if it displays “0000:50”,
it means that it has been in operation for 50 minutes. To view the total working time, press “T” once
more within 10s. If “T” is not touched for 10s, the display returns automatically returns to displaying
the humidity. The current working time can be reset by pressing “T” for 5s continuously. Resetting the
current working time will not affect the total working time.
Note: The total working time can not be deleted. If the time is beyond the range of LED showing time, it
will be deleted and recount from the start.

7
CONTROL PANEL + MAINTENANCE
HUMIDITY CONTROL
The desired humidity could be changed by pressing UP or DOWN keys to set or adjust humidity by 1%
increments in the range between 26% and 90%. When the environmental humidity is below 26% “CO” will
be displayed. Press and hold the UP or DOWN key to increase/decrease the desired humidity level by 5%
per second.
KEY LOCK
If “T” and “P” are pressed simultaneously for 2s, the defrost light will blink and all the keys on the control
panel will lock. Unlock the Control Panel by repeating the same action a second time.
MANUAL DRAINAGE
Press “P” to manually empty water from the pump reservoir before moving the machine to avoid water
spillage. During normal operation the pump purges automatically when the reservoir is full. Manual drain
will last for 3 minutes (180 seconds).
DEFROST INDICATOR
The unit begins to defrost automatically as needed when the defrost indicator lights up; the unit stops
defrosting when the defrost indicator is off. When defrosting nishes, the unit continues to dehumidify
automatically.
MAINTENANCE
Frequent maintenance is recommended on this appliance. Failure to follow the maintenance instructions
may cause failure of the appliance and void the warranty.
Before maintenance or storage, you should always:
10. Process a drainage manually.
11. Disconnect the machine from the power source.
12. Remove the drain hose.
BEFORE USE
1. Check the power cord for signs of damage such as fraying. Repair the cord before use if there is any
damage.
2. Check the lter for signs of dirt or obstructions. Clean or replace the lter as necessary.
3. Check the coils for signs of buildup. Clean if needed.

8
MAINTENANCE
FILTER MAINTENANCE
1. Unplug the unit.
2. Slide the lter from the grille.
3. Clean and wash the lters with warm water (no soap or cleaners). Gently shake the lter dry, then
reinsert it or store in dry and cool area in a sealed container.
4. Replace lters if necessary.
COIL MAINTENANCE
Once per year, clean the coils with an approved coil cleaner. Coil cleaner should be a self-rinsing,
foaming cleaner such as WEB® Coil Cleaner.
PUMP MAINTENANCE
1. To access the pump, remove the screws on the housing, then lift off.
2. Unplug the pump drain line, then remove the screws holding the pump in place.
3. Once the screws are removed, lift off the top of the pump and set aside.
4. Use a paper towel to wipe out the base of the pump, then reassemble.
STORAGE
Clean the Machine Body
Use a soft, damp cloth to clean the exterior of the unit. Do not use any soap or solvents. Do not clean the
unit with water directly.
Organize the Power Cord and Drain Hose
1. Remove the drain hose from the drainage outlet of the machine.
2. Open the velcro on the hangers.
3. Hang the power cord and drain hose on the hangers and close the velcro.
Store the appliance in a dry and cool indoor place, away from direct sunlight as well as chemicals and
out of reach of children. Make sure the machine is levelly positioned. If you want to stack these units,
stack them on their tops with the same orientation. Do not stack more than three units.
If the unit will be stored for an extended period of time, complete the following steps:
1. Turn off the unit and allow it to dry.
2. Clean out the pump reservoir.
3. Wrap and secure the power cord and
4. Cover lter mesh.
5. Store in a clean, dry space.

9
TROUBLESHOOTING
TROUBLESHOOTING
PROBLEM POSSIBLE CAUSE SOLUTION
Dehumidier does
not start.
No electricity. Check for power supply.
The power cord is not
properly plugged in.
Remove and reconnect the power cord.
Dehumidier runs
but humidity level
does not decrease.
The dehumidication system
is within startup process.
Wait for 3 minutes (180 seconds) until the
dehumidication light stops blinking.
The humidity level setting is
too high.
Decrease the humidity level setting.
The working area is not
enclosed.
Make sure the area is tightly sealed.
There are other sources of
humidity in the room.
Remove these sources or wait until they
completely volatilize.
The humidity level has
reached the setting level.
Decrease the humidity level setting, set to
constant dehumidication mode, wait until the
humidity level rises up again.
The machine was tilted and
wasn't positioned upright for
enough time before use.
Position the machine upright on a level surface
and wait for at least 30 minutes before next use.
The air lter or air inlet/outlet
is blocked.
Remove blockage.
The environment temperature
is too low/high or the
humidity level is too low.
The dehumidier is designed to work in an
environment with a temperature of 33°F to 105°F
(0.6°C to 40.6°C) and relative humidity level of
20% and higher. Make sure the room temperature/
humidity does not exceed this range.
Water on the oor. The drain hose is loose. Tighten the connection of the drain hose.
Sudden noise. The machine starts drainage
process.
The water pump can create sounds during
operation. This is a normal sound.

10
TROUBLESHOOTING
PROBLEM POSSIBLE CAUSE SOLUTION
Error Code: E1 Failure of the temperature
sensor.
The dehumidication can function but you won't
be able to see the temperature/humidity on the
screen. Contact AFX Power for more assistance.
Error Code: E2 Failure of the humidity
sensor.
Error Code: E3 Failure of the defrost sensor. Cycle power by turning the unit off and back on
again.
Error Code: E4 Failure of the water pump. Contact AFX Power for more assistance.
The machine is not
positioned levelly.
Position the machine on a level surface. Turn
power back on.
The drain hose is blocked. Remove blockage. Turn power back on.
If any of the above solutions do not resolve the problem or issue, please contact AFX POWER at 1-877-
881-3699 to determine next steps.

11
WARRANTY
EVAP
1 YEAR LIMITED WARRANTY (NORTH AMERICA)
AFX POWER products purchased in North America from authorized distributors include a one (1) year
limited warranty. Contact AFX POWER to confirm warranty information about your product(s).
This limited warranty covers defects in materials and workmanship in your AFX POWER branded
products purchased in North America only.
Please nish the online warranty registration before usage. Visit www.afxpower.com/warranty.
Items mentioned below are not covered by the limited warranty:
1. Power cord, lters or any other components considered as a “consumable parts.”
2. Normal wear and tear.
3. Problems that result, directly or indirectly, from:
i. External causes such as accident, abuse, misuse or problems with electrical power supply.
ii. Disassembling, servicing or modication not authorized by AFX POWER.
iii. Usage that is not in accordance with product instructions as stated in the Owner’s Manual.
iv. Failure to follow the product instructions or lack of necessary maintenance as described in the
Owner’s Manual.
Before contacting AFX POWER, please try one or more of the following:
1. Consult this Owner’s Manual and follow the instructions of troubleshooting guide.
2. Visit www.afxpower.com for more information which could address the issue.
If you need additional assistance from AFX Power, please:
1. Email info@afxpower.com; or
2. Call AFX POWER U.S. Customer Service Department at 1-877-881-3699.
Please also have your original proof of purchase ready when you contact AFX POWER. The proof of
purchase could be in the form of the original receipt from the retailer where the product was purchased.
/