TR1502_P1/9 03/15
James Hardie products contain respirable crystalline silica, which is known to the State of California to cause cancer and is considered by IARC and NIOSH to be a cause of cancer from some occupational
sources. Breathing excessive amounts of respirable silica dust can also cause a disabling and potentially fatal lung disease called silicosis, and has been linked with other diseases. Some studies suggest
smoking may increase these risks. During installation or handling: (1) work in outdoor areas with ample ventilation; (2) use fiber cement shears for cutting or, where not feasible, use a HardieBlade saw blade
and dust-reducing circular saw attached to a HEPA vacuum; (3) warn others in the immediate area; (4) wear a properly-fitted, NIOSH-approved dust mask or respirator (e.g. N-95) in accordance with applicable
government regulations and manufacturer instructions to further limit respirable silica exposures. During clean-up, use HEPA vacuums or wet cleanup methods - never dry sweep. For further information, refer
to our installation instructions and Material Safety Data Sheet available at www.jameshardie.com or by calling 1-800-9HARDIE (1-800-942-7343). FAILURE TO ADHERE TO OUR WARNINGS, MSDS, AND
INSTALLATION INSTRUCTIONS MAY LEAD TO SERIOUS PERSONAL INJURY OR DEATH.
SD050905
TABLE OF CONTENTS:
HardieTrim
®
boards are decorative non-load bearing trim products.
INSTALLATION REQUIREMENTS - 4/4, 5/4, BATTENS, PRIMED & COLORPLUS
®
PRODUCTS
Visit www.jameshardie.com for the most recent version.
Boards
OUTDOORS
1. Position cutting station so that wind will blow dust away from user
and others in working area.
2. Use one of the following methods:
a. Better: i. Dust reducing circular saw equipped with a
HardieBlade
®
saw blade and HEPA vacuum extraction
b. Good: i. Dust reducing circular saw with a HardieBlade saw blade
(only use for low to moderate cutting)
INDOORS
- NEVER use a power saw indoors
- NEVER use a circular saw blade that does not carry the HardieBlade
saw blade trademark
- NEVER dry sweep – Use wet suppression or HEPA Vacuum
NIOSH-approved respirators can be used in conjunction with above cutting practices to further reduce dust exposures. Additional exposure information is available
at www.jameshardie.com to help you determine the most appropriate cutting method for your job requirements. If concern still exists about exposure levels or you
do not comply with the above practices, you should always consult a qualified industrial hygienist or contact James Hardie for further information.
SD083105
CUTTING INSTRUCTIONS
STORAGE & HANDLING:
IMPORTANT: FAILURE TO INSTALL AND FINISH THIS PRODUCT IN ACCORDANCE WITH APPLICABLE BUILDING CODES AND JAMES HARDIE WRITTEN
APPLICATION INSTRUCTIONS MAY LEAD TO PERSONAL INJURY, AFFECT SYSTEM PERFORMANCE, VIOLATE LOCAL BUILDING CODES, AND VOID THE
PRODUCT ONLY WARRANTY. BEFORE INSTALLATION, CONFIRM THAT YOU ARE USING THE CORRECT HARDIEZONE INSTRUCTIONS. INSTALLATION OF
HZ10 PRODUCTS OUTSIDE AN HZ10 LOCATION WILL VOID YOUR WARRANTY. TO DETERMINE WHICH HARDIEZONE APPLIES TO YOUR LOCATION,
VISIT WWW.HARDIEZONE.COM OR CALL 1-866-942-7343 (866 9HARDIE)
These instructions are to be used for HardieTrim
®
HZ10
®
Boards ONLY and are NOT VALID in the following states: AK, UT, ID, CO, WY, MT. These instructions
are also NOT valid in portions of WA, OR, CA, NV, AZ, NM. Enter your zip code at www.hardiezone.com to find out what zone applies to your location.
Store flat and keep dry and covered prior to
installation. Installing James Hardie siding
product wet or saturated may result in
shrinkage at butt joints. Carry product on edge.
Protect edges and corners from breakage.
James Hardie is not responsible for damage
caused by improper storage and handling of
the product.
GENERAL REQUIREMENTS Page 1
FLASHING/CLEARANCE REQUIREMENTS Page 2
FASTENING Page 3
Face Nailing Requirements Page 3
INSTALLATION Page 4-8
Trimming Corners Page 4
Openings Page 4
Band Boards Page 4
Frieze Page 4
Batten Boards Page 5
Fascia Page 6
HardieTrim
™
Tabs Page 7-8
FINISHING Page 9
• Wood or steel must be provided for attaching HardieTrim boards.
• Follow all applicable codes when installing HardieTrim boards.
• DO NOT install HardieTrim boards, such that they may remain in contact with standing water.
• DO NOT use stain, oil/alkyd base paint, or powder coating on James Hardie Products.
Do not use HardieTrim boards to replace any structural component.
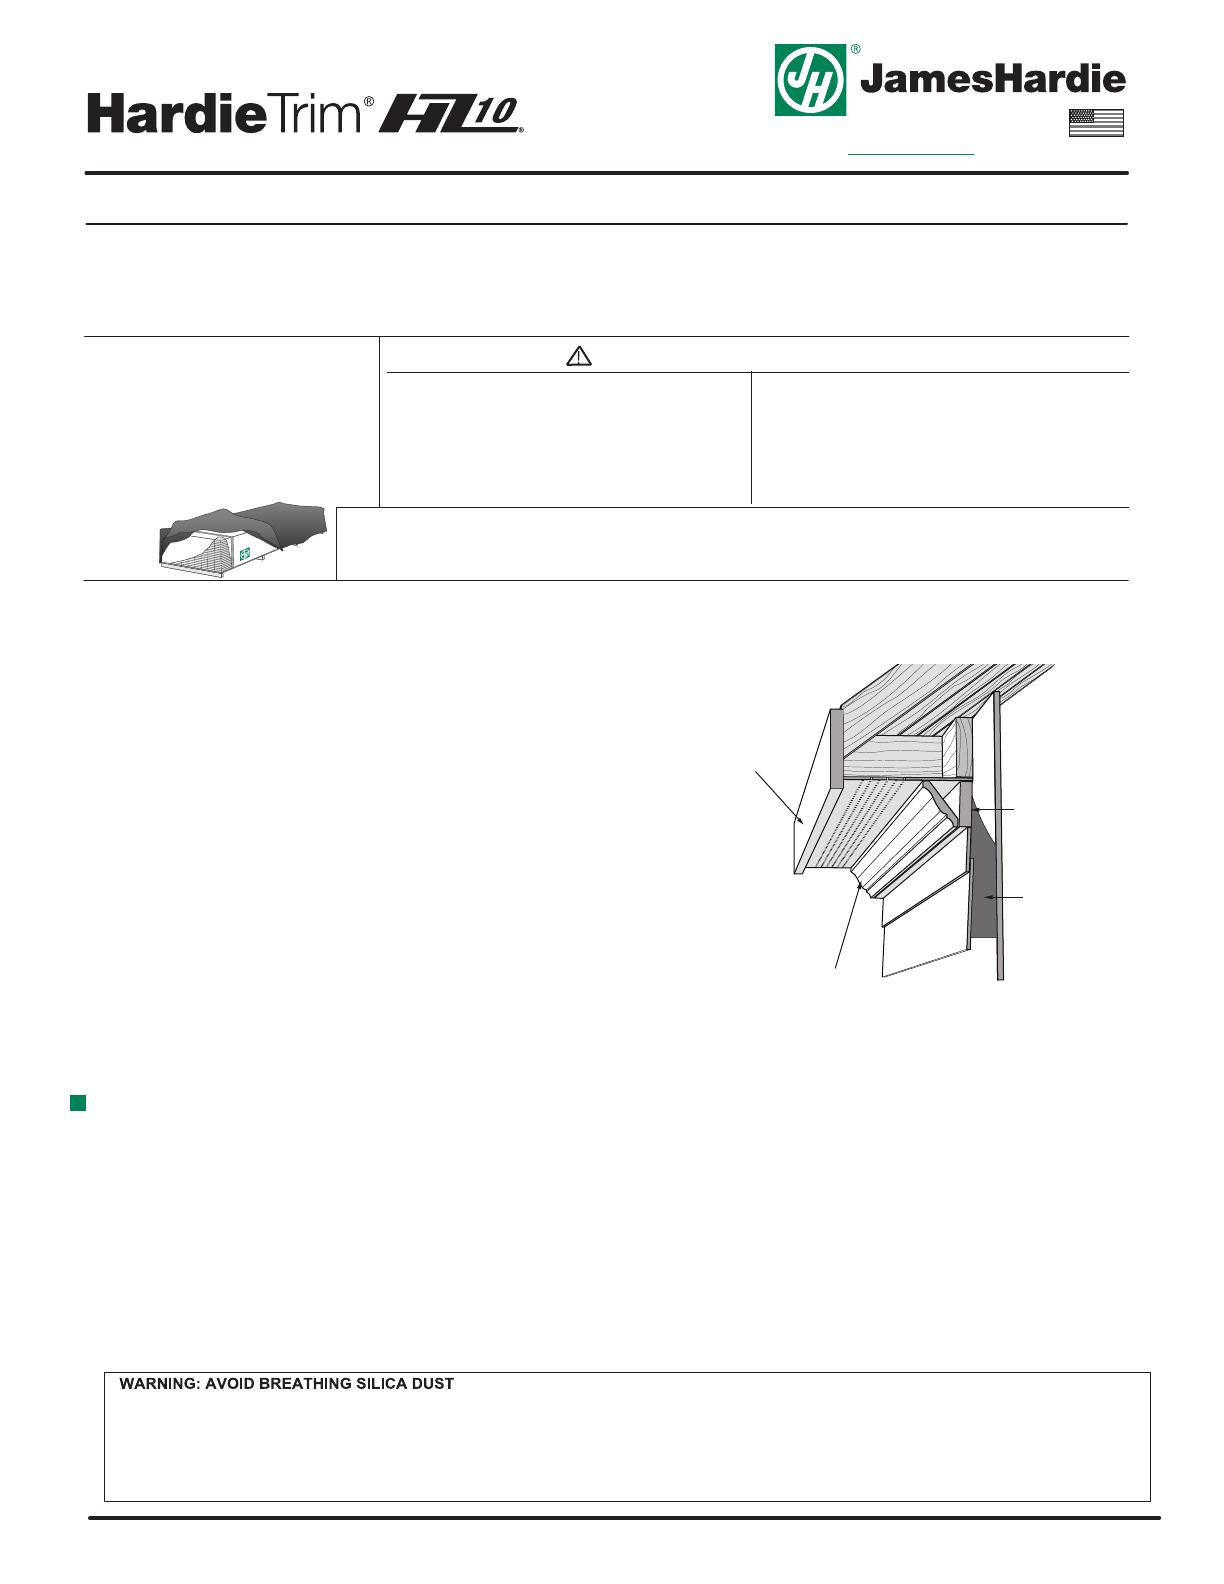
GENERAL REQUIREMENTS
HardieTrim
Boards
HardieTrim
Boards
HardiePlank
Lap Siding
HardieTrim
Crown Moulding
water-
resistive
barrier
Figure 1
EFFECTIVE MAY 2015


