Page is loading ...

Distributed by:
Perfect Aire, LLC
5401 Dansher Rd.
Countryside, IL 60525
844-4PA-AIRE | 844-472-2473
www.perfectaire.us
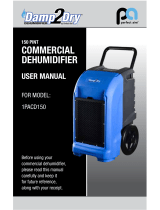
PORTABLE
AIR CONDITIONER
FOR MODELS:
1PPEC8000
1PPEC10000
1PPEC12000
Before using your air conditioner, please
read this manual carefully and keep it for
future reference, along with your receipt.
Specification and performance data is subject to change without notice.
Printed in China
PA/User_1PPECs/11212017
USER MANUAL

For your own records, please attach a copy of your sales receipt to this manual and complete
the following:
Model Number:
_______________________________________ Serial Number: _________________________________________
Purchase Date: _______________________________________ Store Purchased: ______________________________________
Installation Date: _____________________________________ Installation Co.: ________________________________________
Installer Name: _______________________________________ Installer Phone No.: ___________________________________
CONSUMER PRODUCT INFORMATION

This manual provides the information needed for proper use and maintenance of this air conditioner.
Basic preventative care can help extend the life of this unit. The “Troubleshooting” section in this
manual contains a chart with solutions to the most common problems. Referring to this section may
save time and prevent the need for a service call in the even of a problem.
OPERATING CONDITIONS
The air conditioner must be operated within the temperature range indicated below:
MODE ROOM TEMPERATURE
COOL 64°F – 90°F
ENERGY SAVING TIPS
• Usetheunitintherecommendedroomsize.
• Locatetheunitwherefurniturecannotobstructtheairow.
• Keepblinds/curtainsclosedduringthesunniestpartoftheday(coolingmode).
• Keepdoorsandwindowsclosedtokeepcoolairinandwarmairout(coolingmode)orkeepwarm
airinandcoolairout(heatingmodeforunitswithheatingfunction).
NOTE:Alltheillustrationsinthismanualareforexplanationpurposesonly.Unitpurchasedmaybe
slightlydierent.
Thedesignandspecicationsaresubjecttochangewithoutpriornoticeforproductimprovement.
ContactConsumerServicesat844-4PA-AIRE(844-472-2473)fordetails.
CONTENTS
IMPORTANT SAFEGUARDS ..............................................................................1
LCDI POWER CORD & PLUG ............................................................................2
PARTS DIAGRAM ................................................................................................3
WINDOW KIT PARTS & INSTALLATION ..........................................................4
DESCRIPTION OF THE CONTROL PANEL ......................................................7
OPERATING THE CONTROL PANEL ................................................................7
TIPS FOR BEST PERFORMANCE ......................................................................10
WATER DRAINAGE ............................................................................................10
REMOTE CONTROL ...........................................................................................12
MAINTENANCE ..................................................................................................15
UNIT SPECIFICATIONS ......................................................................................16
TROUBLESHOOTING .........................................................................................17
NOTE: Performance may be
reduced outside of these
operating temperatures.

ABOUT FLUORINATED GASES
• Thisairconditioningunitisahermeticallysealedunitthatcontainsfluorinatedgases.
For specific information on the type of gas and the amount, please refer to the relevant
label on the unit itself.
• Installation,service,maintenanceandrepairofthisunitmustbeperformedbya
certified technician.
• Productuninstallationandrecyclingmustbeperformedbyacertifiedtechnician.
• Whentheunitischeckedforleaks,properrecord-keepingofallchecksis
strongly recommended.

1
IMPORTANT SAFEGUARDS
Usethisunitonlyasdescribedinthisinstructionmanual.Aswithallelectricalequipment,whilethe
instructions aim to cover as many problems as possible, caution and common sense should be
applied when operating and installing this unit.
• Thisunitisdesignedforhomeairconditioningandmustnotbeusedforotherpurposes.Itis
dangerous to modify or alter the characteristics of the unit in any way.
• Theunitmustbeinstalledinconformitywithnationallegislationregulatingelectricalequipment
and installations.
• Iftheunitrequiresrepair,contactaServiceCenterauthorizedbythemanufactureronly.Repairs
carriedoutbyunauthorizedpersonnelmaybedangerousandwillvoidthewarranty.Thisunitmust
be used exclusively by adults.
• Neverallowtheunittobeusedbypeople(includingchildren)withpsychological,physicalor
sensoryimpairmentsorwithinsucientexperienceandknowledge,unlesscloselysupervisedand
instructed by someone responsible for their safety. Young children should be supervised to ensure
that they do not play with the unit.
• Theunitmustbeusedinaproperlygroundedwallreceptacle.Ifthewallreceptacleyouintend
touseisnotadequatelygroundedorprotectedbyatimedelayfuseorcircuitbreaker,havea
qualiedelectricianinstallaproperreceptacle.Haveyourelectricalcircuitcheckedbya
qualiedelectrician.
• Donotuseextensioncordorplugadapter.
• Alwaysunplugtheunitbeforecleaningorperformingmaintenance.
• Unitmustbepluggedintoitsowndedicatedoutlet.
• Neverunplugtheunitbypullingonthepowercord.
• Donotinstalltheunitinroomscontaininggas,oilorsulfur.Donotinstallnearheatsources.Keep
theunitatleast20inches(50cm)awayfromammablesubstances(alcoholetc)orpressurized
containers(e.g.aerosolcans).
• Donotrestheavyorhotobjectsontopoftheunit.
• Cleantheairlteratleastonceaweek(asshownonpage15).
• Avoidusingheatingunitsneartheairconditioner.
• Iftheunithasbeensetonitsside,placeuprightfor24hoursbeforestartingtheunit.Always
transport the unit upright or resting on one side. Before moving the appliance, empty the internal
traycompletelyofwater.Aftermovingtheunit,waitatleast1hourbeforestartingit.
• Whenputtingtheunitaway,donotcoverwithplasticbags.
• Thematerialsusedforpackagingcanberecycled.Youarethereforerecommendedtodisposeof
theminspecialdierentiatedwastecollectioncontainers.
• Ifthepowercableisdamaged,itmustbereplacedbythemanufactureroranauthorizedtechnical
servicecenterinordertoavoidallrisk.
• Properlydisposeoftheunitaccordingtolegalwastecodes.
ELECTRICAL CONNECTIONS
Beforepluggingtheunitintothemainsocket,checkthat:
• themainpowersupplycorrespondstothevalueindicatedontheratingplateonthebackof
the unit;
• thepowersocketandelectricalcircuitareadequatefortheunit;
• themainsocketmatchestheplug.Ifthisisnotthecase,havetheplugreplaced;
• themainsocketisadequatelygrounded.
FAILURE TO FOLLOW THESE IMPORTANT SAFETY INSTRUCTIONS ABSOLVES THE MANUFACTURER OF
ALL LIABILITY.

2
LCDI POWER CORD & PLUG
ThisairconditionerisequippedwithanLCDI(LeakageCurrentDetectionandInterruption)power
cordandplugasrequiredbyUSNationalElectricCode440.65.Thiscordconsistsofalengthof
shieldedexiblecordwithnoterminationontheloadsideandaLCDIattachmentplugonthe
line side.
TheLCDIpowercordandplugwillremovethesupplysourceviaelectricaldisconnect(circuit
trip)ifthenominalcurrentleakagebetweenthecordshieldandeitherloadconductorexceedsa
predeterminedvalue.Thecordwillremainde-energizeduntilthedevicehasbeenmanuallyreset.This
isintendedtoreducetheriskofareinthepowercordorcombustiblematerialsnearby.Thecord
shieldsarenotgroundedandtheymustbeconsideredshockhazardsifexposed.Thecordshield
must not be connected to the ground or to any exposed metal.
ThetestandresetbuttonsontheLCDIPlugareusedtocheckiftheplugisfunctioningproperly.To
test, follow the steps below that correspond to the plug on your unit:
NOTEYourunit’spowercordmaydierfromtheoneshown.
Iftestbuttonispressedandunitcanstillbeturnedon,currentleakagehasbeendetected.Donot
use the air conditioner or attempt to reset the LCDI Plug. Contact Perfect Aire Consumer Services at
844-472-2473fortroubleshootingrecommendations.
WARNING
1. DO NOT press the TEST button while the air conditioner is operating.
2. TheTESTandRESETbuttonsshouldnotbeusedas“ON”and“OFF”switches.
3. Thecordandplugarenotintendedtooerprotectiontoexternallyconnectedloadsor
supply circuits.
4. The cord and plug are intended for indoor use only.
LCDI POWER CORD & PLUG
1. Plugpowercordintowalloutlet.
2. PressTESTButton,circuitshouldtrip,
cutting power to the air conditioner.
3. PressRESETbuttonforuse.
ALTERNATE PLUG WITH LED LIGHT
1. Plugpowercordintowalloutlet.TheLED
light will turn on.
2. PressTESTButton,circuitshouldtrip,
cuttingpowertotheairconditioner.When
thisoccurs,theLEDlightwillturno.
3. PressRESETbuttonforuse.Oncepower
is restored, the LED light will turn on again.
LED
LIGHT
RESET
TEST

3
1
2
4
5
3
6
7
8
10A
10
9
18
20
19
17
16
14
11
12
15
13
1
2
4
5
3
6
7
8
10A
10
9
18
20
19
17
16
14
11
12
15
13
1. AirOutletGrille
2. ControlPanel
3. Casters
4. AirIntakeGrille
5. RemoteControlSensor
6. Upper&LowerAirFilters
7. CarryingHandle
8. AirExhaustHoseDischargeOpening
9. CondensationDrainHole
10. PowerCord
10A. PowerCordWrap
11. ExhaustHose
12. WindowKitAdapter
13. ExhaustHoseConnector
14. RemoteControl
15. CasterLocks
16. WindowKitScrews(2x)
17. WindowKit
18. WindowKitAdapterExtension
19. DrainageHose
20. RubberPlug(spareinbag)
21. ProductManual(notshown)
PARTS DIAGRAM
NOTE: All the pictures in the manual are for
explanation purposes only. The actual shape of
theunityoupurchasedmaybeslightlydierent.

4
WINDOW KIT PARTS & INSTALLATION
PARTS
INSTALLATION
WhentheunitisoperatinginCOOL or DRY mode, the unit draws in indoor air and exhausts hot air
outoftheroomtocompletetheairexchange.WhentheunitisoperatinginFAN mode no outdoor air
exchangetakesplace.Thewindowkitandexhausthosedonotneedtobeinstalledwhentheunitis
used as a fan or in DRY mode.
NOTE:Thesuppliedwindowkitcanbeinstalledinslidingwindowsordoublehungwindowsupto4.6
ft.long(approximatelength).
Choosealocationnearagroundedelectricaloutletandsuitablewindow.Removepackagingand
locate components.
EXHAUST HOSE
WINDOW KIT
Window Kit Adapter
Window Kit Screws
Exhaust Hose
Connector
Window Kit Adapter Extension
Exhaust Hose

5
Screw
Screw
1 Screw
Panel with
Exhaust
Opening
Panel without
Exhaust Opening
Panel
A
A
A
D
D
B
B
B
C
D
D
C
C
Parts:
A. Panel
B. Panel with one exhaust hose opening
C. Panel without exhaust hose opening
D.Screwstolockpanelstogether
1. Assembly Panel
SlidePanelBandCintoPanelAandsizetowindow
width.Windowssizesvary.Whensizingthewindow
width,besurethatthewindowkitassemblyisfreefrom
gapsand/orairpocketswhentakingmeasurements.
2. Security Panels
Insert the screws into the holes that correspond with
thewidththatyourwindowrequirestoensurethat
therearenogapsorairpocketsinthewindowkit
assembly after installation.

6
ThewindowkitandexhausthosemustbeinstalledinorderfortheunittoworkcorrectlyinCOOL
modeandAUTOmode.ThewindowkitandexhausthoseshouldnotbeusedwhiletheunitisinFAN
mode or DRY mode.
Thewindowkithasbeendesignedtotintomostverticalandhorizontalwindowopenings,not
including casement windows.
1a.Extendbothendsofthe
exhaust hose approximately 6 in.
1b.Screwthewindowkitadapter
onto one end of the exhaust hose
counter-clockwise.
1c.Screwtheexhausthose
connector onto the other end of the
exhausthosecounter-clockwise.
3.Openthewindowordoor
toadjustthelengthofthe
WindowKittottheopening.If
necessary,markthekitandcut
oneenddowntoproperlytthe
opening.(Werecommendusing
ahacksawforthisprocess.)
4.AttachtheWindowKitAdaptertotheWindowKit.
AttachtheWindowKitExtensionAdaptertotheWindow
KitAdapterifnecessary.Closethewindowtightly.Your
Portable Air Conditioner is ready to go.
NOTE:Whenusingtheventingsystem,keeptheExhaust
Hoseasstraightaspossible.TheExhaustHosecanbe
shortened, but increasing the length of the exhaust hose is
not recommended. DO NOT use an extension cord with your
Portable Air Conditioner.
NOTE:ThePortableAirConditionerabovemaydierfrom
the unit described in this manual. The above directions and
images show general directions for Perfect Aire single hose
Portable Air Conditioners.
2.Connect
the Exhaust
Hoseover
the discharge
opening on
thebackof
the unit
STEP 1
STEP 2
STEP 3
STEP 4
Window Kit
Adapter
*Window Kit Adapter
Extension (if necessary)
*Window Kit Adapter Extension is an optional part that
can be used on window sizes that require a longer
connection between the window and the exhaust hose.

7
1. COOL
2. DRY
3. FAN
4. SMART
5. SLEEP
6. FAN Speed
7. TIMER
8. Digital Readout
(Temperature,Timer,ErrorCode)
9. ON/OFFButton
10. FANSpeedButton
11. SWINGButton
12. MODEButton(selectsthemode)
13. Increase(
)andDecrease( )
Temperature Buttons
DESCRIPTION OF THE CONTROL PANEL
OPERATING THE CONTROL PANEL
1 8 72
3 4 5 6
9
1012
11
13 13
The control panel enables you to manage all the main functions of the unit,
buttofullyutilizetheunit’sfeatures,youmustusetheremotecontrol.
TURNING THE UNIT ON / MODES
• Plugunitintothewalloutlet.Twolinesappearonthedisplayindicating
that the unit is in standby.
• PresstheON/OFF
button until the unit powers on. The last active
functionbeforetheunitwasturnedowillappear.
NOTE: Never turn the air conditioner off by unplugging it from the electrical outlet in the wall. Always
press the ON/OFF
button, then wait for a few minutes before unplugging from the wall. This allows the
unit to perform a cycle of checks to verify operation.

8
COOL MODE
Ideal for hot muggy weather when you need to cool and dehumidify the room.
To properly set this mode:
• Makesuretheexhausthoseisproperlyinstalled.
• PresstheMODE
button until the COOL symbol appears.
• Selectthetargettemperaturebypressingthe
or buttons until the
desired temperature is displayed.
• SelecttherequiredfanspeedbypressingtheFAN
button. Four speeds are available:
Low speed: for silent operation
Medium speed: reduces noise levels but still maintains a good level of comfort
Maximum speed: to achieve the target tempe rature as rapidly as possible
Auto fan: the unit automatically selects the most suitable fan speed in relation to the
temperature set on the digital display
NOTE:Themostsuitabletemperaturefortheroomduringthesummervariesfrom75ºF–80ºF(24ºC–
27ºC).Itisrecommended,however,nottosetatemperaturemuchbelowtheoutdoortemperature.
DRY MODE
Ideallyusedtoreduceroomhumidity(springandautumn,damprooms,rainy
periods,etc.).InDRY mode,theexhausthoseandwindowkitshouldbe
removed. To properly set this mode:
• PresstheMODE
button until the DRY symbol appears.
NOTE:Inthismode,thefanspeedispresetandcannotbemanuallyadjusted.

9
FAN MODE
Whenusingtheunitinthismode,theexhausthosedoesnotneedtobeattached.Toproperlysetthis
mode:
• PresstheMODE
button until the FAN symbol appears.
• SelectthedesiredfanspeedbypressingtheFAN
button. Three speeds are available:
Low speed: for silent operation
Medium speed: reduces noise levels but still maintains a good level of comfort
Maximum speed: to achieve the target tempe rature as rapidly as possible
NOTE:InthismodeAUTOspeedcannotbeselected.
SMART MODE
This unit automatically chooses whether to operate in COOL or FAN mode. To properly set this
mode:
• PresstheMODE
button until the SMART symbol appears.
SLEEP FUNCTION
This mode can only be set with the remote control. Please refer to remote control instructions on the
following pages.
ERROR CODES
If the Unit
Displays This
What Should I Do?
Low Temperature (frost prevention) - The unit is
fitted with a frost protection device to avoid excessive
formation of ice. The unit starts up again automatically
when defrosting process is complete.
Probe Failure (sensor damaged) - If this is displayed,
contact Consumer Services at 844-472-2473.
Full Tank (safety tank full) - Empty the internal safety
tank following the instructions in the “End of Season
Operations” paragraph on page 16.

10
TIPS FOR BEST PERFORMANCE
WATER DRAINAGE
To get the most out of your air conditioner, follow these recommendations:
• Closeallthewindowsintheroom.
• Protecttheroomfromdirectexposuretothesunbypartiallyclosingcurtainsand/orblindsto
maketheunitmuchmoreecient.
• NEVERrestobjectsofanykindontheairconditioner.
• DO NOTobstructtheairintakeandoutlet.Leavethegrillesfree.
• Makesuretherearenoheatsourcesintheroom.
• NEVERusetheunitinverydamprooms(suchasthelaundryroom).
• NEVER use the unit outdoors.
• Makesuretheairconditionerisstandingonalevelsurface.Ifnecessary,placecasterlocks
under the front wheels.
ThisairconditionerisequippedwithMISTtechnologywhichmeansthewatertanknearlyneverlls.
Hence,waterdrainagewillgenerallyonlyberequiredattheendoftheseason.(SeeSTART&ENDOF
SEASONOPERATIONSonpage16.)Onrareoccasions,thetankmaystillrequireemptyingduringthe
seasonasindicatedby“Ft”(FullTank)ontheunitdisplay.
NOTE:Asasafetymeasure,toabsolutelypreventwaterspillage,theairconditionerisequippedwith
afailsafedeviceifthewatertanklls.Theunitwillcompletelystop,thecontrolpaneldisplays“Ft”
(“FullTank”asmentionedintheERRORCODEsectiononthepreviouspage),andthecompressor
andfanwillnotrestartuntilthetankhasbeendrained.(SeeSTART&ENDOFSEASONOPERATIONS
onpage16.)
Close
Curtains
Do Not Cover
The Unit

11
INTERMITTENT DRAINAGE
(SEE FIG. A BELOW)
• Turntheairconditioneroandunplugunit,thendrainthewatertankbyremovingthedrainplug
andallowingthewatertoowintoadrainpan(notprovided).Dependingonthesizeofthepan
being used, this step may have to be repeated. It may be easier to wheel the unit to the nearest
drain hole or outside, remove the drain plug and drain the water onto the ground freely.
• Thewatertankisconsideredsucientlyemptiedwhennomorewaterowsfromthedrainoutlet.
Tocompletelydrainallwaterfromthewatertank,carefullytilttheunitbyliftingitslightlyupwards
from the front until no more water drains from the outlet. Replace drain plug.
• RestarttheairconditionerbypressingtheON/OFFbutton.EnsurethattheunitisinCOOLorDRY
mode.Thecompressorwillstartapproximately3minutesaftertheunitisswitchedon.
CONTINUOUS DRAINAGE
(SEE FIG. B BELOW)
Thoughnotlikelyneeded,shouldyouwishtosetupacontinuousdrainratherthanpotentialmanual
drainage, follow these instructions:
• Emptythewatertankcompletely,asinstructedabove.
• Connectoneendofthedrainhose(provided)tothedrainoutlet,andleadtheotherendoutdoors
or place where it can be drained freely.
• Turnontheunit.
• Iflongerhoseisneededyoucanpurchaseonewith9/16inchinnerdiameteratyourlocal
hardware store.
Drain Plug
Drain Plug
Drain Pan (not provided)
Drain Outlet
Drain Outlet Drain Hose
A B
NOTE:
Thedrainhoseshouldbenolongerthan6ft.andshouldallowwatertoowdownward.Continuous
drainagewillnotworkifanypartofthehosedoesnotallowgravitytotakewaterdownward.

12
REMOTE CONTROL
NOTES ABOUT THE REMOTE CONTROL:
• Pointtheremotecontrolatthereceiverontheunit.
Theremotecontrolmustbenomorethan23ft(7m)
awayfromtheunit(withoutobstaclesbetweenthe
remotecontrolandthereceiver).
• Theremotecontrolmustbehandledwithextreme
care. Do not drop it or expose it to direct sunlight or
sources of heat.
• Forbestoperation,donotmixoldandnewbatteries.
LCD Display
MODE Button
(Cool, Dry, Fan)
TIMER Button
SLEEP Button
SWING Button
°C/°F Button
Fan Speed
TIMER/TEMP Decrease
TIMER/TEMP Increase
POWER Button
This button does
not have a function
MAX 23 ft (7m)

13
INSERTING OR REPLACING THE BATTERIES
• Removethecoverontherearoftheremotecontrol.
• Inserttwo“AAA”1.5Vbatteriesinthecorrectposition.(See
instructionsinsidethebatterycompartment).
• Replacethecover.
NOTE: If the remote control unit is replaced or disposed of, the
batteries must be removed and discarded in accordance with current
legislations as they are harmful to the environment.
USING THE REMOTE CONTROL
Note: / Arrows on screen indicate current function.
COOL MODE
• PresstheON/OFF button to turn the unit on.
• PresstheMODE button to select COOL . An arrow will
appear next to this icon to indicate that it is selected.
• Selectthetargettemperaturebypressingthe
or buttons.
• SelecttherequiredfanspeedbypressingtheFAN button until
therequiredspeedisselected(AUTO/HIGH/MED/LOW).
NOTE: In COOL mode, the unit automatically removes excess
moisture from the air.
DRY MODE
• Keepthewindowsanddoorsclosedforeective
dehumidication.
• Whenusedasadehumidieronly,disconnecttheexhausthose
from the air conditioner.
• PresstheON/OFF
button to turn the unit on.
• PresstheMODE button to select DRY . An arrow will appear
next to this icon to indicate that it is selected. The fan speed will
alwaysbepresetandcannotbeadjusted.
FAN MODE
• PresstheON/OFF button to turn the unit on.
• PresstheMODE button to select FAN . An arrow will appear
next to this icon to indicate that it is selected.
• Toselectfanspeed,presstheFAN
button until the desired
speedisselected(HIGH/MED/LOW).AUTOfanspeedcannotbe
selected in this mode.
• Fanspeedisindicatedbytheontherightsideofthescreen.
ON OFF
ON OFF
ON OFF

14
SMART MODE
• TheunitautomaticallyselectstooperateinCOOL or FAN
mode.
• Tosetthismode,presstheMODE button until the arrow next
to the SMART
symbol appears.
SLEEP FUNCTION
Thetemperaturesettingwillgraduallyincreaseto1ºFabovethe
originalsettemperatureforeachoftherst2hours.Theunitwill
keepoperatingatthesametemperaturefor6hours,thenswitchto
standby mode. To set this function:
• Selecttheoperatingmode(COOL/DRY/SMART).
• PresstheSLEEP
button; the unit will operate in the
selected mode.
SWING FUNCTION
Thisfunctionisusefulforselectingtheleft/rightswingofairdelivery.
To set this function:
• Selecttheoperatingmode(COOL/DRY/FAN/SMART).
• PresstheSWING
button to activate this function.
• PresstheSWING
button again to deactivate this function.
SETTING THE TIMER
The timer can be used to delay the unit’s start or stop time to avoid wasting electricity by
optimizingoperatingperiod.
TIMER OFF FUNCTION
1. WiththeunitON,presstheTIMER button. The is displayed
above the TIMER OFF to indicate that it is active.
2. Setthetimeyouwanttheunittoswitchousingthe
and
buttons(from30minutesto24hours).
•Duringtherst10hoursyoucanselect30minuteintervalsupto
9.5hours;After10hours,only1hourintervalscanbeselected.
3. PresstheTIMER
buttonagaintoconrmthesetting.The
TIMER icon on the control panel will be activated.
•Attheendofthesettime,theunitautomaticallyswitchesOFF.
•TocanceltheTIMERsetting,presstheTIMER button again at any point during the set time.
ON OFF
ON OFF
ON OFF
ON OFF

15
TIMER ON FUNCTION
1. WiththeunitON,setoperatingmode,temperatureandfanspeed
before setting TIMER ON function.
2. PressON/OFF
button to switch into STANDBY.
3. PresstheTIMER
button twice. The is displayed above the
TIMER ON to indicate that it is active.
4. Setthetimeyouwanttheunittoswitchousingthe
and
buttons(from30minutesto24hours).
•Duringtherst10hoursyoucanselect30minuteintervalsupto9.5hours;After10hours,only1
hour intervals can be selected.
5. PresstheTIMER
buttonagaintoconrmthesetting.TheTIMERicononthecontrolpanelwill
be activated.
•Attheendofthesettime,theunitswitchesONautomatically.
•TocanceltheTIMERsetting,presstheTIMER button again at any point during the set time.
ON OFF
MAINTENANCE
CLEANING
Beforecleaningorperformingmaintenance,turntheunitOFFbypressingtheON/OFF button on
thecontrolpanelorON/OFF buttonontheremotecontrol.Waitforafewminutes,thenunplug
from the main wall outlet.
CLEANING THE CABINET
You should clean the unit with a slightly damp cloth, then dry with a dry cloth.
• NEVER wash the air conditioner with water. It could be dangerous and damage the unit.
• NEVER use petrol, alcohol, or solvents to clean the unit.
• NEVERsprayinsecticideliquidorsimilarsubstancesontheunit.
CLEANING THE AIR FILTERS
Tokeepyourairconditionerworkingeciently,youshould
cleanthelterseveryweek.
Theltersarehousedbehindtheupperandlowerintake
grilles.(Seegureonright.)
Useavacuumcleanertoremovedustaccumulationfromthe
lters.Iftheyareverydirty,immersetheminwarmwaterand
rinsethemanumberoftimes.Afterwashing,lettheltersdry
completely,thenplacethemsecurelybackintotheunit.

16
START & END OF SEASON OPERATIONS
START OF SEASON
• Makesurethepowercordandplugarenotdamagedand
thatthegroundingsystemisecient.
• Followtheinstallationinstructionsprecisely.
END OF SEASON
• Toemptytheinternaltrayofwater,rstremovetheplug.
• Completelyemptywaterintoabasinortray.Whenallof
the water has been drained, replace the plug.
• Cleanthelteranddrythoroughlybeforereinstalling.
• Storeindoorsinawarmanddrysafespacewithallparts.
• Removethebatteriesfromtheremotewhenstoringforan
extended period of time.
• Noiselevelismeasuredatadistanceof3.28ftawayfromthefrontoftheunit,whentheunitisin
cooling mode.
• Powerconsumptionismeasuredwhenthefanrunsatthehighestspeedsetting.
• Thesespecicationsareforreferenceonly.Foractualdata,pleaserefertotheratinglabelonthe
backoftheunit.
• Ifthetemperatureoftheoperatingenvironmentishigherthanthemaxoperatingtemperatureor
lowerthantheminimumoperatingtemperature,theairconditionermaynotworkproperly.
1PPEC8000 1PPEC10000 1PPEC12000
COOLING CAPACITY
8,000BTU/Hr 10,000BTU/Hr 12,000BTU/Hr
DEHUMIDIFYING
CAPACITY
86 pts per Day 107ptsperDay 117ptsperDay
COOLING POWER USAGE
914Watts,8.3Amps 991Watts,9.1Amps 1200Watts,10.2Amps
AIR FLOW VOLUME
206CFM 206CFM 206CFM
POWER SOURCE
115V/60HZ 115V/60HZ 115V/60HZ
SOUND PRESSURE LEVEL
53dB(A) 53dB(A) 54dB(A)
PRODUCT WEIGHT
59.5Lbs 60.6 Lbs 62.8Lbs
OPERATING TEMP.
70°F–95°F 70°F–95°F 70°F–95°F
PRODUCT DIMENSIONS
(W x D x H)
10.625ʺx18.875ʺ x
27.375ʺ
10.625ʺx18.875ʺ x
27.375ʺ
10.625ʺx18.875ʺ x
27.375"
REFRIGERANT
R-410A R-410A R-410A
UNIT SPECIFICATIONS
/