Installation
Guide Note: Read the [Important] section carefully before starting the installation
Quick
Installation
Complete the following steps for quick installation: (See the figure)
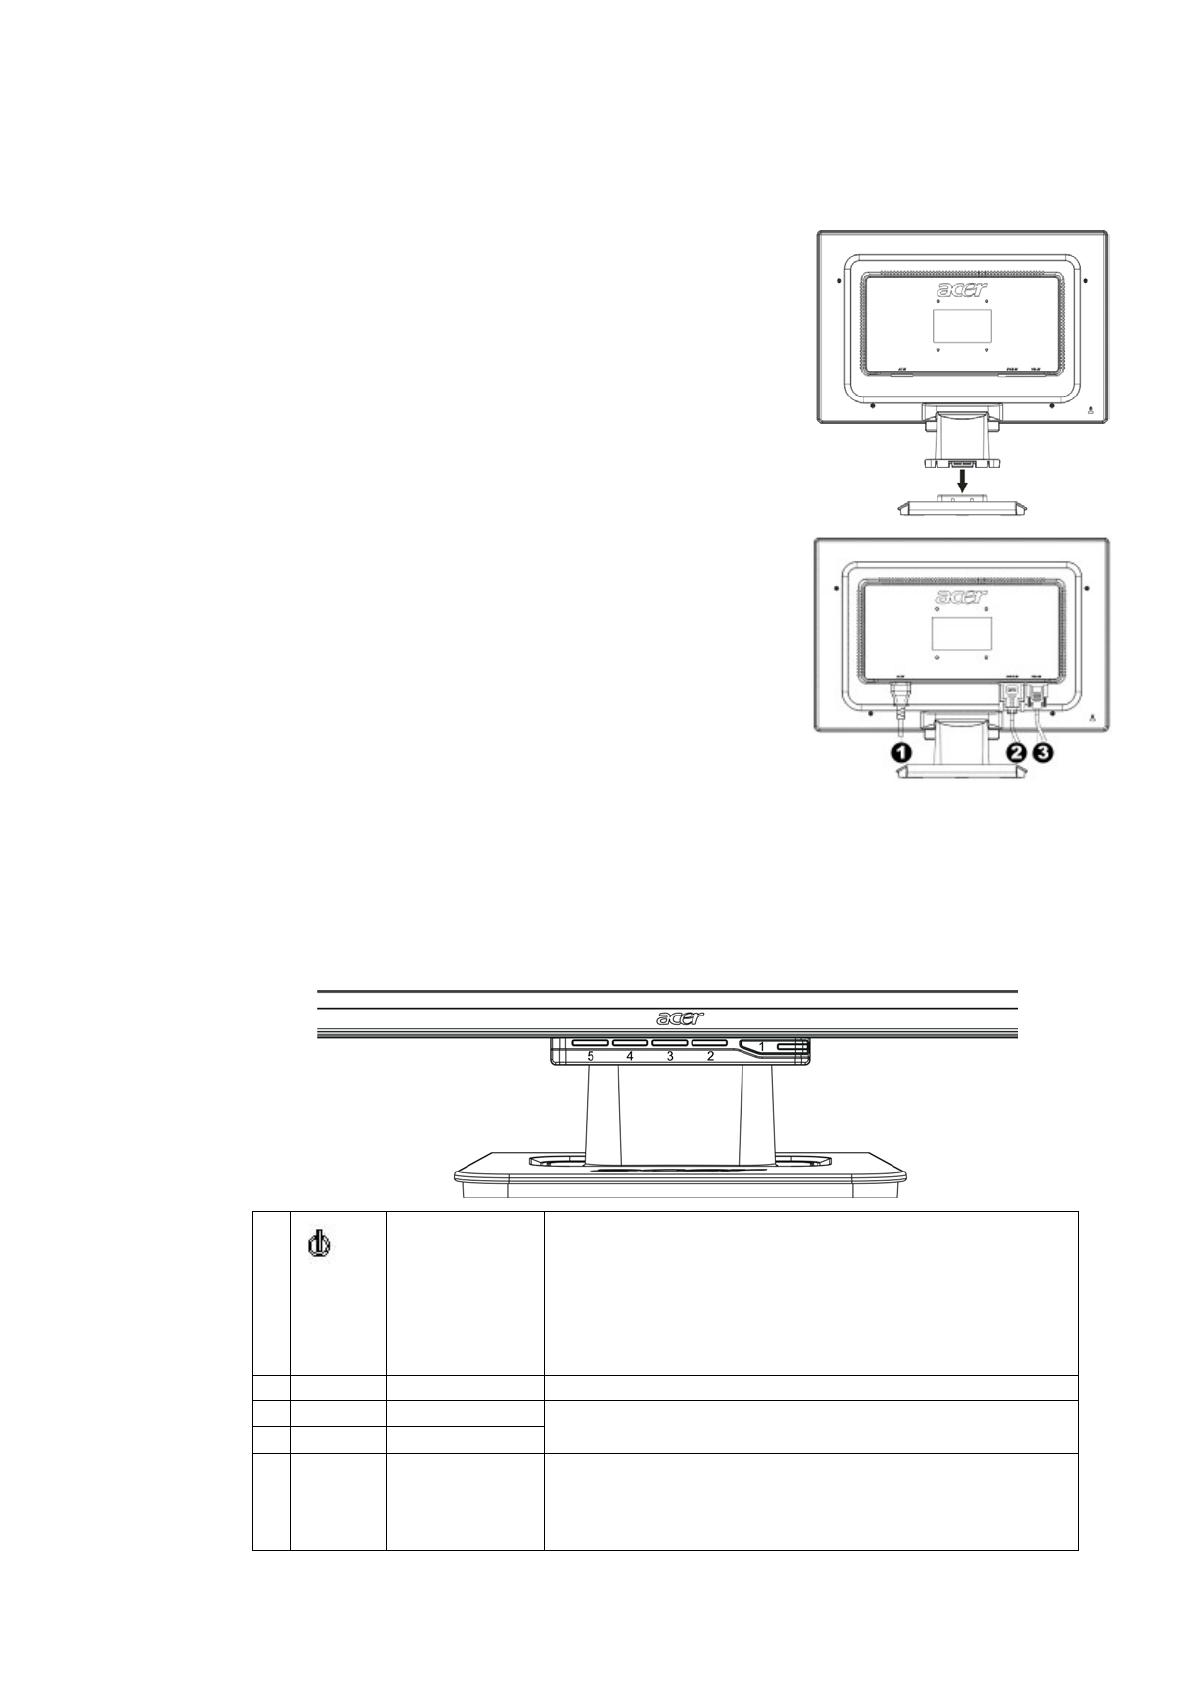
Assemble the seat of the display
Take out the seat out of the box and place it on a flat
table.
Take your LCD display out of the carton and assemble
the display and seat along the rail. You will hear a click
sound when the display and seat are engaged correctly.
Connection to PC
Make sure that the power supply of your PC is turned off
and the power plug is removed.
Connect and fasten both ends of the signal cable to
your PC host and LCD display respectively.
Connect the attached power cable to your LCD display.
Plug the power cable to the receptacle.
Turn on the power supplies of your PC and LCD display. X Power Cable
Y DVI Signal Cable (Optional)
Z D-Sub Signal Cable
Adjustment of Display
Key Definition
1
Power Source Power On/Off
Green indication: Power is on and normal
Orange indication: Sleep status in the energy-saving
mode
Colorless indication: Power off
2 Menu OSD Menu Press this button to enter OSD. Press it again to exit OSD.
3 > Plus
4 < Minus
Press this button for selection or adjustment when OSD is
started.
5 Auto Automatic
Adjustment
Press this button to exit the manual when OSD is started.
Press this button for the display to optimize the position,
phase and clock pulse automatically when OSD is not
started.

