Page is loading ...

Visit our website at: http://www.harborfreight.com
Email our technical support at: [email protected]
64797
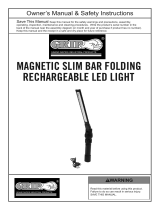
RUGGED WORK LIGHT
Owner’s Manual & Safety Instructions
Save This Manual Keep this manual for the safety warnings and precautions, assembly,
operating, inspection, maintenance and cleaning procedures. Write the product’s serial number in the
back of the manual near the assembly diagram (or month and year of purchase if product has no number).
Keep this manual and the receipt in a safe and dry place for future reference. 18l
When unpacking, make sure that the product is intact
and undamaged. If any parts are missing or broken,
please call 1-888-866-5797 as soon as possible.
Copyright
©
2018 by Harbor Freight Tools
®
. All rights reserved.
No portion of this manual or any artwork contained herein may be reproduced in
any shape or form without the express written consent of Harbor Freight Tools.
Diagrams within this manual may not be drawn proportionally. Due to continuing
improvements, actual product may differ slightly from the product described herein.
To ols required for assembly and se rv ic e m ay n ot b e i nc lu de d .
Read this material before using this product.
Failure to do so can result in serious injury.
SAVE THIS MANUAL.

Page 2 For technical questions, please call 1-888-866-5797. Item 64797
Specifications
Charger Rating 6VDC, 500mA
Battery
Rechargeable Li-Ion
3.7V, 2200mAh
IMPORTANT SAFETY INFORMATION
To prevent serious injury, FIRE, and EXPLOSION:
1. Keep dry. Do not open, drop, short-circuit,
incinerate, expose to temperatures higher
than 140° F, or charge/use if damaged.
2. Do not submerge Light in water or any other liquid.
3. Do not operate in explosive atmospheres,
such as in the presence of flammable
liquids, gases, or dust.
4. Do not charge for longer than 6 hours.
Overcharging will cause overheating
and shorten battery life.
5. People with pacemakers should consult their
physician(s) before use. Electromagnetic fields in
close proximity to heart pacemaker could cause
pacemaker interference or pacemaker failure.
6. Not a toy. Keep out of reach of children.
Lithium Battery Safety Warnings
LITHIUM BATTERIES STORE
A LARGE AMOUNT OF ENERGY AND
WILL VENT FIRE OR EXPLODE IF MISTREATED:
1. Keep Work Light dry.
2. DO NOT DO ANY OF THE FOLLOWING
TO THE BATTERY PACK:
a. Open,
b. Drop,
c. Short-circuit,
d. Puncture,
e. Incinerate, or
f. Expose to temperatures greater than 140°F.
3. Charge Work Light only according
to these instructions.
4. Li-Ion battery must be recycled or
disposed of properly. Do not open,
crush, heat above 140° F or incinerate.

Page 3For technical questions, please call 1-888-866-5797.Item 64797
Setup - Before Use:
Read the ENTIRE IMPORTANT SAFETY INFORMATION section at the beginning of this
manual including all text under subheadings therein before set up or use of this product.
Note: For additional information regarding the parts listed in the
following pages, refer to Maintenance and Servicing on page 5.
Functions
Selection
Buttons
Flashlight
Floodlight
Base

Page 4 For technical questions, please call 1-888-866-5797. Item 64797
Charging Instructions
Read the ENTIRE IMPORTANT SAFETY INFORMATION section at the beginning of this document
including all text under subheadings therein before set up or use of this product.
1. The Battery is located inside the Battery
Pack which is inside the Work Light.
2. Turn OFF the Work Light and unscrew the
Base from the bottom of the Work Light.
3. Pull out the Battery Pack and connect the
Charger’s cable into the Socket, located
on the side of the Battery Pack.
4. Plug the Charger into a powered 120 VAC outlet.
5. The Indicator will light up red during
charging. After approximately 6 hours
the Indicator will turn green, indicating the
Battery is fully charged and ready for use.
6. Disconnect the Charger’s cable and slide the
Battery Pack back into the Work Light.
7. Screw the Base onto the Work Light until tight.
Socket
Indicator
Battery Pack
NOTICE: Do not leave the Battery in a
discharged state. Charge the Battery every 3 months
if the Work Light is not in use. This will keep the
Battery from wearing down and add to its life.
Do not charge the Work Light for more
than 6 hours. Overcharging will cause
overheating and shorten battery life.
Do not charge the Work Light at
temperatures below 40° F.
Operation Instructions
Read the ENTIRE IMPORTANT SAFETY INFORMATION section at the beginning of this document
including all text under subheadings therein before set up or use of this product.
NOTE: Before using the Work Light for
the first time, fully charge the Battery.
1. The Work Light has two modes: Floodlight
and Flashlight. The Selection Buttons on the
side of the Work Light control the lights.
2. To use the Floodlight:
a. Press Floodlight button to turn ON for low light.
b. Press again for high light.
c. Press a third time to turn the Floodlight OFF.
3. To use the Flashlight:
Press Flashlight button to turn ON
and press it again to turn OFF.
Flashlight
Floodlight
Selection Buttons
Note: If the light will not turn on, check
that the Base is screwed on securely.
4. The Work Light has a magnetic Base that allows
it to be magnetically attached a to metal object.
Three
Magnets
Base

Page 5For technical questions, please call 1-888-866-5797.Item 64797
Maintenance and Servicing
Procedures not specifically explained in this manual must
be performed only by a qualified technician.
TO PREVENT SERIOUS INJURY FROM ACCIDENTAL OPERATION:
Make sure that the Trigger is in the off-position and remove its Battery
Pack before performing any procedure in this section.
TO PREVENT SERIOUS INJURY FROM TOOL FAILURE:
Do not use damaged equipment. If abnormal noise or vibration
occurs, have the problem corrected before further use.
Cleaning, Maintenance, and Lubrication
1. BEFORE EACH USE, inspect the general
condition of the tool. Check for:
• leaking, swollen, or cracked battery pack,
• loose hardware,
• misalignment or binding of moving parts,
• cracked or broken parts, and
• any other condition that may
affect its safe operation.
2. AFTER USE, wipe external surfaces
of the tool with clean cloth.
3. Store tool in dry, indoor area
out of reach of children.
Battery Removal, Replacement, and Disposal
1. The Battery is located inside the Battery
Pack which is inside the Work Light.
2. Turn OFF the Work Light and unscrew the
Base from the bottom of the Work Light.
3. Slide out the Battery Pack and disconnect the
battery from its connector. Note polarity.
4. Replace the Battery with one of identical
type. Be sure polarity orientation is correct.
5. Charge new Battery, if necessary. See
Charging Instructions (page 4) for details.
6. Slide Battery Pack back into the Work Light.
7. Screw the Base onto Work Light until tight.
8. Li-Ion battery must be recycled or
disposed of properly. Do not open,
crush, heat above 140° F or incinerate.

Page 6 For technical questions, please call 1-888-866-5797. Item 64797
Record Product’s Serial Number Here:
Note: If product has no serial number, record month and year of purchase instead.
Note: Replacement parts are not available for this item.
PLEASE READ THE FOLLOWING CAREFULLY
THE MANUFACTURER AND/OR DISTRIBUTOR HAS PROVIDED THE PARTS LIST AND ASSEMBLY
DIAGRAM IN THIS MANUAL AS A REFERENCE TOOL ONLY. NEITHER THE MANUFACTURER OR
DISTRIBUTOR MAKES ANY REPRESENTATION OR WARRANTY OF ANY KIND TO THE BUYER THAT HE
OR SHE IS QUALIFIED TO MAKE ANY REPAIRS TO THE PRODUCT, OR THAT HE OR SHE IS QUALIFIED
TO REPLACE ANY PARTS OF THE PRODUCT. IN FACT, THE MANUFACTURER AND/OR DISTRIBUTOR
EXPRESSLY STATES THAT ALL REPAIRS AND PARTS REPLACEMENTS SHOULD BE UNDERTAKEN BY
CERTIFIED AND LICENSED TECHNICIANS, AND NOT BY THE BUYER. THE BUYER ASSUMES ALL RISK
AND LIABILITY ARISING OUT OF HIS OR HER REPAIRS TO THE ORIGINAL PRODUCT OR REPLACEMENT
PARTS THERETO, OR ARISING OUT OF HIS OR HER INSTALLATION OF REPLACEMENT PARTS THERETO.

Page 7For technical questions, please call 1-888-866-5797.Item 64797
Parts List and Diagram
Part Description Qty
1 Lens 1
2 Housing 1
3 Cover 1
4 Base 1
5 Bottom Cap with Three Magnets 1
6 Inner Tube (right) 1
7 COB Reflector 1
8 PCB with COB 1
9 Heat Sink 1
Part Description Qty
10 LED Reflector 1
11 PCB with LED 1
12 Inner Tube (left) 1
13 PCB with Selection Buttons 1
14 PCB 1
15 Battery Pack 1
16 Battery (not shown, inside Battery Pack) 1
17 Charger 1
1
2
3
4
5
6
8
9
10
11
12
13
7
14
15
17

3491 Mission Oaks Blvd. • PO Box 6009 • Camarillo, CA 93011 • 1-888-866-5797
Limited 90 Day Warranty
Harbor Freight Tools Co. makes every effort to assure that its products meet high quality and durability
standards, and warrants to the original purchaser that this product is free from defects in materials
and workmanship for the period of 90 days from the date of purchase. This warranty does not apply to
damage due directly or indirectly, to misuse, abuse, negligence or accidents, repairs or alterations outside
our facilities, criminal activity, improper installation, normal wear and tear, or to lack of maintenance.
We shall in no event be liable for death, injuries to persons or property, or for incidental, contingent,
special or consequential damages arising from the use of our product. Some states do not allow the
exclusion or limitation of incidental or consequential damages, so the above limitation of exclusion
may not apply to you. THIS WARRANTY IS EXPRESSLY IN LIEU OF ALL OTHER WARRANTIES,
EXPRESS OR IMPLIED, INCLUDING THE WARRANTIES OF MERCHANTABILITY AND FITNESS.
To take advantage of this warranty, the product or part must be returned to us with transportation charges
prepaid. Proof of purchase date and an explanation of the complaint must accompany the merchandise.
If our inspection verifies the defect, we will either repair or replace the product at our election or we may
elect to refund the purchase price if we cannot readily and quickly provide you with a replacement. We will
return repaired products at our expense, but if we determine there is no defect, or that the defect resulted
from causes not within the scope of our warranty, then you must bear the cost of returning the product.
This warranty gives you specific legal rights and you may also have other rights which vary from state to state.
/