Page is loading ...

WI-FI SECURITY DOME CAMERA
QUICK START GUIDE
ENGLISH

WELCOME!
Congratulations on your latest purchase and welcome
to the Q-See family. This guide includes everything you
will need to help get your camera up and running right
out of the box. We are excited to have you on board
and thank you for choosing Q-See!


WHAT’S INCLUDED
Camera
Wi-Fi
Antenna
Wrench
Mounting
Hardware
Mounting
Guide
Grommet
Also included: 1 power supply & 1 weather seal (seal is for custom installs)
4

FEATURES
5
BEST IN CLASS
Setting the resolution
bar higher than 1080p
MOTION ALERT
Get alerts about
important activity
NIGHT VISION
See what’s happening in
pitch dark
MICRO SD CARD SUPPORT
Internal back up memory for
video storage
EASY SETUP
Less fuss, more
monitoring
ADD-ON
Expand your current
surveillance system
with ease

GET CONNECTED
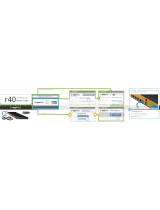
6
Find the desired location for your camera to be placed. If you are going to
be mounting the camera, please use the included mounting hardware to
secure the camera rmly to the wall. Please make sure to go through all
steps and test the system completely before mounting the cameras.
You are now ready to setup the camera. Once
the camera is plugged in you may see a red LED
power indicator light up. Later when connected
to Wi-Fi this LED should turn green .
• Slide the included rubber grommet onto the antenna stem of the camera
• Screw the supplied Wi-Fi antenna on to the dome camera
• Plug in the included power supply to a surge protector and plug in the
power supply to the Wi-Fi dome camera.

7

8
STEP 1
REGISTRATION
Before installing, please register your device on the Q-See Support
Portal at www.q-see.com/register to receive critical updates and
support for your system. Registering will also help us to assist you
with any technical or warranty issues if ever necessary.
Please be sure to keep a record of your model number(s)
and to save this guide, as you will need this information if
you are ever in need of technical or warranty support.
NOTE: Your username and password used to register your device are not the same
as those you use to log in to your system. Please write down your username, pass-
word, and model number(s) in the spaces provided below:
Username:
Password:
Model #:

NOTE: Ensure that your mobile device is connected to the
Wi-Fi network you wish to use for your camera.
Download the QC View App from the App Store on your
mobile device. Once the App has been installed select the
Menu button in the top left corner,
followed by Device Manager.
STEP 2
DOWNLOAD & INSTALL THE QC VIEW APP
9
NOTE: If you already have a Wi-Fi
NVR this camera will automatical-
ly try to connect to it. Start using
the NVR quick start guide to
complete setup. If you would like
to use this as a standalone de-
vice, disconnect or power o your
Wi-Fi NVR before proceeding.
*All screenshots in guide are
from QC View app on iOS.

In Device Manager, Click “+” to add a new device. Select “Wi-Fi
conguration” and create a name for your camera. Tap the QR
code icon in the SN eld and then scan the QR code located on
the back camera panel (see photo below). Once the QR code has
been scanned, complete
the remaining username
and password elds and
hit next:
Username: admin
Password: admin
STEP 3
ADD A NEW DEVICE
10

Congure the network
settings by entering the
password of your Wi-Fi
network.
STEP 4
ADD A WI-FI DEVICE
11
NOTE: The Wi-Fi network should be the same one used by your mobile device.

12
Once your Device has
been added successfully,
select Start Live Preview
to view the feed from
your camera.
STEP 5
START LIVE PREVIEW

13
Your camera has been set
up successfully. You can
now access your camera
feed anytime and anywhere
using the QC View App.
STEP 6
VIEW THE LIVE VIDEO FEED

14
If you would like to add this camera to your existing QC Series NVR,
login to your NVR and go to Remote Devices. Select your camera
from the device list and click Add. The camera feed will appear on
your NVR. The NVR has to be connected to the same network as
your mobile device for the initial setup process.
Visit www.q-see.com/support to verify if your system is compatible.
*This screenshot is from a QC Series NVR.
STEP 7
ADD TO AN EXISTING QC NVR SYSTEM

15
The lens of your dome camera can be adjusted based
on where you are mounting it by gently loosening its
screw and rotating the angle and
orientation of the camera. The
LEDs denote the bottom half
of the camera so be sure to
rotate the lens accordingly or
the camera view will be
sideways. The center
blue sensor should point
directly down when
mounted.
LENS ADJUSTMENT

The reset button on your dome camera
is located under the lens cover that can
be removed with the included wrench.
If you wish to change the existing Wi-Fi
network to a dierent network, while the
camera is powered on, hold the reset
button for 15 seconds and setup your camera again.
The micro SD memory card slot is located under the lens cover that can be
removed with the included wrench. Slide the slot open, place in a memory card,
close the slot and lock the card into position. Some units will include an SD card.
ADDITIONAL FEATURES
RESET BUTTON
MEMORY SLOT
16

17
Please do not worry about the additional
network cable on your dome camera. This
network cable can alternatively be used to hard-
wire the camera using an Ethernet cable instead
of a Wi-Fi connection. Please make sure that this
cable is never exposed to moisture.
NETWORK CABLE

Q-See is always here to answer your questions and take your
valued suggestions.
Visit us at www.q-see.com/support for 24/7
online support and access to our Support Portal.
WARRANTY
& SUPPORT
18
DISCLAIMER: Although Q-See has made every eort to ensure that the infor-
mation in this guide was correct at the time of printing, Q-See does not assume
any liability to any party for any loss, damage, or disruption caused by any errors,
omissions, or typos that may occur.

19
Regulatory Information
FCC Information
This device complies with Part 15 of the FCC Rules. Operation is subject to the following two conditions:
(1) This device may not cause harmful interference, and
(2) This device must accept any interference received, including interference that may cause undesired opera-
tion.
Attention that changes or modification not expressly approved by the party responsible for compliance could
void the user’s authority to operate the equipment.
Note: This product has been tested and found to comply with the limits for a Class B digital device, pursuant
to Part 15 of the FCC Rules. These limits are designed to provide reasonable protection against harmful
interference in a residential installation. This product generates, uses, and can radiate radio frequency energy
and, if not installed and used in accordance with the instructions, may cause harmful interference to radio
communications. However, there is no guarantee that interference will not occur in a particular installation.
If this product does cause harmful interference to radio or television reception, which can be determined by
turning the equipment off and on, the user is encouraged to try to correct the interference by one or more of the
following measures:
• Reorient or relocate the receiving antenna.
• Increase the separation between the equipment and receiver.
• Connect the equipment into an outlet on a circuit different from that to which the receiver is connected.
• Consult the dealer or an experienced radio/TV technician for help.
This equipment should be installed and operated with a minimum distance 20cm between the radiator and your
body.
1.2.51.32.Tgz001-000
Check online at www.Q-See.com for more information on our terms of service.

GQCWD-E-V2
Rev. 5/1/17, QCW4, QCK81, QC826, QC838, QC838B, QC858,
QC8116, QC8816, QC8832, QC8916, QC8932
/