Page is loading ...

1
Inverted
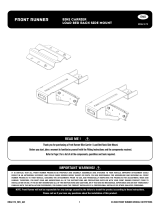
Spare wheel Clamp
SWCL004
INSTALL TIME: 5 Mins
REV_A00
IMPORTANT WARNING!
IT IS CRITICAL THAT ALL FRONT RUNNER PRODUCTS BE PROPERLY AND SECURELY ASSEMBLED AND ATTACHED TO YOUR
VEHICLE. IMPROPER ATTACHMENT COULD RESULT IN AN AUTOMOBILE ACCIDENT, AND COULD CAUSE SERIOUS BODILY
INJURY OR DEATH TO YOU OR TO OTHERS. YOU ARE RESPONSIBLE FOR ASSEMBLING AND SECURING ALL FRONT RUNNER
PRODUCTS TO YOUR VEHICLE, CHECKING THE ATTACHMENTS PRIOR TO USE, AND PERIODICALLY INSPECTING THE
PRODUCTS FOR ADJUSTMENT, WEAR, AND DAMAGE. THEREFORE, YOU MUST READ AND UNDERSTAND ALL OF THE
INSTRUCTIONS AND CAUTIONS SUPPLIED WITH YOUR FRONT RUNNER PRODUCT PRIOR TO INSTALLATION OR USE. IF YOU DO
NOT UNDERSTAND ALL OF THE INSTRUCTIONS AND CAUTIONS, OR IF YOU HAVE NO MECHANICAL EXPERIENCE AND ARE NOT
THOROUGHLY FAMILIAR WITH THE INSTALLATION PROCEDURES, YOU SHOULD HAVE THE PRODUCT INSTALLED BY A
PROFESSIONAL INSTALLER OR OTHER QUALIFIED PERSONNEL.

2
( A
)Familiarize yourself with the parts and then step away from the work area and read through these
instructions from beginning to end. Take a moment as little prep now may save you a lot of time later.
GET ORGANIZED...
Here is what you are looking at:
You will need:
13 mm Flat or Socket Wrench
Two 19 mm Flat Wrench
REV_A00
Item # Quantity Description
1 1 M12 WING NUT
2 3 M12 SPRING WASHER
3 3 M12 FLAT WASHER
4 1 CLAMP
5 1 M12 THREADED BAR
6 2 M12 HEX NUT
7 1 MOUNTING BRACKET
8 2 M8 x 20 HEX BOLT
9 2 M8 FLAT WASHER
10 2M8 NYLOC NUT
11 2M8 NUT CAP

3
REV_A00
Mount Spare wheel Clamp
()
A Decide where on your Rack
you would like to mount
your Spare Wheel Clamp and
whether you would like to
mount the Clamp on top or
or underneath your Rack.
Remember to check the
width of your wheel.
Referring to the Exploded View on Page 2 and the fitment chosen (On top or underneath), loosely
assemble Items 8-10 to either side of the Mounting Bracket (Item 7) as shown.
If you have chosen to mount underneath the Rack, continue with Step 2D. If you have chosen to mount on
top of the Rack, continue with Step 2C.
()
B
()
C Having decided where on the Rack you would like to mount your Spare Wheel Clamp, position the
Mounting Bracket Assembly above the Rack as shown, lining up the Hex Bolts from Step 2B with the
machined slots in the Rack as indicated. Lower the Bracket, inserting the Hex Bolts into the machined
slots. Slide the Bracket Assembly into position (Left to right) making sure the Hex Bolts remain in the
Racks "U" channel.
Tighten the Nyloc Nuts to secure the Bracket in position and place a M8 Nut Cap (Item 11) over each nut.
Continue with Step 2F.
Machined Slot

4
REV_A00
()
D Having decided where on the Rack you would like to mount your Spare Wheel Clamp and working from
the top of the Rack, feed the Bracket Assembly between the Slats and rotate as shown below.
Mount Spare wheel Clamp cont...
Working from underneath the Rack, line up the Hex Bolts from Step 2B with the machined slots in the
Rack as indicated. Lift the Bracket, inserting the Hex Bolts into the machined slots. Slide the Bracket
Assembly into position (Left to right) making sure the Hex Bolts remain in the Racks "U" channel.
Tighten the Nyloc Nuts to secure the Bracket in position and place a M8 Nut Cap (Item 11) over each nut.
()
E
Machined Slot
Referring to the Exploded View on Page 2, assemble Items 1-6 to the Mounting Bracket as shown.
()
F
Congratulations, you have completed your installation. Take a step back and admire your work. Good Job!
()
G
/