
Grandstream Networks, Inc.
GWN700x Series
GWN700x – User Manual

WELCOME
The GWN700X is a powerful enterprise-grade gigabit Multi-Wan firewall router including 2 SFP Ports and multiple Gigabit
RJ45 ports that provides a comprehensive VPN solution in one and multiple scenarios. As a high-performance and dynamic
firewall product, it supports DPI in-depth security detection and content security including URL filtering, domain name
filtering, content filtering, safe search, application identification, traffic statistics, and other comprehensive attack protection,
which can effectively ensure continuous and stable operation of enterprise core applications and services, and ensure
enterprise management administrators can better monitor and manage network traffic. GWN700X integrates a series of rich
functions, including NAT, firewall, VPN, load balancing, and bandwidth management capabilities. As a fanless PoE router,
GWN700x can be powered by an external power adapter or IEEE 802.3af/at PoE Input, and 2x GbE ports can support 48V
Passive or Active (IEEE802.3af Class 2) PoE output. It is also supported by GWN.Cloud and GWN Manager, Grandstream’s free
cloud and on-premise network management platform that makes managing your network or several networks across multiple
locations easier than ever before. Ideal for the enterprise retail, education, hospitality, and medical markets.
PRODUCT OVERVIEW
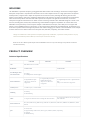
Technical Specifications
Changes or modifications to these products not expressly approved by Grandstream, or operation of these products in any way
other than as detailed by this User Manual, could void your manufacturer warranty.
Please do not use a different power adapter with the GWN700X routers as it may cause damage to the products and void the
manufacturer warranty.
GWN7001 GWN7002 GWN7003
CPU Dual ARM Cortex A53 1GHz
RAM/Flash 256MB/256MB 512MB/256MB
NAT Routing & IPSec
VPN Performance
●2.2Gbps
●530Mbps IPSec VPN throughput
Network Interfaces
6x Gigabit Ethernet ports
*All ports are WAN/LAN
configurable.
2 x Gigabit SFP ports and 4x
Gigabit Ethernet ports
*All ports are WAN/LAN
configurable
2 x Gigabit SFP ports and 9 x Gigabit Ethernet
ports
*All ports are WAN/LAN configurable
Auxiliary Ports 1x USB 2.0 port, 1 x Reset Pinhole
Mounting ●Desktop
●Wall mounting
LEDs 8 x single-color LEDs for device tracking and status indication 13 x single-color LEDs for device tracking and
status indication
Network Protocols IPv4, IPv6, IEEE 802.1Q, IEEE 802.1p, IEEE 802.1x, IEEE 802.3, IEEE 802.3, IEEE802.3u, IEEE802.3x, IEEE
802.3ab
QoS
●VLAN, TOS
●Support multiple traffic classes, filter by port, IP address, DSCP, and policing
●App QoS
●VoIP Prioritizing

GWN700x Technical Specifications
INSTALLATION
Before deploying and configuring the GWN700x router, the device needs to be properly powered up and connected to the
network. This section describes detailed information on the installation, connection, and warranty policy of the GWN700x
router.
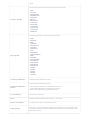
Firewall DPI, DDNS, Port Forwarding, DMZ, UPnP, Anti-DoS, traffic rules, NAT, ALG
VPN
● SSL VPN Server / Client-to Site
●IPsec VPN Client-to-Site / Site-to-Site
●PPTP VPN Server / Client-to-Site
●L2TP Client-to-Site
●IPSec Encryption: DES, 3DE, AES
●IPSec Authentication: MD5, SHA-1, SHA2-256
●IPSec Key Exchange: Main/Aggressive Mode, Pres-shared Key, DH Groups 1/2/5/14
●IPSec Protocols: ESP
●IPsec NAT Traversal
●SSL VPN Encryption: AES, DES
●SSL Authentication: MD5, SHA-1, SHA2-256, SHA2-384, SHA2-512
●SSL VPN Certificate: RSA
●PPTP/L2TP Encryption: MPPE 40-bit, 128-bit, IPSec
●PPTP/L2TP Authentication: MS-CHAPv1/2
Network Management
GWN7001 embedded
controller can manage itself
and up to 100 GWN APs.
GWN7002 embedded
controller can manage itself
and up to 100 GWN APs.
GWN7003 embedded controller can manage
itself and up to 150 GWN APs.
GWN.Cloud offers a free cloud management platform for unlimited GWN Routers and GWN APs
PoE Input N/A Standard: IEEE 802.3af/at
PoE Output N/A 2 x PoE out ports
Passive 48V or IEEE802.3af
PoE Power Budget N/A 24V DC 1A: 12.8W
24V DC 1.5A: 24.8W
Power & Green Energy
Efficieny
Universal power adaptor
included
Input: 100-240VAC 50-60Hz
Output: 12V DC 1A (12W)
Universal power adaptor included
Input: 100-240VAC 50-60Hz
Output: 24V DC 1A (24W)
Environmental
Operation: 0°Cto 50°C
Storage: -10°C to 60°C
Humidity: 10% to 90% Non-condensing
Physical
Unit Dimension:
210mm(L)x130mm(W)x35m
m(H);
Unit Weight: 453g
Entire Package Dimension:
246mm(L)x235mm(W)x45m
m(H);
Entire Package Weight: 672g
Unit Dimension:
210mm(L)x130mm(W)x35m
m(H);
Unit Weight: 505g
Entire Package Dimension:
246mm(L)x235mm(W)x54m
m(H);
Entire Package Weight: 730g
Unit Dimension:
260mm(L)x149mm(W)x35mm(H);
Unit Weight: 1096g
Entire Package Dimension:
297mm(L)x255.5mm(W)x54mm(H);
Entire Package Weight: 1443g
Package Content
GWN7001 router, universal
power supply unit, network
cable, quick installation guide
GWN7002 router, universal
power supply unit, network
cable, quick installation guide
GWN7003 router, universal power supply
unit, network cable, quick installation guide, 8
x screws, 1 ground wire, 2 x mounting
brackets.
Compliance FCC, CE, RCM, UC, UKCA

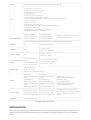
Package Contents
GWN700x Package Content
GWN700x Ports
GWN700x ports
No. Port Description
1
●GWN7001: 6x Gigabit Ethernet ports
●GWN7002: 4x Gigabit Ethernet ports
●GWN7003: 9 x Gigabit Ethernet ports
Note: All ports support WAN/LAN configurable.
The Gigabit Ethernet ports include 2 x PoE OUT ports and 1 x PoE IN port (GWN7002/7003 only).
22 x Gigabit SFP ports (GWN7002/7003 only).
3USB 2.0 port
4
●GWN7001: Power adapter connector (DC 12V, 1A)
●GWN7002: Power adapter connector (DC 24V, 1A)
●GWN7003: Power adapter connector (DC 24V, 1A)
5Grounding terminal (GWN7003 only).
6Factory Reset pinhole. Press for 5 seconds to reset
factory default settings

GWN700x ports
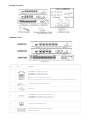
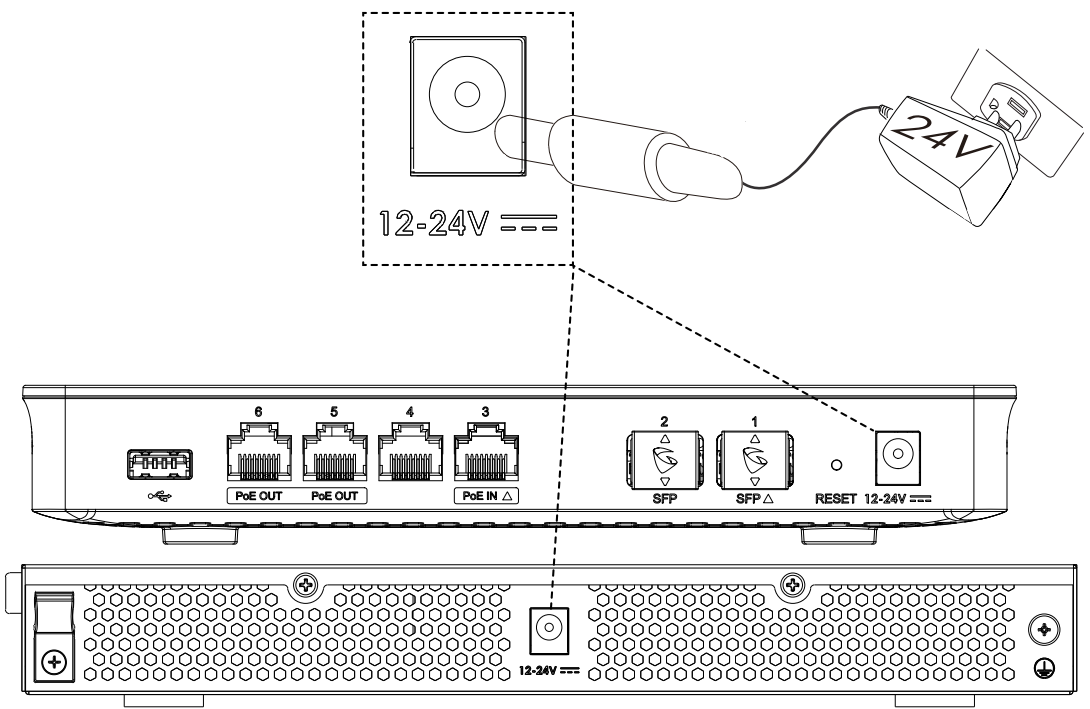
Powering and Connecting GWN700x
1. Power the GWN700x
GWN7002/GWN7003 can be powered on using the right PSU (DC 24V, 1A) or PoE (IEEE 802.3af/at).
Powering the GWN700x routers
2. Connect to the Internet
Connect the LAN/WAN or SFP/WAN port to an optical fiber broadband modem, ADSL broadband modem, or community
broadband interface.
Connect GWN700x to the Internet
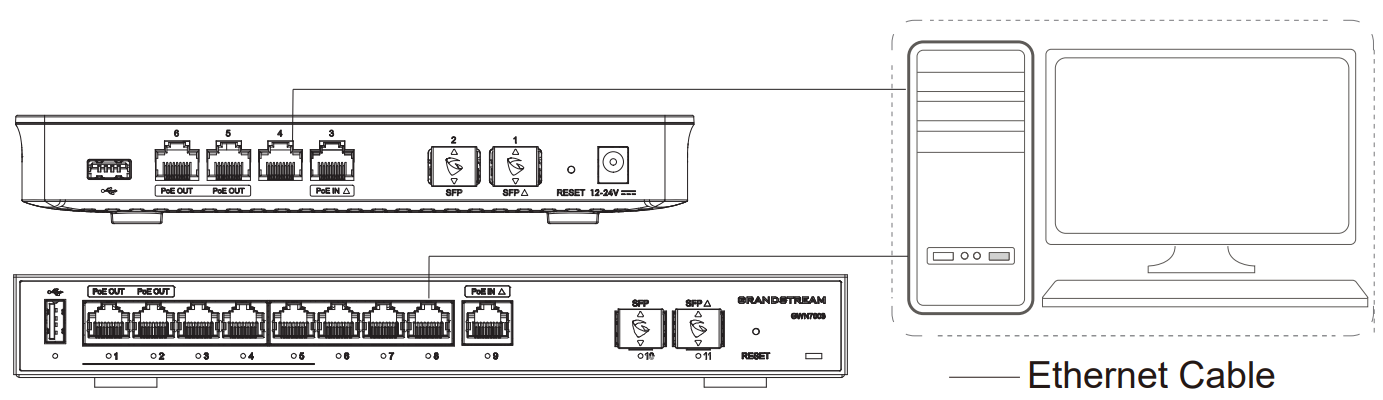
3. Connect to GWN7002/7003 Network
Connect your computer to one of the LAN ports.
GWN700x network
Note:

GETTING STARTED
The GWN700x Multi-WAN Gigabit VPN Routers provide an intuitive web GUI configuration interface for easy management to
give users access to all the configurations and options for the GWN700x’s setup.
Use the WEB GUI
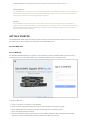
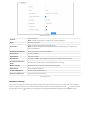
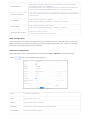
Access WEB GUI
The GWN700x embedded Web server responds to HTTPS GET/POST requests. Embedded HTML pages allow users to
configure the device through a Web browser such as Microsoft IE, Mozilla Firefox, or Google Chrome.
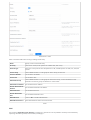
GWN700x Web GUI Login Page
To access the Web GUI:
1. Connect a computer to a LAN port of the GWN700x.
2. Ensure the device is properly powered up, and the Power and LAN port LEDs light up in green.
3. Open a Web browser on the computer and enter the web GUI URL in the following format:
https://192.168.80.1 (Default IP address).
4. Enter the administrator’s login and password to access the Web Configuration Menu. The default administrator’s
username is “admin” and the default password is printed on the MAC tag of the unit.
GWN7002/GWN7003’s default password information is printed on the MAC tag at the bottom of the unit.
Safety Compliances
The GWN700x Router complies with FCC/CE and various safety standards. The GWN700x power adapter is compliant with the UL
standard. Use the universal power adapter provided with the GWN700x package only. The manufacturer’s warranty does not
cover damages to the device caused by unsupported power adapters.
Warranty
If the GWN700x Router was purchased from a reseller, please contact the company where the device was purchased for a
replacement, repair or refund. If the device was purchased directly from Grandstream, contact our Technical Support Team for an
RMA (Return Materials Authorization) number before the product is returned. Grandstream reserves the right to remedy the
warranty policy without prior notification.

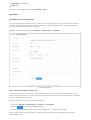
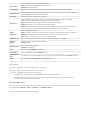
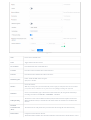
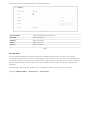
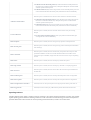
At first boot or after factory reset, users will be asked to change the default administrator and user passwords before
accessing the GWN700x web interface. The password field is case-sensitive with a maximum length of 32 characters. Using
strong passwords including letters, digits, and special characters are recommended for security purposes.
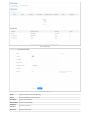
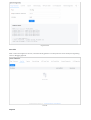
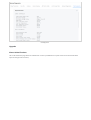
Once the user enters the password, this is the initial page that will be shown. This page contains general information about
the router.
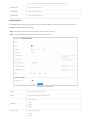
WEB GUI Configuration
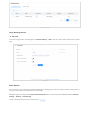
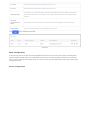
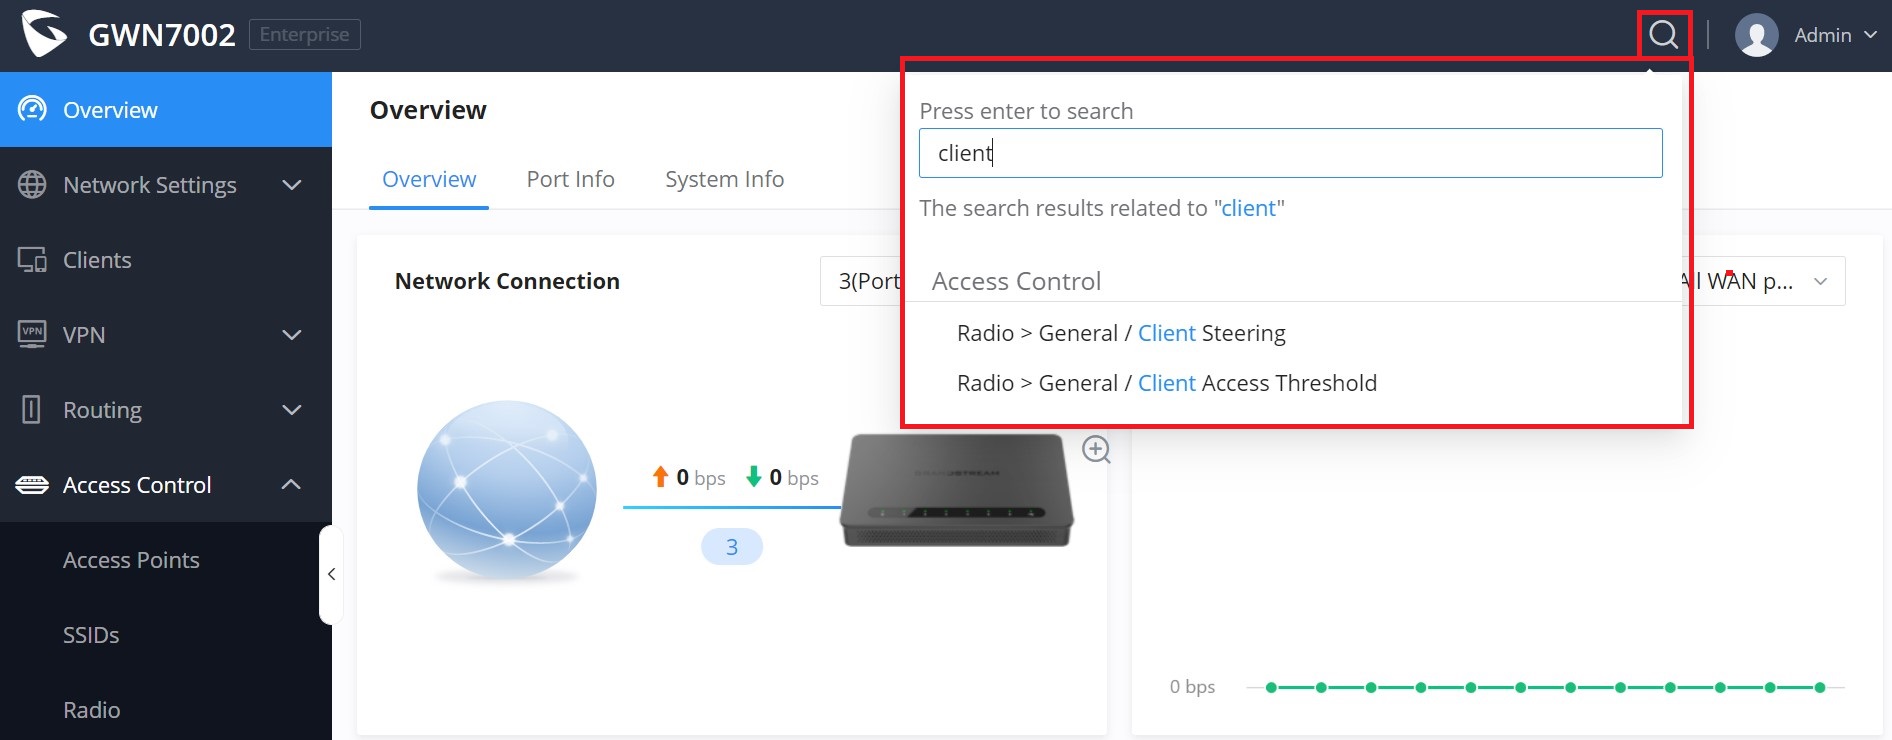
Search
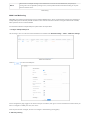
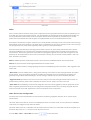
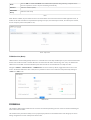
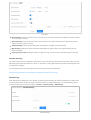
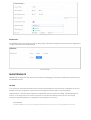
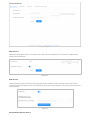
To make it easier for the user to find a particular option quickly, the GWN700X web UI has a search feature which can be
accessed by clicking on the magnifier icon on the top right corner of the screen and typing the option name.
Search
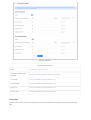
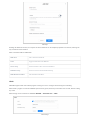
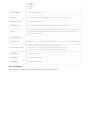
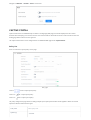
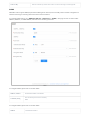
Setup Wizard and Feedback
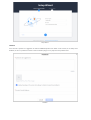
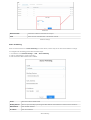
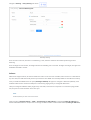
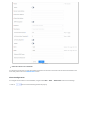
Setup Wizard
If the user missed the Setup Wizard at the first boot of GWN700X. It’s accessible all the time at the top of the page and it
contains the necessary settings that the user must configure in 2 steps, first country and time zone, and Internet Settings.
Click on button to go through the setup wizard.

Setup Wizard
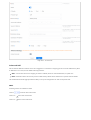
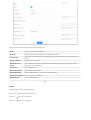
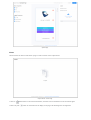
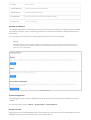
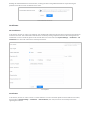
Feedback
If the user has a question or a suggestion to make the GWN700x product even better or has an issue, he can always send
feedback, in case of a problem it’s better as well to include Syslog as it may help solve the problem faster.
Feedback

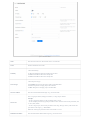
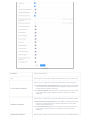
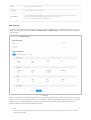
OVERVIEW
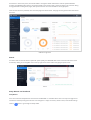
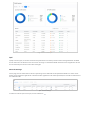
Overview Page
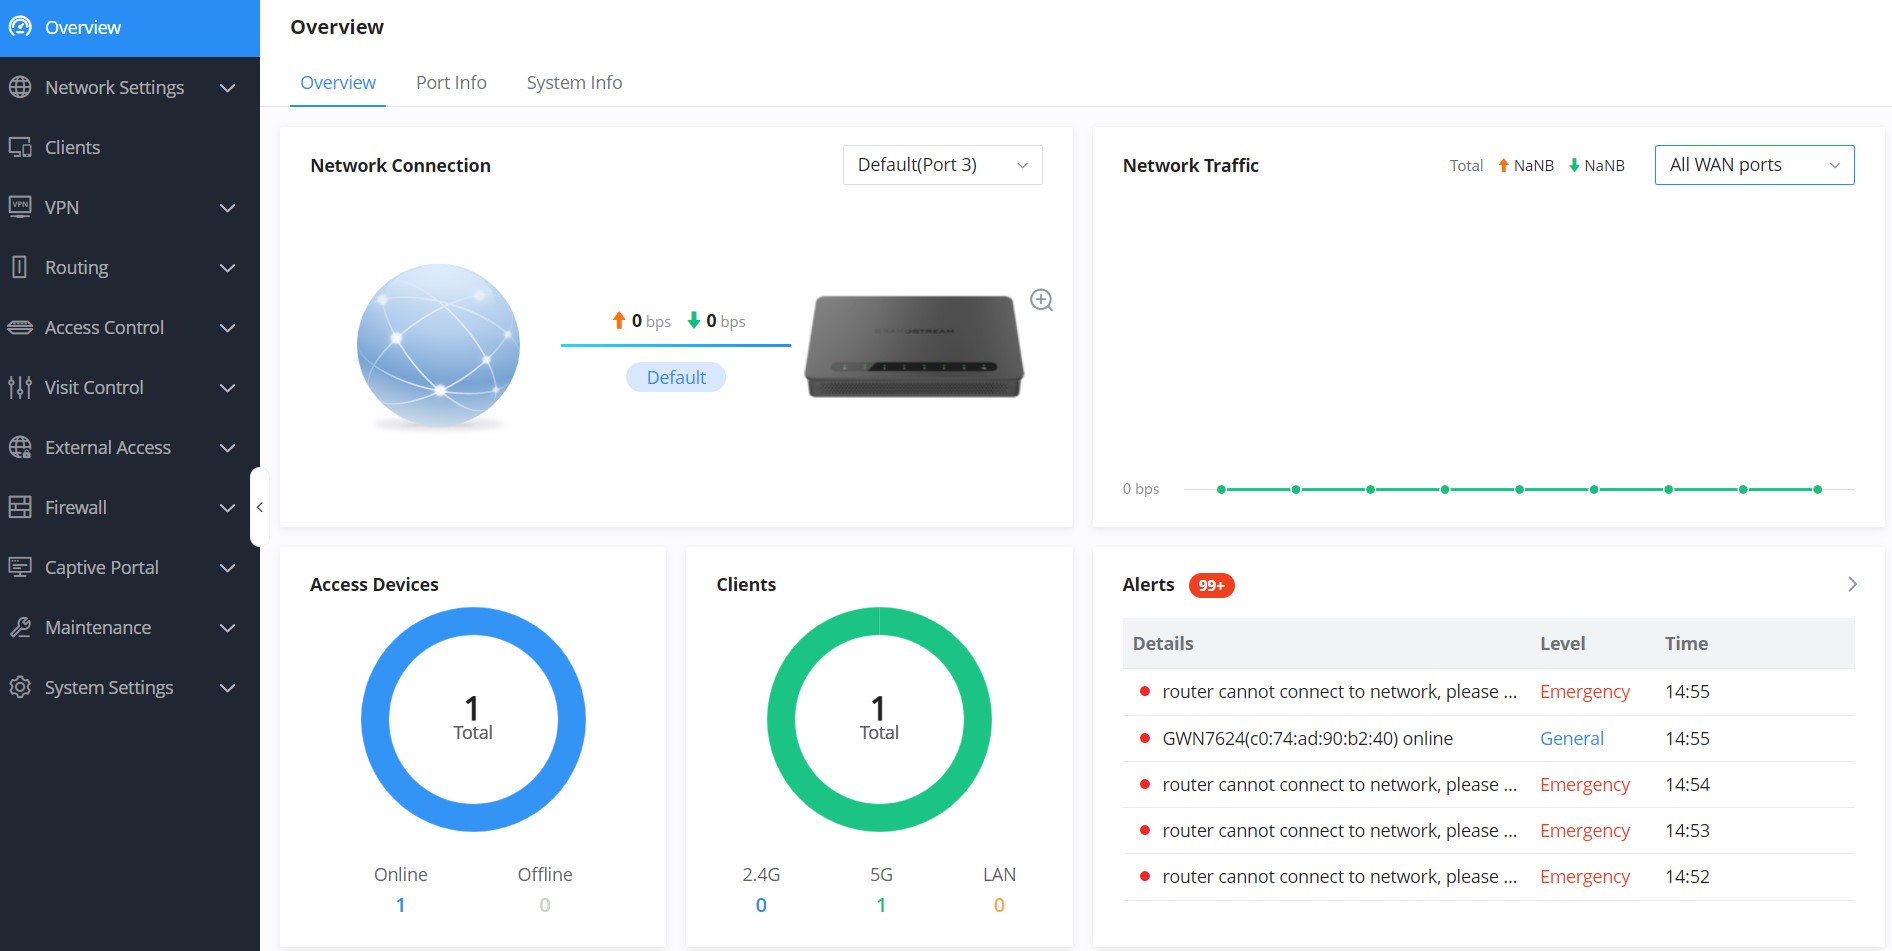
Overview is the first page shown after successful login to the GWN700x’s Web Interface. It provides an overall view of the
GWN700x’s information presented in a Dashboard style for easy monitoring as well as the System Info (Product Name, System
Version, MAC Address…). It is used to show the status of the GWN700x for different items like (upload and download speed,
number of clients connected, bands used, access devices, network traffic, alerts, top access devices, top SSIDS, and top
clients).
Overview Page
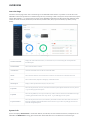
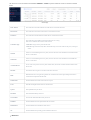
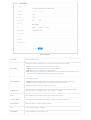
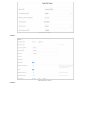
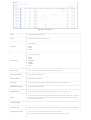
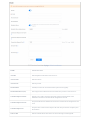
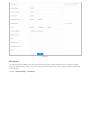
System Info
System Info displaysDevice Statusto check MAC address, Part Number, Firmware related information, and Uptime for the
GWN700x andWAN Statusshowing general information about WAN Port such as IP address and Connection Type.
Network Connection Display the current status of the router, is it connected or not, as well as showing the current upload and
downlaod speed.
Network Traffic Shows network traffic in real time.
Access Devices shows the total number of Access Devices online and offline.
Clients Shows the total number of clients connected to 2.4G and 5G as well as the ones connected to the LAN.
Alerts Shows Alerts General, Important or Emergency with details and time.
Clients Speed Displays Clients speed based on time (1H, 12H, 1D or 1W)
Top Clients Shows the Top Clients list, users may assort the list of clients by their upload or download. Users may click on
to go to Clients page for more options.
Top SSIDs Shows the Top SSIDs list, users may assort the list by number of clients connected to each SSID or data usage
combining upload and download. Users may click on to go to SSID page for more options.
Top Access Devices
Shows the Top Access Devices list, assort the list by the number of clients connected to each access device or
data usage combining upload and download. Click on the arrow to go to the access point page for basic and
advanced configuration options.

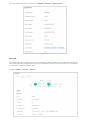
The router’s System Info can be accessed fromtheWeb GUI → Overview → System Info Tab.
System Info
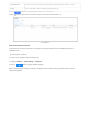
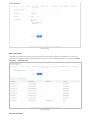
Port Info
Port Info page displays an overview of all ports status including the USB Port, Gigabits ports, and SFP ports, indicating the
links up with green color and links down with grey color, furthermore the user can click on the port icon to get more info
about the select link, refer to the figure below:
Navigate to Web UI → Overview → Port Info:

Port Info
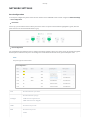
NETWORK SETTINGS
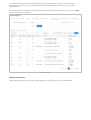
Port Configuration
To access port configuration, please access the user interface of the GWN700X router and then navigate to Network Settings
→ Port Configuration.
Port Status
On the top, you can find the status of all the ports of the router. The ports connected will be highlighted in green, while the
ports which are not connected will be shown in gray.
Port Configuration
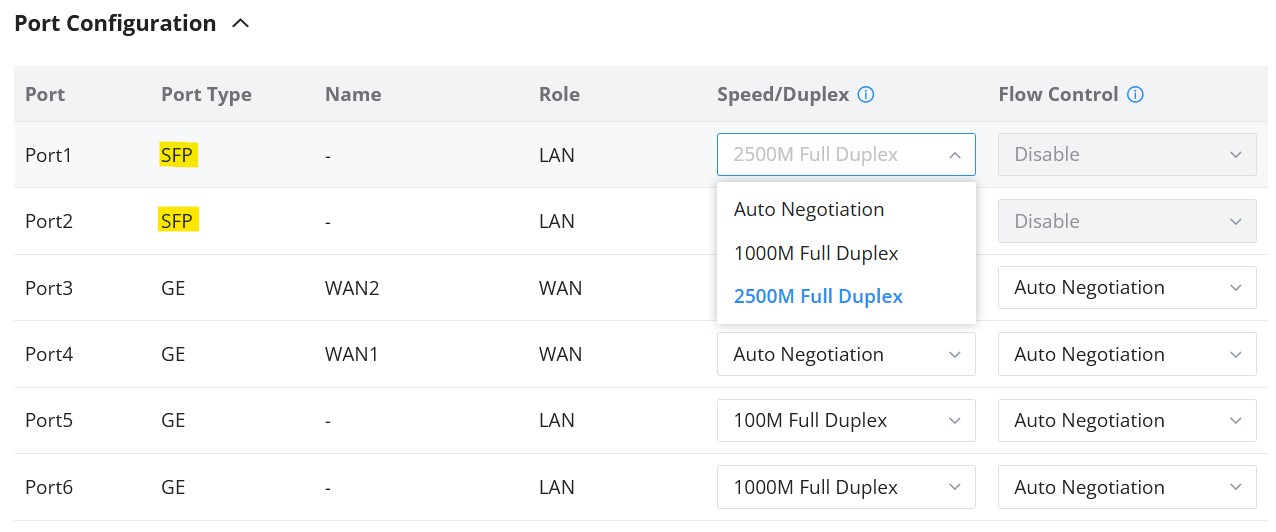
Port configuration page allows the user to configure the settings related to all the ports of the router; this includes the gigabit
Ethernet ports as well as the SFP ports. The settings that can be edited include flow control, speed and duplex mode.
Note:
SFP ports support 2.5G SFP module.
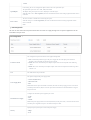
Port This field indicates the port number.
Port Type
This field indicates the port type.
●GE: Stands for Gigabit Ethernet
●SFP: Small form-factor Pluggable
Name This indicates the port name.
Role This indicates the port role.
●LAN

PoE Configuration
The user can also control the total power limited that the router can supply through PoE. The power supplied can also be
controlled on the port level.
●WAN
Speed/Duplex
In this setting, the user can configure the duplex mode as well as the speed of the port.
The speed of the port can be set to: 10M, 100M, and 1000M.
The duplex setting of the port can be set to: Half Duplex and Full Duplex.
When the mode is set to Auto Negotiation, the router will determine based on the settings negotiated with the device
connected.
Flow Control
The user can enable or disable flow control using this option.
When the setting is set to Auto Negotiation, the router will determine based on the settings negotiated with the
device connected.
Note:
Total Power Limit
This configures the power limit which can be supplied through PoE.
●Auto: Automatically detect the type of the power supply and select the output power. When the
DC/PoE+ input is detected, the total power limit is 12.8W
●12.8W: This can be selected if the power adaptor output values which corresponds to the following
values:
●24.8W: This can be selected if power adaptor output values which corresponds to the following values:
24VDC 1.5A.
Port This field indicates the port number.
Power Supply Mode
This option configures the power supply mode.
●Active PoE (802.3af/at)
●48V Passive PoE
●Off
Note: When the 48V passive PoE mode is selected, the router will always supply power. It is not safe for
non-POE powered devices (PD) to access this port. Please ensure that the connected PD devices support
48V passive PoE.
Maximum Power Supply
Configures the maximum power supplied by the router.
●5.2W
●9W
●12.8W
Note: If the power supply mode is Active PoE (802.3af/at) or 48V passive PoE , ensure that the sum of the
maximum power supplied to all ports is less than the total power limit.
Priority
Specify the priority of the port in terms of the power supply.
●High
●Low

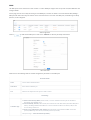
WAN
The WAN ports can be connected to a DSL modem or a router. WAN port support also sets up static IPv4/IPv6 addresses and
configure PPPoE.
On this page, the user can modify the setting for each WAN port, and also can delete or even add another WAN, Adding a
WAN port will reduce the LAN ports number. In the case where there is more than one WAN port, load balancing or backup
(Failover) can be configured.
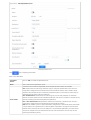
WAN Configuration
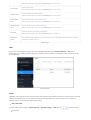
Click on to add another WAN port or click on the “edit icon” to edit the previously created ones.
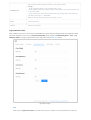
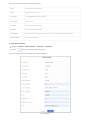
Add or Edit WAN
Please refer to the following table for network configuration parameters on the WAN port.
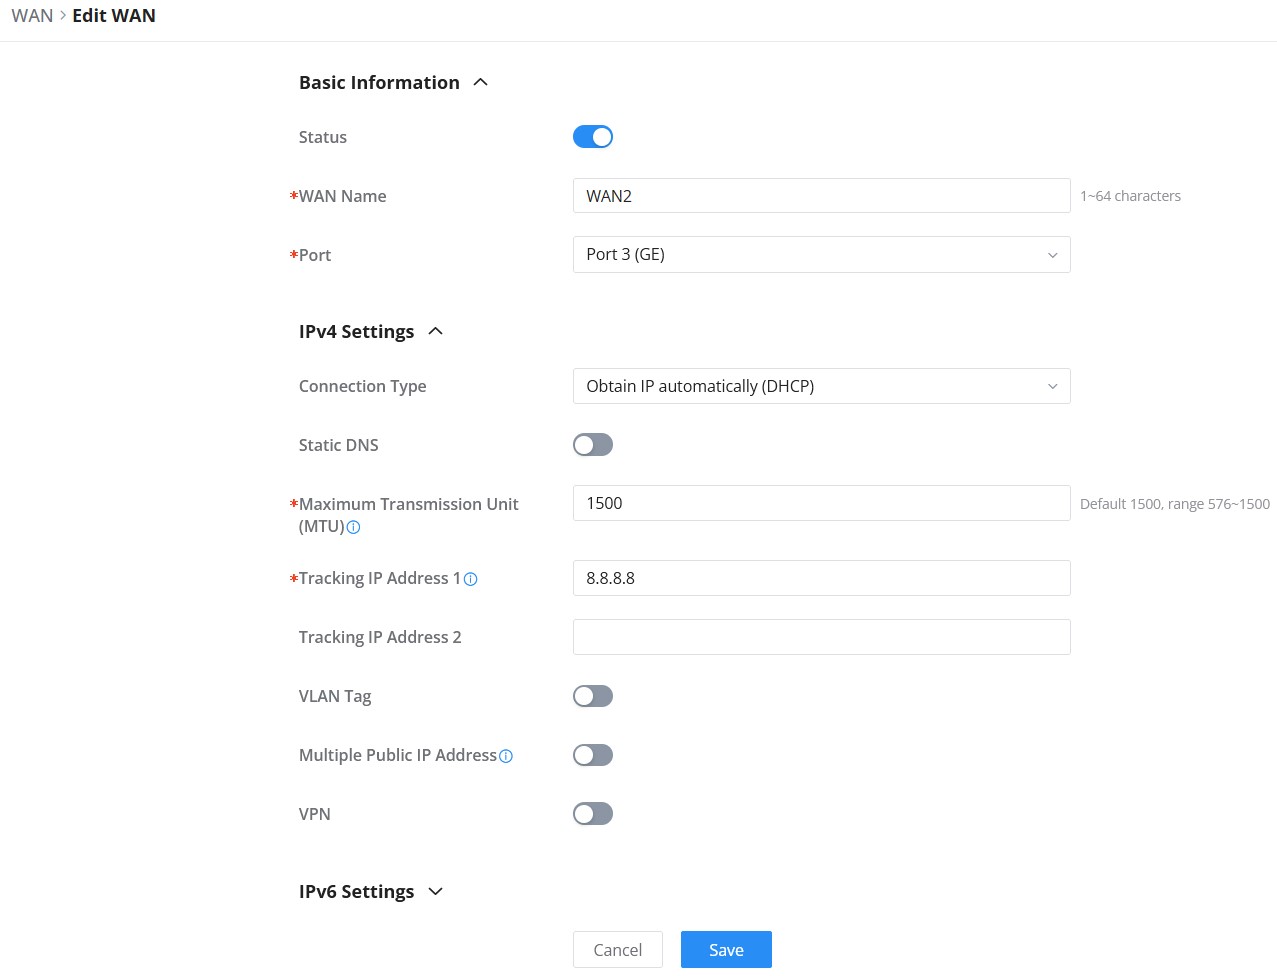
Basic Information
Status Click to enable or disable the WAN
WAN Name Enter a name for the WAN port
Port Select from the drop-down list the port to be used as a WAN
IPv4 Settings
Connection Type
●Obtain IP automatically (DHCP): When selected, it will act as a DHCP client and acquire an IPv4 address
automatically from the DHCP server.
●Enter IP Manually (Static IP): When selected, the user should set a static IPv4 address, IPv4 Subnet Mask, IPv4
Gateway and adding Additional IPv4 Addresses as well to communicate with the web interface, SSH, or other
services running on the device.
●Internet Access with PPPoE account (PPPoE): When selected, the user should set the PPPoE account and
password, PPPoE Keep alive interval, and Inter-Key Timeout (in seconds).
The default setting is “Obtain IP automatically (DHCP)”.

Static DNS Check Static DNS then enter the Preferred DNS Server and the Alternative DNS Server.
Maximum
Transmission
Unit (MTU)
Configures the maximum transmission unit allowed on the wan port.
●When using Ethernet, the valid range that can be set by the user is 576-1500 bytes. The default value is 1500.
Please do not change the default value unless you have to.
●When using PPPoE, the valid range that can be set by the user is 576-1492 bytes. The default value is 1492. Please
do not change the default value unless you have to.
Tracking IP
Address 1 Configures tracking IP address of WAN port to determine whether the WAN port network is normal.
Tracking IP
Address 2 Add another alternative address for Tracking IP Address
VLAN Tag Select if either to enable or disable VLAN Tag.
Multiple Public
IP Address Please use with Port Forward function, so that you can access to router via public IP address.
VPN
VPN
●L2TP: Layer Two Tunneling Protocol (L2TP) is an extension of the Point-to-Point Tunneling Protocol (PPTP)
used by internet service providers (ISPs) to enable virtual private networks (VPNs).
●PPTP: Point-to-Point Tunneling Protocol (PPTP) is a network protocol that enables the secure transfer of data
from a remote client to a private enterprise server by creating a virtual private network (VPN) across TCP/IP-
based data networks.
Username Enter the username to authenticate into the VPN server.
Password Enter the password to authenticate into the VPN server.
Server Address Enter the IP address or the FQDN of the VPN server.
MPEE
Encryption When PPTP is chosen as the VPN Connection Type, the user can choose to toggle on or off the MPEE Encryption.
IP Type ●Dynamic IP: The IP will be assigned statically using DHCP.
●Static IP: The IP will be assigned statically.
VPN Static DNS Enable this option to use the statically assigned DNS server addresses.
Maximum
Transmission
Unit (MTU)
This configures the value of the maximum transmit unit. The valid range for this value is 576 - 1460.
The default value is 1430.
Note: Please do not change this value unless it's necessary.
IPv6 Settings
IPv6 Enable this option to use IPv6 on this specific WAN port.
Connection Type ●Obtain IP automatically (DHCPv6)
●Enter the IP manually (static IPv6)
IPv6 Address When the Connection Type is set to Static IP, the user can can enter the static IP address in this field.

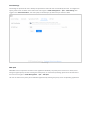
WAN Settings
LAN
To access the LAN configuration page, log in to the GWN700x WebGUI and go toNetwork Settings → LAN. VLAN
configuration such as adding VLANs or setting up a VLAN port can be found here on this page, as well as the ability to add
Static IP Bindings.
LAN configuration
VLAN
GWN700x router integrates VLAN to enhance security and add more functionalities and features. VLAN tags can be used with
SSIDs to separate them from the rest, also the user can allow these VLANs only on specific LANs for more control and
isolation and they can be used as well with policy routing.
Add or Edit VLAN
To Add or Edit a VLAN, Navigate toRouter Interface→Network Settings → LAN. Click on button or click on
Edit button.
Note: This option appears only when the Connection Type is set to Static IPv6.
Prefix Length Enter the prefix length.
Note: This option appears only when the Connection Type is set to Static IPv6.
Default Gateway Enter the IP address of the default gateway
Note: This option appears only when the Connection Type is set to Static IPv6.
Preferred DNS
Server
Enter the IP address of the preferred DNS server.
Note: This option appears only when the Connection Type is set to Static IPv6.
Alternative DNS
Server
Enter the IP address of the alternative DNS server
Note: This option appears only when the Connection Type is set to Static IPv6.
Static DNS Enable this option to enter statically assigned DNS.
Note: This option appears only when the Connection Type is set to DHCPv6.
IPv6 Relay to
VLAN
Once enabled, relay IPv6 addresses to clients on the LAN side. Note: This function will take effect only "IPv6 Relay
from WAN" is enabled on VLAN.

Add or Edit VLAN
VLAN ID Enter a VLAN ID
Note:VLAN ID range is from 3 to 4094. Up to 8 VLANs supported
Name Enter the VLAN name
Destination
Select the destination interfaces (the WAN ports).
Note: by default, interfaces in the Default rule of the load balancing pool is selected and
cannot be deselected
VLAN Port IPv4 Address Check IPv4 Address to specify the Address.
IPv4 address Enter IPv4 Address
Subnet Mask Enter Subnet Mask
DHCP Server By default it’s “Off“, choose “On” to specifiy the IPv4 address Allocation Range
IPv4 Address Allocation
Range Enter the start and the end of the IPv4 address Allocation Range.
Release Time(m) The default value is 120, and the valid range is 60~2880.
DHCP Option Enter or Add DHCP Options
Preferred DNS Server Enter the Preferred DNS Server
Alternative DNS Server Enter the Alternative DNS Server
Add or Edit VLAN
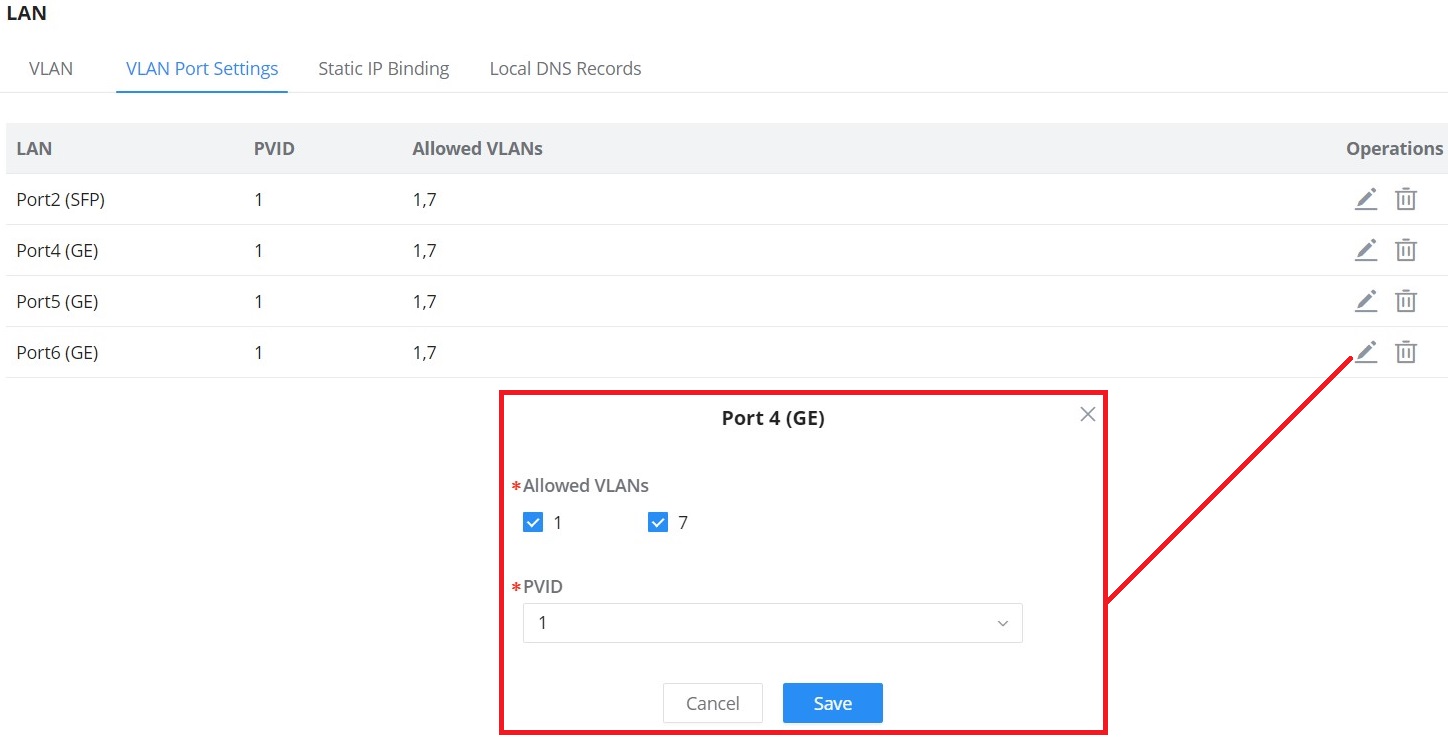
VLAN Port Settings
The user can use LAN ports to allow only specific VLANs on each LAN port and in case there are more than one VLAN then
there is an option to choose one VLAN as the default VLAN ID (PVID or Port VLAN Identifier). Click on to edit the VLAN
Port Settings or click on to delete that configuration and bring back the default settings which is by default VLAN 1.

VLAN Ports
Allowed VLANs Choose the VLANS to be allowed on this port.
PVID Select the Port VLAN Identifier or the default VLAN ID
VLAN Port Settings
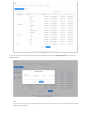
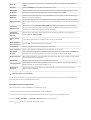
Static IP Binding
Users can use the feature to setStatic IP Bindingto certain clients, to whom they do not want the IP address to change.
To configure Static IP Binding, please follow the below steps:
1- Go under the menuNetwork Settings → LAN → Static IP Binding.
2- Click on “Add” button to create a new entry.
3- Enter the device’s MAC address and IP address.
Static IP Binding
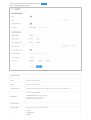
VLAN Select the VLAN or Default VLAN
Binding Devices Select to input manually by entering the MAC Address and IP Address or select from the clients list.
MAC Address Enter the MAC Address
IP Address Enter the IP Address
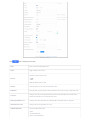
Static IP Binding

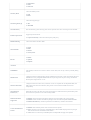
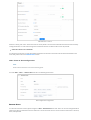
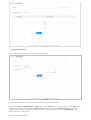
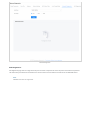
Local DNS Records
Local DNS Records is a feature that allows the user to a DNS records into the router which can be used to map the domain
name to an IP address. This feature can be used when the user needs to access a specific server using a domain name instead
of an IP address when they do not want to include the entry in public DNS servers. To add a local DNS record, please navigate
to Network Settings → LAN → Local DNS Records, then click “Add”
Add Local DNS Records
Enter the domain name in “Domain”
Then, enter the IP address to which the domain name will be mapped to.
Toggle on the “Status” for the mapping to take effect.
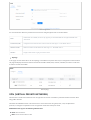
Network Acceleration
Hardware acceleration allows the router to transfer data at a higher rate when PPTP or L2TP acceleration is enabled. This
ensures a high performance even when VPN is enabled.
Hardware Acceleration
CLIENTS
Clients page keeps a list of all the devices and users connected currently or previously to different LAN subnets with details
such as the MAC Address, the IP Address, the duration time, and the upload and download information.
Note
When using the PPTP VPN, it is recommended to enable the PPTP acceleration.
Important
Please note that enabling the Hardware Acceleration will disable some features, such as, QoS, rate limit, traffic statistics, content
security, and IPSec Client-to-Site.

The clients’ list can be accessed from GWN700x’s Web GUI → Clients to perform different actions for wired and wireless
clients.
Clients Page
Edit Device
MAC Address This section shows the MAC addresses of all the devices connected to the router.
Device Name This section shows the names of all the devices connected to the router.
IP Address This section shows the IP addresses of all the devices connected to the router.
Connection Type
This section shows the medium of connection that the device is using.
There are two mediums which can be used to connect:
●Wireless: Using an access point with the router.
●Wired: Using an ethernet wired, either connected directly to one of the router's LAN ports, or through a
switch.
Channel If device is connected through an access point, the router will retrieve the information of which channel the
device is connected to.
SSID Name If device is connected through an access point, the router will retrieve the information of which SSID the
device is connected to.
Associated Device In case of an access point or an access point with the router, this section will show the MAC address of the
device used
Duration This indicates how long a device has been connected to the router.
RSSI RSSI stands for Received Signal Strength Indicator. It indicates the wireless signal strength of the device
connected to the AP paired with the router.
Station Mode This field indicates the station mode of the access point.
Total Total data exchanged between the device and the router.
Upload Total uploaded data by the device.
Download Total downloaded data by the device.
Current Rate The real time WAN bandwidth used by the device.
Link Rate This field indicates the total speed that the link can transfer.
Manufacturer This field indicates the manufacturer of the device.
OS This field indicates the operating system installed on the device.

In the operations column click on Edit icon to set the name of the device, and assign a VLAN ID and static address to the
device.
Edit Device
Delete Device
To delete a device, go to the Operations column and click the delete button then click “Delete”. Please note that you can
only delete the devices which are offline, the devices online cannot be deleted.
View Client Information and Report
Click on a device to open the full report of the traffic used by the device. The report will contain the total data uploaded and
downloaded, as well as the statistics used by each application on the device.
Page is loading ...
Page is loading ...
Page is loading ...
Page is loading ...
Page is loading ...
Page is loading ...
Page is loading ...
Page is loading ...
Page is loading ...
Page is loading ...
Page is loading ...
Page is loading ...
Page is loading ...
Page is loading ...
Page is loading ...
Page is loading ...
Page is loading ...
Page is loading ...
Page is loading ...
Page is loading ...
Page is loading ...
Page is loading ...
Page is loading ...
Page is loading ...
Page is loading ...
Page is loading ...
Page is loading ...
Page is loading ...
Page is loading ...
Page is loading ...
Page is loading ...
Page is loading ...
Page is loading ...
Page is loading ...
Page is loading ...
Page is loading ...
Page is loading ...
Page is loading ...
Page is loading ...
Page is loading ...
Page is loading ...
Page is loading ...
Page is loading ...
Page is loading ...
Page is loading ...
Page is loading ...
Page is loading ...
Page is loading ...
Page is loading ...
Page is loading ...
Page is loading ...
Page is loading ...
Page is loading ...
Page is loading ...
Page is loading ...
Page is loading ...
Page is loading ...
Page is loading ...
Page is loading ...
Page is loading ...
Page is loading ...
Page is loading ...
Page is loading ...
Page is loading ...
Page is loading ...
Page is loading ...
Page is loading ...
Page is loading ...
Page is loading ...
Page is loading ...
Page is loading ...
Page is loading ...
Page is loading ...
Page is loading ...
Page is loading ...
Page is loading ...
-
 1
1
-
 2
2
-
 3
3
-
 4
4
-
 5
5
-
 6
6
-
 7
7
-
 8
8
-
 9
9
-
 10
10
-
 11
11
-
 12
12
-
 13
13
-
 14
14
-
 15
15
-
 16
16
-
 17
17
-
 18
18
-
 19
19
-
 20
20
-
 21
21
-
 22
22
-
 23
23
-
 24
24
-
 25
25
-
 26
26
-
 27
27
-
 28
28
-
 29
29
-
 30
30
-
 31
31
-
 32
32
-
 33
33
-
 34
34
-
 35
35
-
 36
36
-
 37
37
-
 38
38
-
 39
39
-
 40
40
-
 41
41
-
 42
42
-
 43
43
-
 44
44
-
 45
45
-
 46
46
-
 47
47
-
 48
48
-
 49
49
-
 50
50
-
 51
51
-
 52
52
-
 53
53
-
 54
54
-
 55
55
-
 56
56
-
 57
57
-
 58
58
-
 59
59
-
 60
60
-
 61
61
-
 62
62
-
 63
63
-
 64
64
-
 65
65
-
 66
66
-
 67
67
-
 68
68
-
 69
69
-
 70
70
-
 71
71
-
 72
72
-
 73
73
-
 74
74
-
 75
75
-
 76
76
-
 77
77
-
 78
78
-
 79
79
-
 80
80
-
 81
81
-
 82
82
-
 83
83
-
 84
84
-
 85
85
-
 86
86
-
 87
87
-
 88
88
-
 89
89
-
 90
90
-
 91
91
-
 92
92
-
 93
93
-
 94
94
-
 95
95
-
 96
96


Ask a question and I''ll find the answer in the document
Finding information in a document is now easier with AI