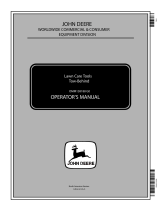
Precision TBS4500PRCGY Owner's manual
- Category
- Spreader
- Type
- Owner's manual
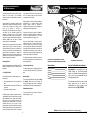
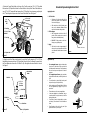
Precision TBS4500PRCGY is a trail behind broadcast spreader engineered to give you the most dependable and best-performing product possible. It is designed to be towed behind a tractor and is ideal for spreading a variety of materials, including seed, fertilizer, and ice melt. The spreader has a 100 lb. maximum operating weight and should not be towed at more than 4 miles per hour. It features a wrap-around support for added durability, a control cable holder for easy operation, and a spinner disc for even spreading.
Precision TBS4500PRCGY is a trail behind broadcast spreader engineered to give you the most dependable and best-performing product possible. It is designed to be towed behind a tractor and is ideal for spreading a variety of materials, including seed, fertilizer, and ice melt. The spreader has a 100 lb. maximum operating weight and should not be towed at more than 4 miles per hour. It features a wrap-around support for added durability, a control cable holder for easy operation, and a spinner disc for even spreading.


-
 1
1
-
 2
2
-
 3
3
-
 4
4
-
 5
5
-
 6
6


Precision TBS4500PRCGY Owner's manual
- Category
- Spreader
- Type
- Owner's manual
Precision TBS4500PRCGY is a trail behind broadcast spreader engineered to give you the most dependable and best-performing product possible. It is designed to be towed behind a tractor and is ideal for spreading a variety of materials, including seed, fertilizer, and ice melt. The spreader has a 100 lb. maximum operating weight and should not be towed at more than 4 miles per hour. It features a wrap-around support for added durability, a control cable holder for easy operation, and a spinner disc for even spreading.
Ask a question and I''ll find the answer in the document
Finding information in a document is now easier with AI
Related papers
-
Precision TBS7019 Owner's manual
-
Precision TBS4500PRCGY Owner's manual
-
-
-
-
-
-
-
Other documents
-
 John Deere AS-40JD User manual
-
Land Pride PFS User manual
-
Agri-Fab 45-04632 User manual
-
-
-
-
Sears 45-02153 User manual
-
Sears 486.245951 User manual
-
-
Craftsman 486243232 Owner's manual
