Page is loading ...

Ab / Back
Owners Manual

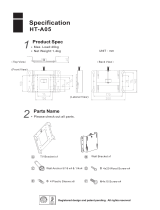
2
Item
1
2
3
4
5
6
7
8
9
10
11
12
13
14
15
16
17
18
19
20
21
22
23
24
25
Qty
1
9
52
50
27
4
50
1
6
1
4
2
2
15
1
2
1
2
1
2
4
26
2
1
2
Tools Required:
O
8mm Allen Wrench
O
3” Ratchet Extension
O
9/16” Wrench
O
17mm Wrench
O
17mm Socket
O
9/16” Socket
O
Ratchet
O
8mm Hex Bit
Description
3/8 x 73mm Hex Bolt
3/8 x 67mm Hex Bolt
3/8 SAE Washer
3/8 RH Washer
3/8 Low HT Lock Nut
3/8 x 92mm Hex Bolt
3/8 RH Cap
Cable
4 1/2” Pulley
3/8 x 40mm Hex Bolt
3/8 x 1/2 Flange Spacer
Guide Rod
Weight Stack Cushion
Weight Plate
Head Plate Assembly
13/16” Shaft Collar
Guide Rod Support
3/8 x 63mm Hex Bolt
Pillow Block Collar
Pillow Block
3/8 x 75mm Btn Hd Bolt
3/8 FLAT BLK Washer
Plastic Washer
Chest Roller Pad
Plastic Collar
Part Number
DA1C03807316NU
DA1C03806716NU
DC120010510U
PO5-0009
807200U
DA1C03809216NU
P06-0021
P13-0102
P06-0035
DA1C03804016NU
P08-0085
P01-1036
A06-0304
7954901 (Box set of 5)
AP10-0053
A05-0212
A04-1639
DA1C03806316NU
P05-0248
A05-0351
DAEC03807516NB
DC125010020B
P06-0345
P06-0280
P06-0277
Ab / Back
1. Assembly Instructions
Item
26
27
28
29
30
31
32
33
34
35
36
37
38
39
40
41
42
43
44
45
46
47
48
49
50
51
Qty
2
2
2
1
1
2
1
1
1
1
1
1
2
2
1
2
1
1
10
10
1
2
4
4
2
1
Description
3/8 x 49mm Hex Bolt
3/8 x 43mm Hex Bolt
Pulley Cover
Weight Stack Pin
Counter Weight
3/8 x 33mm Hex Bolt
Lumbar Pad
3/8 x 76mm Hex Bolt
Seat Pad
Handle
3/8 x 81mm Hex Bolt
Foot Rest
3/8 x 64mm Hex Bolt
3/8 x 46mm Hex Bolt
Cam Shroud
3/8 x 89mm Hex Bolt
Front Shroud
Rear Shroud
3/8 x 90mm Btn Hd Bolt
3/8 Acorn Nut
Tower Cap
3/8 x 25mm Btn Hd Bolt
3/8 FLAT Washer
Bushing
M10 x 76mm Hex Bolt
Weight Stack Label
Part Number
DA1C03804916NU
DA1C03804316NU
P02-0256
P11-0048
P10-0052
DA1C03803316NU
A07-0235
DA1C03807616NU
P07-0005
AP04-0813
DA1C03808116NU
P04-0814
DA1C03806416NU
DA1C03804616NU
AP02-0987
DA1C03808916NU
A10-0227
A10-0230
DAEC03809016NB
A05-0443
AP06-0257
DAEC03802516NB
DC125010020U
A05-0356
DA1M10007615NB
MD000132
Hardware Bags
ACUHB-FSABBAPLT -or- ACUHB-FSABBAWHT

3

4
Ab / Back
1. Assembly Instructions

5
1. Assemble the TOWER (A) to the CAM FRAME (B) using two 3/8 X 92mm
BOLTS (6), four 3/8 X 67mm BOLTS (2), twelve 3/8" SAE WASHERS (3),
twelve 3/8" RH WASHERS (4), six 3/8" LOW HT LOCK NUTS (5) as shown.
Finger tighten the bolts and nuts at this time.
2. Assemble the SEAT FRAME (C) to the CAM FRAME (B) using two 3/8 X
92mm BOLTS (6), four 3/8" SAE WASHERS (3), four 3/8" RH WASHERS
(4), two 3/8" LOW HT LOCK NUTS (5) as shown. Finger tighten the bolts
and nuts at this time.
3. Assemble the CROSS BRACE (D) to the CAM FRAME (B) and SEAT
FRAME (C) using three 3/8 X 67mm BOLTS (2), six 3/8" SAE WASHERS
(3), six 3/8" RH WASHERS (4), three 3/8" LOW HT LOCK NUTS (5). Use
only one 3/8 X 67mm BOLT at the back of the SEAT FRAME as shown.
4. SECURELY tighten all loose frame connections made to this point, then
proceed to snap twenty-two RH CAPS (7) over the RH WASHERS (4) on
all tightened connections.
5. Wrap the threaded end of CABLE (8) around two 4-1/2" PULLEYS (9) and
SECURELY assemble the PULLEYS to the TOWER (A) using two 3/8 X
63mm BOLTS (18), four 3/8 X 1/2" FLANGE SPACERS (11) and two 3/8"
LOW HEIGHT LOCK NUTS (5) as shown.
NOTE: Make sure the CABLE is in the groove of the PULLEY before tight-
ening.
6. Route the ball end of CABLE (8) through the TOWER (A) and around one 4-
1/2" PULLEY (9) and SECURELY assemble the PULLEY between the
PLATES (J) on the TOWER using two 3/8 X 49mm BOLTS (26), four 3/8"
SAE WASHERS (3), four 3/8" RH WASHERS (4), two 3/8" LOW HEIGHT
LOCK NUTS (5) and four RH CAPS (7) as shown.
NOTE: Make sure the CABLE is in the groove of the PULLEY before tight-
ening.
Wrap the ball end of CABLE around one 4-1/2" PULLEY (9) and securely
assemble the PULLEY between the U-BRACKET (K) on the TOWER using
two 3/8 X 43mm BOLTS (27), four 3/8" SAE WASHERS (3), four 3/8" RH
WASHERS (4), two 3/8" LOW HEIGHT LOCK NUTS (5) and four RH CAPS
(7) as shown.
NOTE: Make sure the CABLE is in the groove of the PULLEY before tight-
ening.

6
Ab / Back
1. Assembly Instructions
7. WEIGHT STACK ASSEMBLY
Insert the two GUIDE RODS (12) into the base of the TOWER (A) as
shown.
Slide two WEIGHT STACK CUSHIONS (13) down over the GUIDE RODS
as shown.
Lubricate the GUIDE RODS with a slicon or teflon spray that is available
at most hardware stores.
Using EXTREME CARE, slide fifteen 10 LB. WEIGHT PLATES (14) down
over the GUIDE RODS.
Carefully Slide the HEAD PLATE ASSEMBLY (15) down over the GUIDE
RODS onto the weight stack.
Slide one 13/16" SHAFT COLLAR (16) over each GUIDE ROD.
8. Route the threaded end of the CABLE (8) through the hole in the GUIDE
ROD SUPPORT (17).
Slide the GUIDE ROD SUPPORT over the GUIDE RODS (12) and SECURELY
assemble the GUIDE ROD SUPPORT to the TOWER using two 3/8 X 67mm
BOLTS (2), four 3/8" FLAT WASHERS (48) and two 3/8" LOW HEIGHT LOCK
NUTS (5) as shown.
Slide the 13/16" SHAFT COLLARS (16) underneath the GUIDE ROD SUP-
PORT BUSHINGS and SECURELY tighten the set screws.
9. Slide two PILLOW BLOCKS (20) over the CAM PIVOT SHAFTS (E) as
shown.
SECURELY assemble the CAM (F) to the CAM FRAME (B) using four BUSH-
INGS (49), four 3/8 X 75mm BUTTON HEAD BOLTS (21), four 3/8" FLAT
BLK WASHERS (22), four 3/8" RH WASHERS (4), four 3/8" SAE WASHERS
(3), four 3/8" LOW HT LOCK NUTS (5) and four RH CAPS (7) as shown.
Do not tighten the PILLOW BLOCK COLLAR set screws at this time.
10. Slide one PLASTIC COLLAR (25) over the end of the PAD SHAFT. Position
the PLASTIC COLLAR 21 1/4” from the end of the PAD SHAFT and tighten
the set screw securely.
Slide one PLASTIC WASHER (23) and the CHEST ROLLER PAD (24) over
the PAD SHAFT (G) until it meets the installed SHAFT COLLAR. Install a
second PLASTIC WASHER and the PLASTIC COLLAR (25) over the end of
the PAD SHAFT and snug to the CHEST ROLLER PAD. Tighten the SHAFT
COLLAR set screw securely.
NOTE: Be sure the second SHAFT COLLAR is installed fully onto the PAD
SHAFT.

7
11. Wrap the ball end of the CABLE (8) around one 4-1/2" PULLEY (9) and
SECURELY assemble the PULLEY to the FORWARD PIVOT ARM (L) as
shown using one 3/8 X 46mm BOLT (39), one PULLEY COVER (28), one
3/8" SAE WASHER (3), one 3/8" RH WASHER (4) and one RH CAP (7).
NOTE: Make sure the CABLE is in the groove of the PULLEY and the
PULLEY COVER is positioned correctly (as shown), before tightening.
Wrap the ball end of the CABLE (8) around one 4-1/2" PULLEY (9) and
SECURELY assemble the PULLEY to the REARWARD PIVOT ARM (M) as
shown using one 3/8 X 46mm BOLT (39), one PULLEY COVER (28), one
3/8" SAE WASHER (3), one 3/8" RH WASHER (4) and one RH CAP (7).
NOTE: Make sure the CABLE is in the groove of the PULLEY and the
PULLEY COVER is positioned correctly (as shown), before tightening.
Attach the ball end of the CABLE (8) to the CAM FRAME (B) as shown
using one 3/8 X 40mm BOLT (10), two 3/8" SAE WASHERS (3) and one
3/8" LOW HT LOCK NUT (5).
Verify the cable has been routed according to the illustration shown
below.
12. Visually check the alignment of the PIVOT ARM PULLEYS and the
TOWER PULLEYS. Slide the CAM (F) as necessary to align the pulleys.
Tighten the PILLOW BLOCK COLLAR set screws securely.

8
Ab / Back
1. Assembly Instructions
13. Slide the metal ring of the WEIGHT STACK PIN (29) over the STEM on
the HEAD PLATE ASSEMBLY (15) as shown.
Screw the threaded end of the CABLE (8) into the STEM of the HEAD
PLATE ASSEMBLY far enough that the HEAD PLATE just begins to lift off
of the first WEIGHT PLATE. Then tighten jam nut SECURELY.
Apply WEIGHT STACK LABELS to the WEIGHT PLATES (14) and HEAD
PLATE ASSEMBLY. Begin with number one at the HEAD PLATE ASSEM-
BLY with larger numbers in consecutive order towards bottom of weight
stack.
14. SECURELY assemble the COUNTER WEIGHT (30) to the PIVOT ARM (N)
using two 3/8 X 33mm BOLTS (31), two 3/8" SAE WASHERS (3), two 3/8"
RH WASHERS (4) and two RH CAPS (7) as shown.
15. SECURELY assemble the LUMBAR PAD (32) to the SEAT FRAME (C)
using two M10 X 76mm BOLTS (50), two 3/8" SAE WASHERS (3), two
3/8" RH WASHERS (4) and two RH CAPS (7).
16. SECURELY assemble the SEAT PAD (34) and HANDLE (35) to the SEAT
FRAME (C) using one 3/8 X 76mm BOLTS (33), one 3/8 X 81mm BOLT
(36), one 3/8 X 73mm BOLTS (1), four 3/8" SAE WASHERS (3), four 3/8"
RH WASHERS (4) one 3/8" LOCK NUT (5) and four RH CAPS (7) as
shown.
17. SECURELY assemble the FOOT REST (37) to the SEAT FRAME (C) using
two 3/8 X 64mm BOLTS (38), two 3/8" SAE WASHERS (3), two 3/8" RH
WASHERS (4) and two RH CAPS (7) as shown.

9
18. SECURELY assemble the CAM SHROUD (40) to the CAM FRAME (B)
using two 3/8 X 89mm BOLTS (41), four 3/8" SAE WASHERS (3), four
3/8" RH WASHERS (4), two 3/8" LOW HT LOCK NUTS (5) and four RH
CAPS (7) as shown.
19. SHROUD ASSEMBLY
SECURELY assemble the FRONT SHROUD (42) and the REAR SHROUD
(43) to the TOWER (A) using ten 3/8 X 90mm BUTTON HEAD BOLTS
(44), twenty 3/8" FLAT BLK WASHERS (22) and ten 3/8" ACORN NUTS
(45) as shown.
SECURELY assemble the TOWER CAP (46) to the TOWER (A) using two
3/8 X 25mm BUTTON HEAD BOLTS (47) and two 3/8" FLAT BLK WASH-
ERS (22).

10
Ab / Back
2. Safety & Warranty
It is the sole responsibility of the purchaser of LIFE FITNESS products to instruct all individuals, whether they are the end user or supervising personnel on
proper usage of the equipment.
It is recommended that all users of LIFE FITNESS exercise equipment be informed of the following information prior to its use.
PROPER USAGE
1. Do not use any equipment in any way other than designed or intended by the manufacturer. It is imperative that all LIFE FITNESS equipment is
used properly to avoid injury.
2. Keep hands and feet clear at all times from moving parts to avoid injury.
CHECK FOR DAMAGED PARTS
1. DO NOT use any equipment that is damaged and or has worn or broken parts. Use only replacement parts supplied by LIFE FITNESS.
2. MAINTAIN LABELS AND NAMEPLATES: Do not remove labels for any reason. They contain important information. If unreadable or missing, con-
tact LIFE FITNESS for a replacement.
3. SECURING EQUIPMENT: All equipment MUST be secured to the floor to stabilize and eliminate rocking or tipping over. This must be performed
by a licensed contractor.
4. Ensure that any person(s) making adjustments or performing maintenance or repair of any kind is qualified to do so. LIFE FITNESS will provide
service and maintenance training at our corporate facility upon request or in the field if proper arrangements are made.
SPECIFIC OPERATING WARNINGS
1. Do not allow users to wear loose fitting clothing while using equipment. It is also recommended to have users secure long hair back and up to
avoid contact with moving parts.
2. It is the purchaser's sole responsibility to properly instruct its end users and supervising personnel as to the proper operating procedures of all
LIFE FITNESS equipment.
3. Keep children away from strength equipment. Parent or others supervising children must provide close supervision of children if the equipment is
used in the presence of children.
4. Never use dumbbells or other means to incrementally increase the weight resistance. Use only those means provided by LIFE FITNESS.
5. UNDERSTANDING EACH AND EVERY WARNING TO THE FULLEST IS IMPORTANT. IF ANY OF THESE WARNINGS ARE UNCLEAR, ASK FOR
CLARIFICATION FROM LIFE FITNESS PERSONNEL.
6. It is recommended that all individuals consult a physician prior to commencing an exercise program. If at any time during exercise you feel faint,
dizzy or experience pain, stop and consult your physician.

11
WARRANTY
WHAT IS COVERED
This Life Fitness commercial exercise equipment (Hip Abduction / Adduction) is warranted to be free of all defects in material and workmanship.
WHO IS COVERED
The original purchaser or any person receiving the Product as a gift from the original purchaser.
WHO PAYS TRANSPORTATION & INSURANCE FOR SERVICE
If the Product or any covered part must be returned to a service facility for repairs, We, Life Fitness, will pay all transportation and insurance charges for
the first year. You are responsible for transportation and insurance charges during the second and third years (if applicable).
WHAT WE WILL DO TO CORRECT COVERED DEFECTS
We will ship to you any new or rebuilt replacement part or component, or, at our option, replace the Product. Such replacement parts are warranted for
the remaining portion of the original warranty period.
WHAT IS NOT COVERED
Any failures or damage caused by unauthorized service, misuse, accident, negligence, improper assembly or installation, debris resulting from any con-
struction activities in the Product's environment, rust or corrosion as a result of the Product's location, alterations or modifications without our written
authorization or by failure on your part to use, operate and maintain the Product as set out in your Operation Manual (.Manual.). All terms of this warranty
are void if this product is moved beyond the continental borders of the United States of America (excluding Alaska, Hawaii and Canada) and are then sub-
ject to the terms provided by that country's local authorized Life Fitness representative.
OPERATION MANUAL
It is VERY IMPORTANT THAT YOU READ THIS MANUAL before operating the Product. Remember to perform the periodic maintenance requirements
specified in the Manual to assure proper operation and your continued satisfaction.
HOW TO GET PARTS & SERVICE
Simply call Customer Support Services at (800) 351-3737 or (847) 451-0036, Monday through Friday from 8:00 a.m. to 6:00 p.m. Central Standard Time,
and tell them your name, address and the serial number of your Product. They will tell you how to get a replacement part, or, if necessary, arrange for
service where your Product is located or advise you on how and where to ship the Product for service. Before shipping:
1. Obtain a Return Authorization Number (RA#) from Customer Support Services
2. Securely pack your Product (use the original shipping carton, if possible)
3. Write the RA# on the outside of the carton
4. Insure the Product, and
5. Include a letter explaining the defect or problem and a copy of your proof of purchase if you believe the service is covered by warranty

12
Ab / Back
2. Safety & Warranty
EXCLUSIVE WARRANTY
THIS LIMITED WARRANTY IS IN LIEU OF ALL OTHER WARRANTIES OF ANY KIND EITHER EXPRESSED OR IMPLIED, INCLUDING BUT NOT LIMITED TO
THE IMPLIED WARRANTIES OF MERCHANTABILITY AND FITNESS FOR A PARTICULAR PURPOSE, AND ALL OTHER OBLIGATIONS OR LIABILITIES ON
OUR PART. We neither assume nor authorize any person to assure for us any other obligation or liability concerning the sale of this Product. Under no cir-
cumstances shall we be liable under this warranty, or otherwise, of any damage to any person or property, including any lost profits or lost savings, for
any special, indirect, secondary, incidental or consequential damages of any nature arising out of the use of or inability to use this Product. Some states
do not allow the exclusion or limitation of implied warranties or of liability for incidental or consequential damages, so the above limitations or exclusions
may not apply to you.
CHANGES IN WARRANTY NOT AUTHORIZED
No one is authorized to change, modify or extend the terms of this limited warranty.
EFFECT OF STATE LAWS
This warranty gives you specific legal rights and you may have other rights, which vary, from state to state.
OUR PLEDGE TO YOU
Our Products are designed and manufactured to the highest standards.
We want you completely satisfied with our Products and will do everything possible under the terms of this warranty to keep you secure in knowing you
have bought the best!

13
General Specifications
1. Frame Construction
Frame is constructed of mechanical quality steel purchased in mill run quantities
Frame is primarily 2" x 3" tubing with 11 gauge wall thickness.
2. Frame Finish
Prior to applying finish, each part is chemically washed to prepare surface for maximum adhesion
3. Bolts
All hardware is metric and has a corrosion resistant finish.
4. Instructional Placard
Visual placard provides illustration for proper use.
5. Equipment Anchoring
All machines have holes in the feet, which allow for easy anchoring to the floor. Life Fitness recommends that all machines be anchored to the
floor to minimize the possibility that they will be tipped.
6. Warranty
A 10-year minimum warranty on structural frames (excluding finish surfaces), 1 year on guide rods, pulleys and weight plates,
and 90 days on grips, upholstery, cables and any items not specified.
7. Liability Insurance
Certificate of insurance available upon request
Product Specifications
AB / BACK Product # - FSABBA
Machine Weight: 490 lbs. 222 kg.
Size: in = 52.5L x 44W x 70.5H cm = 134 L x 112 W x 179 H
Live Area: in = 65L x 54W x 70.5H cm = 165 L x 137 W x 179 H
Ab / Back
3. Specifications

14
Abdominal Crunch
4. Exercise
Abdominal
Start Finish
Back
Start Finish

15
CLEAN
O
Upholstery with a mild soap and water.
O
Hand grips with mild soap and water.
INSPECT
O
Hardware should be checked for looseness. Tighten as required.
O
Frames should be inspected for wear or damage. All paint chips should be filled immediately with touch-up paint.
O
Handgrips should be checked for wear or damage.
ONCE A DAY
O
Wipe down upholstery with a mild soap and water or comparable all purpose cleaner.
ONCE A WEEK
O
Visually inspect all hardware for loosening, tampering or wear.
O
Check condition of hand grips.
ACTION DAILY MONTHLY BI-ANNUALLY AS NEEDED
CLEAN
Upholstery X
Hand Grips X
INSPECT
Hardware X
Frame X
Hand Grips X
Abdominal Crunch
5. Maintenance

©
2007 Life Fitness, a division of Brunswick Corporation. All rights reserved.
Life Fitnessis a registered trademark of Brunswick Corporation.
FSABBA 2.09.06 7887901 Rev A-3
/