Panasonic AG-HMC150 User manual
- Category
- Camcorders
- Type
- User manual
Panasonic AG-HMC150 is a professional camcorder that offers a wide range of features for both videographers and filmmakers. With its 3MOS sensor, it can capture stunning 1080i/60 and 720p/60 video, while its Leica Dicomar lens provides excellent optical performance. The AG-HMC150 also features a variety of manual controls, including focus, iris, and gain, which give users the flexibility to achieve the look they want.
Panasonic AG-HMC150 is a professional camcorder that offers a wide range of features for both videographers and filmmakers. With its 3MOS sensor, it can capture stunning 1080i/60 and 720p/60 video, while its Leica Dicomar lens provides excellent optical performance. The AG-HMC150 also features a variety of manual controls, including focus, iris, and gain, which give users the flexibility to achieve the look they want.


-
 1
1
-
 2
2
-
 3
3
-
 4
4
-
 5
5
-
 6
6
-
 7
7
-
 8
8
-
 9
9
-
 10
10
-
 11
11
-
 12
12
-
 13
13
-
 14
14
-
 15
15
-
 16
16
-
 17
17
-
 18
18
-
 19
19


Panasonic AG-HMC150 User manual
- Category
- Camcorders
- Type
- User manual
Panasonic AG-HMC150 is a professional camcorder that offers a wide range of features for both videographers and filmmakers. With its 3MOS sensor, it can capture stunning 1080i/60 and 720p/60 video, while its Leica Dicomar lens provides excellent optical performance. The AG-HMC150 also features a variety of manual controls, including focus, iris, and gain, which give users the flexibility to achieve the look they want.
Ask a question and I''ll find the answer in the document
Finding information in a document is now easier with AI
Related papers
-
Panasonic AG-HMC150P User manual
-
Philips AG-HPX170P User manual
-
-
Panasonic AG-AC160AP User manual
-
Panasonic DVX100B User manual
-
-
-
-
-
Other documents
-
-
-
Sony PMW-EX1R User manual
-
-
Canon RC-IP100 User manual
-
Hitachi VF-PBM307 Operating Instructions Manual
-
Funai fun-link SV310FX1 Owner's manual
-
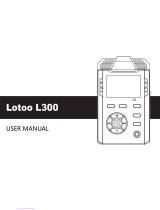 Lotoo L300 User manual
-
 blue built 13 Pro Camera Lens Protector Glass User guide

