Page is loading ...

2015 West Bend
®
, a Brand of Focus Products Group International, LLC.
www.westbend.com
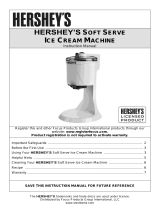
DUAL SINGLE-SERVE ICE CREAM
MACHINE
Instruction Manual
Register this and other Focus Products Group International products through our
website: www.registerfocus.com.
Product registration is not required to activate warranty.
Important Safeguards ............................................................................................. 2
Before the First Use ................................................................................................ 3
Using Your Dual Single-Serve Ice Cream Machine ................................................. 3
Helpful Hints ............................................................................................................ 5
Cleaning Your Dual Single-Serve Ice Cream Machine ............................................ 6
Recipe ...................................................................................................................... 6
Warranty .................................................................................................................. 7
SAVE THIS INSTRUCTION MANUAL FOR FUTURE REFERENCE

English - 2
IMPORTANT SAFEGUARDS
To prevent personal injury or property damage, read and follow all instructions
and warnings.
When using electrical appliances, basic safety precautions should always be
followed including:
Read all instructions.
Always unplug from outlet when not in use and before cleaning. Allow to cool
before putting on or taking off parts and before cleaning.
Close supervision is necessary when this appliance is used by or near children.
Should leakage occur, discontinue use immediately and contact customer service
for assistance.
Do not operate any appliance with a damaged cord or plug, after the appliance
malfunctions, or has been damaged in any manner. For service information see
warranty page.
The use of accessory attachments not recommended by Focus Products Group
International may cause cause fire, electric shock, or injury.
Do not use this appliance outdoors.
Do not let cord hang over the edge of the table or counter, or touch hot surfaces.
Do not place on or near a hot gas or electric burner, or in a heated oven.
Do not use appliance for other than intended use.
To protect against electric shock, do not immerse cord, plugs, or other electric
parts in water or other liquids.
Do not attempt to repair this appliance yourself.
A short power-supply cord is provided to reduce risks resulting from becoming
entangled in or tripping over a longer cord.
Longer extension cords are available, but care must be exercised in their use.
While use of an extension cord is not recommended, if you must use one, ensure
that the marked electrical rating of the extension cord is equal to or greater than
that of the appliance. If the plug is of the grounded type, the extension cord must
be a grounding-type 3-wire cord. To avoid pulling, tripping or entanglement,
position the extension cord so that it does not hang over the edge of the counter,
table or other area where it can be pulled on by children or tripped over.
This appliance has a polarized plug (one blade is wider than the other). To reduce
the risk of electric shock, this plug is intended to fit into a polarized outlet only one
way. If the plug does not fit fully into the outlet, reverse the plug. If it still does not
fit, contact a qualified electrician. Do not attempt to modify the plug in any way.
Do not use an outlet or extension cord if the plug fits loosely or if the outlet or
extension cord feels hot.
For household use only.
SAVE THESE INSTRUCTIONS

English - 3
BEFORE THE FIRST USE
Please check all packaging material carefully before discarding. Accessory
parts may be contained within the packaging material.
Wash funnels, mixing paddles, freezing canisters, and cover in warm, soapy water.
Rinse and dry thoroughly. Do not put the freezing canisters into the freezer if they
are wet. Wipe the support stand and motor unit with a damp cloth, if necessary.
NEVER IMMERSE THE MOTOR IN WATER OR ANY OTHER LIQUID.
USING YOUR DUAL SINGLE-SERVE ICE CREAM MACHINE
Freezing Canister Preparation - The freezing canisters must be completely frozen
before making your recipe. The length of time needed to freeze the freezing
canisters varies depending on the temperature of your freezer. For convenience,
leave the freezing canisters in the freezer at all times.
In general, freezing time is between 16 and 24 hours. Put the freezing canisters in a
plastic bag to prevent freezer burn and place them in the back of your freezer where
it is the coldest. The freezing canisters are filled with liquid. To determine if the
freezing canisters are completely frozen, shake and listen for liquid movement. You
should not hear any liquid within the canister walls. Do not refreeze a partially
thawed canister, always thaw completely before freezing.
Making Frozen Desserts
Note: When assembling, dismantling or cleaning, always ensure that the appliance
is switched to “O” (off) and is not connected to the power supply.
1. Prepare recipe ingredients from this manual, or use your own recipes, prior to
assembling the ice cream machine. Liquids increase in volume during the
freezing process; therefore, the maximum amount of liquid used must not exceed
2 cups; 1 cup per freezing canister.
IMPORTANT: Do NOT remove freezing canisters from freezer until recipe is
prepared. It is critical to keep the freezing canisters as cold as possible prior to
assembling the ice cream machine as they begin to thaw immediately upon
removal from the freezer.
Support Stand
Motor Unit
Center Locks
Mixing Paddle (x2)
Funnel (x2)
Freezing Canister (x2)
Cover

English - 4
2. Assemble the Ice Cream Machine:
a. Place one or both of the freezing canisters on to the support stand, with the
handles facing out. The raised parts of the support stand will fit into the holes
in the bottom of the freezing canisters.
b. Place the mixing paddles into the freezing canisters. Place the rounded end
of the mixing paddle into the dimples in the bottom of the freezing canisters.
c. Set the cover over the freezing canisters and mixing paddles. Press the
cover down to center the mixing paddles in place. Turn the center locks to
lock the cover in place.
d. Place the motor unit over the cover, aligning the tabs on the bottom of the
motor unit with the slots in the cover, and press down firmly to lock in place;
there will be a “clicking” sound when the tabs are locked correctly.
e. Place the funnels into the holes at the side of the container.
f. Plug the cord in to a 120 volt, AC electrical outlet ONLY.
3. Push the On/Off switch to “–” (on). Note: The Ice Cream Machine must be on
before adding ingredients. This prevents the mixture from immediately freezing
on the inside of the freezing canisters, which may stop the movement of the
mixing paddles.
4. Slowly pour the prepared ice cream mixture into the freezing canisters through
the funnels. Note: Do not fill above the “MAX” fill line, 1 cup per freezing
canister. This will prevent overflow during ice cream expansion.
5. To add other ingredients such as candy chips, crushed candies, nuts, and/or
syrups during the freezing process, slowly add them through the ingredient
opening. This should be done after the ice cream has begun to thicken or about 5
minutes before ice cream is finished. Additives should be no larger than a
chocolate/candy chip and easily fit through the funnel.
6. Leave the machine on for approximately 15 to 25 minutes, or until mixture is of
the desired consistency. Do NOT turn the ice cream machine off during use as
the mixture may freeze up and stop the movement of the mixing paddle. We
recommend that you turn the appliance off after 30 minutes of use to prevent
overheating and thawing of the frozen mixture.
7. Switch the motor unit to “O” (off), unplug the cord, and remove the motor unit by
pressing the tabs on the sides of the motor and lifting. Unlock and remove the
cover. Remove the paddles; using a spatula, scrape any ice cream still on the
paddles into the freezing container or your bowl. Use a rubber, plastic, or wooden
utensil to remove the ice cream from the freezing canisters. Do NOT use metal
utensils, including ice cream scoops, as they will damage the interior surface of
the freezing canisters.
8. The finished ice cream will be quite soft in consistency and can be served in
bowls and eaten with a spoon. If you desire to have a firmer consistency,
transfer the ice cream to an airtight container and place in the freezer for another
hour or more, depending on how firm you want the ice cream to be. Do NOT
store prepared ice cream in the freezing canisters.

English - 5
HELPFUL HINTS
Store the freezing canisters in the freezer so they are always ready for use. Keep
them wrapped in plastic bags to prevent freezer burn and store in an upright
position.
Homemade ice cream recipes use only fresh ingredients; therefore, they do not
have the same consistency as store-bought ice creams which use gums and
preservatives to make them firmer. If you prefer a firmer consistency, place the
frozen ice cream in an airtight container and store it in the freezer for one or more
hours until the desired consistency is achieved.
For recipes that require pre-cooking, prepare the mixture a day ahead and store
overnight in the refrigerator. This will allow the mixture to completely cool and
increases the volume.
Ice cream mixtures may be stored in the refrigerator up to 3 days prior to freezing.
Be sure to mix well before adding the mixture to the freezing canisters.
The most common ingredients in ice cream are cream, sugar, eggs, and milk. For
the richest flavor and creamiest texture, use a cream containing the highest
percentage of fat. Heavy cream has the highest fat content (approximately 36%),
Whipping Cream (30%), Coffee/Light Cream (18%), and Half & Half (10%).
Substitutions of milk products (both cream and milk) may be used to reduce the fat
content. However, this may change the taste, consistency, and texture of the ice
cream. When substituting ingredients, be sure the total liquid measurement
remains the same as the original recipe.
Artifical sweeteners may be used to replace sugar in a recipe. Add only to a
cooled mixture as heat affects the sweetness.
Do not fill above the “MAX” fill line, 1 cup per freezing canister. This will prevent
overflow during ice cream expansion.
For recipes containing alcohol, add the alcohol during the last 2 minutes of the
freezing process. Alcohol can adversely affect the freezing process if added
earlier.
The flavor of sorbets is greatly dependent on the ripeness and sweetness of the
fruit or juice used so be sure to taste the mixture prior to freezing. If the flavor is
too tart, add sugar. For fruits that are very ripe and sweet, decrease the amount of
sugar. Note: Freezing reduces sweetness.
The ice cream or sorbet mixture must be liquid before freezing. Do not use stiff or
frozen ingredients such as whipped cream or frozen liquids or juices.
Ice cream or sorbets should be stored in airtight containers in the freezer. Do
NOT store in the freezing canisters.
Do NOT operate this appliance for longer than 30 minutes at a time. If the mixture
is not frozen or has begun to thaw, do not continue. Possible reasons for the
mixture not freezing include:
o Freezing canisters were not cold enough. Check your freezer temperature to
be sure it is 0° F (-18° C) or colder. Be sure the freezing canisters are
completely frozen (no liquid sound when shaken) and were left in the freezer
for a minimum of 16 to 24 hours.
o The mixture was too warm. Ingredients should be chilled prior to mixing and
should be kept refrigerated until ready to freeze in the ice cream machine.
o The proportion of ingredients was incorrect. Check your recipe carefully and if
substitutions were made, be sure the total liquid ingredients are equal to the
original recipe.

English - 6
CLEANING YOUR DUAL SINGLE-SERVE ICE CREAM MACHINE
1. Switch to “O” (off) and unplug from the electrical outlet.
2. Do NOT immerse the motor unit in water. To clean, wipe gently with a damp
cloth. If necessary, wipe the support stand with a damp cloth then dry.
3. Always let the freezing canisters thaw completely before washing. Wash freezing
canisters, cover, paddles, and funnels in warm, soapy water. Rinse and dry
thoroughly. Note: Never use sharp utensils, scouring pads, or abrasive cleaners
on the freezing canisters.
4. Never place the freezing canisters in the freezer when they are wet; be sure they
have been thoroughly dried. Place the freezing canisters in plastic bags, to
prevent freezer burn, and place them in the back of your freezer where it is
coldest.
Note: Do not wash any part of the appliance in the dishwasher.
This appliance has no user serviceable parts.
RECIPE
This vanilla recipe is a blank canvas for your ice cream creations. Add syrups or
chopped pieces of your favorite candy to personalize to your taste.
Basic Vanilla Ice Cream
1½ cup Heavy cream
½ cup Whole milk
¼ cup + 2 tbsp. Sugar
1 tsp. Vanilla
pinch Salt
Mix ingredients thoroughly in a large bowl. Chill in refrigerator for one to two hours.
Follow basic directions for making ice cream, dispense when complete. Note: this
recipe will fill both freezing canisters. If you want to make only one pint, halve the
recipe.

English - 7
L5918A 05/15 West Bend
®
, a Brand of Focus Products Group International, LLC.
Printed in China
PRODUCT WARRANTY
Appliance 1 Year Limited Warranty
Focus Products Group International, LLC (“the Company”) warrants this appliance from failures
in the material and workmanship for one (1) year from the date of original purchase with proof
of purchase, provided that the appliance is operated and maintained in conformity with the
Instruction Manual. Any failed part of the appliance will be repaired or replaced without charge
at the Company’s discretion. This warranty applies to indoor household use only.
This warranty does not cover any damage, including discoloration, to any non-stick surface of
the appliance. This warranty is null and void, as determined solely by the Company, if the
appliance is damaged through accident, misuse, abuse, negligence, scratching, or if the
appliance is altered in any way.
THIS WARRANTY IS IN LIEU OF ALL IMPLIED WARRANTIES, INCLUDING WARRANTIES
OF MERCHANTABILITY, FITNESS FOR A PARTICULAR PURPOSE, PERFORMANCE, OR
OTHERWISE, WHICH ARE HEREBY EXCLUDED. IN NO EVENT SHALL THE COMPANY
BE LIABLE FOR ANY DAMAGES, WHETHER DIRECT, INDIRECT, INCIDENTAL,
FORSEEABLE, CONSEQUENTIAL, OR SPECIAL ARISING OUT OF OR IN CONNECTION
WITH THIS APPLIANCE.
If you think the appliance has failed or requires service within its warranty period, please
contact the Customer Care Department at (866) 290-1851, or e-mail us at
customercare@focuspg.com. A receipt proving the original purchase date will be required for
all warranty claims, hand written receipts are not accepted. You may also be required to
return the appliance for inspection and evaluation. Return shipping costs are not refundable.
The Company is not responsible for returns lost in transit.
Valid only in USA and Canada
REPLACEMENT PARTS
Replacement parts, if available, may be ordered directly from the Company several ways.
Order online at www.westbend.com, e-mail customercare@focuspg.com, over the phone by
calling (866)290-1851, or by writing to:
Focus Products Group International, LLC.
Attn: Customer Care Dept.
P. O. Box 53
West Bend, WI 53095
To order with a check or money order, please first contact Customer Care for an order total.
Mail your payment along with a letter stating the model or catalog number of your appliance,
which can be found on the bottom or back of the appliance, a description of the part or parts
you are ordering, and the quantity you would like. Your check should be made payable to
Focus Products Group International, LLC.
Your state/province’s sales tax and a shipping fee will be added to your total charge. Please
allow two weeks for processing and delivery.
This manual contains important and helpful information regarding the safe use and care of your
product. For future reference, attach dated sales receipt for warranty proof of purchase and
record the following information:
Date purchased or received as gift: _______________________________________________
Where purchased and price, if known: _____________________________________________
Item number and Date Code (shown bottom/back of product):___________________________

2015 West Bend
®
, una Marca de Focus Products Group International, LLC.
www.westbend.com
MÁQUINA DE HACER HELADOS DE DOBLES
PORCIONES ÚNICAS
Manual de Instrucciones
Registre este y otros productos de Focus Products Group International a través de
nuestro sitio web: www.registerfocus.com
No se requiere registrar el producto para activar la garantía.
Precauciones Importantes ........................................................................................ 2
Antes del Primer Uso .............................................................................................. 3
Uso de la Máquina de Hacer Helados ...................................................................... 3
Consejos Prácticos................................................................................................... 5
Limpieza de la Máquina de Hacer Helados ............................................................. 6
Receta ...................................................................................................................... 6
Garantía ................................................................................................................... 7
CONSERVE ESTE MANUAL DE INSTRUCCIONES PARA FUTURAS
CONSULTAS
/