Sorelle PARIS Assembly Instruction Manual

Category
Baby furniture
Type
Assembly Instruction Manual

Sorelle PARIS is a versatile and durable crib, changing table, and toddler bed in one. It features adjustable mattress support positions for newborns, infants who start to roll over, and toddlers who can sit. The changing table has a contoured top and a safety strap for the changing pad. The crib converts to a toddler bed with the purchase of a separately sold rail. Sorelle PARIS meets or exceeds all applicable safety standards.

Sorelle PARIS is a versatile and durable crib, changing table, and toddler bed in one. It features adjustable mattress support positions for newborns, infants who start to roll over, and toddlers who can sit. The changing table has a contoured top and a safety strap for the changing pad. The crib converts to a toddler bed with the purchase of a separately sold rail. Sorelle PARIS meets or exceeds all applicable safety standards.

Paris Crib and Changer
Assembly Instruction
Important Information:
Read all instructions BEFORE assembling crib.
KEEP INSTRUTIONS FOR FUTURE USE.
Made in China
Page 1
WARNING:
*Infants can suffocate on soft bedding. Never add a pillow or comforter. Never place additional padding
under an infant.
*Failure to follow these warnings and the assembly instructions could result in serious injury or death.
DO NOT use this crib if you cannot exactly follow the accompanying instructions.
*To reduce the risk of SIDS, pediatricians recommend healthy infants be placed on their backs to
sleep, unless otherwise advised by your physician.
*Strangulation Hazard: STRINGS CAN CAUSE STRANGULATION! Do not place items with a string
around a child's neck, such as hood strings or pacifier cords. Do not suspend strings over a crib or
attach strings to toys.
*Strangulation Hazard: To help prevent strangulation tighten all fasteners. A child can trap parts of
the body or clothing on loose fasteners.
*Strangulation Hazard: Do not place crib near window or patio door where cords from blinds or
drapes may strangle a child.
*Fall Hazard: When child is able to pull to a standing position, set mattress to lowest position and
remove bumper pads, large toys and other objects that could serve as steps for climbing out. This crib
has an adjustable mattress support. For the convenience of the parent when the baby is very small, the
mattress support may be used in the highest position.
*Fall Hazard: Stop using crib when child begins to climb out or reaches a height of 35in. (89cm),
whichever occurs first. The child should be placed in a youth or regular bed.
*Check this product for damaged hardware, loose joints, loose bolts or other fasteners, missing parts,
or sharp edges before and after assembly and frequently during use. Securely tighten loose bolts and
other fasteners. Do not use crib if any parts are missing, damaged or broken.Contact C&T
International Inc./Sorelle for replacement parts and instructional literature if needed. Do not substitute
parts.
*Follow warnings on all products in a crib.
*If refinishing, use a non-toxic finish specified for children's products.
*Never use plastic shipping bags or other plastic film as mattress covers because they can cause
suffocation.
*Infants can suffocate in gaps between crib sides and a mattress that is too small.
*Ensure a safe environment for the child by checking regularly, before placing the child in the crib, that
every component is properly and securely in place.
*To avoid head injury, do not allow any child to play underneath the crib.
*Never add an accessory such as a bassinet or changing table that extends over the sleeping area.
C
Crib Warnings:
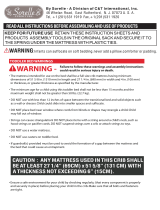
AUTION : ANY MATTRESS USED IN THIS CRIB SHALL
BE AT LEAST 27 1/4” (69CM) x 51 5/8” (131 CM) WITH
A THICKNESS NOT EXCEEDING 6” (15CM).
SORELLE
NOTE: TODDLER RAIL MODEL # 129 IS SOLD SPEARATELY.
NOTE: ADULT RAIL MODEL # 223 IS SOLD SPEARATELY.
Page 2
Toddler Bed Warnings:
Changing Table Warnings:
WARNING
INFANTS HAVE DIED IN TODDLER BEDS FROM ENTRAPMENT.
Openings in and between bed parts can entrap head and neck of a small child.
NEVER use bed with children younger than 15 months.
ALWAYS follow assembly instructions.
The maximum user weight is 50lbs (22.7kg)
WARNING
STRANGULATION HAZARD
NEVER place bed near windows where cords from blinds or drapes may strangle a child.
NEVER suspend strings over a bed.
NEVER place items with a string, cord, or ribbon, such as hood strings or pacifier cords,
around a child's neck. These items may catch on bed parts.
CAUTION
ENTRAPMENT HAZARD
To avoid dangerous gaps, any mattress used in this bed shall be a full-size crib mattress
at least 51 5/8 in (1310mm) in length, 27 1/4 in (690mm) in width and 4 in (100mm) in
thickness. The mattress thickness must not exceed 6 in (150mm).
WARNING
FALL HAZARD - to prevent death or serious injury, always keep child within arm’s reach.
Read all instructions before use of the changing table.
KEEP THESE INSTRUCTIONS IN A SAFE PLACE FOR FUTURE USE.
Inspect the changing table periodically. Do not use the changing table if it is damaged or
broken. Contact C&T International Inc. with any questions.
Tighten all loose screws and bolts before each use.
The maximum recommended weight of the child is 30lbs for the changing table.
Use only the pad provided by C&T International Inc. or Manufacturer’s
Always secure the pad to the changing surface by inserting the strap through the hole in
the middle of the pad. See Instructions.
NEVER use crib without Changing Table attached
SORELLE
SORELLE
Important: In order to properly assemble the crib, carry out the operations in order specified. Failure to assemble the crib in the manner recommended order
can make the crib hazardous.
Parts list
3 egaP
(A): Back Side Rail (x1) (C): Left Side Rail (x1)(B): Front Side Rail (x1)
(D): Middle Panel (x1) (E): Right Panel (x1)
(G): Back Left Leg (x1) (H): Front Left Leg (x1)
(I): Front & Back Contoured Top (x2) (K): Small Front
Support Bar (x1)
(K1): Changer Front
Contoured Top (x1)
(J): Decorative Support
Bar Bolt Ends (X1)
(F): Mattress Support(x1)
(O1): Top Shelf (x1) (O2): Bottom Shelf (x1) (P): Back Middle Shelf (x1)
SORELLE
Important: In order to properly assemble the crib, carry out the operations in order specified. Failure to assemble the crib in the manner recommended order
can make the crib hazardous.
Parts list
4 egaP
(R): Drawer Left (x1)
(S) Drawer Right (x1)
(T) Drawer Back (x1)
(U): Drawer Bottom (x1)
(V) Drawer Front (x1)
(Q) Change Pad (x1)
(L): Back Middle Bar (x1)
(Side Groove)
(M): Front and Back Bottom
Support Bar (x2)
(Side Groove)
(N): Front Middle Bar (x1)
(Y): (Z):
Back Middle Leg (x1) Back Right Leg (x1)
m. Allen Wrench ( 1PCS )
e .
Screws 32mm ( 8PCS )
f .
Wooden dowel ( 8PCS)
a. General Allen head bolt M6 X 70mm ( 4 pcs)
b. General Allen head bolt M6 X 55mm ( 10 pcs)
c. General Allen head bolt M6 X 35mm ( 25 pcs)
d. General Allen head bolt M6 X 16mm ( 4 pcs)
SORELLE
Important: In order to properly assemble the crib, carry out the operations in order specified. Failure to assemble the crib in the manner recommended order
can make the crib hazardous.
Assembly Hardware Set
5 egaP
j. Knob Screw (1 pc)
k. Door Knob (1 pc)
i. General Allen head bolt M6 X 40mm ( 2 pcs)
page 6
SORELLE
A.
B.
C.
D.
.
Install Screws (e) into Drawer Sides (S &R) and align with pilot holes located in the Drawer Back (T).Tighten using
Phillips screw driver(not included) .
Slide Drawer Bottom (U) into Grooves located in Drawer sides (S &R) as well as Drawer Back (T). See Figure . 1
Install Screws (e) into Drawer Sides (S &R) and align with pilot holes located in the mounting blocks of Drawer Front (V).Tighten using
Phillips screw driver(not included) .
Using Drawe
r Knob Screw (j) , install one Knob (k) on drawer.
2
STEP 2 LEFT PANEL ASSEMBLY
STEP 1 LEFT PANEL ASSEMBLY
A..
e
e
e
e
Drawer Left(R)
Drawer Right(S)
Drawer Back(T)
Drawer Bottom (U)
Drawer Front(V)
Using four 4 x bolt (b), assemble Back Left Leg (G)
and Front Left Leg (H) to Left Side Rail (C).
Make sure all mattress support
holes are facing in. Figure 2.
(k)
(j)
4x
b
m
b
b
b
b
Left Side
Rail(C)
Back Left
Leg(G)
Front Left
Leg(H)
4. Using Drawer Knob
Screw (j) , install one (1)
Knob (k) on Drawer.
page 7
SORELLE
A
B.
.
STEP 3 MIDDLE & RIGHT PANEL ASSEMBLY
STEP 4 CHANGER ASSEMBLY (PART 1)
Figure 3B:Figure 3A:
Figure 4B :Figure 4A :
Using three 3 x bolt (b), assemble Back Middle Leg (Y) to Middle Panel (D). Figure 3A.
Using three 3 x bolt (b), assemble Back Right Leg (Z) to Right Panel (E). Figure 3B.
b
b
c
b
b
b
b
Middle Panel(D)
Back Middle Leg (Y)
Middle Panel(D)
Front and Back Bottom
Support Bar (M)
Back Middle Bar (L)
Decorative Support
Bar Bolt Ends (J)
Middle Panel(D)
Back Middle Leg (Y)
Right Panel(E)
Using two 2 x bolt (c), assemble Small Front Support Bar (K) to the Middle Panel (D). Figure 4A.
Insert one 1x wooden dowel (f) on either end of Front Middle Bar (N). Connect (N) to Middle
Panel (D) using one 1 x bolt (c). Figure 4A.
Using one 1 x bolt (c). assemble the Front Bottom Support Bar (M) groove facing inward. Figure 4A.
c
c
c
c
c
Front Middle Bar (N)
Small Front
Support Bar (K)
c
f
f
f
A.
Using two 2 x bolt (c) and one 1 x wooden dowel (f), assemble the Decorative Support Bar
(J) to Back Middle Leg (Y). Figure 4B.
Using one 1 x bolt (c) assemble the Back Middle Bar (L) groove facing upward. Figure 4B.
Using one 1 x bolt (c), assemble the Back Bottom Support Bar (M) groove facing inward. Figure 4B.
B.
Back Right Leg (Z)
page 8
SORELLE
STEP 5 CHANGER ASSEMBLY (PART 2)
STEP 6 CHANGER ASSEMBLY (PART 3)
Figure 5 :
Figure 6B:
Figure 6A:
A
A
B.
.
Slide Top Shelf (O1) and Bottom Shelf (O2) veneered side up horizontally into the grooves.1
Slide Back Middle Shelf (P) veneered side facing outwards vertically into the grooves. Figure 5.
Top Shelf (O1)
Insert one 1 x wooden dowel (f) to the top hole
of the the Decorative Support Bar (J). Figure 6A.
B Insert eight 8 x bolt (c) into remaining exposed
holes and fasten to connect Right Panel (E).
Figure 6B.
Bottom Shelf (O2)
Back Middle Shelf (P)
Middle Panel (D)
Right Panel (E)
c
c
c
c
c
c
f
f
page 9
SORELLE
A.
B.
STEP 7 ASSEMBLY OF BACK SIDE RAIL
STEP 8 ASSEMBLY OF MATTRESS SUPPORT
Figure 8 :
Figure 7A :
Figure 7B :
Figure 7C :
A.
Swing out the four arms and attach the Mattress Support (F) using four 4 x bolt (d).
Recommended mattress position:
Top position for newborn.
Middle position as your child starts to roll over.
Lowest position when your child can sit or pull
up on his/her knees.
Attach the Back Contoured Top (I) to the Back Side Rail (A). Secure with two 2 x bolt (a) from underneath. Figure 7A.
Insert on 1 x wooden dowel (f) on either end of the Back Side Rail assembly (I) +(A). Figure 7A.
C.
Secure the Back Side Rail assembly (I) + (A) to the changer unit by using two 2 x bolt (c). Figure 7B.
D.
Attach the Left Side Rial (C) using two 2 x bolt (c). Figure 7B.
a
a
f
f
c
c
c
c
d
m
F
D
Mattress Support(F)
Back Contoured Top (I)
Back Side Rail (A)
Left Side Rail (C)
page 10
SORELLE
A
B.
.
STEP 9 ASSEMBLY OF FRONT SIDE RAIL
STEP 10 ASSEMBLY OF CHANGER FRONT CONTOURED TOP
Figure 9A :
Figure 9B :
Figure 10 :
Attach the Front Contoured Top (I) to the Front Side Rail (B). Secure with two 2 x bolt (i) from underneath. Figure 9A.
Insert one 1 x wooden dowel (f) on either end of the Front Side Rail assembly (I) + (B). Figure 9A.
C.
Secure the Front Rail Assembly (I) + (B) to the crib with four 4 x bolt (c). figure 9B.
Front Contoured
Top(I)
K1
Insert groove on Changer Front Contoured Top (K1) to the top of Small Front support Bar (K) and secure with
two 2 x bolt (a) from underneath. Figure 10.
Front Side Rail(B)
i
f
f
i
c
c
c
c
a
c
page 11
SORELLE
A.
STEP 11 INSERT DRAWER
Figure 11 :
Insert drawer.Figure 11.
Changing Pad Assembly
3. Make sure that safety belt is fastened around
child, and adjusted so safety belt is snug around
child’s mid-section. Make sure buckle is securely
latched. Figure 3.
CLICK!
1
2
3
2. Pull through front of pad completely. Make
sure pad is facing up and warnings are always
visible. Figure 2.
Important : If changing pad and safety belt are
assembled, make sure warnings are facing up and visible.
If not, reassemble by following the steps below.
1. Locate safety belt bolted to dresser top. Insert
safety belt through slit in changing pad from
back of pad. Figure 1.
  • Page 1 1
  • Page 2 2
  • Page 3 3
  • Page 4 4
  • Page 5 5
  • Page 6 6
  • Page 7 7
  • Page 8 8
  • Page 9 9
  • Page 10 10
  • Page 11 11
  • Page 12 12

Sorelle PARIS Assembly Instruction Manual

Category
Baby furniture
Type
Assembly Instruction Manual

Sorelle PARIS is a versatile and durable crib, changing table, and toddler bed in one. It features adjustable mattress support positions for newborns, infants who start to roll over, and toddlers who can sit. The changing table has a contoured top and a safety strap for the changing pad. The crib converts to a toddler bed with the purchase of a separately sold rail. Sorelle PARIS meets or exceeds all applicable safety standards.

Ask a question and I''ll find the answer in the document

Finding information in a document is now easier with AI