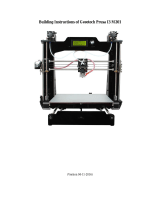
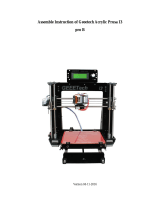
bq Prusa i3 Hephestos User manual

Category
3D printers
Type
User manual

bq Prusa i3 Hephestos is an open-source 3D printer designed to make 3D printing technology accessible to everyone. With its user-friendly design and step-by-step assembly instructions, it's perfect for beginners and hobbyists looking to create their own 3D objects. With its large build volume and sturdy construction, the bq Prusa i3 Hephestos can handle a wide range of printing materials and projects, making it a versatile choice for various applications.

bq Prusa i3 Hephestos is an open-source 3D printer designed to make 3D printing technology accessible to everyone. With its user-friendly design and step-by-step assembly instructions, it's perfect for beginners and hobbyists looking to create their own 3D objects. With its large build volume and sturdy construction, the bq Prusa i3 Hephestos can handle a wide range of printing materials and projects, making it a versatile choice for various applications.

First steps
1
List of components – rst steps
2 x Axial ball bearing B623ZZ
2 x Printed pulley for X axis bearing B623ZZ
2 x Printed pulley for Y axis bearing B623ZZ
1 x Printed X axis right
1 x Printed X axis left
1 x Printed X axis tensioner for bearing B623ZZ
1 x Printed X axis carriage A
1 x Printed Y axis tensioner for bearing B623ZZ
1 x Printed Y axis endstop
1 x Printed fan holder
1 x Printed LCD support
1 x Printed Hot-End safety cover
17 x M3 - DIN 934 class 8 black nut
2 x M5 - DIN 934 class 8 black nut
*Youwillndtheothercomponentsmentionedintheserst
steps in the Electronics box.
G003796
Congratulations!YouarenowpartoftheRepRapcommunity.
Atbqwehavechosenanopensource3Dprintermodelwiththe
aimofmakingthistechnologymorereadilyavailabletoeveryone.
Wehaveimproveditwithourowndesignsandwiththoseof
thecommunityinordertomakeitsassemblyanduseaseasyas
possible, without the need for advanced technical knowledge.
Allyouneedisanidea,andthedesiretomaterialiseit.Your
HEPHESTOS will take care of the rest. We believe in an open
sourcecreativeapproach,wherethelimitsareonlysetbyyour
imagination.
We would like to thank you for choosing our Kit, and we invite
you to share your experiences with us and with others, in order to
participateinthisveryspecialcommunity.
Welcome!
Important
Followthelinkatthebottomtondcompleteinformationabout
Prusa i3 HEPHESTOS. Download 3D designs of the different parts
andrmwareupdates,checkthe3Dprintingforum,playvideoson
howtoassembleyourprinter,etc.
Before printing, you need to level your printer’s Z axis and base.
Follow the instructions at:
bq.com/gb/products/prusa-hephestos.html
Create a creator!
Prusa i3 HEPHESTOS Kit
!
YourKitiscomprisedofthefollowingboxesandguides:
TheKitisdividedintoboxesandguideswhichfacilitatetheassemblyof
your Prusa i3 HEPHESTOS.
Wesuggestthatyoufollowthenumericalonthefrontofeachguide.
Oneachboxthereispictureidentifyingthepartitcontains.Thesame
pictureappearsonthefrontcoveroftheguidetotheassemblyofthat
part.
Where to begin
Auxiliary box
Box and guide to assemble of the
electronics
Box and guide to
assembly the Y axis
Box and guide
to assemble the
extruder
Box and guide to
assemble the X
Box and guide for the Z
Supplementary box
Tool box
’First steps’
box
Steps to be followed, in order
Description of the stage of
assembly
Pictures of the components
needed at each step
Description of the components
needed at each step
Note of important
information
Front cover
Explanation of the assembly
TheguideshelpyoutoassembleyourPrusai3HEPHESTOS:
Necessary tools which are not included in the Kit
Reference system
Soldering iron and tin
Scissors
Metal le
A
A
B
C
C
Front view
Right-hand
side
Duringtheassemblyofyour
Prusa i3 HEPHESTOS we refer
to the positions of the parts.
Followthisdiagramtoposition
themcorrectly.
Left-hand
side
B
Steps prior to assembly
Preparing of the pulleys
4 x
Axial ball bearing B623ZZ
Printed pulley for X and Y axis
Pulley that houses the axial ball bearing.
A B
A
B
File the edges of the pulley a little, so that
the tensioner rotates smoothly inside it.
2 x
1
2
3 4
Fitting the nuts
When tting the nut, carefully press with
the soldering iron (3 and 4); the part melts
very easily.
To avoid burns, do not touch the nut after
using the soldering iron.
Soldering iron
Not included.
A
A
1
2
3 4
5 6
Right-hand X
axis
Part at the right-hand end of Axle X, where
the belt tensioner is held.
1 x M5
Nut
Left-hand X
axis
Part at the left-hand end of Axle X, where the
Nema17motorisheld.
1 x M5
Nut
Left-hand X
axis
Part at the left-hand end of Axle X, where the
Nema17motorisheld.
1 x M3
Nut
X axis
tensioner
for bearing
B623ZZ
Tensioner of the Axle X belt where the axial
ball bearing B623ZZ is housed together with
the pulley.
1 x M3
Nut
X axis
carriage A
Carriage of Axle X where the extruder is held,
adapted for the use of chains.
2 x M3
Nut
Y axis
tensioner
for bearing
B623ZZ
Tensioner of the X axis belt
where the axial ball bearing
B623ZZ is housed together
with the pulley.
1 x M3
Nut
Y axis basic
endstop
Part located at the base of Y axis and
incorporating a screw with a M3 nut to adjust
thetotalstrokeoftheaxis.Itiscomplemented
by the part which holds the endstop to the
frame.
1 x M3
Nut
Fan holder
50 x 50 mm fan holder,
located above the electronics
tocoolthemcorrectly.
2 x M3
Nut
Fan holder
50 x 50 mm fan holder,
located above the electronics
tocoolthemcorrectly.
2 x M3
Nut
LCD panel
support
Support for the LCD
panel. The hole for the
nuts is longer than usual
to help the nut slide in and
position itself correctly
when the LCD panel is
screwed in.
4 x M3
Nut
LCD panel
support
Support for the LCD
panel. The hole for the
nuts is longer than usual
to help the nut slide in and
position itself correctly
when the LCD panel is
screwed in.
2 x M3
Nut
Hot-End
Safety
cover
This part covers the Hot-
End to prevent the user
fromtouchingitwhenit’s
hot, thus avoiding burns.
1 x M3
Nut
Updating the motors and their cables (optional)
4 x 4 x
Nema 17 motors with
4-pin male connector.
Bevelled axis.
1 metre long four-thread
cables with a 4-pin
female connector on
each side.
A B
A
B
1
Assembly:
Ifyouwishtohavettedcables,cutandsolder
eachcableaccordingtothemeasurement
indicated in the table.
2
Motor Total
length
of motor
(cm)
X 85
Y 50
Z left. 45
Z right. 65
Preparation of the power supply cable
Jack adapter/connector
Female2.1mmjackadapter/connectorandRamps1.4
withtwoterminals.
220 AC 12 DC 100W power supply
Supplywith1.10mcable,100Wwith2.1mmjack
(INPUT:100-240VAC1,8A50-60HzandOUTPUT:
12VDC8.0A).
150 mm of exible, two-strand, bi-colour
cable of cross-section 1 mm²
A
B
Connect the red cable to the terminal with
the ‘+‘ symbol and the black cable to the
terminal with the ‘-‘ symbol.
1 x
A B
1 x
1 x
C
C
1
2
3
4
  • Page 1 1
  • Page 2 2
  • Page 3 3
  • Page 4 4
  • Page 5 5
  • Page 6 6
  • Page 7 7
  • Page 8 8
  • Page 9 9
  • Page 10 10
  • Page 11 11
  • Page 12 12

bq Prusa i3 Hephestos User manual

Category
3D printers
Type
User manual

bq Prusa i3 Hephestos is an open-source 3D printer designed to make 3D printing technology accessible to everyone. With its user-friendly design and step-by-step assembly instructions, it's perfect for beginners and hobbyists looking to create their own 3D objects. With its large build volume and sturdy construction, the bq Prusa i3 Hephestos can handle a wide range of printing materials and projects, making it a versatile choice for various applications.

Ask a question and I''ll find the answer in the document

Finding information in a document is now easier with AI