EPSON PowerLite 8200i / 9100i
If you see a blank screen or the No Signal message
after turning on your laptop, check the following:
• Make sure the power light is green and
not flashing and the lens cap is off.
• Try turning off the laptop and restarting it.
• If you’ve connected more than one computer and/or video source,
you may need to press the Computer or Video button on top of the
projector. (Allow a few seconds for the projector to sync up after
pressing it.)
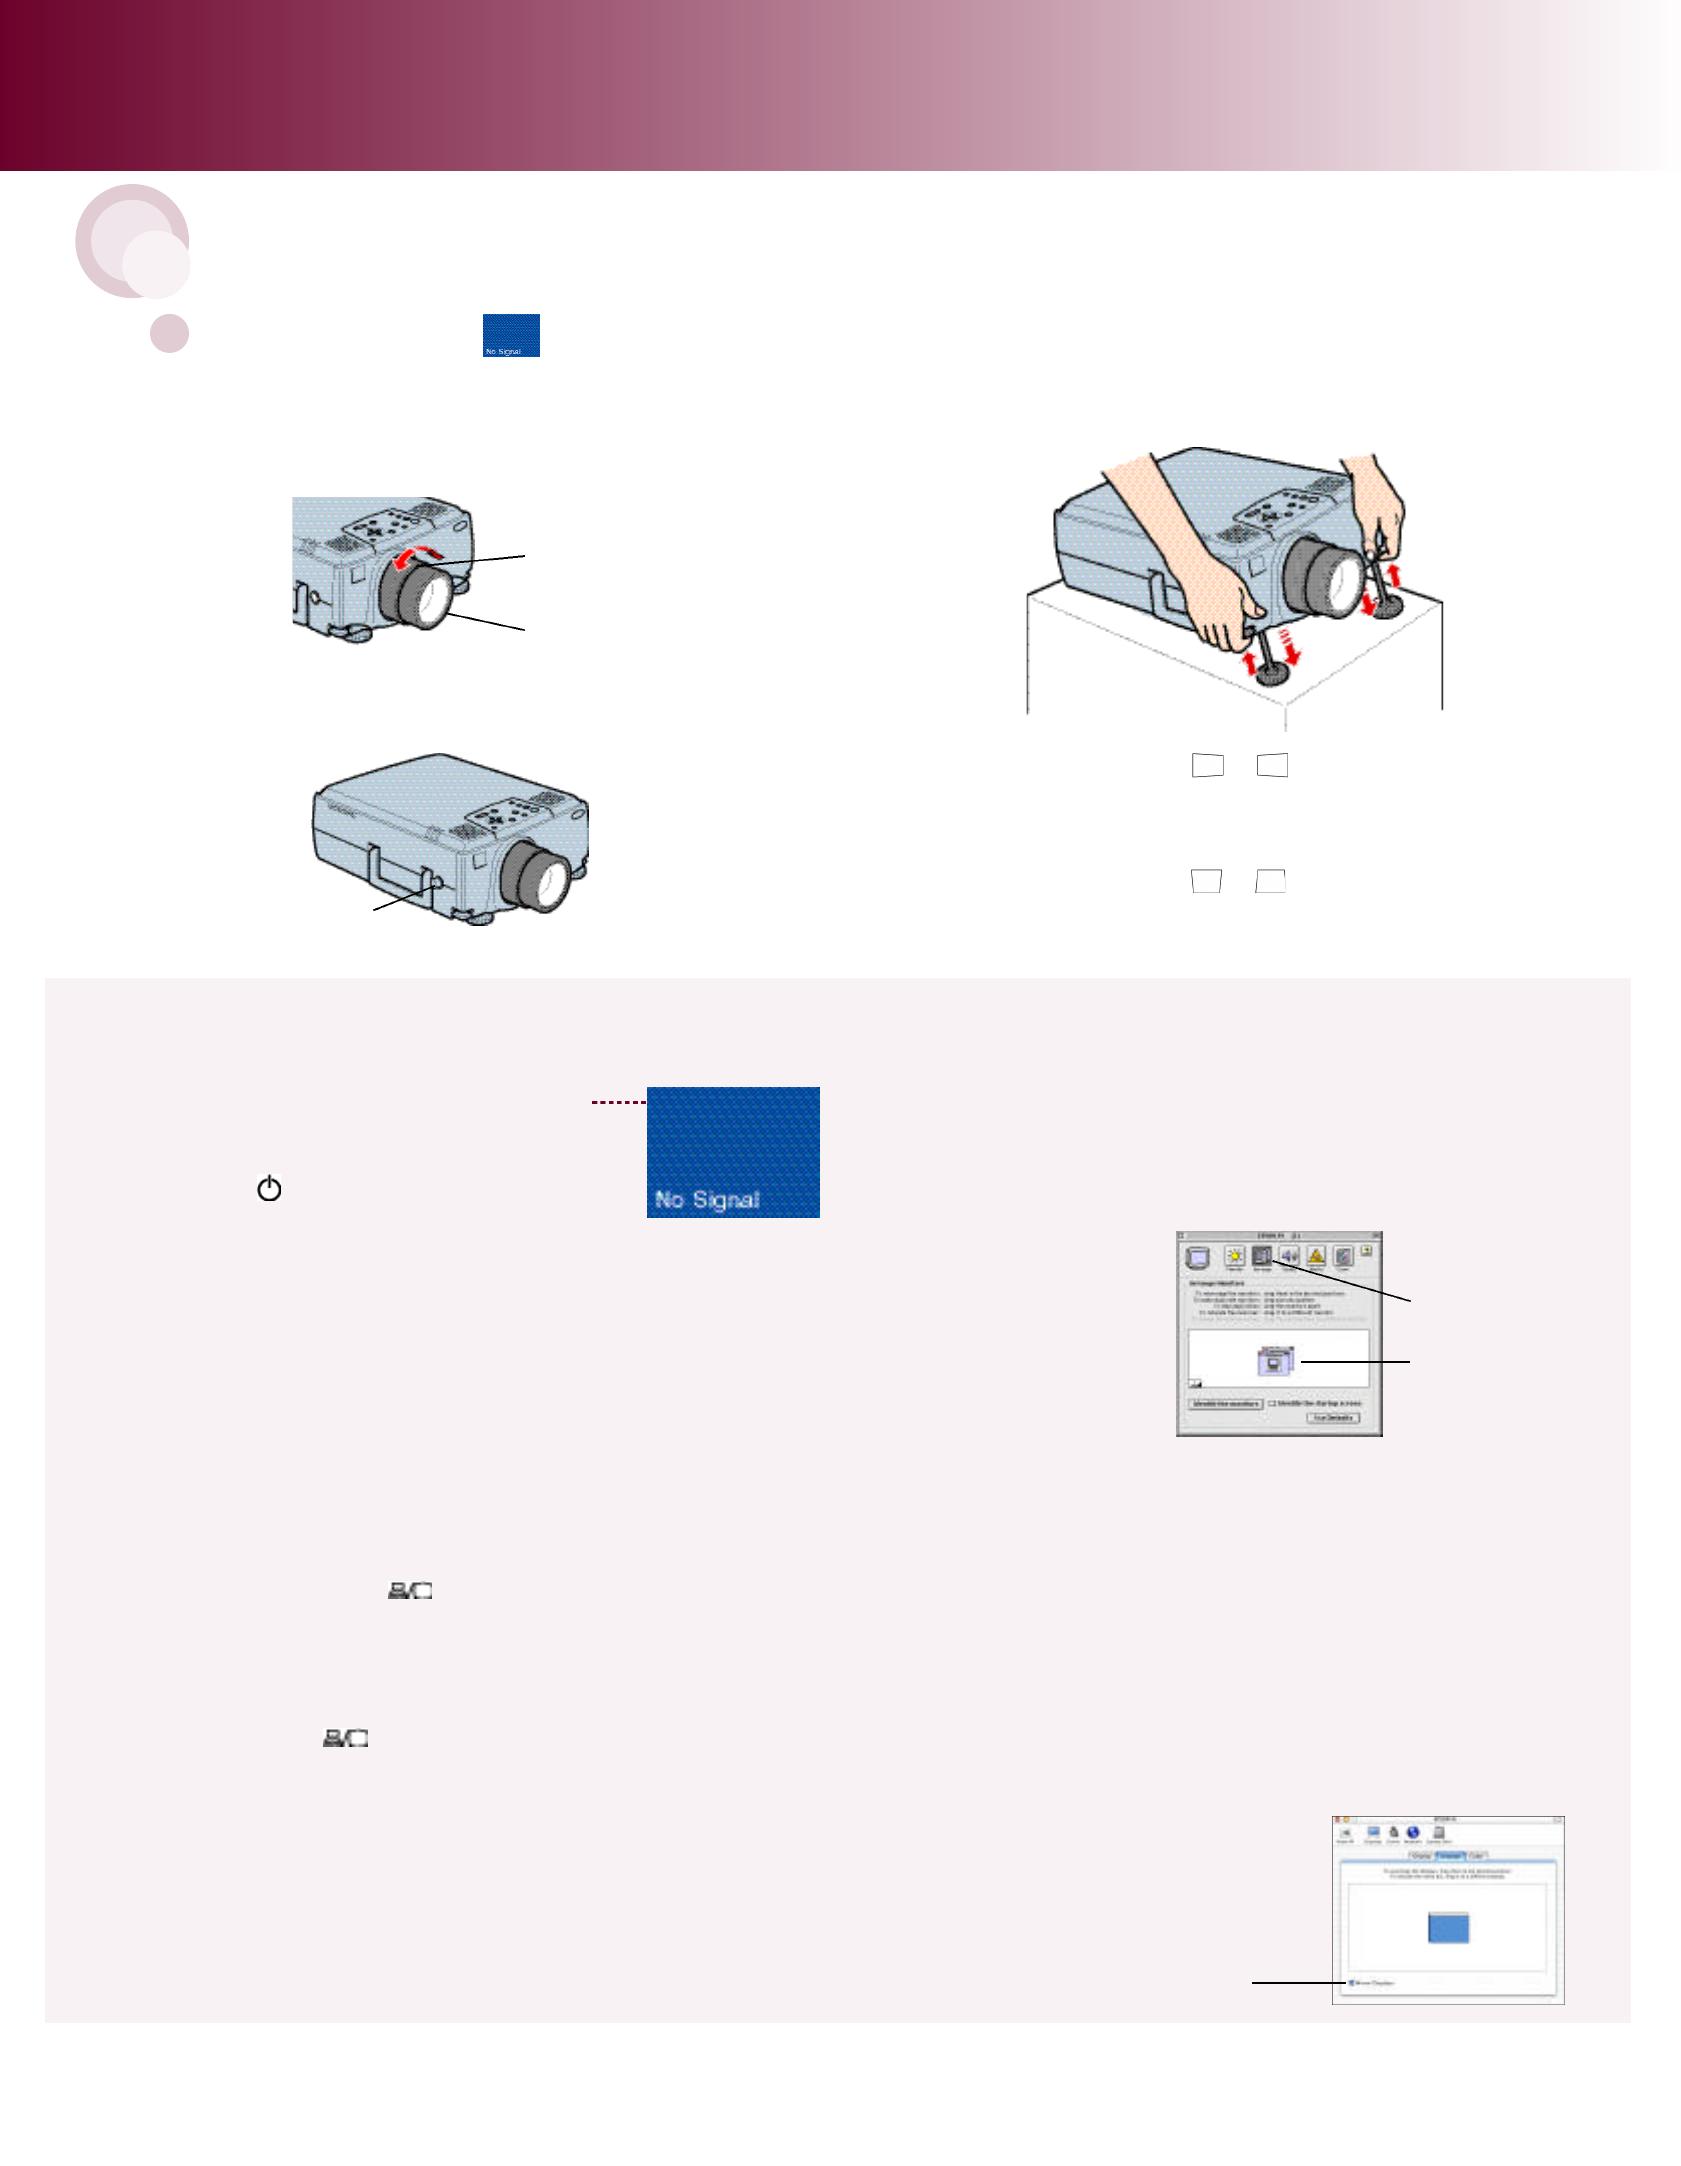
Adjust the image
1
Rotate the focus ring to sharpen the image. Rotate the zoom
ring to reduce or enlarge the image. (You can also move the
projector closer to or farther from the screen.)
If You See a Blank Screen
• Press the function key that lets you display on an external monitor.
It may have an icon such as , or it may be labelled CRT/LCD.
You may have to hold down the Fn (function) key while pressing it.
Check your laptop’s manual or online help for details. (Allow a few
seconds for the projector to sync up after pressing it.)
On most systems, the key lets you toggle between the LCD
screen and the projector, or display on both at the same time.
• You might need to use the Display utility in the Control Panel
to enable both the LCD screen and external monitor port.
If you’re using a Windows laptop:
If you’re using a Macintosh with OS 9.x
or earlier:
CPD-13535
EPSON is a registered trademark of SEIKO EPSON CORPORATION. PowerLite is a registered trademark of Epson America, Inc.
Copyright © 2002 by Epson America, Inc.
2
3
If the image isn’t high enough after rotating the lens shift
knob, you can raise it more by extending the projector’s feet.
Pull up the blue foot release levers and lift the front of the
projector as shown. Once the image is positioned where you
want it, release the levers to lock the feet in position.
4
If your image looks like or , you’ve placed the projector
off to one side of the screen, at an angle. Move it directly in
front of the center of the screen, facing the screen squarely.
5
If your image looks like or , press the + or – side of
the Keystone button to correct the shape of the image.
EPSON PowerLite 8200i /9100i
Note: If you see a blank screen after focusing,
see the box below.
zoom ring
focus ring
If you need to raise the image, press the lens shift knob to
extend it and then rotate it until the image is positioned
correctly.
lens shift knob
1. From the Apple menu, select Control Panels, then click Monitors
and Sound.
2. Click the Arrange icon.
3. Drag one monitor icon on top of the other. This lets you display
on the projector screen as well as the LCD screen.
1. F rom the Apple menu, select System Pre f e re n c e s, then click D i s p l a y s.
2. Click Detect Displays to display part of your desktop on the
projector screen.
3. To display the entire desktop on both your projector screen and
LCD screen, click the Arrange tab. (If you don’t see this tab, check
to see if there is a window hidden by
another window on your screen.)
4. Click Mirror Displays. One of the
monitor icons automatically moves on
top of the other.
drag one monitor
icon on top of the
other
click here
If you’re using a Macintosh with OS X:
click here
8291iPoster.qx 12/14/01 9:31 AM Page 2

