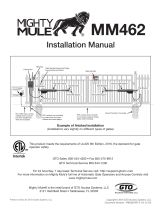
GTO SW-4000XL Operating instructions

Category
Gate Opener
Type
Operating instructions

This manual is also suitable for

1
GRNCOM COM
CYCLE
CLOSE
SAFETY
SHADOW
LOOP
CLOSE
EDGE
OPEN
EDGE
EXIT
OPEN
BLK
RECEIVER
RED
25
FUSE
B A T T +
B A T T -
1 2 3 4
ON DIP
STATUS
LEARN RMT
RECEIVER
LEARN
MAST LIMIT
LEARN
SLV LIMIT
S3
S4
ALM
S2
OFF
SOFT START OFF
WARNING OFF
OPEN PULL
SLV OPEN DLY.
MODE1 OFF
MODE2 OFF
ON
ON
PUSH
SIMULT.
ON
ON
120 MIN MAX
CHARGING
PWR IN
ORGBLUEWHTGRN BRN RED
MASTER INPUTS
BLK
SOLAR
or
18 VAC
ORGBLUEWHTGRN BRN RED
SLAVE INPUTS
BLK
LOCK
GTO AUX
GTO
TRANSF
LOCK
PWR
AUX
R L Y
POWER
INPUTS
CONTROL
OUTPUTS
MASTER CABLESLAVE CABLE
CONTROL INPUTS
AUTO CLOSE TIME STALL FORCE
Generation-3 Control Board
Wiring and Programming Instructions
PRO3040-G3
for the
GTO/PRO 3000XL/4000XL
2
Power Cable from
the Master Arm
GRNCOM COM
CYCLE
CLOSE
SAFETY
SHADOW
LOOP
CLOSE
EDGE
OPEN
EDGE
EXIT
OPEN
BLK
RECEIVER
RED
RECEIVER
ORGBLUEWHTGRN BRN RED
MASTER INPUTS
BLK
MASTER CABLE
CONTROL INPUTS
Step 2
Strip approximately
3
/16" of insulation from each wire of
the opener power cable. Twist each exposed wire tightly
(there are seven [7] wires inside the power cable sheath).
Loosen sealing nut on strain relief hub at bottom of
control box. Insert power cable into control box through
strain relief. Thread approximately 6" of the power cable
into the control box and retighten sealing nut until the
power cable locks into place.
Step 3
Insert the stripped power cable wires into the
appropriate terminals on the MASTER INPUTS
terminal block. The green wire should be inserted
into the GRN terminal, the white wire into WHT,
the blue wire into BLUE, brown wire into BRN, and
the orange wire into the ORG terminal, red wire into
RED, and black wire into BLK.
Tighten the set screws against the end of the wires.
A dab of petroleum jelly on each terminal will help
prevent corrosion.
Correct
Wrong Wrong
Wire
Terminal
Block
Terminal
Block
Terminal
Block
Wire Wire
Connecting Opener Power Cable
Sealing Nut
Hub
Lock Nut
Strain Relief
Step 1
Make sure the control box power switch is in the OFF position.
The ON/OFF Switch is located on the bottom of the control
box. Remove the control box cover and slide the battery into
position with its terminals to the RIGHT (see illustration).
Connect the BLACK battery wire to the NEGATIVE () battery
terminal. Connect the RED battery wire to the POSITIVE (+)
terminal. Pay close attention to the color of the wires. If the wires
are connected incorrectly, the control board will be damaged.
NEVER insert the battery with the terminals to the left.
RED wire to POSITIVE (+) terminal
BLACK wire to NEGATIVE () terminal
RED
BLACK
Operator Power Cable
RECEIVER
25
FUSE
BATT+
BATT-
1 2 3 4
ON DIP
RECEIVER
LEARN
MAST LIMIT
LEARN
SLV LIMIT
S3
S4
ALM
S2
MASTER INPUTS
SOLAR
or
18 VAC
SLAVE INPUTS
LOCK
GTOAUX
GTO
LOCK
PWR
AUX
RLY
POWER
INPUTS
CONTROL
OUTPUTS
MASTER CABLESLAVE CABLE
CONTROL INPUTS
AUTO CLOSE TIME STALL FORCE
12 V Battery (Included)
Strain Relief
Space for optional
second 12 Volt battery
(see Accessory Catalog)
Battery wires for
optional second battery.
3
Powering the System
Installation of the Transformer
IMPORTANT:
• Thetransformerisdesignedandintendedforindoor use. If the transformer can be plugged only into
an outside electrical outlet, a weatherproof cover or housing (available at local electrical supply stores)
must be used.
• AlllowvoltagewireusedwiththeGTOPRO®GateOpenermustbe16gaugedualconductor,
multi-stranded, direct burial wire (see page 20 and the Accessory Catalog). Do not run more than
1000 feet of wire.
• Ifyourgateismorethan1000ft.fromanacpowersource,youwillneedtouseatleastone5watt
SolarPaneltochargethebattery(see Accessory Catalog). Refer to the Solar Panels and Gate
Activity chart below.
Step 1
Make sure the power switch is OFF before proceeding to the next step.
Step 2
Select the electrical outlet outlet into which you will plug the transformer.
Measure the distance from this outlet to the control box following the path
where the wire will be laid. After you have measured how much wire is
needed, cut the wire to the appropriate length.
The table and map
illustrate the maximum
number of gate cycles
to expect per day in a
particular area when
usingfrom5to30watts
of solar charging power.
(see Accessory Catalog).
The figures shown are
for winter (minimum
sunlight) and do not account for the use of any
accessory items. Accessories connected to
your system will draw additional power from
the battery.
NOTE:Amaximumof30wattsofsolar
charging power can be connected to the
GTOPRO®GateOpener.ConsultSolar
Panel Installation Instructions for further
information.
Winter Ratings Zone 1 Zone 2 Zone 3
12vsinglegate(5watts)solarcharger 4 8 13
12vsinglegate(10watts)solarcharger 8 16 26
12vsinglegate(15watts)solarcharger 11 20 30
12vsinglegate(20watts)solarcharger 14 28 38
12vsinglegate(25watts)solarcharger 17 36 46
12vsinglegate(30watts)solarcharger 20 44 54
Optional Solar Panels and Gate Activity
ON/OFF Switch
4
IMPORTANT INFORMATION ABOUT LOW VOLTAGE WIRE
The only wire acceptable for use with GTO products is 16 gauge multi-stranded, low voltage, PVC
sheathed wire. This particular gauge enables the transformer to provide an adequate charge through the
control board to the battery at distances up to 1000 ft.
DO NOT use telephone wire or solid core wire. Unlike multi-stranded wire, these types of wire are
inadequate for use with your gate opener system. Telephone wire and solid core wire do not deliver
enough voltage for your gate opener to function and will cause the system to go into a condition known
as "low voltage lockout."
NEVER splice wires together. Splicing permits corrosion and seriously degrades the wire's ability to
carry an adequate current.
Step 5
Strip
3
/16" off the ends of the low voltage wire and
twist tightly. Attach these ends to the GTO TRANSF
(GTOTransformer)terminalslocatedonthePOWER
INPUTS (GTOTransformer)terminalblock(see
illustration at right). Be certain not to let the
exposed wires touch each other!
Insert one transformer wire into an GTO TRANSF
terminal. Insert the other transformer wire into the
remaining GTO TRANSF terminal. The transformer
wires can be connected to the GTO TRANSF
terminals regardless of color or polarity.
Tighten set screws against exposed end of wires. A
dab of household petroleum jelly on each terminal will
help prevent corrosion.
~~
ORGBLUEWHTGRN BRN RED
MASTER INPUTS
BLK
SOLAR
or
18 VAC
ORGBLUEWHTGRN BRN RED
SLAVE INPUTS
BLK
LOCK
GTO AUX
GTO
TRANSF
LOCK
PWR
AUX
RLY
POWER
INPUTS
CONTROL
OUTPUTS
MASTER CABLESLAVE CABLE
Low Voltage Wire
from Transformer
or Solar Panel
PVC Pipe
Power Cable
from Master Arm
12 V Battery
RECEIVER
25
FUSE
BATT+
BATT-
1 2 3 4
ON DIP
RECEIVER
LEARN
MAST LIMIT
LEARN
SLV LIMIT
S3
S4
ALM
S2
MASTER INPUTS
SOLAR
or
18 VAC
SLAVE INPUTS
LOCK
GTOAUX
GTO
LOCK
PWR
AUX
RLY
POWER
INPUTS
CONTROL
OUTPUTS
MASTER CABLESLAVE CABLE
CONTROL INPUTS
AUTO CLOSE TIME STALL FORCE
WARNING! DO NOT PLUG THE TRANSFORMER
INTO AN OUTLET DURING THIS STEP! THE
TRANSFORMER MUST ONLY BE PLUGGED INTO
AN OUTLET DURING STEP 7!
Step 3
Lay the measured length of low voltage wire in a trench following a path
from the selected electrical outlet to the control box. Wires coming up
fromthegroundshouldberunthroughPVCconduittoprotectthemfrom
lawn mower blades, weed eaters, and grazing animals. Be sure to bury the
wire laid in the trench.
Step 4
Feed the low voltage wires upward through the strain relief opening on the
lowerleftofthecontrolbox.Pull6"to8"ofwireintothecontrolboxand
tighten the strain relief screw to secure the wires.
5
Step 7
Plugthetransformerintotheelectricaloutlet.
(Use of a surge protector with the transformer is strongly
recommended.)
HINT: Keep a few mothballs in the control box to
discourage insects from entering it and damaging the
control board.
Step 6
Strip
1
/2" of insulation from the ends of the low voltage
wire. Attach these stripped ends to the transformer
terminals.
A dab of household petroleum jelly on each terminal will
help prevent corrosion.
Make sure the exposed wires do not touch each other!
SURGE PROTECTOR
Transformer
6
1 2 3 4
ON DIP
STAT US
LEARN RMT
LEARN
MAST LIMIT
LEARN
SLV LIMIT
S3
S4
S2
OFF
SOFT START OFF
WARNING OFF
OPEN PULL
SLV OPEN DLY.
MODE1 OFF
MODE2 OFF
ON
ON
PUSH
SIMULT.
ON
ON
120 MIN MAX
AUTO CLOSE TIME STALL FORCE
1 2 3 4
ON DIP
STAT US
LEARN RMT
LEARN
MAST LIMIT
LEARN
SLV LIMIT
S3
S4
S2
OFF
SOFT START OFF
WARNING OFF
OPEN PULL
SLV OPEN DLY.
MODE1 OFF
MODE2 OFF
ON
ON
PUSH
SIMULT.
ON
ON
120
MIN
MAX
AUTO CLOSE TIME
STALL FORCE
1 2 3 4
ON DIP
SOFT START OFF
WARNING OFF
OPEN PULL
SLV OPEN DLY.
MODE1 OFF
MODE2 OFF
ON
ON
PUSH
SIMULT.
ON
ON
120 MIN
ON
OFF
1
ON DIP
2 3 4
Main DIP Switch Settings (MODES)
DIP Switch #1 - Soft Start/Stop
ON - Soft start enabled (factory preset).
OFF - Soft start disabled.
The Soft Start/Stop feature slowly starts the
gate as it begins to open and slows the gate as
it comes to the closed position. This saves wear
and tear on the gate and gate opener system.
DIP Switch #2 - Warning Buzzer
ON - Buzzer warning enabled (factory preset).
OFF - Buzzer warning disabled.
The Warning Buzzer alerts you when the gate
opener is beginning to either open or close the
gate. It sounds for the first 2 seconds in each
direction. It also sounds a warning when the gate
obstructs two times in one cycle. Switching this
to OFF only disables the open and close warning
not the obstruction warning.
DIP Switch #3 - Push/Pull-to-Open
ON - Pushtoopen.
OFF - Pushtoopen(factorypreset).
IfyourgateopensintothepropertytheDIP
Switch is set to the OFF position (factory
setting). If your gate opens out from the property
theDIPSwitchmustbesettotheONposition.
NOTE:ifyouhaveaPush-to-Opengate
applicationyouwillneedaPush-to-Openbracket
(seePush-to-OpenInstructionsonpage30).
DIP Switch #4 - Dual Operation
ON - Slave opens simultaneously with master.
OFF - Slave opens after master.
Note: Not applicable for single gate operator.
DIP Switches
CONTROL BOARD SETTINGS
Auto Close Time
Potentiometer
1 2 3 4
ON DIP
STATUS
LEARN RMT
LEARN
MAST LIMIT
LEARN
S3
S2
OFF
SOFT START OFF
WARNING OFF
OPEN PULL
SLV OPEN DLY.
MODE1 OFF
MODE2 OFF
ON
ON
PUSH
SIMULT.
ON
ON
120 MINMAX
AUTO CLOSE TIME STALL FORCE
Auto Close
The 'AUTO CLOSE TIME' pot controls
auto close feature.
Turning the pot all the way counter-clockwise
will turn auto close feature off. The minimum
auto close time is 3 seconds. The maximum
(turn the pot all the way clockwise) auto close
timeis120seconds.
7
Setting the Closed Position Limit
for Pull to Open Applications
TURN CONTROL BOX ON
Your GTO PRO® has two Limit Settings
1) OPEN Limit setting:(GateintheOPENPOSITION/thelimitisFACTORYSETandNOTADJUSTABLE)Theopen
limit setting is the fully open position.
2) CLOSED Limit setting:(GateintheCLOSEDPOSITION)Toachieveoptimumclosedposition,youarerequired
tocompletethefollowingFOURSTEPS:
Step 1
ConrmthatthepowerswitchisintheONpositionandthegateisintheOPENPOSITION.
Step 2
Activate your opener by pressing the entry transmitter button.
Yourgateshouldnowbemovingfromthefullyopenposition
towardtheclosedposition.PreparetoSTOPthegatebypressing
the entry transmitter button again when the gate reaches the
desired closed position. This step may be repeated until desired
close position is achieved. Once the desired CLOSED position
has been achieved, proceed to step 3.
Step 3
WiththegateinthedesiredclosedpositionPRESS&HOLD
the“LEARNMASTLIMIT"buttononthecontrolboardfor5
seconds.
Step 4
Pressthetransmitterbuttonandallowthegatetoreturntothe
fullyopenposition.YOURGATE’SCLOSEDPOSITIONLIMIT
ISNOWPROGRAMMED.
TESTING YOUR CLOSED LIMIT SETTING:
Pressyourentrytransmitterandallowyourgatetoclose.IftheCLOSEDpositionisnotcorrectorneedstobechanged,you
willneedtoCLEARyourCLOSEDLIMITsettingsandfollowSteps1-4again.
CLEARING THE PROGRAMMED CLOSED LIMIT SETTING:
If you make a mistake and set the limit at the wrong position – press your transmitter to return the gate to the fully opened
position,thenpressandholdthe"LEARNMASTLIMIT"buttonfor5seconds.Thiswillclearthememoryfortheclosed
limitposition.FollowSteps1-4again.
Learn Master Limit
Button
1 2 3 4
ON DIP
STAT US
LEARN RMT
LEARN
MAST LIMIT
LEARN
SLV LIMIT
S3
S4
S2
ART OFF
G OFF
PULL
EN DLY.
OFF
OFF
ON
ON
PUSH
SIMULT.
ON
ON
120 MIN MAX
CLOSE TIME STALL FORCE
8
Obstruction Sensitivity Potentiometer
ALWAYS KEEP SAFETY AT THE TOP OF YOUR LIST WHEN ADJUSTING OR
SERVICING YOUR AUTOMATIC GATE OPENER!
1 2 3 4
ON DIP
OFF
SOFT START OFF
WARNING OFF
OPEN PULL
SLV OPEN DLY.
MODE1 OFF
MODE2 OFF
ON
ON
PUSH
SIMULT.
ON
ON
120 MIN MAX
AUTO CLOSE TIME STALL FORCE
1 2 3 4
ON
OFF
ON
ON
PUSH
SIMULT.
ON
ON
120 MIN MAX
AUTO CLOSE TIME STALL FORCE
MIN MAX
STALL FORCE
IMPORTANT: For safety reasons
the obstruction setting or Stall
ForceontheGTOPRO®control
board comes from the factory set at
MIN (minimum). In many gate in-
stallations this setting will need to
be adjusted to overcome the weight
and size of the gates.
The Stall Force potentiometer on
the control board operates like a
volume control on a radio. It controls the obstruction
sensitivity (or the amount of force the opener will apply to an
obstruction) before it automatically stops and reverses direction for
approximately two (2) seconds.
Use a small slotted screwdriver to turn the arrow in the center of the
potentiometer. Adjust the stall force from the MINIMUM position
where the gate operates without obstructing from its own weight or the
wind conditions in your area.
9
1 2 3 4 5 6 7 8 9
ECE
A23S 12V
ALKALINE BATTERY
+
0
LED
2. Set the transmitter DIP Switches
Therearenine(9)transmitterDIPswitches;eachcanbeplacedinthreedifferent
positions (+, 0, ). DO NOT set all the switches in the same position, such as all +,
all 0, or all .OncetheDIPswitcheshavebeensettoapersonalcode,replacefront
cover.
WARNING: No other adjustments should be made inside the transmitter.
Setting Your Personal Transmitter Code
1. Remove the Transmitter Cover
On the back of the transmitter use a small phillips head screw driver to remove
the two screws on the sides of the visor clip and separate the front cover from the
transmitter.Withthefrontcoverremoved,thebatteryandtheDIPswitcheswill
be exposed. To set a new code, use a small screwdriver to move the switches.
All GTO transmitters are set to a standard code at the factory and are ready to operate your GTO PRO® Gate Opener
®
. For
your safety and security, however, we strongly recommend that you replace the factory setting with your own personal code.
Follow the directions below:
3. “Teach” the New Code to Control Board Memory
1 2 3 4
ON DIP
STAT US
LEARN RMT
LEARN
MAST LIMIT
LEARN
SLV LIMIT
S3
S4
S2
ART OFF
G OFF
PULL
EN DLY.
OFF
OFF
ON
ON
PUSH
SIMULT.
ON
ON
120 MINMAX
CLOSE TIME STALL FORCE
Learn Remote
Button
A.Pressandholdtransmitterbutton.
B.Pressandholdthe LEARN RMT (Learn Remote) button
on the control board until the buzzer sounds.
C. Release transmitter button. The new code
is stored in control board memory.
D. Release the LEARN RMT (Learn Remote) button.
+
0
ECE
1 2 3 4 5 6 7 8 9
10
Installing the Receiver
Use the transmitter to check the range of the receiver before permanently mounting it.
Consider the following when mounting the receiver:
•Standardreceivercablelengthis10feet(receiverswithalongercableareavailableas
specialorderitems;call the GTO Sales Department).NEVERsplicereceivercable!
•Run the cable through PVC conduit to protect it from damage.
•DONOTruncablethroughmetalconduitbecausethereceiversignalrangewillbe
decreased.
•DONOTruncableinconduitcontainingacwiring.
•Thereceiverrangecanvaryfrom50to100feetdependinguponweather,topography,
and external interference.
•DONOTmountupsidedown.
•DONOTmountonmetalfenceorpost;doingsowilldecreasesignalrange.
•MOUNTsothatyouhavelineofsightbetweenremotetoantenna.
•MOUNT3feetawayfromACvoltage.
•MOUNTashighaspossibleforoptimumrange.
FCC Regulation
ThisdevicecomplieswithFCCrulesPart15.Operationissubjecttothefollowing
conditions:
1. This device may not cause harmful interference.
2. This device must accept an interference that may cause undesired operation.
Transmitter distance may vary due to circumstances beyond our control. NOTE:
The manufacturer is not responsible for any radio or TV interference caused by
unauthorized modifications to this equipment. Such modifications could void the
user’s authority to operate the equipment.
11
Connecting Additional Safety Devices
TheGTOPRO®3000isequippedwithbuilt-inobstructionsensitivity.Theopenerisdesignedtostopandreversethegate
within2secondswhenitcomesincontactwithanobstruction.However,obstructionsensitivity,althoughfunctioning
properly, may not be sensitive enough to prevent bodily injury in some circumstances. To augment your protection against
entrapment, GTO recommends using some form of additional safety device. When installed, contact sensors must be
mountedincompliancewithUL325,UnderwritersLaboratoriessafetystandardforgateopeners.Reviewpage5forinfor-
mationaboutmountingrequirementsforsafetyedges("contactsensors").
Refer to the sensor manufacturer’s instructions for information
about installing these devices on a vehicular gate.
PLEASE NOTE: Contact sensors are not included withtheGTOPRO®3000.
The GTO PRO® 3000 will ONLY accept accessory devices with normally open dry contact output.
Make sure the power switch to the opener is turned
off before connecting safety device wiring to the
terminal blocks. Unplugging the transformer does
not turn power to the opener OFF.
Contact Sensor Input Connection:
ConnectoneoftheOPENEDGEcontactsensorwirestothe
COMMON (COM) terminal and the other to the OPEN
EDGEterminalontheGTOPRO®3000controlboard.
ConnectoneoftheCLOSEEDGEcontactsensorwirestothe
COMMON (COM) terminal and the other to the CLOSE
EDGEterminalontheGTOPRO®3000controlboard.
Activation of a contact sensor while the gate is in motion
will cause the gate to stop and reverse within two (2)
seconds.
Contact Sensors (safety edges)
If not installing a contact sensor skip to next section.
Although GTO strongly recommends the use of additional safety devices, we do not endorse any
specific brand names. Only use products that are certified and listed to be in compliance with
any applicable UL standards (Underwriters Laboratories) and national and regional safety
codes.
Call GTO Sales at 1-800-543-4283 for information on compatible
products for your specific application.
GRNCOMCOM
CYCLE
CLOSE
SAFETY
SHADOW
LOOP
CLOSE
EDGE
OPEN
EDGE
EXIT
OPEN
BLK
RECEIVER
RED
RECEIVER
ALM
BLK
CONTROL INPUTS
Wire from Contact Sensor
(open safety edge)
Wire from Contact Sensor
(close safety edge)
NOTE: If the close edge is contacted when the gate is opening, nothing happens. If the close edge
is contacted when the gate is closing, then it reverses. If the open edge is contacted when the gate is
closing, nothing happens. If the open edge is contacted when the gate is opening, then it reverses.
12
Refer to the sensor manufacturer’s instructions for information
about installing these devices on a vehicular gate.
Make sure the power switch to the opener is turned
off before connecting safety device wiring to the
terminal blocks. Unplugging the transformer does
not turn power to the opener OFF.
Non-Contact Sensor Connection:
Connect one of the non-contact sensor dry contact output wires to
the COMMON (COM) terminal and the other to the SAFETY
terminalontheGTOPRO®3000controlboard.
This input is ONLY monitored when the gate
is closing. Activating the non-contact sensor
(obstructing the safety beam path) will cause the
gate to reverse to the fully open position.
Non-Contact Sensors (photo beams)
TheGTOPRO®3000canalsoaccept"Safety"inputfromnormallyopen"dry-contact"outputdevicessuchasphotobeams
connectedtotheSAFETYinputterminal.
If not installing a non-contact sensor skip to next section.
PLEASE NOTE: Non-contact sensors are not included withtheGTOPRO®3000.
GRNCOMCOM
CYCLE
CLOSE
SAFETY
SHADOW
LOOP
CLOSE
EDGE
OPEN
EDGE
EXIT
OPEN
BLK
RECEIVER
RED
RECEIVER
ALM
BLK
CONTROL INPUTS
Wire from Non-Contact
Sensor (photo beam)
Shadow Loop
If not installing a shadow loop skip to next section.
GRNCOMCOM
CYCLE
CLOSE
SAFETY
SHADOW
LOOP
CLOSE
EDGE
OPEN
EDGE
EXIT
OPEN
BLK
RECEIVER
RED
RECEIVER
ALM
BLK
CONTROL INPUTS
Wire from Loop Detector
Refer to the sensor manufacturer’s instructions for information
about installing these devices on a vehicular gate.
Make sure the power switch to the opener is turned
off before connecting safety device wiring to the
terminal blocks. Unplugging the transformer does not
turn power to the opener OFF.
Shadow Loop Connection:
Connect the COM wire from the Loop Detector to the COMMON
(COM) terminal and the normally open wire from the Loop Detector
to the SHADOWLOOPterminalontheGTOPRO®3000
control board.
PLEASE NOTE: Non-contact sensors are not included withtheGTOPRO®3000.
The SHADOW LOOP is a detector located within the moving
path of the gate to prevent the gate from closing when a vehicle is in
the path.
This input is ONLY monitored when the gate is at
the fully open position. Activating this will prevent
the gate from closing.
TheGTOPRO®3000canaccept"ShadowLoop"inputfromLoopDetectorthatprovidesnormallyopen"dry-contact"
connected to "Shadow Loop" input terminal.
13
Connecting Accessories
Cycle Input
TheGTOPRO®3000canacceptNORMALLYOPEN"DRY-CONTACT"accessories,suchas;PushButtonEntryDevices
andKeyPads.
Refer to the sensor manufacturer’s instructions for
information about installing these devices on a vehicular
gate.
Make sure the power to the opener is turned off
before connecting cycle input device wiring to
the terminal blocks. Unplugging the transformer
does not turn power to the opener OFF.
Cycle Input Connection:
Connect one of the accessory wires to the COMMON
(COM) terminal and the other to the CYCLE
Each activation of the accessory will cause the
gate to cycle as follows:
OPEN STOP CLOSE STOP
If not connecting accessories skip to next section.
GRNCOMCOM
CYCLE
CLOSE
SAFETY
SHADOW
LOOP
CLOSE
EDGE
OPEN
EDGE
EXIT
OPEN
BLK
RECEIVER
RED
RECEIVER
ALM
BLK
CONTROL INPUTS
Wire from Accessory
(push button, key pad, etc.)
Free Exit Input
TheGTOPRO®3000canacceptNORMALLYOPEN
"DRY-CONTACT"freeexit/entrydevicessuchas
GTOWandandLoopDetector
Refer to the sensor manufacturer’s instructions for
information about installing these devices on a
vehicular gate.
Make sure the power to the opener is turned
off before connecting free exit/entry device
wiring to the terminal blocks. Unplugging
the transformer does not turn power to the
opener OFF.
Free Exit Connection:
Connect Exit Wand BLK wire to the COMMON (COM)
terminal and Exit Wand BLU wire to the EXIT OPEN
terminalontheGTOPRO®3000controlboard.
Activation of this input will cause the gate to
open to the fully opened position. As long as
contact is held, the gate will remain open.
GRNCOMCOM
CYCLE
CLOSE
SAFETY
SHADOW
LOOP
CLOSE
EDGE
OPEN
EDGE
EXIT
OPEN
BLK
RECEIVER
RED
RECEIVER
ALM
BLK
CONTROL INPUTS
Wire from Exit/Entry Device
(GTO Wand, Loop Detector etc.)
14
GTO LOCK
SOLAR
or
18 VAC
ORGBLUEWHTGRN BRN
SLAVE INPUT
LOCK
GTOAUX
GTO
TRANSF
LOCK
PWR
AUX
RLY
POWER
INPUTS
CONTROL
OUTPUTS
SLAVE CAB
Wire from
Automatic GTO Lock
GTO Lock:
For use exclusively with GTO Lock (FM143 or FM144).
Connecting other devices to these terminals may cause incorrect
operation and void your warranty.
GTO Lock Connection:
ConnecttheredandblackleadsfromthelocktotheGTOLOCK
terminalontheGTOPRO®3000controlboard.
Aux:
•These2terminalsarenormallyopen'dry-contact'
(no voltage) relay ouput.
•These2terminalsareON(shorted)wheneverthegateis
moving and OFF (opened) otherwise.
•These2terminalsmaximumratingis24Vdc,1Amp.
Connecting GTO Automatic Gate Lock
If not connecting gate lock skip to next section.
15
Step 3
WiththegateinthedesiredopenpositionPRESS&HOLDthe“LEARNMASTLIMIT"buttononthecontrolboardfor5
seconds.
Step 4
Pressthetransmitterbuttonandallowthegatetoreturntotheclosedposition.YOURGATE’SOPENPOSITIONLIMITIS
NOWPROGRAMMED.
TESTING YOUR OPEN LIMIT SETTING:
Pressyourentrytransmitterandallowyourgatetoopen.Ifthe
OPENpositionisnotcorrectorneedstobechanged,youwill
needtoCLEARyourOPENLIMITsettingsandfollowsteps
one(1)tofour(4)again.
CLEARING PROGRAMMED
OPEN LIMIT SETTING:
If you make a mistake and set the limit at the wrong position
– press your transmitter to return the gate to the fully closed
position, then press and hold the "LEARN MAST LIMIT" button
for5seconds.Thiswillclearthememoryforthe
openlimitposition.Followstepsone(1)tofour(4)again.
Learn Master Limit
Button
1 2 3 4
ON DIP
STAT US
LEARN RMT
LEARN
MAST LIMIT
LEARN
SLV LIMIT
S3
S4
S2
ART OFF
G OFF
PULL
EN DLY.
OFF
OFF
ON
ON
PUSH
SIMULT.
ON
ON
120 MIN MAX
CLOSE TIME STALL FORCE
Step 4
Make sure the control box power switch is OFF. Use a small
screwdriver to move the Number 3DIPswitchfromthefactory
setting(OFF/Pull-To-Open)toON for Push-To-Open. Turn
power switch ON. The control board is now configured to push
the gate open.
Setting the Open Position Limit
Step 1
ConrmthatthepowerswitchisintheONposition,andthegateisintheCLOSEDPOSITION.
Step 2
Activateyouropenerbypressingtheentrytransmitterbutton.Yourgateshouldnowbemovingfromtheclosedposition
towardtheopenposition.PreparetoSTOPgatebypressingtheentrytransmitterbuttonagainwhenthegatereachesthe
desiredopenposition.Thisstepmayberepeateduntildesiredopenpositionisachieved.OncethedesiredOPENpositionhas
been achieved, proceed to Step 3.
ON
OFF
DIP#3
ON Push-to-open operation.
OFF Pull-to-openoperation(factory setting).
1
ON
234
1 2 3 4
ON
OFF
SOFT START OFF
WARNING OFF
OPEN PULL
SLV OPEN DLY.
MODE1 OFF
ON
ON
PUSH
SIMULT.
ON
120 MIN MAX
AUTO CLOSE TIME STALL FORCE
1 2
3
4
ON
O
FF
SO
FT
S
TART
O
FF
WARNING OFF
OPEN PULL
S
LV
O
PEN DLY
.
MODE1 OFF
O
N
O
N
PU
SH
S
IM
U
LT
.
ON
120
MIN
MAX
AU
T
O
C
L
OS
E TIME
STALL FORC
ORC
1 2 3 4
ON DIP
OFF
OFF
PULL
DLY.
OFF
OFF
ON
ON
PUS
SIMU
ON
ON
120 MIN
Push to Open Installation
16
Maintenance & Troubleshooting Guide
Ifyourgateopenerdoesnotfunctionproperlyafteritisinstalled,usethisguidebeforecallingtheGTOServiceDepartment.
‘PR03040-G3’ DIAGNOSTIC INDICATORS GUIDE
This guide provides detailed explanations of various alarm sound and led indicators for the new
PRO3040-G3 board).
A. LED INDICATORS ON WORKING OPENER:
In the following modes, the control boards will indicate various conditions of the operator. The operator
is fully operational in these modes.
1. Input Changed indicators:
Alarm: None.
‘STATUS’ Led: 1 blink.
•Wheneverthereisachangeinstateinanyofthefollowinginputs:retractedlimitswitch,DIP-
Switches, Cycle, Safety, Exit, Shadow, Close Edge or Open Edge.
2. ‘CYCLE’ Input Activated indicators:
Alarm: None.
‘STATUS’ Led: 1 blink with 2 seconds pause (Idle state only)
•‘CYCLE’inputiscontinuouslyshortedtocommon/ground.
3. ‘SAFETY’ Input Activated indicators:
Alarm: None.
‘STATUS’ Led: 2 blinks with 2 seconds pause (Idle state only)
•‘SAFETY’inputiscontinuouslyshortedtocommon/ground.
4. ‘EXIT’ Input Activated indicators:
Alarm: None.
‘STATUS’ Led: 3 blinks with 2 seconds pause (Idle state only)
•‘EXIT’inputiscontinuouslyshortedtocommon/ground.
5. ‘SHADOW’ Input Activated indicators:
Alarm: None.
‘STATUS’ Led:4blinkswith2secondspause(Idlestateonly)
•‘SHADOW’loopinputiscontinuouslyshortedtocommon/ground.
6. ‘CLOSE EDGE’ Input Activated indicators:
Alarm: None.
‘STATUS’ Led:5blinkswith2secondspause(Idlestateonly)
•‘CLSEDGE’inputiscontinuouslyshortedtocommon/ground.
7. ‘OPEN EDGE’ Input Activated indicators:
Alarm: None.
‘STATUS’ Led: 6 blinks with 2 seconds pause (Idle state only)
•‘OPNEDGE’inputiscontinuouslyshortedtocommon/ground.
8. ‘POWER IN’ Input indicator:
Alarm: None.
‘POWER IN’ Led (Green): ON/OFF (see description below)
•ON:Transformerisdetected.
•OFF:Transformerinstallation:NoACinputpowerispresent.Thebatteryisnotbeingcharged...
17
9. Battery charging indicator:
Alarm: None.
‘CHARGING’ Led (Red): vary (see description below)
•ConstantlyON:Thechargingcircuitisinfastchargemode.Thebatteryisbeingchargewitha
constant current (~ 1Amp)
•2blinkspersecond:Soakchargemode.Thechargerhascompletedfastchargemodeand
thebatteryhasreachedthedesiredvoltage(~14.1Volts).Thechargercircuitwillremainatthis
stage for a maximum of 2 hours then switch to float charge mode.
•1blinkper2seconds:Floatchargemode.Thebatteryhasreachedfullcapacity;aconstantvolt
ageisappliedtokeepthebatteryatfullychargedcapacity.(~13.8Volts)
•OFF:Batteryisnotbeingcharge.ThisledwillbeOFFifthereisnotransformeror
solar panel power.
10. Low Battery indicators:
Alarm:1beepevery10seconds(Idlestateonly)
‘STATUS’ Led:1blinkevery10seconds(Idlestateonly)
‘CHARGING’ Led: Rapid pulses every second.
•Operatorwillcontinuetooperatorasnormal.However,thebatterywillneedtobecharged.
Low battery indicator will only be activated while gate is idle.
•Whileinidlestateandthebatteryvoltagedropbelow11.4volts(thisvoltageistemperature
compensated) the unit will enter low battery indicator mode as described above. The operator
will‘exit’lowbatteryindicatormodewhenthevoltageisabove12Volts.
11. Receiver/RF indicators:
Alarm: None
‘RECEIVER’ Led: blinking or OFF.
•Whenthe‘RECEIVER’ledisblinking,thecontrollerisreceiving‘GTOscheme’318MHz
signal from the receiver. This indicates that the transmitter and receiver are working properly.
However,ifthetransmitterisnotbeingpressedandthe‘RECEIVER’ledisblinking,this
indicates that there is significant interference (i.e. A stuck transmitter sending out
unwanted signal).
•The‘RECEIVER’ledisnormallyoffifthetransmitterisnotpressed/transmitting.
B. LED INDICATORS ON NON-WORKING OPENER:
Inthefollowingmodes,theoperatorisnotfunctional.Power-onresetisrequiredtoreturntheoperator
to normal operation after the problem has been corrected.
1. Master arm limit switch error indicators: Error Code ‘1’
Alarm: 1 beep with 2 seconds pause.
‘STATUS’ Led: 1 blink with 2 seconds pause.
•Thelimitswitchfromthemasterarmisnotdetected.Thistypicallyindicatesthatthemaster 
arm is not connected or both the normally open (brown wire) and the normally close (orange
wire) are shorted to common/ground.
2. Slave arm limit switch error indicators: Error Code ‘2’
Alarm: 2 beeps with 2 seconds pause.
‘STATUS’ Led: 2 blinks with 2 seconds pause.
•Thelimitswitchfromtheslavearmisnotdetected.Thistypicallyindicatesthatboththenor
mally open (brown wire) and the normally close (orange wire) are shorted to common/ground.
Note: If no slave arm is connected, the control board will automatically switch to single
mode operation.
•After2secondsofextendingandtheretractedlimitswitchstillbeingactivated(Stucklimit
switch).
18
The GTO, Inc. Technical Service Department is open
Monday–Friday8:00A.M.–5:00P.M. (Eastern Time)
Fax (850) 575-8950 • Web site: www.gtoinc.com
Telephone (800) 543-1236
Telephone (850) 575-4144
3. Master arm running error indicators: Error Code ‘3’
Alarm: 3 beeps with 2 seconds pause.
‘STATUS’ Led: 3 blinks with 2 seconds pause.
•Nopulsesaredetectedfromthemasterarmrevcounterinputduringtherst1-2secondsof
running the gate.
•After2secondsofextendingandtheretractedlimitswitchstillbeingactivated(Stucklimit
switch).
4. Slave arm running error indicators: Error Code ‘4’
Alarm:4beepswith2secondspause.
‘STATUS’ Led:4blinkswith2secondspause.
•Nopulsesaredetectedfromtheslavearmrevcounterinputduringtherst1-2secondsofrun
ning the gate.
•After2secondsofextendingandtheretractedlimitswitchstillbeingactivated(Stucklimit
switch).
5. Current Sensing (Obstruction) error indicators: Error Code ‘5’
Alarm:5beepswith2secondspause.
‘STATUS’ Led:5blinkswith2secondspause.
•Currentsensingcircuitfordetectingobstructionisnotworkingproperly.Thecurrentsensing
circuit is tested prior to running the motor.
6. Board have NOT been tested (and passed QA): Error Code ‘25’
Alarm:2beepsthen5beepswith2secondspause.
‘STATUS’ Led:2blinksthen5blinkswith2secondspause.
•Theboardhasnotbeentestedand/orhavenotpassedQAtest.
7. Master Motor Terminals Shorted: Error Code ‘12’
Alarm: 1 beep then 2 beeps with 2 seconds pause.
‘STATUS’ Led: 1 blink then 2 blinks with 2 seconds pause.
•Themastermotorterminalsand/orleadsareshorted.
8. Slave Motor Terminals Shorted: Error Code ‘13’
Alarm: 1 beep then 3 beeps with 2 seconds pause.
‘STATUS’ Led: 1 blink then 3 blinks with 2 seconds pause.
•Themastermotorterminalsand/orleadsareshorted.
  • Page 1 1
  • Page 2 2
  • Page 3 3
  • Page 4 4
  • Page 5 5
  • Page 6 6
  • Page 7 7
  • Page 8 8
  • Page 9 9
  • Page 10 10
  • Page 11 11
  • Page 12 12
  • Page 13 13
  • Page 14 14
  • Page 15 15
  • Page 16 16
  • Page 17 17
  • Page 18 18

GTO SW-4000XL Operating instructions

Category
Gate Opener
Type
Operating instructions
This manual is also suitable for

Ask a question and I''ll find the answer in the document

Finding information in a document is now easier with AI