Tappan TGF657BFD1 Owner's manual

Category
Cookers
Type
Owner's manual
GAS_NGE
READANDSAVETHESEINSTRUCTIONS OWNER'SGUIDE
i i i ii i i ii iiii iiii i
P/N 318200764 (0703) Rev. A
I
Product Registration
Register Your Product
The PRODUCT REGISTRATION CARD
should be filled in completely, signed and
returned to Electrolux Home Products
North America,
//!
Thank you for choosing this appliance. The information contained within this
Owner's Guide wilt instruct you on how to properly operate and care for your
appliance+ Please read through the information contained in your literature pack to
learn more about your new appliance,
Record Your Model and Serial Numbers
Record in the spaceprovided below the model and serial numbersfound on the
serial plate located under the lift-up cooktop.
Model Number:
Serial Number:
Date of Purchase:
Contents
This Owner's Guide contains general
operating instructions for your appliance
and feature information for several
I models. Your appliance may not have all
[ the described features.
Versi6n en espafiol
Sidesea obtener una copia en espa_ol de
este Man ual del Usuario, s[rvase escribir a
la direcci6n quese incluye acontinuaci6n.
So]icite la 318208764sp.
Etectrolux Home Products
Attn : Care Use
P.O, Box 212378
Augusta, GA 30917
© 2007 Electrolux Canada Corp,
All rights reserved
Product Registration ...................................................... 2
VersiOn en espafiol ........................................................ 2
Important Safety Instructions ...................................... 3-5
Liquefied Petroleum (Propane) Gas Conversion ............. 6
Grounding Instructions (electric ignition models only) ._ 6
Cooktop and Oven Ignition ........................................... 6
Flame Size ...................................................................... 7
Proper Burner Adjustments ............................................ 7
Selecting Surface Cooking Ustensils .............................. 7
Specialty Pans & Trivets .................................................. 8
Canning Tips & Informations ......................................... 8
Setting Surface Controls ................................................ 9
Before Setting Oven Controls ...................................... I0
Setting Oven Controls .................................................. 10
Air Circulation in the Oven .......................................... 11
Oven Baking ................................................................ 11
Oven Cleaning ........................................................ 12-13
General Cleaning .................................................... 14-16
Storage Drawer ............................................................ 16
Changing Cooktop and Oven Lights ............................ 17
Adjusting Oven Temperature ....................................... 17
Avoid Service Checklist ........................................... 18-19
Warranty ...................................................................... 20
If the information in this manual is not
followed exactly, a fire or explosion may result causing
property damage, personal injury or death.
FOR YOUR SAFETY:
-- Do not store or use gasoline or other flammable vapors
and liquids in the vicinity of this or any other appliance.
-- WHAT TO DO IF YOU SMELL GAS:
= Do not try to light any appliance.
o Do nottouch any electrical switch; do not use any phone
in your building.
o Immediately call your gas supplier from a neighbor's
phone. Follow the gas supplier's instructions.
o If you cannot reach your gas supplier, call the fire
department.
Installation and service must be performed by a qualified
installer, servicer or the gas supplier.
UMPORTANT SAFETY BNSTRUCTBONS
Read all instructions before using this appliance.
Save these instructions for future reference.
This guide containsimportant safety symbols and instructions. Pleasepay special attention to these symbols and follow all
instructions given. Here isa brief explanation of the useof these symbols.
_Thissymbolwill helpalertyoutosituationsthat _ This symbol wilt help alert you to situations
may causeserious bodily harm, death or property damage, that may causebodily injury or property damage.
o Remove all tape and packaging wrap before using the
range. Destroy the carton and plastic bags after
unpacking the range. Never allow chifdren to play with
packaging material.
a Proper installation--Be sure your appliance is
properly installed and grounded by a qualified
technician in accordance with the National Gas Code
ANSI Z223.1--iatest edition, or in Canada CAN/CGA
B149.1, and CANICGA B149.2, and the National
Electrical CodeANSI/NFPA No.70--latest edition, or in
Canada CSAStandard C22.1, Canadian ElectricalCode,
Part 1, and local code requirements. Install only per
installationinstructionsprovided in the literature package
for this range.
Askyour dealer to recommenda qualified technician and an
authorized repair service. Know how to disconnect the
electricalpower to the range at the circuit breakeror fuse box
in caseof an emergency.
Cold temperatures candamage the electronic
control. When using the appliance for the first time, or when
the appliance has not been used for an extended period of
time, be certain the unit hasbeen in temperaturesabove32°F
for at least 3 hours before turning on the power to the
appliance.
o User Servicing--Do not repair or replace any part of
the appliance unlessspecifically recommended in the
manuals. All other servicing should be done only by a
qualified technician to reducethe riskof personalinjury and
damage to the range.
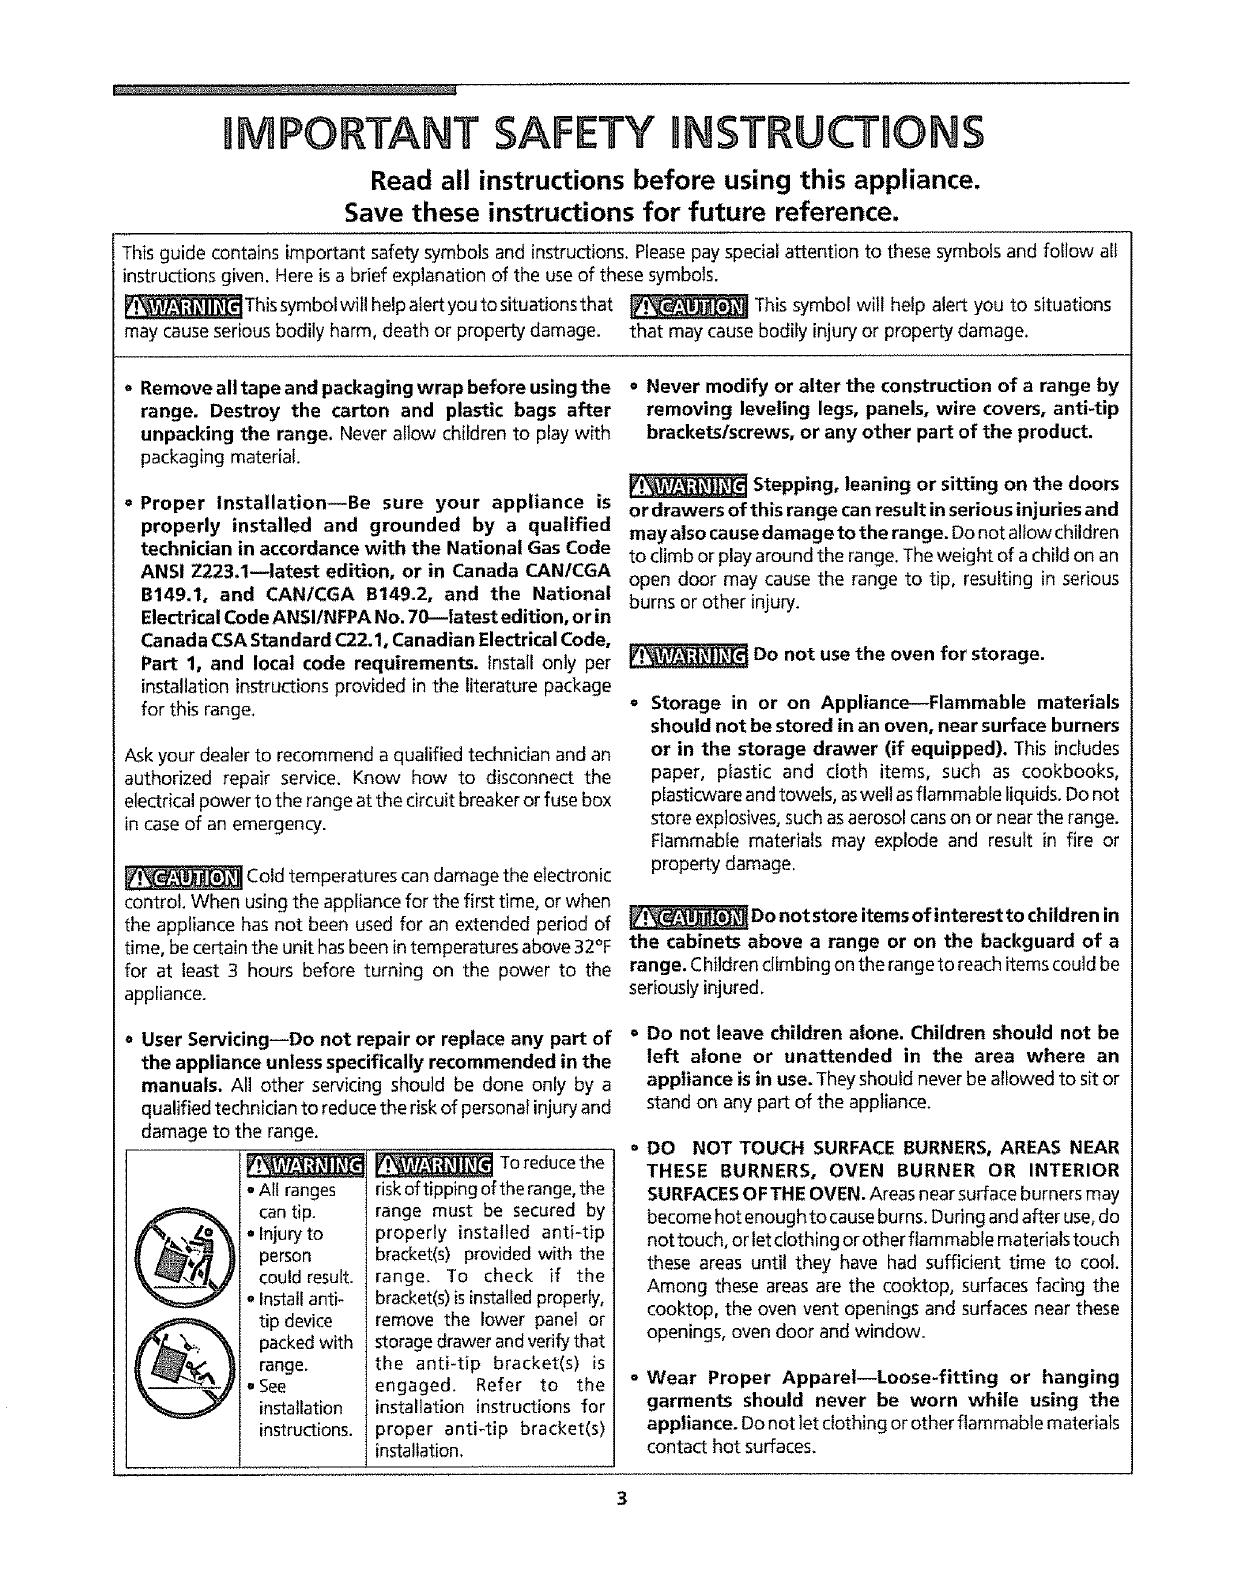
All ranges
cantip.
Injury to
person
could result.
Installanti-
tip device
packedwith
range.
See
installation
instructions.
__,.._ Toreducethe
riskoftipping oftherange,the
range must be secured by
properly installed anti-tip
bracket(s) providedwith the
range. To check if the
bracket(s)isinstalledproperly,
remove the lower panel or
storagedrawerandverifythat
the anti-tip bracket(s) is
engaged. Refer to the
installation instructions for
proper anti4ip bracket(s)
installation.
Never modify or alter the construction of a range by
removing leveling legs, panels, wire covers, anti-tip
brackets/screws, or any other part of the product.
Stepping, leaning or sitting on the doors
or drawers of this range canresult in seriousinjuries and
may also causedamag e to the ra nge.Donot allow children
to climb or playaround the range_Theweight of a child on an
open door may cause the range to tip, resulting in serious
burns or other injury.
Do not use the oven for storage.
Storage in or on Appliance--Flammable materials
should not be stored in an oven, near surface burners
or in the storage drawer (if equipped). This [ndudes
paper, plastic and cloth items, such as cookbooks,
plasticware and towels, aswelf asflammable liquids. Do not
store explosives,such asaerosol canson or nearthe range.
Flammable materials may explode and result in fire or
property damage.
Do not store itemsof interest to children in
the cabinets above a range or on the backguard of a
range. Childrenclimbing on the range to reachitemscould be
seriouslyinjured.
Do not leave children alone. Children should not be
left alone or unattended in the area where an
appliance is in use_Theyshould neverbe allowed to sit or
stand on any part of the appliance.
DO NOT TOUCH SURFACE BURNERS, AREAS NEAR
THESE BURNERS, OVEN BURNER OR INTERIOR
SURFACES OF THE OVEN. Areas near surface burners may
become hot enoughto cause burns_ During and after use, do
not touch, or let clothing or other flare mable materials touch
these areas until they have had sufficient time to cool.
Among these areas are the cooktop, surfaces facing the
cooktop, the oven vent openings and surfaces near these
openings, oven door and window.
Wear Proper Apparel--Loose-fitting or hanging
garments should never be worn while using the
appliance. Do not let clothing or other flammable materials
contact hot surfaces.
mMPORTANT SAFETY MNSTRUCTmONS(continued)
NEVER use this appliance as a space
heater to heator warm the room. Doingsomay resultin
carbon monoxide poisoning and overheating of the
oven,
Do Not Use Water or Flour on Grease Fires--Smother
the fire with a pan lid, or use baking soda, a dry
chemical or foam-type extinguisher.
= When heating fat or grease, watch it closely. Fat or
grease may catch fire if allowed to become too hot.
UseOnly Dry Potholders--Moist or damp potholders
on hot surfacesmay resultin burnsfrom steam. Donot
letthe potholders touch the flame or burners. Do not use
a towel or other bulky cloth instead of a potholder.
Do Not Heat Unopened Food Containers--Build-up
of pressure may cause the container to burst and
result in injury.
= Remove the oven door from any unused range if it is
to be stored or discarded.
IMPORTANT--Do not attempt to operate the oven
during a power failure. If the power fails, always turn
the oven off. If the oven is not turned off and the power
resumes, the oven will begin to operate again. Food left
unattended could catch fire or spoil.
IMPORTANT INSTRUCTIONS FOR USING YOUR
COOKTOP
= Know which knob controls eachsurface heating unit.
UseProper Flame Size--Adjust flamesizeso
it doesnot extend beyond the edge of the utensil. Theuseof
undersized utensilswill exposea portion of the burner flame
todirect contact and may result in ignition of clothing. Proper
relationship of utensil to flame wil! also improve efficiency.
o Utensil Handles Should Be Turned Inward and Not
Extend Over Adjacent Surface Burners--To reduce the
risk of burns, ignition of flammable materials, and spillage
due to unintentional contact with the utensil, the handle of
the utensil should be positioned sothat it isturned inward,
and doesnot extend over adjacent surface burners.
o Never Leave Surface Burners Unattended at High
Settings--Boilovers cause smoking and greasy spi!tovers
that may ignite, or a pan that has boiled dry may melt.
Protective Liners--Do not usealuminum foil to tinesurface
burner pans,oven bottom or any other part of the range.
Useof protective linersor aluminum foil may interfere with
heat and air distribution, and combustion, Damage to the
range or personal injury may result,
= Glazed Cooking Utensils--Only certain types of glass,
glasslceramic, ceramic, earthenware, or other glazed
utensilsare suitable for rangetop servicewithout breaking
due to the sudden change in temperature. Check the
manufacturer's recommendations for rangetop use.
° Do Not Use Decorative Surface Burner Covers. If a
burner isaccidentally turned on, the decorative cover will
become hot and possiblymelt. You wilt not be able to see
that the burner ison. Burnswill occur if the hot covers are
touched. Damage may also be done to the cooktop or
burners becausethe coversmay causeoverheating. Air will
be blocked from the burner and cause combustion
problems.
IMPORTANT INSTRUCTIONS FOR USING YOUR
OVEN
= Usecare When Opening Door--Stand to the sideof the
rangewhen opening the door of a hot oven. Lethot air or
steam escape before you remove or replace food in the
oven.
o Keep Oven Vent DuctsUnobstructed. Theoven isvented
below the backguard. Touching the surfaces in this area
when theovenisoperating maycausesevereburns. Also, do
not placeplasticor heat-sensitive itemson or nearthe oven
vent. Theseitems could melt or ignite.
NEVERcover any slots,holesor passages
in the oven bottom or cover an entire rack with
materials suchas aluminum foil. Doingso blocksairflow
through the oven and may causecarbon monoxidepoisoning,
Aluminum foil liningsmay trap heat, causinga fire hazard.
o Placement of Oven Racks. Always place oven racks in
desired locationwhile oven is cool. If rack must be moved
while oven ishot, useextreme caution. Usepotholders and
grasp the rack with both hands to reposition. Do not let
potholders contact the ovenburnerfiameorinteriorofthe
oven. Removeall utensils from the rack before removing
rack.
IMPORTANT SAFETY mNSTRUCT ONS(continued)
= Do not use a broiler pan without its insert. Broirer pan
and grid allow dripping fat to drain and be kept away from
the high heat of broiler_
° Do not cover broiler grid with aluminum foil. Exposed
fat and grease could ignite.
° Do not touch a hot light bulb (some models) with a
damp cloth. Doing so could cause the bulb to break.
Disconnect the range or turn off the power to the range
before removing and replacing Lightbulb.
= Kitchen cleanerslaerosols--AIways follow the
manufacturer's recommended directions for use. Beaware
that excess residue from cleaners and aerosols may ignite
causing damage and/or injury.
CONTINUOUS CLEANING OVENS (some models):
= Do not useoven cleaners on the oven liner or any of
the continuous cleaning surfaces. Continuous cleaning
surfacescan be identifiedby their rough surface finish.
SELF-CLEANING OVENS (some models):
IMPORTANT INSTRUCTIONS FOR CLEANING
YOUR RANGE
= Clean the range regularly to keep all parts free of
grease that could catch fire. Payparticular attention to
the area underneath each surface burner. Exhaust fan
ventilation hoodsand greasefitters shouldbe kept clean.Do
not al!ow greaseto accumulate. Greasydeposits inthe fan
could catch fire. Refer to the hood manufacturer's
instructions for cleaning.
o Clean in the self-cleaning cycleonly the parts of the
oven listed in this owner's guide. Before seff-cieaning
the oven, remove all utensils stored in the oven.
= Do not clean the oven door gasket. The door gasket is
essentialfor agood seal.Careshould be taken not to rub,
damage or remove the gasket.
Do not use oven cleaners. Nooven cleaneror oven liner
protective coating of any kind should be usedinor around
any part of the oven.
IMPORTANT SAFETY NOTICE
The California Safe Drinking Water and Toxic Enforcement Act requires the Governor of Cal_fornla to publish a list of substances known
to the state to cause cancer, birth defects or other reproductive harm, and requires businesses to warn customers of potential exposure
to such substances.
SAVE THESE INSTRUCTnONS
Liquefied Petroleum
(Propane) Gas
Conversion
Thisappliancecan be usedwith Natural Gasor Liquefied Petroleum(Propane)Gas.
It isshipped from the factory for usewith Natural Gas.
Refer to the Installation instructions for conversion from Natural Gasto Propane
Gas, or from Propane Gasto Natural Gas.
_ Severeshock or damage to the appliance may occur if the
appliance is not installed by a qualified installer.
Grounding Instructions
(electric ignition models only)
Avoid fire hazard or
electrical shock. Donot usean adaptor
plug, an extension cord, or remove
grounding prong from electrical power
cord. Failureto follow this warning can
cause serious injury, fire or death.
Grounding f ._
type wall {Do not,underany_
rec'epta_le I drcumstances, cut, I
--_..._71 _ remove, or bypass I
e grounding j
I tI," [I'Pri,(l_.f>_ng" )
Power supply cord with 3-prong
grounding plug
IMPORTANT: READ AND SAVE THESE INSTRUCTIONS.
Thisappliance isequipped with a3-prong grounding plugfor your
protection against shock hazard and should be plugged directly into a properly
grounded receptacle. DO NOT cutor removethe grounding prong from this plug.
Forpersonal safety, this oven must be properly grounded. Formaximum safety,
the power cord must be plugged into a 120V--60 Hz, outlet that is correctly
polarized and properly grounded,
If a two-prong wall receptacle is the only available outlet, it is the personal
responsibility of the consumerto haveit replaced with a properly grounded three-
prong wall receptacle installed by a qualified electrician.
DO NOT UNDER ANY CIRCUMSTANCES CUT OR REMOVE THE THIRD ROUND
GROUNDING PRONG FROM THE POWER CORD PLUG. SEE THE INSTALLATION
INSTRUCTIONS PACKAGED WiTH THIS APPLIANCE FOR COMPLETE INSTALLATION
AND GROUNDING INSTRUCTIONS.DO NOTOPERATETHEAPPLIANCEUSING ATWO-
PRONGADAPTER OR AN EXTENSIONCORD.
Cooktop and
Oven agnition
During a power failure,
the oven burners cannot be lit and you
should not try to do so.Theoven burner
valveswill not open up and will prevent
thegasfrom flowing through the burner
valvesto the burners.
To Manually Light Cooktop Burners with Spark Ignition
When youturn the control knob to LtTE,all ignitors make anelectric spark(aticking
sound) which lights the selected burner.
During a power failure, the burners will not light automatically, inan emergency,
a cooktop burner may be lit with a match by following the stepsbelow:
I.
2.
Light amatch and hold the flame near the burner you want to light. Wooden
matches work best.
Pushin and turn the control knob slowly. Besureyou areturning the correct
knob for the burner you are lighting.
Note: If the burner does not light within 5 seconds, turn the knob off
and wait one minute before trying again.
Oven Ignition
When you turn the oven on, the glow bar igniterbeginsto heat. When the lighter
ishot enough, in about 1 minute, the gas flows into the burner and isignited.
Theigniter glows bright orange when hot. Itcycleson and off with the thermostat
and will glow whenever the burner isom
Flame Size
Neverextend the flame beyond the outer
edgeof the utensil.A higher flame simply
wastes heat and energy, and increases
your riskof beingburned bythe flame,
Proper Burner
Adjustments
For most cooking, start on the highest control setting and then turn to a lower
one to complete the process. Use the chart below asaguide for determining proper
flame size for various types of cooking. The size and type of utensil used and the
amount of food being cooked wilt influence the setting needed for cooking.
For deep fat frying, use a thermometer and adjust the surface control knob
accordingly. If the fat istoo cool, the food will absorb the fat and begreasy. If the
fat istoo hot, the food wilt brown soquickly that the center wilt be undercooked,
Donot attempt to deep fat fry too much food atonceasthefood will neither brown
nor cook properly.
*Flame Size Type of Cooking
High Flame Start most foods; bring water to a boil; pan broiling
Medium Flame Maintain aslow boil; thicken sauces,gravies; steam
Low Flame Keep foods cooking; poach; stew
* These settings are based on using medium-weight aluminum pans with
lids. Settings may vary when using other types of pans.
Thecolor ofthe flame isthe keyto proper burner adjustment, A goodflame isclear,
blue and hardlyvisible in awell-lighted room. Eachcone of flame should besteady
and sharply defined. Adjust or clean burner if flame is yellow-orange. To clean
burner, see instructions under General Cleaning.
Selecting Surface
Cooking Utensils
For best resultsand energy conservation, choose cooking utensils that havethese
Pansshould have flat bottoms, Check
for flatness by rotating a ruler across
the bottom, There should be no gaps
between the pan and ruler,
Note: Always use a utensil for its in-
tended purpose. Follow manufacturer's
instructions, Some utensils were not
made to be used in the oven or on the
cooktop,
Note: Donot usegriddle overmorethan
one burner. That can damage your
cooktop and that can result in exposure
to carbon monoxide levels above
allowable current standards. That can
hazardousto your health.
characteristics:
*GOOD
o Fiat bottomand straight
sides.
o Tight fitting lids.
e Weight of handle does not
tilt pan. Pan is well
balanced.
o Pan sizes match the amount
of food to be prepared.
e Macle of a material that
conducts heat well.
o Easyto clean.
POOR
o Curved and warped pan
bottoms.
e Pan overhangs unit by more
than one inch or 25mm.
e Heavy handle tilts pan.
o Flame extends beyond unit.
* Specialtypanssuch aslobster pots, woks with flat bottom, griddles and pressure
cookers may be used but must conform to the above recommended cookware
requirements.
Speciaffy Pans & Trivets
Woks with flat bottoms suitable for
useon your cooktop are available in
most cookshop or hardware stores.
Round-bottomed woks (with a
support ring that does not extend
beyond the burner unit) may alsobe
used.The metal ring was designed to
support the wok safelywhen itisfilled
with large amounts of liquids (soup
making) or fat (frying).
DO NOT use a wok if it is equipped
with a metal ring that extends
beyond the burner unit. Becausethis
ring traps heat, the surface unit and
cooktop surface could be damaged.
Wire trivets: Do not usewire trivets, Cookware bottoms must be indirect contact
with the grates.
DONOTusetwo burner units to heat one large pansuch asa roaster
or griddle, or allow cooking utensilsto boil dry. Thebottom surfaceof the pan ineither
of these situations could cause discoloring or crazing of the appliance cooking
surface, and damage to the grates and burner units.
Canning Tips &
Dnforrnation
Canning can generate
Eargeamounts of steam. Use extreme
caution to prevent burns. Always raise
the lid to vent steam away from you.
I. Use tested recipes and follow instructionscarefully. Check with your local
Cooperative Agricultural ExtensionServiceor a manufacturer of glassjars for
the latest canning information.
2. Usefiat-bottomed cannersonly. Heat isspreadmore evenlywhen the bottom
surface isflat.
3. Center canner on the burner grate.
4. Startwith hot water and ahigh heatsetting to reducethe time ittakesto bring
the water to a boil; then reduce the heat setting aslow aspossibleto maintain
a constant boil,
5. It isbest to cansmall amounts and light loads,
Prevent damage to cooktop and burner grates:
1. Do not usewater bath or pressure canners that extend more than one inch
beyond the edge of the burner grate.
2. Do not leavewater bath or pressure canners on high heat for an extended
amount of time.
3, Alternate surface units between eachbatch to aIIowthe units andsurrounding
surfacesto coot down. Try to avoid canning on the same burner unit all day,
]_'!_ Safecanning requiresthat harmful micro_organismsare destroyed
and the jars aresealed completely, When canning ina water bath canner, a gentle
but steady boil must be maintained continuously for the required time.
Setting Surface
Controls
Surface Control Knob
Griddle
Griddl nHole
The hole in the griddle cover should be
toward the backguard.
Make sure to locate the
griddle observationholetoward thefront
of the rangeto observethe burner flame.
Do not use the griddle
cover over a lit burner or for cooking.
This may damage the cover.
Each burner lights automatically from an electric ignitor. Electric ignitors light
automatically each time a SurfaceControl knob isturned to the LITEposition.
To Operate the Surface Burner
1_ Placecooking utensil on burner.
2. Pushin and turn the SurfaceControl knob to LITE.Note: All electronic ignitors
will click at the same time. However, only the burner you are turninc on will
ignite.
3. Visually check that the burner has fit.
4. After the burner lights, turn the control knob to the desired flame size.The
control knobs do not have to be set at a particular mark. Usethe guides and
adjust the flame asneeded. DO NOT cook with the control knob in the UTE
position. (Theelectronic ignitors will continue to click if one Surface Control
knob is left in the LtTEposition, causing premature wear.)
Inthe event of an electrical power outage, the surface burners canbe lit manually.
To light a surface burner, hold a lit match to the burner head, then slowly turn the
surfacecontrol knob to LITE.Usecaution when lighting surfaceburners manually.
Do not place plastic items such as salt and pepper shakers,
spoon holders or plastic wrappings on top of the range when it is in use.
These items could melt or ignite. Potholders, towels or wood spoons could catch
fire if placed too close to aflame.
Griddle (some models)
Your non-stick griddle must first be "conditioned" to insure non-stick cooking,
Removethe enamel griddle cover.Wipe ateaspoon ofvegetable oil overthe surface
before using the griddle for the first time.
Do not overheat the griddle asthis will causepermanent staining of the non-stick
coating. You can protect the non-stick coating by keeping the enamel coverover
the griddle when not in use.
Thegriddle isintended for direct food cooking. Donot usepansor other cookware
on the griddle. Doing so could damage the finish. After turning on the griddle
burner, you can check to see if it is ignited by looking at the griddle burner flame
reflection platethrough the observation hole,Seediagram of Griddle Burnerat left.
5th Burner (some models)
The 5th burner pan, chrome bowl insert and a burner grate can be used in place
of the griddle. Tousethe griddle areafor a 5th burner, removethe griddle and place
the 5th burner panoverthe burner. Then placethe bowl insertand the burner grate
in the proper position. Operate the 5th burner with the griddle control knob.
Before Setting Oven
Controls
Oven Vent Location
The oven isvented through the center
rear of the cooktop. When the oven is
on, warm air is released through the
vent.Thisventing isnecessaryfor proper
burner operation in the oven, DO NOT
block the vent_ Doing so may cause
baking failures, fire or damage to the
range,
vent andgriddle
v.erholelocation
Arranging Oven Racks
ALWAYSARRANGEOVENRACKSWHENTHEOVEN15COOL(PRIORTOOPERATING
THEOVEN).Always useoven mitts when usingthe oven.
To remove an oven rack, pull the rack
forward until itstops. Lift upfront of rack
and slideout. To replace an oven rack,
fit the rack onto the guides on the oven
wats. Tilt the front of the rack upward
and slidethe rack back into place.
The rungson the offset rack are slightly
raised from the edges of the rack. This
raised part of the rack is designed to
allow easy and safe removal of foods
from the lower racks of the oven and
prevent hands from contacting the hot
oven door,
Setting Oven ControRs
(Porcelain Enamel and Continuous
Cleaning Oven Only, Self-Cleaning Oven
Seethe Electronic Oven Control Guide)
Temperature Control Knob
Broiler pan and its grid allow dripping
grease to drain and be kept away from
the high heat ofthe broiler. DO NOT use
the pan without its grid. DO NOT cover
the grid with foil. The exposed grease
could ignite,
(some models)
Shouldanovenfireoccur,
leavethe oven door closed and turn the
oven off. If the fire continues, throw
baking soda on the fire or use a fire
extinguJsher.DO NOT put wateror flour
on the fire. Flourmay beexplosive.
To Bake
1. Arrange oven rackswhiie the oven isstill cool+See UArranging Oven Racks"
under Before Setting Oven Controls.
2. Pushin and turn the Temperature Control knob to the desired temperature.
3. Preheat the oven for 10 to 12 minutes before baking, Preheating is not
necessarywhen roasting, cooking casserolesor broiling most foods.
4. When cooking isfinished, turn the Temperature Control knob to OFF.
TO Broil
Broiling isdone in the compartment below the oven cavity. Food isbroiled bythe
same burner that heats the oven. The broiler compartment roils out for easy
checking and turning of food.
1. Open the broiler drawer and roll the broiler compartment out.
2. Arrange broi_erpanwhile brot compartment isstill cool Forraremeats, position
the broiler pan closerto the burner (upper position). Forwel-done foods such
aschicken, lobster tails orthick cutsof meat, position the pan further from the
burner (lower position).
RackPosition From Top Food
1 Raresteaks
2-3 Ham slices, fish, hamburgers and medium
steaks and chops
4 Well-done foods such aschicken and lobster
3. Pushin and turn the Temperature Control knob to BROIL.
4. Placethe gridon the broiler pan, then placethe meat on the grid. DO NOT use
the broiler pan without the grid or cover the grid with aluminum foil. The
exposed fat could ignite.
5, Pushthe compartment all the way into the range and closethe drawer.
6. Broil on one side until food is browned; turn and cook on the second side.
Seasonand serve.Note: Always pull the broiler compartment out to the stop
position before turning or removing food.
7. When broiling isfinished, turn the Temperature Control knob to OFF.
10
Air Circulation in the
Oven
For best air circulation and baking results, center pans as much as possible. Allow
2-4" (5-10 cm) around the utensil(s) for proper air circulation and be sure pans do
not touch each other, the door, sides or back of oven. The hot air must circulate
around the pans in the oven for even heat to reach all parts of the oven.
If using multiple pans, stagger as shown, if using one pan, place in center of oven.
Oven Baking
"Baking" meansto cook foods such ascakesor casserolesby dry heat in a covered
or uncovered pan. Roasting,often confused with baking, meansto cook meat inan
uncovered pan. To bake or roast, foIlow the instructionsprovided in the Owner's
Guide. (See "Setting Oven Controls" section.)
Baking Problems and
Solutions Chart (Below)
Product Expectations
The cooking times and temperatures needed to bake a product may vary slightly
from your previously owned appliance.
Baking Problems Causes Corrections
Cookiesand Cookies and biscults put into the oven - Atlow oven to preheat to the selected temperature before piacing
biscuits bum on the
Cakes too dark on top
or bottom.
Cakes not done in the
center.
Cakes not level.
Foods not done when
cooking time isup.
before the preheating time is
completed,
Oven rack overcrowded.
Dark pan absorbs heat too fast,
Cakes put into the oven before
preheating time is completed.
, Rack position too high or low.
Oven too hot
., Oven too hot,
° Incorrect pan size.
Pan not centered in oven.
o
o
food in oven.
Choose pan sizes that wilt permit 2-4" (5-10 cm) of air space on
all sides when placed in the oven.
Use a medium-weight aluminum baking sheet.
Allow ovento preheat to the selectedtemperature before plating
food in the oven.
Use proper rack position for baking needs.
Set oven temperature 25°F/12°C lower than recommended,
o Set oven temperature 25°FIt2°C lower than recommended.
, Use pan size suggested in recipe.
Use proper rack position and place pan so there is 2-4" (5-t0 cm)
of space on all sides of pan.
Range not level, o
Pan too close to oven wall or rack
overcrowded.
Pan warped.
Oven rack not level,
o
o
o
o
o
o
Oven too cool.
° Oven overcrowded,
o Oven door opened too frequently.
Place a marked glass measuring cup filled with some water on the
center of the oven rack. If the water level is uneven, refer to the
installation instructions for leveling the range,
Be sure to allow 2=4" (5-10 cm) of clearance on all sides of each
pan in the oven.
Do not use pans that are dented or warped.
Check oven rack for flatness and proper positioning.
Set oven temperature 25_F/12_C h_gher than suggested and bake
for the recommended time.
Be sure to remove all pans from the oven except the ones to be
used for baking.
Open oven door only after shortest recommended baking time.
!1
Oven Cleaning (continued)
Adhere to the following cleaning
precautions:
o AIIowthe oven to cool before cleaning.
o Wear rubber gloves when cleaning
the range manually.
REMOVESPILLOVERSAND HEAVYSOIL-
INGAS SOONAS POSSIBLE.REGULAR
CLEANINGSWlLLREDUCETHE NUM_
BEROF MAJOR CLEANtNGSLATER.
Ammonia mustbe rinsed
before operating the oven. Provide
adequate ventilation.
DO NOT line the oven
walls, bottom, racksor anyother partof
the range with aluminum foil. Doing so
will destroy heat distribution, produce
poor baking results and cause
permanent damage to the oven interior
(aluminum foil wi!l melt to the interior
surface of the oven).
Self-Cleaning Oven (some models)
Referto your Electonic Oven Control Guide
During the self-cleaning cycle, the outside of the wall oven can
become very hot to the touch. DO NOT leavesmall children unattended near the
appliance. Usecarewhen opening the oven door after self-cleaning cycle. Stand
to the side of the oven when opening the door to allow hot air or steamto escape.
Easy Clean Oven (some models)
Porcelainhasa smooth finish and isa type of glassfused to metal. Oven cleaners
can be used on all interior oven surfaces.
General Cleaning
Removesoils using hot, soapywater. Do not allow food spillswith a highsugar or
acid content (such as milk, tomatoes, saukerkraut, fruit juices or pie filling) to
remain on the surface asthey may causea dull spot even after cleaning.
To Remove Heavy Soil
1. Allow a dishof ammonia to sit inthe oven overnight or for severalhours with
the oven door closed. Cleansoftened spotsusing hot, soapywater. Rinsewell
with water and a clean cloth.
2. If soil remains, use a soap-filled scouring pad or a nonabrasive cleaner, tf
neccessary, use an oven cleaner following manufacturer's instructions. DO
NOT mix ammonia with other cleaners.
3. Clean any soil from the oven frame, the door liner outside the oven door
gasket, the smallarea atthe front center of the ovenbottom and the oven vent
exit (located below the backguard). Clean with hot, soapy water. Rinsewell
using cleanwater and a cloth.
Adhere to the following precautions when using oven cleaners:
1. DO NOT spray on the electrical controls or switches because it could cause a
short circuit and result in sparking or fire.
2. DO NOT allow afilm from the cleaner to build up on the temperature sensing
bulb; it could causethe oven to heat improperly.(Thebulb islocatedin the rear
of the oven). Carefully wipe the bulb clean after each oven cleaning, being
careful not to movethe bulb. A change inits position could affect how the oven
bakes,Avoid bending the bulb and capillary tube.
3. DO NOT spray any cleaner on the oven door trim or gasket, handles or any
exterior surfaces of the range, wood or painted surfaces. The cleaner can
damage these surfaces_
Cleaning the Oven Bottom
The oven bottom in porcelain enamel oven models can be removed for
cleaning. See "To Remove and Replace Oven Bottom" under General Cleaning.
Clean using hot, soapy water, a mild abrasivecleanser,asoap-filled abrasive pad
or oven cleaner following manufacturer's instructions.
12
Oven Cleaning (continued)
Adhere to the following cleaning
precautions:
=Allowthe ovento coolbefore cleaning.
o Wear rubber gloveswhen cleaning the
range manually,
REMOVE SPILLOVERSAND HEAVY
SOILING AS SOON AS POSSIBLE.
REGULAR CLEANINGS WILL REDUCE
THE NUMBER OF MAJOR
CLEANINGS LATER.
Ammonia must be rinsed
before operating the oven, Provide
adequate ventilation.
_!_ DO NOT use oven
cleaners, gritty cleansers, coarse abrasive
pads or brushes, silicone sprays or metal
scrapers on the interior walls, oven frame
or ceiling of a continuous cleaning oven.
Permanent damage to the oven may
result.
DO NOT line the oven
walls, bottom, racksor any other part of
the range with aluminum foil. Doing so
will destroy heat distribution, produce
poor baking results and cause
permanent damage to the oven interior
(aluminum foil will melt to the interior
surface of the oven).
Continuous Cleaning Oven (some models)
Continuous cleaning ovens have a special coating which is a porous ceramic
material.This rough coating tends to prevent grease spatters from forming little
beadswhich run down the sidewails leaving streaks that require hand cleaning.
Instead,when spatter hits the porous coating, it dispersesand ispartially absorbed.
Thisspreading action increasestheexposure of ovensoilto heatedair, making it less
noticeable.
Soilmaynotdisappearcomptetefy. Remaining soil will gradually fadewith continued
oven use. Thespecial coating works best on small amounts of spatter. Larger spills,
or spills generating from sugar, egg and dairy mixtures, do not clean as well.
If difficult soils occur:
1. Removethe oven racksand cookware.
2. Removesoils by completing stepsa or b below:
a) Usehot, soapywater and wash soilsusing a nylon-bristly brush or a nylon
mesh scouring pad. DO NOT rub or scrub with paper towels, cloths or
sponges.They will leavelint on the ovencoating.
b) Applyammonia with aspongeanddab itintothe porouscoating. Leavethe
ammonia on the soiled areafor 30 minutes.
3. Rinsewith clearwater.
4. Closethe oven door and push in and turn the Temperature Control knob to
450°F (230°C).
5. Operate oven for t5 minutes.
6. Remaining soilwill fade with continued oven use.
Cleaning the Oven Bottom
The oven bottom isnot a continuous cleaning finish. Oven cleaners can be
used on the oven bottom only. Removethe oven bottom before using oven
cleaners.DO NOT get ovencleaner on any of the continuous cleaning surfaces.
Note: To remove or replace oven bottom, see "To Remove and Replace Oven
Bottom" under General Cleaning,
Toclean, usehot, soapywater, a mild abrasivecleanser,a soap-filled abrasive pad
orovencleaner(on the oven bottom only) following manufacturer's instructions.
I3
General Cleaning
Cleaning Various Parts of Your Range
Beforecleaning any part of the range, be sure al controls are turned OFFand the
range isCOOL.REMOVESPtLLOVERSAND HEAVYSOILINGASSOONAS POSSIBLE.
REGULARCLEANINGSWILLREDUCETHENUMBEROFMAJORCLEANINGSLATER,
Surfaces
Aluminum (Trim Pieces)& Vinyl
Glass, Painted and Plastic
Control Knobs, Body Parts, and
Decorative Trim
Control Panel
Porcelain Enamel Burner Grates,
Under the Cooktop, Cooktop,
Broter Pan and Insert (some
models), Rol-out Broiler, Door
Liner and Oven Bottom
Stainless Steel, Chrome
Decorative Trim, Drip Pans
Oven Racks
,?-!- "
Surface Burners
Oven Door
i'_iii -J_--
'< i;_i. _ 3_-_ _.
ilI-,,_,_£_,;_ I,
How to Clean
Use hot, soapywater and a cloth. Dry with a clean cloth.
For general cleaning, use hot, soapy water and a cloth. For more dift7cult soils and built-up grease,
apply a liquid detergent directly onto the soil. Leave on soil for 30 to 60 minutes. Rinse with a damp
cloth and dry. DO NOT use abrasive cleaners on any of these materials; they can scratch.
Before cleaning the controlpanel, turn allcontrols to OFFand remove the control knobs. To remove,
)ul each knob straight off the shaft. Cleanas instructed above. Besureto squeezeexcesswater from
the cloth before wiping the panel; especially when wiping around the controls. Excesswater in or
]round the controls may causedamage to the appliance. To replace knobs after cleaning, line up the
flat sidesof both the knob and the shaft; then push the knob into place.
Clean in the dishwasher and dry upon removal. If soils are not removed, follow these cooktop
cleaning instructions: Gentlescouring with a soapyscouring padwill remove most spots. Rinsewith
aI: I solution of clearwater and ammonia. Ifnecessaol, coverdifficult spotswith anammonia-soaked
paper towel for 30 to 40 minutes. Rinsewith clean water and a damp cloth, and then scrub with a
soap-filled scouring pad. Rinseand wipe dry with a dean cloth. Removeall cleanersor the porcelain
may become damaged during future heating. DO NOT use spray oven cleaners on the rangetop.
Cleanwith hot, soapywater and adishcloth. Rinsewith cleanwater andacloth. Coverstubborn spots
with an ammonia-soaked paper towel for 30 to 40 minutes. Rinse. C]eanersmade especialy for
stainless steel are recommended. Be sureto rinse the cleaners as bluish stains may occur during
heating and cannot be removed.
Oven rackscan be removedor left in the oven during the self-cleaning cycle for cleaning. Ifremoved,
clean byusing amild, abrasivecleaner, following manufacturer's instructions. Rinsewith cleanwater
and dry.
if the racks arecleaned in the self-clean cycle,their color will turn slightly blue and the finish will be
dull After the self-clean cycleiscompleted, and the oven has cooled, rub the sidesof the rackswith
wax paper or acloth containing asmallamount of babyoil or salad oil (this will make the racksglide
easier into the rack positions).
The holes in the burners of your range must be kept clean at all times for proper ignition and a
complete, even flame. Cleanburner holes routinely with a smallgauge wire or needle andespecially
after bad spilovers which could clog these holes.
Toremove and replace burner units per your model, see "To Remove and Replace Burners" under
General Cleaning. To clean, soak the burners in a I: 1clean water and ammonia solution for 30 to
40 minutes. Forstubborn stains, scrub with soap and water or a mild abrasive cleanserand a damp
cloth. Before putting the burner back, dry it thoroughly by setting it in a warm oven for 30 minutes.
Then replace it, making sure it is properly seated and level. DO NOT put burner units in the
dishwasher.
Tocleanoven door, washwith hot,soapywater and aclean cloth.DO NOT immersethe door inwater.
DO NOT cleanthe ovendoor gasket.(Self<leaning ovenonly:Theovendoor gasketismadeof awoven
material which isessentialfor a good seal).Careshould be taken not to rub, damage or removethe
gasket.
14
General Cleaning
(continued)
When lowering the top,
grasp the sides with fingertips only. Be
careful not to pinch fingers. Also, DO
NOT drop or bend the rangetop when
raising or lowering. This could damage
the surface.
Hold coo_op flat to remove
DONOTturn the burners
on when the cooktop is raised for
cleaning,Besurethatthe top iscompletely
lowered and securely in place before
turning on the burners.
Use the finger openings along the
outside edges of the oven bottom to
raiseand lower the oven bottom.
To Raise and Lower the Top for Cleaning
1, Removeburner grates andspiltover bowls. Setaside.
2, Graspthe front of the cooktop and then lift.
3, Lift the top high enough to fully raisethe support rods, The Uft-up rods will
support the top in its raised position.
4. Clean underneath using hot, soapy water and a clean cloth; then, dry.
5, Lower the top gently after lowering the support rod.
To Remove and Replace Burners for Cleaning
Your model wit! have one of the two burners types shown below, Follow the
instructions that correspond with the burners on your range.
Figure 1
Figure 2
._ i ¸
To Remove Burners (Figure 1)
1. Removeshipping screwswith a Phillips®Headscrewdriver. Seeillustration for
screw locations.
2. Tilt the burner at the end closest to the support bar until the locator tab is
released(front burnerstilt right, rear burnerstilt left). Move it toward the back
of the range. Thiswill separate it from the gasvalve at the front of the range.
To Remove Burners (Figure 2)
I. Removeshipping screwswith a Phillips® Headscrewdriver. Seeillustration for
screw locations.
2. Lift burner pair straight up and out of range.
To Replace Burners (Figure 1)
1. Slidethe burner tube overthe gasvalve atthe front of the range (front burners
fit over the right valve, rear burners fit overthe left valve on each side of the
range).
2. Tilt burner so that the locating tab will slide into the s!ot on the support bar.
Make sure burners are properly seated on support bar and are level.
3. Replaceshipping screws if desire&
To Replace Burners (Figure 2)
1, Placeburner pair overmounting bracket, Makesure burnersarepositioned over
gasvalvesand are properly positioned and level.
2. Replaceshipping screws if desired.
To Remove and Replace Oven Bottom
To Remove the Oven Bottom:
Usingthe finger openings on eachsideof the oven bottom, pull out and lift up the
oven bottom.
To Replacethe Oven Bottom:
1. Graspthe oven bottom and position the front tabs inplace in the slots at the
rear of the oven.
2. Lowerthe front of the oven bottom and slide into place.
15
I
General Cleaning
(continued)
The door is heavy. For
safe,temporary storage, laythe door flat
with the inside of the door facing down.
Removingthe Oven Door
; !J GuideR°lter
Broiler Compartment
Front Frame
Griddle
Griddf n Hole
Storage Drawer
Storage Drawer
Front Frame
To Remove and Replace Oven Door
The oven door can be removed to make oven cleaning easier.
To Remove Oven Door:
1. Open door approximately 4 inches to the stop position.
2, Graspdoor at side edges.
3. Lift door up and off hinges.
4. To cleanoven door, seethe cleaning chart on page 16.
To Replace Oven Door:
1. Besurethe hinge armsare in the stop position. Becareful if pulling the hinges
openby hand.Thehingesmaysnapbackagainstthe ovenframe and could pinch
fingers.
2. Hold the door at the sidesnear the top,
3. Slidethe door down onto the hinges asfar asit will go and close the door.
4. tfthedoorisnot inlinewiththe ovenflame, removedcor andrepeattheabovesteps.
Cleaning the Roll-Out Broiler (some models)
To Remove the Roll-Out Broiler:
I. Pull out broiler until it stops, andthen push back in about I inch.
2. Grasphandle, lift and pull out broiler. Liftthe rollersunder the broiler overthe
roller guide stops in the broiler compartment.
3. Clean the lower and sidebroiler plates and roll-out broiler asexplained in the
cleaning instructions for porcelain enamel under General Cleaning,
To Replacethe Roll-Out Broiler:
I. Put the rollers under the broiler behind the roller guide stops in the broiler
compartment.
2. Hold broiler in the raised position as you slide it partly into the broiler
compartment, then lower broiler and push completely closed.
Cleaning the Griddle (some models)
Before cleaning, besure all controls are OFF.Foreasiercleaning, cleanthe griddle
while it isstill warm. The griddle can be removed for easiercleaning. Thegriddle
canbewashed inthe sink with a mild detergent and plasticscouring pad. Forgreasy
residue, use agrease-dissolving dishwashing liquid and a nylon scrub brush.
Avoid abrasivecleansersthat canscratchthe finish. Donot useovencleaners.Wipe
dry before reinstalling into rangetop,
Storage Drawer (some models)
Usethe storage drawer for storing cooking utensils. The drawer can be removed
to facilitate cleaning under the range. Use carewhen handling the drawer.
To open the storage drawer, push the drawer in gently and it will spring open. To
close, push the drawer until you hear a click, which indicates that the spring is
compressed, and the drawer isclosed.
To Remove the Storage Drawer:
I. Open and empty the drawer of all utensils.
2. Pull drawer out to the drawer stop.
3. Lift the front high enough to allow the drawer to be pulled out,
To Replace the Storage Drawer:
1. Insert the rear end of the drawer into the opening,
2. Fit the end rollers onto the guide rails.
3. Hold the drawer in a horizontal position, then push in until a click is heard.
Flammable materials should not be stored in an oven, near surface elements or in the storage drawer or
compartment (if equipped). This includes paper, plastic and cloth items, such ascookbooks, plasticware and towels, aswell as
flammable liquids. Do not store explosives,such asaerosol cans,on or near the range. Flammablematerials may explode and
result in fire or property damage.
16
Changing Cooktop and Be sure the oven is unplugged and all parts are COOL before
Oven Lights (some models) replacingthe oven light.Wear a leather-facedglove for protection against possible
broken glass.
Fluorescent
LJgh|
0
Glass
Frame
To Change the Cooktop Light (some models)
Usethe rocker switch located on the top left sideof the control panel to turn the
cooktop light on or off.
1_ Turn power off at the main sourceor unplug the range_
2_ Removecontrol buttons_
3. Removescrewsfrom backguard frame trim, two from each side, and lift off.
Removethe glasspanel.
4. Removebulb bysliding your fingers over the bulb at eachend and rotating the
top of the bulb 1/4 turn awayfrom you. Replacethe bulb with one of the same
length and wattage.
5. A defective starter can be removed byturning it counter-clockwise 1/4 turn.
6. Replacethe glasspanel and frame trim on backguard.
7. Replacescrews and control buttons.
To Change the Oven Light
Usethe rocker switch located on the top left sideof the control panel to turn the
oven light on or off.
1o Turn electrical power off at the main source or unplug the oven.
2. Presswire holder to one side to release the glass shield.
3. Replace bulb with a new 40 watt appliance bulb.
44 Replace glass shield in socket and snap wire holder into place.
54 Turn power back on again at the main source (or plug the oven back in).
64 The clock wi!l then need to be reset, To reset, see Setting the Clock and
Minute Timer in this Owner's Guide.
Adjusting Oven
Temperature
(Easyand continuous cleaning models
only, Self-cleaning model refer to the
electronic timer guide)
Figure t: Backof Control Knob
_' Note position of pointer
prior to adjustment
Thetemperature inthe oven hasbeen setat the factory, When first usingthe oven,
be sure to follow recipe times and temperatures. If you think the oven istoo hot
or too cool, the temperature inthe oven canbe adjusted. Before adjusting, test a
recipeby usinga higheror lower temperaturethan the recommended temperature.
Thebaking resultsshould helpyou to decide how much of anadjustment isneeded.
To Adjust Oven Temperature:
1. Check to be surethe Temperature Control knob is inthe OFFposition,
2. PullTemperature control knob straight off the shaft.
3. Loosen. but do not remove, the two screwsat the back of the knob (Figure1).
Note: tf knob does not have 2 screws, it isnot adjustable. There isa seriesof
small indicator grooves, One of these grooves is positioned next to a tiny
pointer. Note the position of the pointer.
4. To increasethe temperature, move the pointer in a clockwise direction. To
decreasethe temperature, move the pointer in a counterclockwise direction.
The temperature can be adjusted in increments of 10°F.
5. When the desired adjustment isreached, tighten both screws.
6. Toreplacethe knob, line upthe flat sidesof both the knob and the shaft. Push
the knob into place. DO NOT force the Temperature Control knob onto the
shaft or you may damage the back of the knob.
Note: Once an adjustment ismade, the OFFposition will varyfrom the reference
mark on the backguard depending on the amount of adjustment.
17
Avoid Service Checklist
Beforeyou callforsen4ce, reviewthis list, Itmaysaveyou time and expense.The list
includes common occurrences that are not the result of defective workmanship or
materials in thisappliance.
OCCURRENCE
Oven Control Beeps and Displays
-F1- through -FS- (some models).
Range is not level.
Cannot move appliance easily,
Appliance must be accessible for service.
Surface burners do not light
Flame burns half way around.
Surface burner flame is orange,
Oven does not operate
POSSIBLE CAUSE/SOLUTION
Electronic control has detected a fault condition. Push Cancel to clear the display and stop
the display from beeping. Reprogram the oven. If a fault reoccurs, record the fault number,
push the Cancel button and contact an authorized servicer.
Poor installation. Place oven rack in center of oven. Place a [evel on the oven rack. Adjust
leveling legs at base of range until the rack is level.
Weak, unstable floor. When oven is level, cooktop may not appear to be level with
countertop. Besure floor is level and can adequately support range. Contact a carpenter to
correct sagging or sloping floor.
Kitchen cabinet misalignment may make range appear to be unleveL Be sure cabinets are
square and have sufficient room for range clearance,
Cabinets not square or are built in too tight. Contact a cabinet maker to correct the
problem.
Contact builder or installer to make appliance accessible.
Carpeting interferes with range. Provide sufficient space so range can be lifted over carpet.
Gas line is hard-plumbed. Have a flexible A.G.AJC.G.A. approved metal appliance
connector installed.
Surface control knob has not been completefy turned to LIFE. Push in and turn the Surface
Control knob to LIFE until burner ignites and then turn control to desired flame size.
Burner ports are clogged. With the burner off, use a small-gauge wire or needle to dean
ports. See "Surface Burners" in the cleaning chart under General Cleaning for additional
cleaning instructions.
Range power cord is disconnected from outlet. Be sure cord issecurely plugged into the
outlet.
Electrical power outage. Burners can be lit manually. See Setting Surface Controls in this
Owner's Guide.
Burner ports are clogged. With the burner off, clean by using a small-gauge wire or needle
to clean ports.
Moisture is present after cleaning. Lightly fan the flame and allow burner to operate until
flame is full. Dry the burners thoroughly following instructions under General Cleaning.
Dust particles in main line. Allow the burner to operate a few minutes until flame turns blue.
A slightly orange flame is unavoidable due to salt air in coastal areas.
Temperature Control knob is not set properly. Make sure the Temperature Control knob is
set to desired function. See Setting Oven Controls,
Be sure regulator gas valve is "ON". See installation instructions,
18
Entire oven does not operate.
Oven and/or cooktop light does not
work.
Oven smokes excessively during broiling.
Controls are not set properly. See instructions under Setting Oven Controls or Oven
Cleaning to set the controls.
Automatic timed oven (Timed Bake feature) set incorrectly. Follow steps under "To Set the
Automatic Timer (Timed Bake Feature)" in Setting Oven Controls.
Make sure cord/plug is plugged tightly into outlet.
Service wiring not complete. Contact servicer or dealer.
Power outage. Check house lights to be sure. Call your local electric company for service
Surface burner can be lit manually. See Setting Surface Controls in this Owner's Guide.
Be sure gas supply is turned on.
Burned-out or loose bulb. See Changing Cooktop and Oven Lights in this Owner's Guide
to replace or tighten the bulb.
Meat too close to broil burner. Reposition the rack to provide more clearance between the
meat and the broiler.
Meat not properly prepared. Remove excess fat from meat. Slash remaining fatty edges to
prevent curling, but do not cut into the lean.
Broiler pan used without grid or grid covered with foil DO NOT use the broiler pan without
grid or cover grid with foil.
Broiler drawerldoor open. Make sure drawerldoor is closed when broiling.
Broiler drawerldoor needscleaning. Excessivesmokeiscausedbyold greaseorfoodspatters,
if the broiler is used often, clean on a regular basis.
Poor baking results. If baked food are too dark on top or bottom, allow the oven to preheat to settemperature
before placing food in oven. Make sure the proper rack position is used when baking. Set
temperature 25°F (12°C) lower than recommended. If food is not done afer recommended
time, increasethe set temperature 25°F (12°C).
Self-Cleaning Cycle does not work.
Controls are not set properly. Follow instructions under Oven Cleaning.
Self-cleanlng cyclewas interrupted. Stoptime must beset 2 to 4 hours past the start time.
Follow steps under °Stopping or Interrupting a Self-Clean Cycle" under Oven Cleaning.
5oll is not completely removed after self-
cleaning cycle,
Failureto clean bottom front, top of oven or door area outside the oven seal.These areas
arenot in the self-cleaning area, but get hot enough to burn on residue. Clean these areas
before starting the self-cleancycle.Burned-on residuemay becleanedwith astiff nylon brush
andwater or a nylon scrubber. Becareful not to damage the oven seal,
Excessivespillovers in oven. Set self-clean cycle for a longer cleaning time.
Flames inside oven or smoke from vent ExcessivespilIovers in oven. This is normal, especially for high oven temperatures, pie
spillovers or large amounts of grease on the oven bottom. Wipe up excessivespillovers
before starting the self-clean cycle.
19
Your appliance is covered by a one year limited warranty. For one year from your original date of
purchase, Etectrolux will pay all costs for repairing or replacing any parts of this appliance that prove to be
defective in materials or workmanship when such appliance is installed, used and maintained in
accordance with the provided instructions.
Exclusions This warranty does not cover the following:
1. Products with original serial numbers that have been removed, altered or cannot be readily determined.
2. Product that has been transferred from its original owner to another party or removed outside the USA or
Canada.
3. Rust on the interior or exterior of the unit.
4. Products purchased "as-is" are not covered by this warranty.
5. Food loss due to any refrigerator or freezer failures.
6, Products used in a commercial setting.
7. Service calls which do not involve malfunction or defects in materials or workmanship, or for appliances
not in ordinary household use or used other than in accordance with the provided instructions.
8. Service calls to correct the installation of your appliance or to instruct you how to use your appliance.
9. Expenses for making the appliance accessible for servicing, such as removal of trim, cupboards,
shelves, etc., which are not a part of the appliance when it is shipped from the factory.
10. Service celts to repair or replace appliance fight bulbs, air filters, water filters, other consumables, or
knobs, handles, or other cosmetic parts,
11. Surcharges including, but not limited to, any after hour, weekend, or holiday service calls, tolls, ferry trip
charges, or mileage expense for service calls to remote areas, including the state of Alaska.
12. Damages to the finish of appliance or home incurred during installation, including but not limited to
floors, cabinets, walls, etc.
13. Damages caused by: services performed by unauthorized service companies; use of parts other than
genuine Electrolux parts or parts obtained from persons other than authorized service companies; or
external causes such as abuse, misuse, inadequate power supply, accidents, fires, or acts of God.
DISCLAIMER OF IMPLIED WARRANTIES; LIMITATION OF REMEDIES
CUSTOMER'S SOLE AND EXCLUSIVE REMEDY UNDER THIS LIMITED WARRANTY SHALL BE PRODUCT
REPAfR OR REPLACEMENT AS PROVIDED HEREIN. CLAIMS BASED ON IMPLIED WARRANTIES,
INCLUDING WARRANTIES OF MERCHANTABILITY OR FITNESS FOR A PARTICULAR PURPOSE, ARE
LIMITED TO ONE YEAR OR THE SHORTEST PERIOD ALLOWED BY LAW, BUT NOT LESS THAN ONE
YEAR. ELECTROLUX SHALL NOT BE LIABLE FOR CONSEQUENTIAL OR INCIDENTAL DAMAGES SUCH
AS PROPERTY DAMAGE AND INCIDENTAL EXPENSES RESULTING FROM ANY BREACH OF THIS
WRITTEN LIMITED WARRANTY OR ANY IMPLIED WARRANTY. SOME STATES AND PROVINCES DO NOT
ALLOW THE EXCLUSION OR LIMITATION OF INCIDENTAL OR CONSEQUENTIAL DAMAGES, OR
LIMITATIONS ON THE DURATION OF IMPLIED WARRANTIES, SO THESE LIMITATIONS OR EXCLUSIONS
MAY NOT APPLY TO YOU. THIS WRITTEN WARRANTY GIVES YOU SPECIFIC LEGAL RIGHTS. YOU MAY
ALSO HAVE OTHER RIGHTS THAT VARY FROM STATE TO STATE.
If You Need
Service
Keep your receipt, deiivery slip, or some other appropriate payment record to establish the warranty period
should service be required. If service is performed, it is in your best interest to obtain and keep all receipts.
Ser'.4ce under this warranty must be obtained by contacting Efectrotux at the addresses or phone
numbers below.
This warranty only applies tn the USA and Canada. In the USA, your appliance is warranted by Electrotux Major Appliances
North Amedca, a division of Electrolux Home Products, Inc. in Canada, your appliance is warranted by E]ectrolux Canada Corp.
Electrolux authorizes no person to change or add to any obligations under this warranty. Obligations for service and parts under
this warranty must be performed by Electrolux or an authorized service company. Product features or specifications as
described or illustrated are subject to change without notice.
USA
1.800.944.9044
ElectroluxMajor Appliances
North America
P.O. Box212378
Augusta, GA 30907
Electrolux
Canada
1.880.668,4606
Electro]ax Canada Corp.
5855 Tern! Fox Way
Mtssissauga, Ontario, Canada
LSV 3E4
  • Page 1 1
  • Page 2 2
  • Page 3 3
  • Page 4 4
  • Page 5 5
  • Page 6 6
  • Page 7 7
  • Page 8 8
  • Page 9 9
  • Page 10 10
  • Page 11 11
  • Page 12 12
  • Page 13 13
  • Page 14 14
  • Page 15 15
  • Page 16 16
  • Page 17 17
  • Page 18 18
  • Page 19 19
  • Page 20 20

Tappan TGF657BFD1 Owner's manual

Category
Cookers
Type
Owner's manual

Ask a question and I''ll find the answer in the document

Finding information in a document is now easier with AI