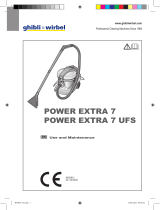
Ghibli & Wirbel M 26 I CEME Use And Maintenance

Type
Use And Maintenance

This manual is also suitable for

Ghibli & Wirbel M 26 I CEME is a professional cleaning machine with a wide range of capabilities, making it a versatile tool for various cleaning tasks. It can be used for spray washing and extracting any type of fabric, carpet, car seats, floors, etc. Additionally, it can be utilized as a vacuum cleaner or solid and liquid suction unit with the appropriate accessories (available upon request). This device is not intended for any other uses beyond those specified, and improper use may result in damage or harm.

Ghibli & Wirbel M 26 I CEME is a professional cleaning machine with a wide range of capabilities, making it a versatile tool for various cleaning tasks. It can be used for spray washing and extracting any type of fabric, carpet, car seats, floors, etc. Additionally, it can be utilized as a vacuum cleaner or solid and liquid suction unit with the appropriate accessories (available upon request). This device is not intended for any other uses beyond those specified, and improper use may result in damage or harm.

www.ghibliwirbel.com
Professional Cleaning Machines Since 1968
EN
Use and Maintenance

HG
www.ghibliwirbel.com
Professional Cleaning Machines Since 1968
2
Mod.
Art.
Cap.ty
Vac mba
Air flow l/s
Nr
3
4
56
7
8
1
2
www.ghibliwirbel.com
Professional Cleaning Machines Since 1968
3
1234
IT
Produttore Modello Articolo Capacità fusto
EN
Manufacturer Model Article Container capacity
FR
Producteur Modèle Article Capacité de la cuve
DE
Hersteller Modell Artikel Fassungsvermögen
des Körpers
ES
Fabricante Modelo Artículo Capacidad del bidón
PT
Produtor Modelo Artigo Capacidade do
reservatório
NL
Producent Model Artikel Inhoud reservoir
CS
Výrobce Model Typ Obsah nádoby
RU
Изготовитель Модель Артикул Емкость бака
5678
IT
Capacità aspirazione Portata d’aria N° Matricola Caratteristiche elettriche
EN
Vacuum Air flow Serial N° Electrical characteristics
FR
Capacité d’aspiration Débit d’air N° Matricule Caractéristiques électriques
DE
Ansaugleistung Luftdurchsatz Matrikelnr. Elektrische Eigenschaften
ES
Capacidad de aspiración Caudal de aire N° Matrícola Características eléctricas
PT
Capacidade de
aspiração Caudal de ar Número de série Características elétricas
NL
Zuigcapaciteit Luchtdebiet Serienummer Elektrische
eigenschappen
CS
Sací výkon Množství
dopravovaného vzduchu Výrobní č. Elektrické údaje
RU
Мощность всасывания Расход воздуха Заводской № Электрические
характеристики
www.ghibliwirbel.com
Professional Cleaning Machines Since 1968
4
Fig. 1 Fig. 2 Fig. 3
Fig. 4
Fig. 8
Fig. 9 Fig. 10
Fig. 5
Fig. 6 Fig. 7
Fig. 11
5
9
8
10
8
9
11
11
1
3
1
2
4
12
13
10
9
14
10
8
15
16 17
7
6
www.ghibliwirbel.com
Professional Cleaning Machines Since 1968
5
0
I
0
I
Fig. 15
Fig. 13
Fig. 16
Fig. 17 Fig. 19
Fig. 20
Fig. 14
21
23
Fig. 18
18
27
18
15
16
19 Fig. 12
30
29
22
24 25
9
10
8
26
15
28
31
28
32
36
www.ghibliwirbel.com
Professional Cleaning Machines Since 1968
6
CLICK
33
Fig. 21
Fig. 22
Fig. 23
Fig. 26
Fig. 27
Fig. 24
Fig. 25
34
35
31
28
38
39
39
36
40
41
37
36
www.ghibliwirbel.com
Professional Cleaning Machines Since 1968
7
EN
English .................................................................................................. ENGLISH - 1
(Translation of original instructions)
www.ghibliwirbel.com
Professional Cleaning Machines Since 1968
ENGLISH -
1
TECHNICAL
CHARACTERISTICS
Voltage ..................................See data plate
Motors power ...................................1900 W
Sound level ....................................65 dB(A)
Depression ....................................190 mbar
Useful capacity tank ............................... 56 l
Detergent tank capacity ......................... 11 l
Dimensions ...............610 x 540 x 920H mm
Weight .............................................. 24,5 kg
Accessories ................................... Ø 40 mm
TYPE OF USE
This appliance was designed for spray wash-
ing and extracting any type of fabric, carpet,
car seats, floors etc.
It can be used as a vacuum cleaner and or
solid and liquid suction unit with the appropri-
ate accessories upon request.
It has only been designed for these uses.
DANGER:
The manufacturer can not be held respon-
sible for any damage due to improper or
incorrect use.
Any other use releases the manufacturer
from liability for harm to persons and/or
property and invalidates any warranty
condition.
IMPROPER USE
Do not use the appliance to:
- Aspirate flammable, explosive, corrosive
and toxic substances.
- Aspirate hot substances.
- Do not use the appliance in liquid suction
mode to suction powder and vice versa.
Do not use the appliance in areas at risk of
explosion.
PREPARING THE
APPLIANCE
Assembling the hoses
- Insert, as far as possible, the sleeve (1
Fig. 1) of the suction hose into the nozzle
(2 Fig. 1) on the drum.
- To release the sleeve (1 Fig. 2) press and
hold the button (3 Fig. 2) and then pull out
the sleeve (1 Fig. 2).
- Connect the (4 Fig. 3) detergent delivery
hose to the quick coupling (5 Fig. 3); to
release it push the quick coupling (5 Fig.
3) inwards.
- Connect the (6 Fig. 4) detergent suction
hose to the quick coupling (7 Fig. 4); to
release it push the quick coupling (7 Fig.
4) inwards.
Rigid pipe assembly for washing car-
pets or floors (if present)
After connecting the suction hose to the out-
let the drum, do as follows:
- Remove the hose from its stiff as follows:
- Top Tube (8 Fig. 5).
- Lower Hose (9 Fig. 5) complete with
pipe cleaner and nozzle.
- Nozzle for carpets and floor coverings
(10 Fig 5).
- Hook the two rigid extensions (8 and 9
Fig. 6), matching the two references (11
Fig. 6)
- Connect the hose (12 Fig. 7) coming from
the nozzle quick connector (13 Fig. 7) of
the dispenser lever; push the lever.to re-
lease, the quick connector (13 Fig. 7).
- Insert the floor nozzle (10 Fig. 8) into the
tube (9 Fig. 8).
- Placethe nozzle (14 Fig. 9) on the mouth-
piece (10 Fig. 9) hooking it into the ap-
propriate bumps in the nozzle (10 Fig. 9).
- Insert the tube (8 Fig. 10) in the hose (15
Fig. 10)
- Connect the quick connector (16 Fig. 11)
of the supply pipe to the fitting (17 Fig.
11) of the dispensing; to release the quick
connector (16 Fig.11) push lever to the
outside of the tube.
Manuale M26_8050832_1ed_04-2017.indd 1 26/04/17 17:05
www.ghibliwirbel.com
Professional Cleaning Machines Since 1968
ENGLISH -
2
Professional hose assembly for fab-
ric washing (if present)
After connecting the suction hose to the out-
let the drum, do as follows:
- Insert the fabric nozzle (18 Fig. 12) into
the flexible hose (15 Fig. 12).
- Connect the detergent hose (19 Fig. 12)
to the quick coupling (16 Fig. 12) on the
flexible hose; to release it push the quick
coupling (16 Fig. 12) towards the hose.
Filling the detergent tank
- Pour into the tank (36 Fig. 13) the deter-
gent necessary for cleaning.
NOTE:
For detergent dosing refer to the manufac-
turer’s instructions.
USING THE APPLICANCE
- The appliance is fitted with wheels and
can therefore be pulled along using the
flexible hose, or pushed with the handle
(21 Fig. 14)
- For lifting, two people, put your fingers in
its handles (22 Fig. 14).
Starting up the appliance
- Insert the plug (23 Fig. 15) into the electri-
cal socket.
- Press the switch (24 Fig. 16) to “I” to start
the engine intake.
- Push the switch (25 Fig. 16) on “I” to start
the detergent pump; the switch lights up.
NOTE:
The suction motor and the detergent pump
operate independently; therefore, it is pos-
sible to:
- wash fabrics or floors/ carpets by starting
only the detergent pump;
- wash and suction liquid simultaneously
by starting up the detergent pump and
suction motor at the same time;
- suction liquids by only starting the suction
motor.
Washing floors or carpets
- For washing floors or carpeting is neces-
sary to fit the rigid tube (8-9 Fig. 17) and
the mouth floor (10 Fig. 17), if present.
- Put the nozzle (10 Fig. 17) perpendicular
to the floor / carpet (see Figure 17).
- Start the suction motor and the detergent
pump by pressing the relative switches
(24 - 25 Fig. 16).
- Press the lever (26 Fig. 17) to deliver the
cleaner, release to stop dispensing.
- The detergent released washes the floor/
carpet / and the dirty liquid is suctioned
into the tank of the appliance.
For very dirty areas it is recommended
you apply detergent to the dirty area with-
out suctioning it; leave the detergent al-
lowing it to work for several seconds and
then wash the area and suction the dirt.
NOTE:
To prevent the detergent pump from break-
ing, it is recommended that you stop its op-
eration, pushing the relative switch, when
dosing has not occurred for several minutes.
NOTE:
When the recovery tank is full, noise in-
creases and the appliance does not suction;
therefore, switch it off and empty the tank as
described in the relevant paragraphs.
Cleaning chairs
- Start the suction motor and the detergent
pump by pressing the relative switches
(24 - 25 Fig. 16).
- Place the mouthpiece on the fabric and
press lightly ; than press the lever (27 Fig.
18) to deliver the cleaner, release to stop
dispensing.
Manuale M26_8050832_1ed_04-2017.indd 2 26/04/17 17:05
www.ghibliwirbel.com
Professional Cleaning Machines Since 1968
ENGLISH -
3
- For very dirty areas it is recommended
you apply detergent to the dirty area with-
out suctioning it; leave the detergent al-
lowing it to work for several seconds and
then wash the area and suction the dirt.
NOTE:
To prevent the detergent pump from break-
ing, it is recommended that you stop its op-
eration, pushing the relative switch, when
dosing has not occurred for several minutes.
NOTE:
When the recovery tank is full, noise in-
creases and the appliance does not suction;
therefore, switch it off and empty the tank as
described in the relevant paragraphs
Switching off the appliance
- Press the switches (24 and 25 Fig. 16) to
“0” to switch off the appliance; the lamps
on the switches will go out.
- Remove the plug (23 Fig. 15) from the
electrical socket.
CLEANING AND
MAINTENANCE
DANGER:
Before performing any maintenance op-
erations, unplug the appliance from the
electrical socket.
Daily cleaning
Emptying the recovery tank
- Position yourself over a floor drain with
the appliance.
- Detach the drain hose (28 Fig. 19) from
its relative support.
- Unscrew the knob (29 Fig. 19) and re-
move the cap (30 Fig. 19) of the water
drain hose (28 Fig. 19) and empty the liq-
uid into the recovery tank (31 Fig. 19).
Cleaning the detergent dosing circuit
At the end of each workday, clean the de-
tergent dosing circuit as follows to prevent
clogging:
- Release pressure from the circuit by
pressing, with dosing pump off, the lever
(27 Fig. 18) or lever (26 Fig. 17)
- Disconnect the detergent delivery hose
(4 Fig. 3).
- Lift up the levers (32 Fig. 20) and remove
the cover (33 Fig. 21) complete with mo-
tor.
- Disconnect the detergent suction hose (6
Fig. 4).
- Remove the detergent container (36 Fig.
22) lifting it by the dedicated handle (40
Fig. 22).
- Empty the remaining liquid into a suitable
container.
- Wash the inside of the detergent contain-
er with running water.
- Put the detergent container back in place,
attaching it to the dedicated bracket (41
Fig. 22) fixed to the tank.
- Connect the detergent (6 Fig. 4) suction
hose to the quick coupling (7 Fig. 4).
- Pour clean water into the detergent con-
tainer, electrically connect the appliance
and start the dosing pump by pressing
the switch (25 Fig. 16).
- Clean the circuit by pressing the lever (27
Fig. 18) or (26 Fig. 17), depending on the
type of mouthpiece.
- Dispense the liquid from the nozzle until
clean water comes out.
- Empty the water in the detergent tank as
described above.
Cleaning the appliance body
- Clean the unit body with a cloth damp-
ened with water or a mild detergent.
- Remove the cover as indicated previous-
ly and clean the inside of the tank with
running water, leaving the drain hose
open (28 Fig. 23) then reassemble eve-
Manuale M26_8050832_1ed_04-2017.indd 3 26/04/17 17:05
www.ghibliwirbel.com
Professional Cleaning Machines Since 1968
ENGLISH -
4
rything proceeding in reverse order.
DANGER:
Do not wash the appliance using jets of
water.
Periodic checks
Cleaning the detergent dispensing
nozzle
If you note that the detergent is not dispensed
evenly, clean the nozzle as described below:
- Remove the ring nut (34 Fig. 24).
- Remove the nozzle (35 Fig. 24) and clean
it with running water, if it is clogged use a
pin being careful not to distort the shape
of the nozzle.
- Reassemble all of the parts performing
these operations in the reverse order.
Cleaning the detergent suction filter
If you note that the detergent is not being
suctioned properly, check and clean the suc-
tion filter located inside the detergent tank.
- Using a screw driver, loosen the suction
cap (36 Fig. 25) and remove it from the
tank with the relative suction hose.
- Remove the filter (37 Fig. 25) and wash it
under running water; if it is too clogged it
should be replaced.
- Reassemble all of the parts performing
these operations in the reverse order.
Replacing the floor nozzle squeegee
(if present)
If when washing the floors the washing liquid
is not suctioned properly and the floor or car-
pet remains wet, check the condition of the
squeegee (38 Fig. 26).
If the blade is worn or damaged should be
replaced by releasing the blade support (39
Fig. 26) from the nozzle.
When replacing the new blade pay attention
to insert it properly into the mouthpiece, then
press until you hear the click coupling (Fig.
27).
SPARE PARTS
Slide nozzle body .................Code 7217519
Manuale M26_8050832_1ed_04-2017.indd 4 26/04/17 17:05
www.ghibliwirbel.com
Professional Cleaning Machines Since 1968
ENGLISH -
5
PROBLEM CAUSE SOLUTION
The vacuum cleaner does
not work.
Switch not pressed.
Plug not inserted.
Power cut.
Press the switch.
Insert the plug into the socket.
Check the power line.
Suction is not satisfactory. Accessories or tubes
clogged.
Suction nozzle squeegee
worn or damaged.
Check and clean the flexible
hose and the suction nozzle.
Check and replace the
squeegee.
Detergent dispensing not
even.
Nozzle clogged.
Filter clogged.
Clean nozzle.
Clean suction filter.
Detergent dispensing not
working.
Switch not pressed.
Thermal protection enabled.
Press the switch.
Wait approx. 30 second for
automatic reset.
Manuale M26_8050832_1ed_04-2017.indd 5 26/04/17 17:05
www.ghibliwirbel.com
Professional Cleaning Machines Since 1968
ENGLISH -
6
Manuale M26_8050832_1ed_04-2017.indd 6 26/04/17 17:05
Professional Cleaning Machines Since 1968
DEALER
GHIBLI & WIRBEL S.p.A.
Registered office:
Via Enrico Fermi, 43 - 37136 Verona (VR) - Italy
Headquarters:
Via Circonvallazione, 5 - 27020 Dorno (PV) - Italy
P. +39.0382.848811 - F. +39.0382.84668 - M. [email protected]
www.ghibliwirbel.com
100% MADE IN ITALY
Cod. 8050832 - 3^ ed. - 04/2022
  • Page 1 1
  • Page 2 2
  • Page 3 3
  • Page 4 4
  • Page 5 5
  • Page 6 6
  • Page 7 7
  • Page 8 8
  • Page 9 9
  • Page 10 10
  • Page 11 11
  • Page 12 12
  • Page 13 13
  • Page 14 14
  • Page 15 15
  • Page 16 16

Ghibli & Wirbel M 26 I CEME Use And Maintenance

Type
Use And Maintenance
This manual is also suitable for

Ghibli & Wirbel M 26 I CEME is a professional cleaning machine with a wide range of capabilities, making it a versatile tool for various cleaning tasks. It can be used for spray washing and extracting any type of fabric, carpet, car seats, floors, etc. Additionally, it can be utilized as a vacuum cleaner or solid and liquid suction unit with the appropriate accessories (available upon request). This device is not intended for any other uses beyond those specified, and improper use may result in damage or harm.

Ask a question and I''ll find the answer in the document

Finding information in a document is now easier with AI