Apple Compressor 4.2 Operating instructions
- Category
- Software
- Type
- Operating instructions

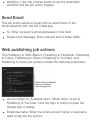
What is Compressor?
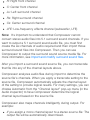
Compressor is an application that transcodes media files into a
variety of formats. You can use Compressor to create files for
many uses, including:
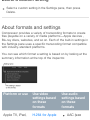
Viewing on Apple devices such as Apple TV, iPad, iPhone,
iPod, or iTunes using high-definition (HD) or standard-definition
(SD) formats (including H.264)
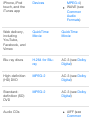
Publishing to video-sharing websites including Facebook,
Vimeo, and YouTube using QuickTime
Burning to DVD or Blu-ray disc using H.264, MPEG-2 for DVD,
and Dolby Digital formats
Podcasting using H.264, AAC, and MP3 formats
Creating a package of media for submitting to the iTunes store
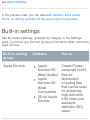
Compressor comes with built-in settings that you can use to
transcode files into the most common media formats. Compressor
also provides preconfigured destinations that transcode files and
then perform actions on the transcoded files. For example, if you
transcode a source file using the built-in “Publish to Vimeo”
destination, the destination outputs a high-quality QuickTime
movie file, and then automatically publishes the movie file to your
Vimeo account.
In addition to transcoding source files, you can use Compressor
Compressor basics

to:
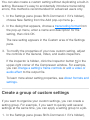
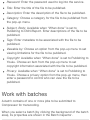
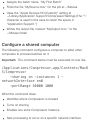
Create custom settings and destinations: You can use a
variety of formats to build custom settings and destinations
tailored to your unique transcoding workflows. For example,
you can create a custom setting with specific frame
dimensions or with video and audio filters applied. And when
you create a destination, you can apply a job action that is
performed after the file is transcoded—such as sending an
email message or running an .
Create settings to transcode Final Cut Pro X and Motion
projects: You can create a custom setting in Compressor and
then use it to transcode Final Cut Pro or Motion projects. For
example, you can create a setting that outputs a file with the
bit rate of your choice.
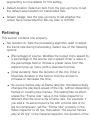
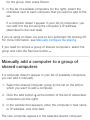
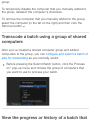
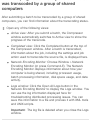
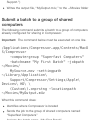
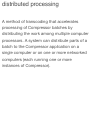
Transcode files using a network of shared computers: If you
need more processing power and shorter transcoding times,
you can create a group of shared computers to distribute and
speed the transcoding process.
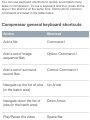
Create Compressor droplets: If you need to provide a very
simple workflow for yourself or other users, you can
, a standalone application that lets you
transcode media files in the Finder, by dragging and dropping.
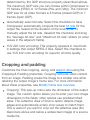
Compressor workflow
The basic process of transcoding files in Compressor is described
below.
Import your media into Compressor
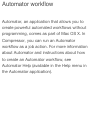
Automator workflow
create a
Compressor droplet

Import your media into Compressor
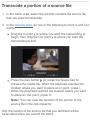
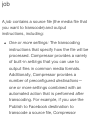
The first step in the transcoding process is to add one or more
media source files to Compressor. You can add media files from
your computer or a connected hard disk. Each media source file
in Compressor is called a job. Each transcoding session,
containing one or more jobs, is called a batch.
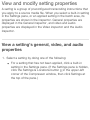
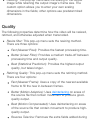
Apply transcoding instructions
After you add a source file, apply one or more transcoding
instructions to it. Compressor provides a variety of preconfigured
transcoding instructions called settings, which you can use to
convert files to the most common media formats. If you want, you
can modify the setting’s properties to meet your requirements.
Compressor also provides a number of preconfigured
destinations, which combine settings and a post-transcoding
action, such as uploading your file to YouTube or burning a Blu-
ray disc.
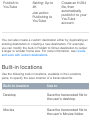
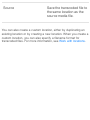
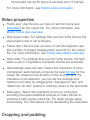
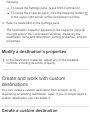
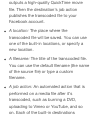
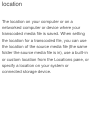
Choose an output location
Designate a location on your computer or on a connected storage
device where you want to save the transcoded media file. You
can choose any of several preconfigured locations, including your
computer desktop, your Movies folder, or the source folder of the
original media. You can also choose a custom location.
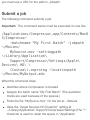
Submit your media for transcoding

After you assign settings or a destination and specify an output
location, click the Start Batch button to begin the transcoding
process. You can monitor the progress of the transcoding in the
Active view. After transcoding is complete, you can see
information about the settings or destinations you used in the
Completed view.
See to view a list of detailed instructions.
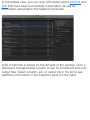
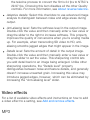
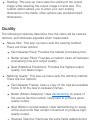
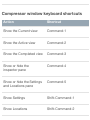
Interface overview
The Compressor window has three views: Current, Active, and
Completed. You can switch between these views by clicking a
view button at the top of the window.
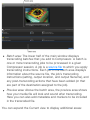
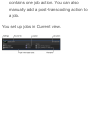
Current view
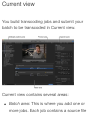
Current view is the default view in Compressor, where you
prepare transcoding jobs and then submit your batch. When you
open Compressor for the first time, Current view displays two
basic areas:
Transcode files

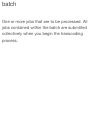
Batch area: The lower half of the main window displays
transcoding batches that you add to Compressor. A batch is
one or more transcoding jobs to be processed in a given
Compressor session. A job is a to which you apply
transcoding instructions. Each job in the batch area displays
information about the source file, the job’s transcoding
instructions (setting, output location, and output filename), and
any post-transcoding actions that have been added (or that
are part of the destination assigned to the job).
Preview area: Above the batch area, the preview area shows
how your media file will look and sound after transcoding.
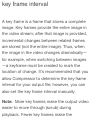
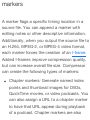
Here you can also add metadata and markers to be included
in the transcoded file.
You can expand the Current view to display additional areas:
source file

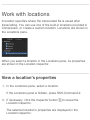
Settings and Locations pane: Click the Settings & Locations
button at the top-left corner of the Compressor window to
expand this area, then click Settings or Locations to display
the individual panes. The Settings pane provides quick access
to all the built-in destinations and settings, as well as to any
custom destinations or settings that you created. Likewise, the
Locations pane provides quick access to all the built-in save
locations, and to any custom save locations that you created.
You apply settings, destinations, and locations to a job by
dragging an item from these panes to the job in the batch
area.
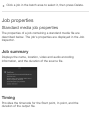
Inspector pane: Click the Inspector button in the upper-right
corner of the Compressor window to expand this area. The
inspector pane has several views that change, depending on
the item that is selected. When you select a batch (by clicking
the background of the batch area), the Batch inspector
appears, displaying basic information about the current batch.
When you select a job in the batch area, the Job inspector

appears, displaying a summary of the job’s transcoding
instructions as well as controls for adding metadata and
modifying job actions. When you select a specific transcoding
instruction in the batch area (one of the rows under the job),
the General, Video, and Audio inspectors appear. These three
panes contain adjustable properties that you can use to
customize the or .
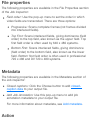
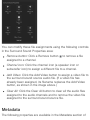
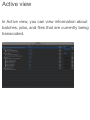
Active view
In Active view, the Compressor window displays status
information about (and their constituent ) currently
being transcoded. In this view, you can monitor progress bars as
well as pause or cancel the transcoding process.
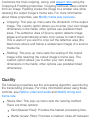
Completed view
setting destination
batches jobs

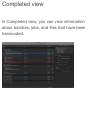
In Completed view, you can view information about and
that have been successfully transcoded, as well as
information about items that failed to transcode.
A list of batches is shown on the left side of the window. Click a
disclosure triangle beside a batch to see its constituent jobs and
output files. Select a batch, job, or output file in the list to see
additional information in the inspector pane (on the right).
batches
jobs

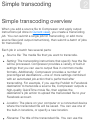
Simple transcoding overview
When you add a source file to Compressor and apply output
instructions (all done in ), you create a transcoding
job. You can submit a single job for transcoding, or add more
source files (and output instructions), then submit a batch of jobs
for transcoding.
Each job in a batch has several parts:
Source file: The media file that you want to transcode.
Setting: The transcoding instructions that specify how the file
will be processed. Compressor provides a variety of built-in
settings that you can use to output files in common media
formats. Additionally, Compressor provides a number of
preconfigured destinations—one or more settings combined
with an automated job action that’s performed after
transcoding. For example, if you use the Publish to Facebook
destination to transcode a source file, Compressor outputs a
high-quality QuickTime movie file, then applies the
destination’s job action to upload the transcoded file to your
Facebook account.
Location: The place on your computer or a connected device
where the transcoded file will be saved. You can use one of
the built-in locations, or specify a new location.
Filename: The title of the transcoded file. You can use the
Simple transcoding
Current view

Filename: The title of the transcoded file. You can use the
default filename (the name of the source file) or type a custom
filename.
Job action: Optionally, you can add a post-transcoding action
to a job, such as burning a DVD, uploading to Vimeo or
YouTube, and so on. Each of the built-in destinations already
contains a job action.
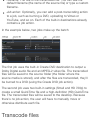
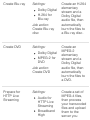
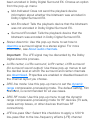
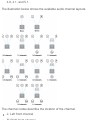
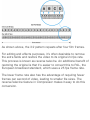
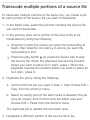
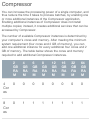
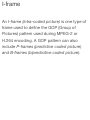
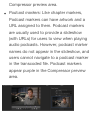
In the example below, two jobs make up the batch:
The first job uses the built-in Create DVD destination to output a
Dolby Digital audio file and an MPEG-2 video file. The transcoded
files will be saved to the source folder (the folder where the
source media is stored), and after the files are transcoded, they’ll
be burned to a DVD (using the Create DVD job action).
The second job uses two built-in settings (Small and HD 720p) to
create a small QuickTime file and a high-definition (HD) QuickTime
file. The transcoded files will be saved to the desktop. Because
there’s no job action, the user will have to manually move or
otherwise distribute each file.
Transcode files

The easiest way to transcode media files in Compressor is to use
or one or more built-in or a built-in (settings
that are combined with a post-transcoding , such as
uploading to Facebook or burning a Blu-ray disc).
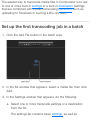
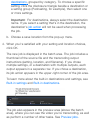
Set up the first transcoding job in a batch
1. Click the Add File button in the batch area.
2. In the file window that appears, select a media file, then click
Add.
3. In the Settings window that appears, do the following:
a. Select one or more transcode settings or a destination
from the list.
The settings list contains basic , as well as
settings destination
job action
settings

, grouped by category. To choose a specific
setting, click the disclosure triangle beside a destination or
a setting group (Podcasting, for example), then select one
or more settings.
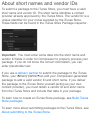
Important: For destinations, always select the destination
name. If you select a setting that’s in the destination, the
destination’s will not be used when processing
the job.
b. Choose a save location from the pop-up menu.
4. When you’re satisfied with your setting and location choices,
click OK.
The new job is displayed in the batch area. The job includes a
thumbnail of the source file and the transcoding output
instructions (setting, location, and filename). If you chose
multiple settings, or a destination with multiple outputs, each
output appears in a separate row. If you chose a destination,
its job action appears in the upper-right corner of the job area.
To learn more about the built-in destinations and settings, see
and .
The job also appears in the preview area (above the batch
area), where you can see the video you’re transcoding, as well
as perform a number of other tasks. See .
destinations
job action
Built-in settings Built-in destinations
Preview jobs

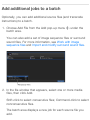
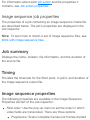
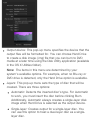
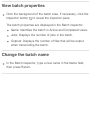
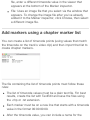
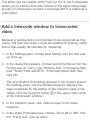
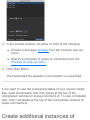
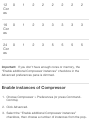
Add additional jobs to a batch
Optionally, you can add additional source files (and transcode
instructions) to a batch.
1. Choose Add File from the Add pop-up menu under the
batch area.
You can also add a set of image sequence files or surround
sound files. For more information, see
and .
2. In the file window that appears, select one or more media
files, then click Add.
Shift-click to select consecutive files; Command-click to select
nonconsecutive files.
The batch area displays a new job for each source file you
add.
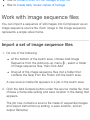
Work with image
sequence files Import and modify surround sound files

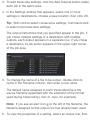
3. To add transcode settings, click the Add Outputs button inside
each job in the batch area.
4. In the Settings window that appears, select one or more
settings or destinations, choose a save location, then click OK.
Tip: Shift-click to select consecutive settings; Command-click
to select nonconsecutive settings.
The output instructions that you specified appear in the job. If
you chose multiple settings or a destination with multiple
outputs, each output appears in a separate row. If you chose
a destination, its job action appears in the upper-right corner
of the job area.
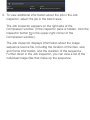
5. To change the name of a file to be output, double-click its
name in the Filename column, then enter a new name.
The default name assigned to each transcoded file is the
source filename appended with the extension of the format
used during transcoding (.mov or .mp4, for example).
Note: If you see an alert icon to the left of the filename, the
filename assigned to that output row has already been used.
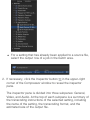
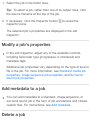
6. To view the properties of a setting, select an output row, then

open the inspector by clicking the Inspector button in the
upper-right corner of the Compressor window.
Depending on the setting you’re viewing, general, video, and
audio properties are displayed in the inspector. For
information about modifying these properties, see
.
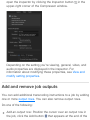
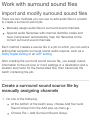
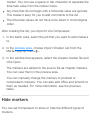
Add and remove job outputs
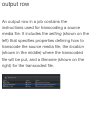
You can add additional transcoding instructions to a job by adding
one or more . You can also remove output rows.
Do one of the following:
Add an output row: Position the cursor over an output row in
the job, click the Add button that appears at the end of the
View and
modify setting properties
output rows

row, then, in the window that appears, select one or more
settings, choose a location, and click OK.
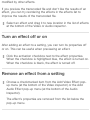
Remove an output row: Position the cursor over the output
row that you want to remove, then click the Remove button
that appears at the end of the row.
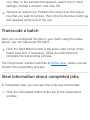
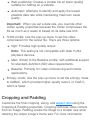
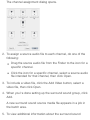
Transcode a batch
After you’ve configured the jobs in your batch using the tasks
above, you can transcode the batch.
Click the Start Batch button in the lower-right corner of the
batch area and, if necessary, follow the instructions to
complete the transcoding process.
The Compressor window switches to , where you can
monitor the transcoding process.
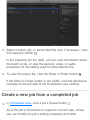
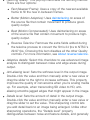
View information about completed jobs
In Completed view, you can see how a file was transcoded.
1. Click the Completed button at the top of the Compressor
window.
Active view

2. Select a batch, job, or transcoded file and, if necessary, click
the Inspector button .
In the inspector (on the right), you can view information about
the batch or job, or view the general, video, or audio
properties for the setting used to transcode the file.
3. To view the output file, click the Show in Finder button .
If the Show in Finder button is not visible, click the disclosure
triangles on the left side of the Completed view window.
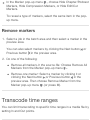
Create a new job from a completed job
In , click a job’s Reuse button .
All of the job’s information is copied to Current view, where
you can modify the job’s setting properties and other
Completed view

information as necessary, then transcode the new job.
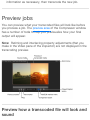
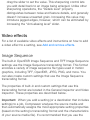
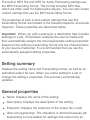
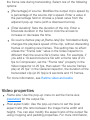
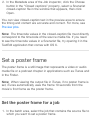
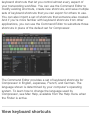
Preview jobs
You can preview what your transcoded files will look like before
you process a job. The of the Compressor window
has a number of tools to help you previsualize how your final
output will appear.
Note: Retiming and interlacing property adjustments (that you
make in the Video pane of the inspector) are not displayed in the
transcoding preview.
Preview how a transcoded file will look and
sound
preview area

1. In a job in the batch area, select the that includes
the setting you want to preview.
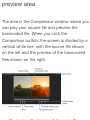
2. If the Comparison button in the preview area isn’t already
selected (highlighted blue), click it to turn on comparison
previewing.
3. Click the Play button .
The source file video plays on the left side of the preview area,
and a preview of the transcoded file plays on the right side.
The transcoded audio plays through your computer speakers
(or through connected speakers).
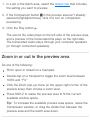
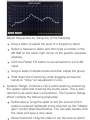
Zoom in or out in the preview area
Do one of the following:
Pinch open or closed on a trackpad.
Double-tap on a trackpad to toggle the zoom level between
100% and “Fit.”
Click the Zoom pop-up menu (in the upper-right corner of the
preview area), then choose a zoom level.
Press Shift-Z to resize the preview area to fit the current
available window space.
Tip: To increase the available preview area space, resize the
Compressor window, or drag the divider bar between the
preview area and the batch area down.
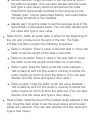
View different areas of a zoomed-in preview
output row

View different areas of a zoomed-in preview
area
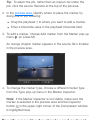
When the preview area is zoomed in to a level greater than 100%,
you cannot view the entire image at once. However, you can scroll
the preview area to see more of the image.
Do one of the following:
Swipe the trackpad using two fingers.
Drag the inner box of the navigation control (in the upper-right
corner of the zoomed-in preview area).
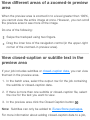
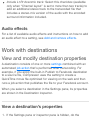
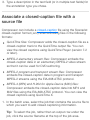
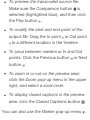
View closed-caption or subtitle text in the
preview area
If your job includes subtitles or , you can view
that text in the preview area.
1. In the batch area, select the output row for the job containing
the subtitle or closed-caption data.
2. If there is more than one subtitle or closed-caption file, select
the row for the text you want to view.
3. In the preview area click the Closed Caption button .
Note: Subtitles can only be added to .
For more information about adding closed-caption data to a job,
closed-caption data
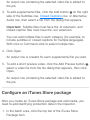
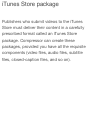
iTunes Store packages
Page is loading ...
Page is loading ...
Page is loading ...
Page is loading ...
Page is loading ...
Page is loading ...
Page is loading ...
Page is loading ...
Page is loading ...
Page is loading ...
Page is loading ...
Page is loading ...
Page is loading ...
Page is loading ...
Page is loading ...
Page is loading ...
Page is loading ...
Page is loading ...
Page is loading ...
Page is loading ...
Page is loading ...
Page is loading ...
Page is loading ...
Page is loading ...
Page is loading ...
Page is loading ...
Page is loading ...
Page is loading ...
Page is loading ...
Page is loading ...
Page is loading ...
Page is loading ...
Page is loading ...
Page is loading ...
Page is loading ...
Page is loading ...
Page is loading ...
Page is loading ...
Page is loading ...
Page is loading ...
Page is loading ...
Page is loading ...
Page is loading ...
Page is loading ...
Page is loading ...
Page is loading ...
Page is loading ...
Page is loading ...
Page is loading ...
Page is loading ...
Page is loading ...
Page is loading ...
Page is loading ...
Page is loading ...
Page is loading ...
Page is loading ...
Page is loading ...
Page is loading ...
Page is loading ...
Page is loading ...
Page is loading ...
Page is loading ...
Page is loading ...
Page is loading ...
Page is loading ...
Page is loading ...
Page is loading ...
Page is loading ...
Page is loading ...
Page is loading ...
Page is loading ...
Page is loading ...
Page is loading ...
Page is loading ...
Page is loading ...
Page is loading ...
Page is loading ...
Page is loading ...
Page is loading ...
Page is loading ...
Page is loading ...
Page is loading ...
Page is loading ...
Page is loading ...
Page is loading ...
Page is loading ...
Page is loading ...
Page is loading ...
Page is loading ...
Page is loading ...
Page is loading ...
Page is loading ...
Page is loading ...
Page is loading ...
Page is loading ...
Page is loading ...
Page is loading ...
Page is loading ...
Page is loading ...
Page is loading ...
Page is loading ...
Page is loading ...
Page is loading ...
Page is loading ...
Page is loading ...
Page is loading ...
Page is loading ...
Page is loading ...
Page is loading ...
Page is loading ...
Page is loading ...
Page is loading ...
Page is loading ...
Page is loading ...
Page is loading ...
Page is loading ...
Page is loading ...
Page is loading ...
Page is loading ...
Page is loading ...
Page is loading ...
Page is loading ...
Page is loading ...
Page is loading ...
Page is loading ...
Page is loading ...
Page is loading ...
Page is loading ...
Page is loading ...
Page is loading ...
Page is loading ...
Page is loading ...
Page is loading ...
Page is loading ...
Page is loading ...
Page is loading ...
Page is loading ...
Page is loading ...
Page is loading ...
Page is loading ...
Page is loading ...
Page is loading ...
Page is loading ...
Page is loading ...
Page is loading ...
Page is loading ...
Page is loading ...
Page is loading ...
Page is loading ...
Page is loading ...
Page is loading ...
Page is loading ...
Page is loading ...
Page is loading ...
Page is loading ...
Page is loading ...
Page is loading ...
Page is loading ...
Page is loading ...
Page is loading ...
Page is loading ...
Page is loading ...
Page is loading ...
Page is loading ...
Page is loading ...
Page is loading ...
Page is loading ...
Page is loading ...
Page is loading ...
Page is loading ...
Page is loading ...
Page is loading ...
Page is loading ...
Page is loading ...
Page is loading ...
Page is loading ...
Page is loading ...
Page is loading ...
Page is loading ...
Page is loading ...
Page is loading ...
Page is loading ...
Page is loading ...
Page is loading ...
Page is loading ...
Page is loading ...
Page is loading ...
Page is loading ...
Page is loading ...
Page is loading ...
Page is loading ...
Page is loading ...
Page is loading ...
Page is loading ...
Page is loading ...
Page is loading ...
Page is loading ...
Page is loading ...
Page is loading ...
Page is loading ...
Page is loading ...
Page is loading ...
Page is loading ...
Page is loading ...
Page is loading ...
Page is loading ...
Page is loading ...
Page is loading ...
Page is loading ...
Page is loading ...
Page is loading ...
Page is loading ...
Page is loading ...
Page is loading ...
Page is loading ...
Page is loading ...
Page is loading ...
Page is loading ...
Page is loading ...
Page is loading ...
Page is loading ...
Page is loading ...
Page is loading ...
Page is loading ...
Page is loading ...
Page is loading ...
Page is loading ...
Page is loading ...
Page is loading ...
Page is loading ...
Page is loading ...
Page is loading ...
Page is loading ...
Page is loading ...
Page is loading ...
Page is loading ...
Page is loading ...
Page is loading ...
Page is loading ...
Page is loading ...
Page is loading ...
Page is loading ...
Page is loading ...
Page is loading ...
Page is loading ...
Page is loading ...
Page is loading ...
Page is loading ...
Page is loading ...
Page is loading ...
Page is loading ...
Page is loading ...
Page is loading ...
Page is loading ...
Page is loading ...
Page is loading ...
Page is loading ...
Page is loading ...
Page is loading ...
Page is loading ...
Page is loading ...
Page is loading ...
Page is loading ...
Page is loading ...
Page is loading ...
Page is loading ...
Page is loading ...
Page is loading ...
Page is loading ...
Page is loading ...
Page is loading ...
Page is loading ...
Page is loading ...
Page is loading ...
Page is loading ...
Page is loading ...
Page is loading ...
Page is loading ...
Page is loading ...
Page is loading ...
Page is loading ...
Page is loading ...
Page is loading ...
Page is loading ...
Page is loading ...
Page is loading ...
Page is loading ...
Page is loading ...
Page is loading ...
Page is loading ...
Page is loading ...
Page is loading ...
Page is loading ...
Page is loading ...
Page is loading ...
-
 1
1
-
 2
2
-
 3
3
-
 4
4
-
 5
5
-
 6
6
-
 7
7
-
 8
8
-
 9
9
-
 10
10
-
 11
11
-
 12
12
-
 13
13
-
 14
14
-
 15
15
-
 16
16
-
 17
17
-
 18
18
-
 19
19
-
 20
20
-
 21
21
-
 22
22
-
 23
23
-
 24
24
-
 25
25
-
 26
26
-
 27
27
-
 28
28
-
 29
29
-
 30
30
-
 31
31
-
 32
32
-
 33
33
-
 34
34
-
 35
35
-
 36
36
-
 37
37
-
 38
38
-
 39
39
-
 40
40
-
 41
41
-
 42
42
-
 43
43
-
 44
44
-
 45
45
-
 46
46
-
 47
47
-
 48
48
-
 49
49
-
 50
50
-
 51
51
-
 52
52
-
 53
53
-
 54
54
-
 55
55
-
 56
56
-
 57
57
-
 58
58
-
 59
59
-
 60
60
-
 61
61
-
 62
62
-
 63
63
-
 64
64
-
 65
65
-
 66
66
-
 67
67
-
 68
68
-
 69
69
-
 70
70
-
 71
71
-
 72
72
-
 73
73
-
 74
74
-
 75
75
-
 76
76
-
 77
77
-
 78
78
-
 79
79
-
 80
80
-
 81
81
-
 82
82
-
 83
83
-
 84
84
-
 85
85
-
 86
86
-
 87
87
-
 88
88
-
 89
89
-
 90
90
-
 91
91
-
 92
92
-
 93
93
-
 94
94
-
 95
95
-
 96
96
-
 97
97
-
 98
98
-
 99
99
-
 100
100
-
 101
101
-
 102
102
-
 103
103
-
 104
104
-
 105
105
-
 106
106
-
 107
107
-
 108
108
-
 109
109
-
 110
110
-
 111
111
-
 112
112
-
 113
113
-
 114
114
-
 115
115
-
 116
116
-
 117
117
-
 118
118
-
 119
119
-
 120
120
-
 121
121
-
 122
122
-
 123
123
-
 124
124
-
 125
125
-
 126
126
-
 127
127
-
 128
128
-
 129
129
-
 130
130
-
 131
131
-
 132
132
-
 133
133
-
 134
134
-
 135
135
-
 136
136
-
 137
137
-
 138
138
-
 139
139
-
 140
140
-
 141
141
-
 142
142
-
 143
143
-
 144
144
-
 145
145
-
 146
146
-
 147
147
-
 148
148
-
 149
149
-
 150
150
-
 151
151
-
 152
152
-
 153
153
-
 154
154
-
 155
155
-
 156
156
-
 157
157
-
 158
158
-
 159
159
-
 160
160
-
 161
161
-
 162
162
-
 163
163
-
 164
164
-
 165
165
-
 166
166
-
 167
167
-
 168
168
-
 169
169
-
 170
170
-
 171
171
-
 172
172
-
 173
173
-
 174
174
-
 175
175
-
 176
176
-
 177
177
-
 178
178
-
 179
179
-
 180
180
-
 181
181
-
 182
182
-
 183
183
-
 184
184
-
 185
185
-
 186
186
-
 187
187
-
 188
188
-
 189
189
-
 190
190
-
 191
191
-
 192
192
-
 193
193
-
 194
194
-
 195
195
-
 196
196
-
 197
197
-
 198
198
-
 199
199
-
 200
200
-
 201
201
-
 202
202
-
 203
203
-
 204
204
-
 205
205
-
 206
206
-
 207
207
-
 208
208
-
 209
209
-
 210
210
-
 211
211
-
 212
212
-
 213
213
-
 214
214
-
 215
215
-
 216
216
-
 217
217
-
 218
218
-
 219
219
-
 220
220
-
 221
221
-
 222
222
-
 223
223
-
 224
224
-
 225
225
-
 226
226
-
 227
227
-
 228
228
-
 229
229
-
 230
230
-
 231
231
-
 232
232
-
 233
233
-
 234
234
-
 235
235
-
 236
236
-
 237
237
-
 238
238
-
 239
239
-
 240
240
-
 241
241
-
 242
242
-
 243
243
-
 244
244
-
 245
245
-
 246
246
-
 247
247
-
 248
248
-
 249
249
-
 250
250
-
 251
251
-
 252
252
-
 253
253
-
 254
254
-
 255
255
-
 256
256
-
 257
257
-
 258
258
-
 259
259
-
 260
260
-
 261
261
-
 262
262
-
 263
263
-
 264
264
-
 265
265
-
 266
266
-
 267
267
-
 268
268
-
 269
269
-
 270
270
-
 271
271
-
 272
272
-
 273
273
-
 274
274
-
 275
275
-
 276
276
-
 277
277
-
 278
278
-
 279
279
-
 280
280
-
 281
281
-
 282
282
-
 283
283
-
 284
284
-
 285
285
-
 286
286
-
 287
287
-
 288
288
-
 289
289
-
 290
290
-
 291
291
-
 292
292
-
 293
293
-
 294
294
-
 295
295
-
 296
296
-
 297
297
-
 298
298
-
 299
299
-
 300
300
-
 301
301
-
 302
302
-
 303
303
-
 304
304
-
 305
305
-
 306
306
-
 307
307
-
 308
308
-
 309
309
-
 310
310
-
 311
311
-
 312
312
-
 313
313
-
 314
314
-
 315
315


Apple Compressor 4.2 Operating instructions
- Category
- Software
- Type
- Operating instructions
Ask a question and I''ll find the answer in the document
Finding information in a document is now easier with AI
Related papers
-
Apple Compressor 4.1 User guide
-
-
-
-
-
-
-
-
-
Other documents
-
Avid MetaFuze 2.5 User guide
-
-
-
-
-
-
-
-
Sony Catalyst Prepare 2018 User manual
-