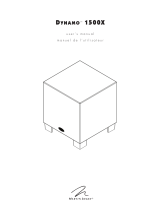
Focal SUB 600 P User manual

Category
Subwoofers
Type
User manual

This manual is also suitable for

6
SUB 600 P
SUB 600 P
Description Caisson de grave actif clos
Haut-parleur Grave Polyflex de 30 cm
Coupure à -6 dB 26 Hz
Réponse en fréquences (+/-3 dB) 28 Hz à 270 Hz
Entrée RCA Droit, gauche LFE
Fréquence de coupure Variable 40 Hz - 200 Hz (LFE)
Réglage de phase Inverseur de phase 0° / 180°
Modes d’alimentation AutoStandby enable / disable
Puissance de l’amplificateur 600W Dynamic (300 W RMS)
Dimensions (H x L x P) 400 x 400 x 425 mm
Poids 21 kg
SUB 600 P
Type Active closed subwoofer
Speaker 12" (30cm) Polyflex woofer
Frequency Response at -6dB 26Hz
Frequency Response (+/-3dB) 28Hz–270Hz
RCA input Right, left LFE
Crossover Frequency Variable 40Hz-200Hz (LFE)
Phase adjustment Phase inverter 0°/180°
Power Modes AutoStandby enable/disable
Amplifier Power 600W Dynamic (300W RMS)
Dimensions (HxWxD) 15
3/4
x15
3/4
x16
3/4
(400x400x425mm)
Weight 46.3lbs (21kg)
Spécifications / Specifications
12
READ FIRST !
IMPORTANT SAFETY INSTRUCTIONS !
The exclamation mark in an
equilateral triangle warns the
user that the manual contains
important instructions on how
to use and look after the device.
The bolt of lightning in an
equilateral triangle warns the
user that the device has high
voltage that could result in a risk
of electric shock.
Warning: To prevent any risk of
electric shock, do not remove
the cover (or the back) from
the device. There are no user-
serviceable parts in this device.
For maintenance or repairs,
contact a qualified professional.
1. Read these instructions.
2. Keep these instructions.
3. Heed all warnings.
4. Follow all instructions.
5. Do not use this apparatus near
water.
6. Clean only with dry cloth.
7. Do not block any ventilation
openings. Install in accordance
with the manufacturer's
instructions.
8. Do not install near any heat
sources such as radiators,
heat registers, stoves, or other
apparatus (including amplifiers)
that produce heat.
9. Do not defeat the safety
purpose of the polarized plug.
A polarized plug has two blades
with one wider than the other. The
wide blade is provided for your
safety. If the provided plug does
not fit into your outlet, consult an
electrician for replacement of the
obsolete outlet.
10. Protect the power cord from
being walked on or pinched
particularly at plugs, convenience
receptacles, and the point where
they exit from the apparatus.
11. Only use attachments/
accessories specified by the
manufacturer.
12. Use only with the cart, stand,
tripod, bracket, or table specified
by the manufacturer, or sold with
the apparatus. When a cart is
used, use caution when moving
the cart/apparatus combination
to avoid injury from tip-over.
13. Unplug this apparatus during
lightning storms or when unused
for long periods of time.
14. Refer all servicing to qualified
service personnel. Servicing is
required when the apparatus
has been damaged in any way,
such as power-supply cord or
plug is damaged, liquid has been
spilled or objects have fallen into
the apparatus, the apparatus has
been exposed to rain or moisture,
does not operate normally, or has
been dropped.
15. When the On/O switch,
or the mains plug or adapter
connected to the product is
used as a disconnect device,
this device must remain readily
accessible.
16. WARNING: To reduce the
risk of fire or electric shock, do
not expose this apparatus to
water, rain or moisture. And the
apparatus shall not be exposed
to dripping or splashing and that
no object filled with liquids, such
as vases, shall be placed on the
apparatus.
17. Do not insert any objects into
the device’s ventilation openings.
They could come into contact
with one of the high-voltage
components or short-circuit them
and cause a fire or electric shock.
Do not spill liquid on the device.
18. Do not attempt to repair
this device yourself. Opening it
may expose you to hazardous
voltages or to other risks. Contact
a qualified professional for all
maintenance work.
19. The equipment shall be used
at maximum 35 degree Celsius
ambient temperature (95°F).
English
13
20. Do not use this device in
tropical climates.
21. Do not use this device at
altitudes of more than 2,000 m
(6,500 ft).
22. Do not overload wall sockets,
extension leads or multiple socket
outlets as this could cause fire or
electric shock.
23. The device must not be
mounted to a wall or ceiling unless
intended by the manufacturer.
24. If the device has been moved
from a cold environment to a hot
environment, make sure that no
condensation appeared before
connecting the power cable.
25. No naked flame sources, such
as lit candles, should be placed on
top of the device.
26. The product should only be
connected to the mains power
type shown on the label on the
device. If you’re not sure what
type of mains electrical supply
you have, ask your retailer or your
electricity supplier. For devices
intended for use with a battery
or another power source, see the
user manual.
27. Always leave a distance of
at least 5 cm (2") around the
product for proper ventilation.
28. When replacement
components are needed, make
sure that the maintenance
technician uses the components
recommended by the
manufacturer or components
with the same technical features
as the original product. Using
non-compliant components
could cause fires, electric shocks
or other risks.
29. After any maintenance or
repair work on the device, ask the
maintenance technician to test it
to check that it works safely.
30. The product should only be
connected to the mains power
type shown on the label on the
device. If you’re not sure what
type of mains electrical supply
you have, ask your retailer or your
electricity supplier. For devices
intended for use with a battery
or another power source, see the
user manual.
31. To avoid damaging your
hearing, do not listen to
loudspeakers at high volumes for
long periods of time.
Listening to speakers at high
volumes can damage the
user’s ears and may lead to
hearing problems (temporary
or permanent deafness, tinnitus,
hyperacusis).
Hearing system exposure to
excessive sound level (over 85 dB
SPL LAeq) for several hours can
cause irreparable damage to your
hearing.
READ FIRST !
IMPORTANT SAFETY INSTRUCTIONS !
GB
14
SUB 600 P
Connections
On low-level RCA inputs:
When using a 2-channel amplifier with ‘Pre-out’ line outputs, Sub 600 P should be connected to the RCA
stereo inputs ‘Line inputs Right (R)/Left (L)’ (fig. B).
On LFE input:
When a multi-channel audio/video amplifier is used, Sub 600 P’s single LFE input should be connected to
the audio/video amplifier’s ‘subwoofer’ output (fig. C).
Power up (fig. A)
- Before powering up, refer to the safety instructions.
- Check the voltage selector
6
before connecting the power cable into the mains.
- Connect the subwoofer to the mains.
Home Cinema settings (fig. A)
- Connect the subwoofer to the amplifier using the subwoofer's LFE output
5
.
- Move the power switch to ‘ENABLE’
1
.
- Set the ‘CROSSOVER’ knob
3
in the LFE position.
- Adjust the ‘VOLUME’ knob
4
to halfway.
- Next, adjust the volume using your amplifier’s settings.
Stereo settings (fig. A)
- Connect the subwoofer to the amplifier using the subwoofer’s Left & Right outputs
5
.
- Move the power switch to ‘ENABLE’
1
.
- Set the ‘CROSSOVER’ knob
3
to the middle position (around 100Hz).
- Adjust the ‘VOLUME’ knob
4
to halfway.
- Adjust the bass level depending on the other speakers used. This adjustment can be done by using as
varied music programs as possible. The bass should be present without being too heavy.
- Select the phase inverter mode (0° or 180°)
2
. The correct position is the one that subjectively provides
the highest and most balanced bass level.
- Fine tune the cut-off frequency to around 100Hz. The lower this value is set to, the deeper and fuller the
bass will sound. The higher it is, the more forceful the impacts will be. The settings are correct when all
these features are simultaneously achieved.
- Readjust the volume settings as required.
- This procedure should be repeated every time the subwoofer changes location.
Auto Standby’ mode
1
Automatic timed power on / off. The Sub 600 P has an automatic audio signal detection system. When
the ‘Auto Standby’ detector is set to ‘Enable’ mode, the subwoofer will turn on immediately when an
audio signal is detected at the input. In ‘Disable’ mode, the detector is inactive and the subwoofer remains
permanently switched on.
On the other hand, if no signal is detected coming into the subwoofer after approximately 20 minutes, the
detection system will automatically place the subwoofer in stand-by mode.
In the event of prolonged absence for several days, we recommend turning the power detector to ‘Off’.
Please validate your Focal-JMlab warranty,
it is now possible to register your product online: www.focal.com/warranty
User manual
15
SUB 600 P
Cable choice
To connect the subwoofer to the amplifier, use a shielded RCA-RCA cable of an appropriate length. If in
doubt, ask your retailer to advise you on the best solution for your needs.
Positioning
Unlike acoustic loudspeakers that need to be placed at a sufficient distance away from the walls and
corners of the listening room, we recommend positioning Sub 600 P subwoofer in a corner.
By placing the subwoofer in a corner, the room resonances will be stimulated in a more linear, predictable
way. Not only will bass perception be optimal, but this layout will also make it possible to boost the
bass level by 6dB. If for practical reasons you cannot place the subwoofer in a corner, experiment with
positioning it in different places within the room until you find the best compromise.
Generally speaking, it is better to place the subwoofer in front of the listening position. (fig. D and E). It
isn’t recommended to place it behind the listening position.
As the frequency ranges involved are omnidirectional, in principle the bass is not affected by objects or
furniture placed between the subwoofer and the listening point (fig. F).
Running-in period
The woofer used in Sub 600 P is a complex mechanical component which requires a running-in period
in order to operate at its best and to become acclimatised to the temperature and humidity of your
environment. The length of time this takes can vary depending on the conditions and may extend over
several weeks.
To reduce this running-in period, we recommend operating your subwoofer for about twenty consecutive
hours at medium volume, with music which is rich in bass. Once the loudspeaker’s characteristics have
totally stabilised, you will be able to enjoy the full potential of your active subwoofer.
Conditions of warranty
All Focal loudspeakers are covered by warranty drawn up by the official Focal distributor in your country.
Your distributor can provide all details concerning the conditions of warranty. Warranty cover extends at
least to that granted by the legal warranty in force in the country where the original purchase invoice was
issued.
Special precautions
The only maintenance required for the Sub 600 P is dusting with a dry cloth. If your subwoofer
becomes dirty, we recommend simply cleaning it with a damp cloth.
Never use solvents, detergents, alcohol-based or corrosive products, scrapers or scourers to
clean the surface of a subwoofer. Keep the product away from sources of heat.
User manual
GB
60
SUB 600 P
F
Élimination correcte de ce produit.
Ce marquage indique que ce produit ne doit pas être éliminé avec les autres déchets ménagers
au sein de l’UE. Par mesure de prévention pour l'environnement et pour la santé humaine, veuillez
le recycler de manière responsable, pour favoriser la réutilisation des ressources matérielles. Pour
retourner votre appareil usé, veuillez utiliser les systèmes de retour et de collecte ou contactez
le détaillant chez lequel le produit a été acheté. Celui-ci pourra procéder au recyclage du produit
en toute sécurité
GB
Correct elimination of this product.
This marking indicates that within the EU this product should not be disposed of with other
household wastes. To prevent any risk to the environment or human health, please recycle them
responsibly to encourage the reuse of material resources. To return your used device, please
use the return and collection systems available, or contact the retailer where you purchased the
product. They can recycle this product safely.
D
Ordnungsgemäße Entsorgung des Produkts.
Diese Kennzeichnung weist darauf hin, dass dieses Produkt innerhalb der EU nicht mit anderen
Haushaltsabfällen entsorgt werden darf.
Als Präventivmaßnahme für die Umwelt und die menschliche Gesundheit muss auf eine
verantwortungsbewusste Wiederverwertung zur Förderung der Wiederverwendung von
materiellen Ressourcen geachtet werden. Für die Rückgabe von Gebrauchtgeräten verwenden
Sie bitte zur Verfügung stehende Rückgabe- und Recyclingsysteme oder wenden Sie sich an
den Händler, bei dem Sie das Produkt erworben haben. Letzterer kann das Gerät sicher dem
Wertstoffkreislauf zuführen.
ES
Eliminación correcta de este producto.
Este símbolo indica que este producto no debe eliminarse con el resto de residuos domésticos
dentro de la UE. Con el objetivo de proteger el medioambiente y la salud pública, recicle de forma
responsable para favorecer la reutilización de los recursos materiales. Para devolver su aparato
usado, utilice los sistemas de devolución y recogida o póngase en contacto con el vendedor del
producto. Este podrá proceder al reciclaje del producto de forma totalmente segura.
I
Corretto smaltimento di questo prodotto.
Questa marcatura indica che, nell'UE, questo prodotto non deve essere smaltito insieme agli altri
rifiuti domestici. A titolo preventivo per l'ambiente e la salute, deve essere riciclato in modo
responsabile per favorire il riutilizzo delle risorse materiali. Per mandare indietro l'apparecchio
usato, si prega di utilizzare il sistema di reso e raccolta o di contattare il rivenditore da cui è stato
acquistato il prodotto, il quale potrà procedere a riciclare il prodotto in totale sicurezza.
  • Page 1 1
  • Page 2 2
  • Page 3 3
  • Page 4 4
  • Page 5 5
  • Page 6 6
  • Page 7 7
  • Page 8 8
  • Page 9 9
  • Page 10 10
  • Page 11 11
  • Page 12 12
  • Page 13 13
  • Page 14 14
  • Page 15 15
  • Page 16 16
  • Page 17 17
  • Page 18 18
  • Page 19 19
  • Page 20 20
  • Page 21 21
  • Page 22 22
  • Page 23 23
  • Page 24 24
  • Page 25 25
  • Page 26 26
  • Page 27 27
  • Page 28 28
  • Page 29 29
  • Page 30 30
  • Page 31 31
  • Page 32 32
  • Page 33 33
  • Page 34 34
  • Page 35 35
  • Page 36 36
  • Page 37 37
  • Page 38 38
  • Page 39 39
  • Page 40 40
  • Page 41 41
  • Page 42 42
  • Page 43 43
  • Page 44 44
  • Page 45 45
  • Page 46 46
  • Page 47 47
  • Page 48 48
  • Page 49 49
  • Page 50 50
  • Page 51 51
  • Page 52 52
  • Page 53 53
  • Page 54 54
  • Page 55 55
  • Page 56 56
  • Page 57 57
  • Page 58 58
  • Page 59 59
  • Page 60 60
  • Page 61 61
  • Page 62 62
  • Page 63 63
  • Page 64 64

Focal SUB 600 P User manual

Category
Subwoofers
Type
User manual
This manual is also suitable for

Ask a question and I''ll find the answer in the document

Finding information in a document is now easier with AI