Page is loading ...

Kat. Nr. 60.1503
Bedienungsanleitung
Operating Instructions
Kat. Nr. 60.1503
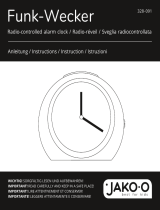
Radio-controlled alarm clock with double alarm bells
Radio-controlled alarm clock with double alarm bells
Thank you for choosing this instrument from TFA.
1. Before you start using it
•
Please make sure to read the instruction manual carefully. This information will help you
to familiarise yourself with your new device, to learn all of its functions and parts, to find
out important details about its first use, how to operate it and how to get advice in the
event of a malfunction.
• Following and respecting the instructions in your manual will prevent damage to your
instrument and loss of your statutory rights arising from defects due to incorrect use.
• We shall not be liable for any damage occurring as a result of not following these instruc-
tions.
• Please take particular note of the safety advice!
• Please keep this instruction manual for future reference.
2. Delivery contents
•
Radio-controlled alarm clock
•
Instruction manual
3. Field of operation and all the benefits of your new instrument at a glance
•
Radio-controlled clock with highest precision
•
Analogue display with fluorescent clock hands
•
Double alarm bells made of metal
•
Snooze function
•
Backlight
4. For your safety
•
This product is exclusively intended for the field of application described above. It should
only be used as described in your instruction manual.
•
Unauthorised repairs, modifications or changes to the product are prohibited.
Caution!
Risk of injury:
•
Keep this instrument and its battery out of the reach of children.
•
Batteries must not be thrown into a fire, short-circuited, taken apart or recharged. Risk of
explosion!
•
Batteries contain harmful acids. Low batteries should be changed as soon as possible to
prevent damage caused leaking.
•
Wear chemical-resistant protective gloves and glasses when handling leaking batteries.
Important information on product safety!
•
Do not place your product near extreme temperatures, vibrations or shocks. Protect it
from moisture.
5. Elements
Buttons
A: ON/OFF switch B: Dial for the alarm time
C: RESET button D: REC button
E: SET button F: SNOOZE/LIGHT button
Housing
G: Battery compartment
6. Getting started
•
Open the battery compartment and insert one new battery 1,5 V C, ensure that the polari-
ty is correct.
•
Your clock is ready for use.
• The clock hands will move to 12 o’clock and the clock will try to receive the radio signal (3 - 12
minutes).
•
When the time code is received, the radio-controlled time will be shown.
•
Twelve times a day the clock will receive the radio signal.
•
Manual initialization can be helpful. Press and hold REC button for 5 seconds. The
clock
hands
will move to 12 o’clock and the clock will try to receive the radio signal (3 - 12 min-
utes) again.
•
If the clock cannot detect the DCF-signal (for example due to disturbances, transmitting
distance, etc.), the time can be set manually. The clock will then work as a normal quartz
clock. (See: Manual setting of the clock).
Note for radio-controlled Time DCF
The time base for the radio-controlled time is a caesium atomic clock operated by the
Physikalisch Technische Bundesanstalt Braunschweig. It has a time deviation of less than one
second in one million years. The time is coded and transmitted from Mainflingen near Frank-
furt via frequency signal DCF-77 (77.5 kHz) and has a transmitting range of approximately
1,500 km. Your radio-controlled clock receives this signal and converts it to show the precise
time. Changeover from summer time or winter time is automatic. The quality of the recep-
tion depends mainly on the geographic location. Normally there should be no reception
problems within a 1,500 km radius around Frankfurt.
Please take note of the following:
•
The recommended distance to any interfering sources like computer monitors or TV sets is
at least 1.5 - 2 metres.
•
Inside ferro-concrete rooms (basements, superstructures), the received signal is naturally
weakened. In extreme cases, please place the unit close to a window to improve the recep-
tion.
•
During nighttime, the atmospheric interference is usually less severe and reception is pos-
sible in most cases. A single daily reception is adequate to keep the accuracy deviation
under 1 second.
7. Operation
7.1 Manual setting of the clock
•
Press and hold the SET button for five seconds.
•
Now hold the button until the desired time is indicated.
•
Press the button briefly and the hand will move minute by minute.
•
After the setting the second hand will move forward again.
•
The manually set time will be overwritten by the DCF time when the signal is received
successfully.
7.2 Setting of the alarm clock
•
Turn the alarm dial and set your respective alarm time (in direction of the arrow).
•
To activate the alarm function, move the ON/OFF switch to ON.
•
When the alarm time is reached, the alarm will ring.
•
When the alarm rings, press SNOOZE/LIGHT button and the snooze function will be acti-
vated. The alarm will be interrupted for 5 minutes.
•
Move the ON/OFF switch to OFF, the alarm function will be deactivated.
7.3 Backlight
•
Press the SNOOZE/LIGHT button. The backlight will come on for 3 seconds.
8. Care and maintenance
•
Clean your clock with a soft damp cloth. Do not use solvents or scouring agents.
•
Remove the battery if you do not use the product for a long period of time.
•
Keep your clock in a dry place.
8.1 Battery replacement
•
Replace the battery when the functions of the instrument become weak.
•
Open the battery compartment and insert one new battery 1,5 V C. Make sure the polarity
is correct. Close the battery compartment again.
9. Troubleshooting
Problems Solutions
No movement ➜ Ensure that the battery polarity is correct
of the clock hands ➜ Change the battery
No DCF reception ➜ Hold REC button for 5 min. and start a new reception
➜ Choose another place for your clock
➜ Check if there is any source of interference
➜ Wait for attempted reception during the night
➜ Manual setting of clock
➜ Restart the device according to the manual or use a pin to press
the RESET button
Incorrect indication ➜ Change the battery
If your device fails to work despite these measures contact the supplier from whom you pur-
chased it.
10. Waste disposal
This product has been manufactured using high-grade materials and components which can
be recycled and reused.
Never dispose of empty batteries and rechargeable batteries in household waste.
As a consumer, you are legally required to take them to your retail store or to
appropriate collection sites depending on national or local regulations in order
to protect the environment.
The symbols for the heavy metals contained are:
Cd=cadmium, Hg=mercury, Pb=lead
This instrument is labelled in accordance with the EU Waste Electrical and Elec-
tronic Equipment Directive (WEEE).
Please do not dispose of this instrument in household waste. The user is obligat-
ed to take end-of-life devices to a designated collection point for the disposal of
electrical and electronic equipment, in order to ensure environmentally-compati-
ble disposal.
11. Specifications
Power consumption: Battery 1 x 1.5 V C (not included)
Housing dimension: 130 x 70 x 180 mm
Weight: 367 g (instrument only)
No part of this manual may be reproduced without written consent of TFA Dostmann. The technical data are cor-
rect at the time of going to print and may change without prior notice.
The latest technical data and information about your product can be found by entering your product number on
our homepage.
EU declaration of conformity
Hereby, TFA Dostmann declares that the radio equipment type 60.1503 is in compliance with Directive 2014/53/EU.
The full text of the EU declaration of conformity is available at the following internet address:
www.tfa-dostmann.de
E-Mail: [email protected]
TFA Dostmann GmbH & Co.KG, Zum Ottersberg 12, D-97877 Wertheim, Germany 09/16
F
B C D E
G
A
RoHS
TFA_No_60.1503_Anl_MULTI_09_16 16.09.2016 11:29 Uhr Seite 2
/