De Dietrich DOP942W Owner's manual

Type
Owner's manual

This manual is also suitable for

FR GUIDE D'UTILISATION
EN USER GUIDE
Four
Oven
2
Dear Customer,
You have just acquired a
DDEE DDIIEETTRRIICCHH
oven and we would like to
thank you.
Our research teams have created this new generation of appliances
for you. Their quality, appearance, functions and technological
advances make them exceptional products, showcases of our unique
know-how.
Your new
DDEE DDIIEETTRRIICCHH
oven will blend harmoniously into your
kitchen and perfectly combine cooking performance and ease of use.
We wanted to offer you a product of excellence.
In the line of
DDEE DDIIEETTRRIICCHH
products, you will also find a wide range of
cookers, hobs, ventilation hoods, dishwashers, and refrigerators, all of
which can be built in and all of which can be coordinated with your
new
DDEE DDIIEETTRRIICCHH
oven.
Of course, in an ongoing effort to better satisfy your demands with
regard to our products, our after-sales service department is at your
disposal and ready to listen in order to respond to all of your questions
and suggestions (contact information at the end of this booklet).
And log onto our website:
wwwwww..ddeeddiieettrriicchh--eelleeccttrroommeennaaggeerr..ccoomm
where you will find our latest
innovations as well as additional useful information.
DDEE DDIIEETTRRIICCHH
SSeettttiinngg NNeeww VVaalluueess
As part of our commitment to constantly improving our products, we reserve the right to make
changes to them based on advances to their technical, functional and/or aesthetic properties.
Important:
Before installing and using your appliance, please read this Installation and Usage
Guide carefully, as it will allow you to quickly familiarise yourself with its operation.
3
EN
TABLE OF CONTENTS
1 / DESCRIPTION OF YOUR APPLIANCE
Introduction to your oven
____________________________________
4
Introduction to the programmer
______________________________
5
Introduction to the selection buttons
__________________________
6
2 / USING YOUR APPLIANCE
Using the programmer
º How to set the time
_____________________________________
7
º Immediate cooking
_____________________________________
8
Programmed cooking
º Immediate start
________________________________________
9
º Delayed start
__________________________________________
10
Using the timer function
_____________________________________
11
Personalising the recommended temperature
___________________
12
Locking the controls
________________________________________
12
3 / OVEN COOKING MODES
_______________________________________
13
4 / GUIDE TO I.C.S. FUNCTIONS
___________________________________
15
6 / CARING FOR AND CLEANING YOUR OVEN
_______________________
18
7 / AFTER-SALES SERVICE
Service calls
______________________________________________
21
4
EN
1 / DESCRIPTION OF YOUR APPLIANCE
INTRODUCTION TO YOUR OVEN
A
B
Programmer
Controls
Lamp
C
D
E
Wire shelf supports
Hole for rotisserie
D
C
B
A
E
5
EN
1 / DESCRIPTION OF YOUR APPLIANCE
INTRODUCTION TO THE PROGRAMMER
A
P
A
B
Cooking modes display
Oven temperature display
Shelf support indicator and
selected cooking mode indicator.
Temperature rise indicator
Adjustment buttons
Settings confirmation touchpads
Clock or timer display
Adjust cooking times/cooking end
time and clock settings
Timer indicator
C
D
E
Control panel lock indicator (child safety device).
Temperature adjustment
Start/Stop
Cooking end time display
Cooking end time indicator
Cooking time indicator
Cooking time display
Cleaning indicator Pyrolysis lock
F
G
H
I
C
D
F
E
H
K
L
O
N
Q
J
I
G
M
J
K
L
M
N
O
P
Q
R
R
B
S
S
ICS Intelligent cooking systém
6
1 / DESCRIPTION OF YOUR APPLIANCE
EN
INTRODUCTION TO THE SELECTION BUTTONS
Roast beef
Roast pork
Lamb
Fish
Chicken
Pizza
Stuffed vegetables
Soufflés
Savoury tarts
Sweet tarts
Small biscuits
Cakes
7
2 / USING YOUR APPLIANCE
EN
How to set the time
--
When plugged in
The display flashes 12:00 (fig.1).
Set the time by pressing the + or - buttons
(holding your finger on the button allows you
to scroll through the numbers rapidly) (fig.2).
Example: 12:30
Press the button to confirm.
The display stops flashing (fig.3).
- To set the time on the clock
Press on the button for a few seconds
until the display starts flashing (fig.1), then
release.
Audible beeps indicate that it is now possible
to set the time.
Adjust the clock setting with the + and -
buttons (fig.2).
Press the
OOKK
button to confirm.
Warning
If the OK touch control is not
pressed, the adjustment will be
automatically recorded after a few
seconds.
USING THE PROGRAMMER
fig.1
fig.2
fig.2
fig.3
fig.1
8
2 / USING YOUR APPLIANCE
EN
•Immediate cooking
The programmer should display only the
time. It should not be flashing.
Press the touch control (fig.1) then use the
touch controls + or - to select your cooking
(fig.2).
Example: —> shelf support 2 recommended.
Confirm with the touch control
OOKK
.
The cooking indicator freezes. The shelf
support indicator and the working elements
appear.
The oven begins heating.
Place your dish in the oven based on the
recommendation shown in the display.
Your oven recommends the optimal
temperature for the chosen cooking mode.
However, you can still adjust the temperture
by pressing the touch control under the
display (fig.3).
The “C” flashes in the display to indicate that
you can adjust the termperature by pressing
the + or - buttons (fig.4).
Example: —> set to 220°C.
Confirm with the touch control
OOKK
.
The temperature rise indicator indicates
the temperature increase in the oven.
A series of beeps will sound when the oven
reaches the selected temperature.
To stop cooking, press and hold the touch
control for a few seconds .
Warning
All types of cooking are done with the door closed.
Warning
After a cooking cycle, the cooling fan continues to operate for a period of time in
order to guarantee optimal oven reliability.
fig.2
fig.1
fig.3
fig.4
9
2 / USING YOUR APPLIANCE
EN
--
Cooking with immediate start and
programmed duration
- Select the desired cooking mode and adjust the
temperature (see paragraph: immediate
cooking).
- Press the touch control until the cooking
duration indicator starts to flash .
The display starts flashing 0:00 to indicate you
can now adjust the setting (fig.
1).
- Press the
++
or
--
touch controls to set the desired
time.
Example: 30 mins cooking time (fig.
2).
Confirm with the touch control
OOKK
.
The cooking time is automatically recorded after
a few seconds.
The cooking time display stops flashing.
The countdown of the cooking time begins
immediately after it has been set.
AAfftteerr tthheessee tthhrreeee sstteeppss,, tthhee oovveenn hheeaattss uupp::
A series of beeps will sound when the oven
reaches the selected temperature.
At the end of cooking (end of programmed time),
- the oven turns off,
- the cooking time indicator and 0:00 both start to
flash (fig.
3),
- a series of beeps sounds for a few minutes.
Press any button to stop the beeping.
PROGRAMMED COOKING
fig.2
fig.1
fig.3
10
2 / USING YOUR APPLIANCE
EN
--
Cooking with delayed start and chosen
cooking end time
PPrroocceeeedd aass wwiitthh pprrooggrraammmmeedd ccooookkiinngg..
- Press the touch control until the cooking
end time starts flashing .
The display starts flashing to indicate you can
now adjust the setting (fig.
1).
- Press the touch control
++
or
--
to set the
desired cooking end time.
Example: end of cooking at 16:00 (fig.
2).
Confirm with the touch control
OOKK
.
The cooking end time is automatically
recorded after a few seconds.
The cooking end time display stops flashing.
AAfftteerr tthheessee 33 sstteeppss,, tthhee oovveenn hheeaattiinngg iiss
ddeellaayyeedd ssoo tthhaatt ccooookkiinngg eennddss aatt 1166::0000..
At the end of cooking (end of programmed
time),
- the oven turns off,
- the cooking time indicator and 0:00 both
start to flash (fig.
3),
- a series of beeps sounds for a few minutes.
Press any button to stop the beeping.
The display returns to the time of day.
The cavity lights up until cooking begins, and
remains lit until cooking is finished.
PROGRAMMED COOKING
fig.1
fig.2
fig.3
11
2 / USING YOUR APPLIANCE
EN
-- YYoouurr oovveennss pprrooggrraammmmeerr ccaann bbee uusseedd aass aann
iinnddeeppeennddeenntt ttiimmeerr tthhaatt aalllloowwss yyoouu ttoo ccoouunntt
ddoowwnn aa ttiimmee wwiit
thhoouutt ooppeerraattiinngg tthhee oovveenn..
In this case, the timer display has priority over
the clock display.
- Press the touch control 3 times (fig.1).
The timer symbol and 0:00 start flashing.
- Adjust the chosen time by pressing the
++
or
--
buttons (fig.2).
- Press the touch control
OOKK
to confirm or wait
a few seconds.
Warning
It is possible to change or cancel the timer at any time.
USING THE TIMER FUNCTION
The display stops flashing after a few seconds and the timer starts working, counting down the
time in seconds.
Once the time has expired, the timer emits a series of beeps to notify you.
Press any button to stop the beeping.
fig.1
fig.2
12
2 / USING YOUR APPLIANCE
EN
PERSONALISING THE RECOMMENDED TEMPERATURE
Select the cooking function:
- Press the touch control
OOKK
..
If you wish to customise the recommended temperature:
- Press the touch control until the temperature starts flashing.
- Press the + or - button until the desired temperature appears.
- Press
OOKK
to confirm.
LOCKING THE CONTROLS (CHILD SAFETY)
OVEN OFF
You have the option of preventing access to
the oven controls by taking the following
steps:
With the oven off, press on the touch control
OOKK
for several seconds until a “key” appears
on the screen -> access to the oven controls
is now blocked (fig.1).
To unlock access, press on the touchpad
OOKK
for several seconds.
The oven controls are once again accessible.
Warning
You cannot lock the oven if you have programmed a cooking cycle.
fig.1
13
3 / OVEN COOKING MODES
EN
*
Program(s) used to obtain the results indicated on the energy label in accordance with European
standard EN 50304 and European Directive 2002/40/CE.
CCIIRRCCUULLAATTIINNGG HHEEAATT
(recommended temperature
118800°°CC
min 35°C max 235°C)
Cooking is controlled by the heating element located at the bottom of the oven and
by the fan.
Rapid temperature increase: Some dishes can be placed in the oven while it is still
cold.
Recommended for keeping white meat, fish and vegetables moist.
For cooking multiple items on up to.3 levels.
CCOOMMBBIINNEEDD HHEEAATT
(recommended temperature
220055°°CC
min 35°C max 275°C)
Cooking controlled by the upper and lower heating elements and by the fan.
Three combined sources of heat: a lot of heat from the bottom, a little circulating heat
and a bit from the grill.
Recommended for quiches, pies, wet fruit tarts, placed in a dish on a baking sheet
which is preferably non-stick.
EECCOO
(recommended temperature
220000°°CC
min 35°C max 275°C)
Cooking controlled by the upper and lower heating elements.
This position allows energy savings while maintaining the quality of the cooking.
The ECO position is used for energy label performance.
All types of cooking are done
wwiitthhoouutt pprreehheeaattiinngg..
FFAANN GGRRIILLLL ++ RROOTTIISSSSEERRIIEE
(recommended temperature
220000°°CC
min 180°C max 230°C)
Cooking controlled, alternately, by the upper element and by the fan.
Preheating is unnecessary. Roasts and poultry are juicy and crispy all over.
The spit keeps turning until the door is opened.
Slide the drip tray onto the bottom shelf support.
Recommended for all poultry and roasts on the spit, for cooking leg joints thoroughly,
and cuts of beef. To keep fish steaks moist.
VVAARRIIAABBLLEE GGRRIILLLL MMEEDDIIUUMM AANNDD HHIIGGHH ++ SSPPIITT
(recommended positions
22 oorr 44
- min 1 - maxi 4)
Cooking is done by the upper element.
The double grill covers the entire grid surface. The grill is as effective on medium as
on high, for small quantities.
They are recommended for grilling chops, sausages, toast or prawns placed on the
grid.
*
*
14
3 / OVEN COOKING MODES
EN
KKEEEEPPIINNGG TTHHIINNGGSS WWAARRMM
(recommended temperature
8800°°CC
min 35°C max 100°C)
This position allows you to keep your dishes hot by occasional heating from the
bottom of the oven along with the fan.
Recommended for letting dough rise for bread, brioche, kugelhopf, etc, without
exceeding 40°C (plate warming, defrosting).
BBRREEAADD
(recommended temperature
220055°°CC
min 35°C max 275°C)
Cooking sequence recommended for baking bread.
After preheating, place the ball of dough on the pasty dish - 2nd shelf.
Do not forget to place a ramekin of water on the bottom to get a crispy, shiny crust.
IINNTTEELLLLIIGGEENNTT CCOOOOKKIINNGG SSYYSSTTEEMM
15
4 / GUIDE TO I.C.S. FUNCTIONS
EN
The ICS (Intelligent Cooking System) function will completely simplify cooking for you because the
oven will automatically calculate all the cooking parameters (temperature, cooking time, cooking
mode) based on the selected dish thanks to its electronic sensors located in the oven that
THE “I.C.S.” FUNCTION
OOPPEERRAATTIINNGG TTHHEE IICCSS FFUUNNCCTTIIOONN::
This cooking mode takes place in two phases:
1) A data search phase during which the oven begins heating and determines the ideal cooking
NN..BB..:: NNoo pprreehheeaattiinngg iiss rreeqquuiirreedd ttoo uussee tthhee IICCSS ffuunnccttiioonn.. CCooookkiinngg AABBSSOOLLUUTTEELLYY mmuusstt bbeeggiinn iinn aa
ccooooll oovve
enn.. IItt iiss uusseeffuull ttoo wwaaiitt ffoorr yyoouurr oovveenn ttoo ccooooll ddoowwnn ccoommpplleetteellyy bbeeffoorree ssttaarrttiinngg aa sseeccoonndd
ccooookkiinngg pprrooggr
raammmmee,, iiff nnoott,, iitt wwiillll ssttaarrtt bbeeeeppiinngg ttoo iinnddiiccaattee tthhaatt tthhee oovveenn iiss hhoott..
2) A second cooking phase: The oven has determined the time required and displays it, along
with the cooking end time. The remaining cooking time indicated takes into account the cooking
time from the first phase. You can now open the door (e.g. to baste a roast).
- The oven turns itself off when the cooking time has ended.
DDEELLAAYYEEDD SSTTAARRTT FFUUNNCCTTIIOONN::
To program a delayed start,
- Press the cooking end time touch control until the indicator starts flashing and change
the cooking end time.
PLEASE NOTE: If you want to programme a subsequent ICS cooking cycle, wait until the oven
has cooled completely. However, you can use the “manual” function even if the oven is hot.
WWaarrnniinngg:: DDoo nnoott ooppeenn tthhee ddoooorr dduurriinngg tthhiiss pphhaassee oorr yyoouu mmaayy ddiissttuurrbb tthhee rreeccoorrddiinngg ooff ddaattaa..
TThhiiss ddaattaa
sseeaarrcchh pphhaassee iiss ssyymmbboolliisseedd bbyy rroottaattiinngg aarrrroowwss..
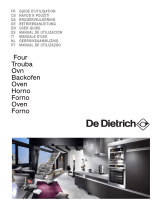
- Press the touch control then use the
touchpad + to select the function
IICCSS
(fig.1).
- Confirm with the touch control
OOKK
.
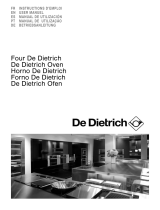
The oven offers a choice of 12 dishes:
- Press the + or - button to select your dish.
Example: Soufflés
One you have selected your dish, slide it into the
oven at the shelf support requested.
- Confirm by pressing the
OOKK
button to start
cooking (fig.2).
fig.1
fig.2
16
I.C.S. FUNCTIONS
EN
RR
ooaasstt
BB
eeeeff
• Roast beef
(prepared rare)
• Place the roast on the grid using the grid + drip
tray assembly.
YYoouu ccaann ttuurrnn iitt oovveerr wwhheenn tthhee ccooookkiinngg ttiimmee bbeeccoommeess
ffiixxeedd..
RR
ooaasstt
PP
oorrkk
• Pork roasts
- Loin
- Tenderloin
LL
aammbb
• Leg of 1kg to 2,500kg
• Place the roast on the grid using the grid + drip
tray assembly.
YYoouu ccaann ttuurrnn iitt oovveerr wwhheenn tthhee ccooookkiinngg ttiimmee bbeeccoommeess
ffiixxeedd..
FF
iisshh
• Whole fish
(sea bream, pollock, trout, mackerel, etc.)
• Roasted fish
CC
hhiicckkeenn
• Chickens weighing 1 to 1.7 kg
• Duck, guinea fowl, etc.
PP
iizzzzaa
• Fresh store-bought pizza
• Ready-to-use pizza dough
• Home-made pizza dough
• Frozen pizza
VV
eeggeettaabblleess
ssttuuffffeedd
• Tomatoes, stuffed peppers & vegetables
• Lasagna (fresh or frozen)
• Shepherd’s pie, brandade, etc.
SS
oouufffflléé
Use a tall mould with straight edges and a diameter
of 21cm.
TT
aarrttss
((ssaavvoouurryy))
• Fresh quiches
• Frozen quiches
• Frozen mini-pastry
TT
aarrttss
((sswweeeett))
• Fresh tarts
• Frozen tarts
SS
mmaallll
BB
iissccuuiittss
• Small individual pastries: cookies, croissants, buns,
fruit bread in a mould, croque-monsieur.
CC
aakkeess
Home-style cakes: sweet or savoury loaves,
pound cake.
Ready-to-mix batters in packets.
17
I.C.S. FUNCTIONS
EN
Take the roast out of the refrigerator at least one hour before starting the cooking programme:
If you prefer meat rare; if you prefer it well done, opt for a traditional cooking function.
Trim away as much fat as possible: it causes smoke.
At the end of cooking, allow the meat to sit for 7 to 10 minutes wrapped in a sheet of aluminium foil before
carving.
• Take the roast out of the refrigerator at least one hour before starting the cooking programme: the colder the
meat is, the closer it will be to the end of cooking.
Use an earthenware dish. Add one to two tablespoons of water.
At the end of cooking, allow the meat to sit for 7 to 10 minutes wrapped in a sheet of aluminium foil before
carving. Add salt when cooking is finished.
Take the meat out of the refrigerator at least one hour before starting the cooking programme:
Select a leg that is round and plump rather than long and lean.
Wrap the meat in aluminium and let it sit after cooking.
Use this function only for whole fish cooked with herbs and white wine.
(Grilled fish or papillote preparations require that the oven be preheated.)
Turnspit cooking: do not forget to place the drip tray on the first shelf support to catch the drippings.
Cooking in a dish: Opt for earthenware dishes to avoid splattering.
Pierce the skin of poultry to avoid splattering.
Place it on the grid for a crispy crust (you can place a sheet of parchment paper between the grid and the
pizza to protect the oven from cheese drippings).
Place the pizza on the baking tray for a soft crust.
Properly adjust the dimensions of the dish to the quantity of food to be cooked to avoid juices spilling over.
Butter the mould and do not touch the inside with your fingers or the soufflé will not rise.
• Use a non-stick aluminium mould: the crust will be crispy on the bottom.
• Remove the tray from frozen quiches before placing them on the grid.
• Use a non-stick aluminium mould:
• The crust will be crispy on the bottom.
• Small individual cakes made on a pastry tray and placed on the grid.
Puff pastry must be cooked on “CAKES” to achieve good results.
Cakes made in a cake mould, round, square... and always placed on the grid.
It is possible to place two cake moulds side by side.
18
EN
6 / CARING FOR AND CLEANING YOUR OVEN
--
Check that the programmer is displaying
the time of day and that it is not flashing.
You can choose between 2 lengths of time for
the pyrolysis:
Pyrocontrol: duration of pyrolysis between
1h30m and 2h12m depending on how dirty it is.
Pyro Max: pyrolysis duration 2h00m.
Press the touch control, then press “-”
once, and confirm by pressing
OOKK
(fig.1).
The pyrolysis duration by default displays
1h30 (fig.1), but you can make this longer or
shorter.
Example: pyrolysis cycle 2h00.
Press the + button to obtain the duration you
want (fig.2).
Confirm by pressing the touch control
OOKK
.
The pyrolysis starts. The duration starts to
count down immediately after it has been set.
The temperature rise symbol lights up.
During pyrolysis, the symbol flashes in the
programmer indicating that the door is
locked (fig.3).
When pyrolysis finishes, 0:00 flashes as well
as the symbol.
--
When the oven is cool, use a damp cloth to
remove the white ashes.
The oven is clean and once again ready for
the cooking application of your choice.
DOING A PYROLYSIS
•Immediate pyrolysis
Warning
Remove the grids and trays from the oven and clean any major spill residue.
fig.1
fig.2
fig.3
19
EN
6 / CARING FOR AND CLEANING YOUR OVEN
•Delayed pyrolysis
--
Follow the instructions described in the
section “Programming for immediate
pyrolysis”.
After confirming the pyrolysis cycle with the
OOKK
button:
- Press the touch control.
The end of cooking time flashes to indicate
that it is now possible to set it (fig.1).
- Press the + or - button to set the desired end
time (fig.2).
Example: end of cooking at 18:00.
Confirm by pressing the touch control
OOKK
.
- After these steps, the beginning of pyrolsys is
delayed so that it finishes at 18:00.
DOING A PYROLYSIS
fig.1
fig.2
20
EN
NOTES
  • Page 1 1
  • Page 2 2
  • Page 3 3
  • Page 4 4
  • Page 5 5
  • Page 6 6
  • Page 7 7
  • Page 8 8
  • Page 9 9
  • Page 10 10
  • Page 11 11
  • Page 12 12
  • Page 13 13
  • Page 14 14
  • Page 15 15
  • Page 16 16
  • Page 17 17
  • Page 18 18
  • Page 19 19
  • Page 20 20
  • Page 21 21
  • Page 22 22

De Dietrich DOP942W Owner's manual

Type
Owner's manual
This manual is also suitable for

Ask a question and I''ll find the answer in the document

Finding information in a document is now easier with AI