Temperature regulation
The temperature may be changed by
pressing the button (B).
The current temperature setting flashes and
by pressing button (B) again the set tem-
perature is possible to change in steps of
one degree.
The selected-temperature will be reached
within 24 hours.
Functions Menu
By activating the button (D) the functions
menu is operating.
Each function could be confirmed by press-
ing button (E). If there is no confirmation af-
ter some seconds the display will go out
from the menu and return in normal condi-
tion.
The following functions are indicated:
Child Lock function
Shopping function
Eco Mode function
Extra Humidity function
Child Lock Function
The Child Lock function is activated by
pressing key (D) (several times if necessary)
until the corresponding icon appears
.
You must confirm the choice by pressing
key (E) within few seconds. You will hear
the buzzer and the icon remains lighted. In
this condition any possible operation
through the keys does not cause any
change as long as this function is activated.
It is possible to de-activate the function at
any time by pressing key (D) until the corre-
sponding icon will flash and then key (E).
Shopping Function
If you need to insert a large amount of
warm food, for example after doing the gro-
cery shopping, we suggest activating the
Shopping function to chill the products
more rapidly and to avoid warming the oth-
er food which is already in the refrigerator.
The Shopping function is activated by
pressing key (D) (several times if necessary)
until the corresponding icon appears
.
You must confirm the choise by pressing
key (E) within few seconds. You will hear
the buzzer and the icon remains lighted.
The Shopping function shuts off automati-
cally after approximately 6 hours. It is possi-
ble to de-activate the function at any time
by pressing key (D) until the corresponding
icon will flash and then key (E).
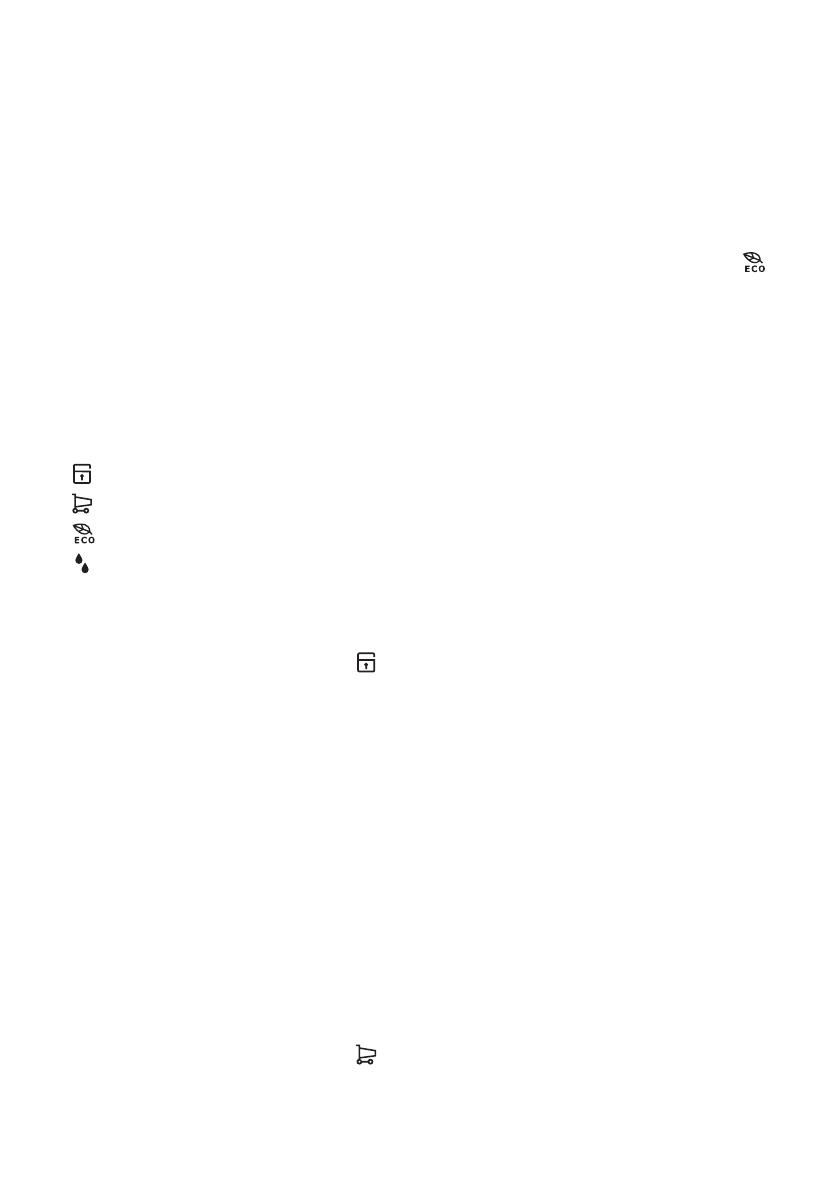
Eco Mode Function
The Eco Mode function is activated by
pressing button D (several times if necessa-
ry) until the corresponding icon appears
(or setting the temperature at +5°C).
You must confirm the choice by pressing
button E within few seconds. You will hear
the buzzer and the icon remains lighted.
In this condition the chosen temperatures
are automatically set (+5°C), in the best
conditions for storing food.
It is possible to de-activate the function at
any time by changing the selected temper-
ature in the compartment.
Extra Humidity function
If you need to increase the humidity in the
refrigerator, we suggest activating the Extra
Humidity function.
The Extra Humidity function is activated by
pressing button (D) (several times if neces-
sary) until the corresponding icon appears.
You must confirm the choice by pressing
button (E) within few seconds. You will hear
the buzzer and the icon remains lighted.
It is possible to de-activate the function at
any time by pressing button (D) until the
corresponding icon will flash and then but-
ton (E).
Holiday Function H
The Holiday function sets the temperature
at approx +15°C. This function allows you
to keep the refrigerator shut and empty dur-
ing a long holiday period ( e. g. the summer
holidays) without the formation of a bad
smell.
The Holiday Function H may be regulated
by pressing the button B. By pressing the
button B the current temperature setting
flashes on the indicator. Press the button B
again. When on the display appears the let-
ter H confirm the choice of the temperature
or by pressing the button E, (you will hear
the buzzer) or by waiting for some seconds
(you will not hear the buzzer).
Now the refrigerator is in the Holiday func-
tion in the energy- saving mode and the in-
electrolux 5


