Page is loading ...

In the USA: if you experience problems with this unit,
call 732-346-0061 for GCI Technologies
customer service. Do not attempt to return
this equipment to your dealer.
Parts of the design of this product may be protected by worldwide patents. Information in this manual is subject to change without notice and does not represent a com-
mitment on the part of the vendor. GCI Technologies Corp. shall not be liable for any loss or damage whatsoever arising from the use of information or any error contained
in this manual. No part of this manual may be reproduced, stored in a retrieval system or transmitted, in any form or by any means, electronic, electrical, mechanical, optical,
chemical, including photocopying and recording, for any purpose without the express written permission of GCI Technologies Corp. It is recommended that all maintenance
and service on this product is performed by GCI Technologies Corp. or its authorized agents. GCI Technologies Corp. will not accept liability for loss or damage caused by
maintenance or repair performed by unauthorized personnel.
Worldwide Headquarters
1 Mayeld Ave, Edison, NJ 08837, USA
Tel: (732) 346-0061 • Fax: (732) 346-0065
Latin America, Mexico, and Caribbean • GCI Technologies
8320 NW 68 Street
Miami, FL 33166, USA
Tel: (305) 592-4746 • Fax: (305) 592-4746
UK • GCI Technologies
44 The Brambles Enterprise Centre, PO7 7TH Waterlooville, UK
Tel: 087 087 00880 • Fax: 087 087 00990
Spain • GCI Technologies S.A.
Caspe, 172 - 1º A
08013 Barcelona, Spain
Tel: 34 93 436 37 00
Fax: 34 93 347 69 61
France • GCI Technologies France S.A.R.L
2bis, rue Léon Blum, 91120 Palaiseau, France
Tél: + 33 1 69 79 97 70 • Fax: + 33 1 69 79 97 80
Germany • GCI Technologies GmbH
Lerchenstraße 14, 80995 München, Germany
Tel: 089 - 319 019 8 - 0 • Fax: 089 - 319 019 8-18
© GCI Technologies Corp. 2011 All Rights Reserved.

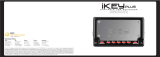
Rackmount Digital Recorder
Instruction Manual | Manual de instrucciones | Manuel d’instructions | Bedienungshandbuch
RM3

2
Contents
Contenidos | Sommaire | Inhaltsverzeichnis
en |
Contents |
Warning ............................................................................
Diagrams ...........................................................................
Introduction .....................................................................
Connections and System Control ..............................
Specications ...................................................................
Product Registration.......................................................
Support..............................................................................
fr |
Sommaire |
Avertissement..................................................................
Diagrammes ....................................................................
Introduction ....................................................................
Connexions & Utilisation .............................................
Caractéristiques techniques ........................................
Enregistrement du produit ..........................................
Assistance ........................................................................
es |
Contenidos |
Advertencia ..........................................................
Diagramas .............................................................
Introducción .........................................................
Conexiones y Control de sistema ..................
Especicaciones ...................................................
Registro de Producto .........................................
Servicio al cliente ................................................
de |
Inhaltsverzeichnis |
Warnungen ...........................................................
Darstellungen .......................................................
Einleitung ...............................................................
Anschlüsse und Systemeinstellungen ..............
Technische Daten ................................................
Produktregistrierung ..........................................
Support Kontakt ..................................................
3
4
5
6
12
39
39
3
4
22
23
30
39
39
3
4
13
14
21
39
39
3
4
31
32
38
39
39

PLEASE READ CAREFULLY BEFORE PROCEEDING
Always follow the basic precautions listed below to
avoid the possibility of serious injury or even death
from electrical shock, short-circuiting, damages, re or
other hazards.
• READ INSTRUCTIONS:
- All the safety and operating instructions should be
read before the product is operated.
• RETAIN INSTRUCTIONS:
- The safety and operating instructions should be re-
tained for future reference.
-All the safety and operating instructions should be
read before the product is operated.
• HEED WARNINGS:
- All warnings on the product and in the operating in-
structions should be adhered to.
• FOLLOW INSTRUCTIONS:
- All operating and use instructions should be fol-
lowed.
• CLEANING:
- The product should be cleaned only with a polishing
cloth or a soft dry cloth.
- Never clean with furniture wax, benzine, insecticides
or other volatile liquids since they may corrode the
cabinet.
• WATER AND MOISTURE:
- Do not use this product near water, for example, near
a bathtub, wash bowl, kitchen sink, or laundry tub; in a
wet basement; or near a swimming pool; and the like.
• DO NOT OPEN:
- Do not open the device or attempt to disassemble
the internal parts or modify them in any way. The de-
vice contains no user- serviceable parts. If it should
appear to be malfunctioning, discontinue use imme-
diately and have it inspected by qualied GEMINI ser-
vice personnel.
• REPLACEMENT PARTS:
- When replacement parts are required, be sure the
service technician has used replacement parts speci-
ed by the manufacturer or have the same character-
istics as the original part. Unauthorized substitutions
may result in re, electric shock, or other hazards.
WARNING • ADVERTENCIA • AVERTISSEMENT • WARNUNGEN
POR FAVOR LEA DETENIDAMENTE ANTES DE PROCEDER
Siguiendo siempre las precauciones básicas indi-
cadas a continuación para evitar la posibilidad de
lesiones serias incluso la muerte por descarga eléc-
trica, cortocircuito, daños, fuego u otros peligros.
• LEA LAS INSTRUCCIONES:
- Todas las instrucciones de seguridad y funciona-
miento deben ser leídas antes de hacer funcionar el
producto.
.• CONSERVE LAS INSTRUCCIONES:
- Las instrucciones de seguridad y funcionamiento
se deben conservar para futuras consultas.Todas las
instrucciones de seguridad y funcionamiento deben
ser leídas antes de hacer funcionar el producto.
• PRESTEN ATENCION A LAS ADVERTENCIAS:
- Todas las advertencias e instrucciones de funciona-
miento del producto deben ser tenidas en cuenta.
• SIGAN LAS INSTRUCCIONES:
- Todas las instrucciones de funcionamiento y uso
deben ser seguidas.
• LIMPIEZA:
- El producto debe ser limpiado solamente con un
paño limpio o un paño seco. Nunca limpien con cera
para muebles, gasolina, insecticidas u otros líquidos
volátiles que puedan corroer el recinto.
• AGUA Y HUMEDAD:
- No use este producto cerca del agua, por ejemplo,
cerca de la bañera, lavamanos, fregadero o la lava-
dora; en un sótano húmedo, o cerca de una piscina;
o parecidos.
• NO LO ABRA:
- No abrá el aparato o intente desmontar las partes
internas o modicarlas de alguna manera. El aparato
no contiene partes inservibles. Caso de que pareciera
que no funcionara, deje de usarlo inmediatamente y
haga que sea revisado por un técnico cualicado de
GEMINI.
• PIEZAS DE RECAMBIO:
- Cuando son necesarias piezas de recambio, tengan
por seguro que el servicio técnico ha usado piezas
de recambio especícas de la marca o de las mismas
características como las originales. Recambios no
autorizados pueden ocasionar incendios, descargas
eléctricas u otros peligros.
LIRE LES INSTRUCTIONS AVANT TOUTE UTILISATION
Veuillez prendre connaissance des instructions suiv-
antes an de prévenir tout accident et/ou mauvaise
utilisation du produit. Le non respect de ces principes
de base peut entraîner différents risques: blessure,
choc électrique , court-circuit, dommage & risque
d’incendie.
• LIRE LES INSTRUCTIONS:
- Toutes les notications techniques et de sécurité
doivent être lues avant utilisation du produit.
• CONSERVATION DU MANUEL D’INSTRUCTIONS:
- Le manuel d’instructions doit être conservé à l’abri
pour un usage futur. Veuillez vous y reporter en cas
de nécessité et avant toute utilisation du produit.
• MISES EN GARDE:
- Vous devez prendre connaissance de toutes les
mises en garde et y adhérer avant toute utilisation du
produit.
• SUIVI & RESPECT DES INSTRUCTIONS:
- Toutes les instructions de fonctionnement &
d’utilisation doivent être respectées.
• ENTRETIEN/NETTOYAGE:
- Cet appareil ne doit être nettoyé qu’avec un chif-
fon légèrement humide ou tissu de polissage. Ne ja-
mais utiliser de produit de nettoyage pour meuble,
benzine, insecticide ou tout autre produit volatile qui
pourrait entraîner une corrosion de l’enceinte.
• EAU & HUMIDITE:
- Ne pas utiliser cet appareil à proximité d’un robinet,
d’un évier, d’une douche, d’une baignoire, d’une pi-
scine. Ne pas installer l’enceinte sur un sol humide.
• NE PAS OUVRIR:
- Ne pas démonter l’appareli an d’accéder aux
composants internes en vue d’une éventuelle répa-
ration/modication. Cet appareil ne contient pas de
pièces/composants qui puissent être réparés par
l’utilisateur. En cas de panne/dysfonctionnement,
veuillez contacter votre revendeur ou le service tech-
nique de GEMINI au 01 69 79 97 79 (FRANCE).
• REMPLACEMENT DE PIECES DETACHEES:
En cas d’intervention technique, veillez à ce que
le technicien n’utilise que des pièces d’origine ou
recommandées par le constructeur. L’utilsation de
composants non spéciés par le constructeur pour-
rait entrainer un mauvais fonctionnement, ainsi que
divers risques (Incendies, choc électrique, court-cir-
cuit...) & l’annulation de la garantie.
BITTE UNBEDINGT VOR INBETRIEBNAHME LESEN
Folgen Sie stets den nachfolgenden Vorsichtsmaß-
nahmen, um die Möglichkeit von schweren Verletzun-
gen oder gar eines tödlichen elektrischen Schlages
sowie Kurzschluss, Beschädigung, Feuer oder an-
derer Gefahren zu verhindern.
• ANWEISUNGEN LESEN:
- Lesen Sie alle Sicherheits- und Bedienungsan-
weisungen, bevor Sie mit dem
Produkt arbeiten.
• AUFBEWAHRUNGSHINWEIS:
- Bewahren Sie alle Sicherheits- und Bedienungs an-
weis ungen gut auf.
• WARNHINWEISE:
- Alle Warnhinweise für das Produkt und die
Bedienungsan weis ungen müssen
genau eingehalten werden.
• ANWEISUNGEN BEFOLGEN:
- Alle Anweisungen zum Betrieb des Produkts sollten
be folgt werden.
• REINIGUNG:
- Das Produkt sollte nur mit einem Polier- oder einem
weichen trockenen Tuch gereinigt werden. Benutzen
Sie dazu niemals Möbelwachs, Benzine, In sekten -
mittel oder andere üchtige Reinigungsmittel, denn
Sie könnten zur Korrosion des Gehäuses führen.
• WASSER&FEUCHTIGKEIT:
- Benutzen Sie dieses Produkt nicht in der Nähe von
Was ser, z. B. in der Nähe einer Badewanne, einer
Waschschüssel, eines Küchenspül beckens, eines
Waschbeckens, in einem feuchten Keller, in der Nähe
eines Schwimmbeckens oder an ähnlichen Orten.
• NICHT ÖFFNEN:
- Öffnen Sie niemals das Produkt und versuchen Sie
nicht, interne Baugruppen zu entnehmen oder zu
modizieren. Das Produkt enthält keine vom Nutzer
zu wechselnde Ersatzteile. Sollten Sie eine Fehlfunk-
tion feststellen stellen Sie unverzüglich den Betrieb
des Produktes ein und lassen Sie es von qualizier-
tem GEMINI Servicepersonal prüfen.
• ERSATZTEILE:
- Wenn Ihr Produkt Ersatzteile benötigt, achten Sie
darauf, dass der Servicetechniker nur vom Hersteller
erlaubte Ersatzteile oder Ersatzteile, die gleichen Ei-
genschaften wie die originalen Teile aufweisen, ein-
setzt. Falsche Ersatzteile können zu Bränden, elek-
trischen Schlägen oder anderen Risiken führen.
Warning
Advertencia • Avertissement • Warnungen
3

Congratulations on purchasing an iKEY-AUDIO RM3 RACK MOUNTED DIGI-
TAL RECORDER. With this state of the art device, you can record and transfer
recordings of any instrument or line signal: mixer, vocals, guitar, bass, keyboard,
or electric instrument. This next generation recording device features the latest
advancements in engineering and is backed by a One year limited warranty*.
Prior to use, we urge that you carefully read all instructions.
Your iKEY-AUDIO RM3 has been carefully inspected and tested before pack-
ing and shipping. After unpacking, carefully inspect it for exterior damage
and immediately report any physical damage during transit to your shipping
carrier. Save the shipping boxes and all packaging materials in case the unit
needs to be returned to your local dealer or GCI Technologies.
(1) AC/DC Power Adaptor
(1) User Manual -
(1) SD Memory Card
(1) Cable for PC Connection
• 19” 1U Rack Mount
• Full color LCD screen
• Records from any MONO or STEREO line source
• Records 128, 256 and 320 kbps MP3 les and WAV les
• Record direct to USB key drive (not included)
• Combo XLR and 1/4 inch (6.35 mm) Microphone inputs with Mic/Line
switch
• Front 1/4” (6.35 mm) Mic and Line Inputs
• Stereo 1/4 inch (6.35mm) line inputs
• 1/4 inch (6.35 mm) headphone/line output
• Balanced XLR outputs
• Rear RCA Line Input and Output
• Rotary Phones/ Line volume control
• Input gain switch with 3 input gain levels – 20 db, 0 db and +10 db
• Adjustable record level with digital input VU
• Easily playback previously recorded media
• Easily download to a computer with the USB to PC data cable (in-
cluded)
• AC/DC adaptor (included)
Selecting ne audio equipment such as the unit you have just purchased is
only the start of your musical enjoyment. Now it’s time to consider how you
can maximize the fun and excitement your equipment offers. This Manu-
facturer and the Electronic Industries Association’s Consumer Electronics
Group want you to get the most out of your equipment by playing it at a safe
level. One that lets the sound come through loud and clear without annoying
blaring or distortion-and, most importantly, without affecting your sensitive
hearing. Sound can be deceiving. Over time your hearing “comfort level”
adapts to higher volumes of sound. So what sounds “normal” can actu-
ally be loud and harmful to your hearing. Guard against this by setting your
equipment at a safe level BEFORE your hearing adapts.
To establish a safe level:
- Start your volume control at a low setting.
- Slowly increase the sound until you can hear it comfortably and clearly,
and without distortion.
Once you have established a comfortable sound level, set the dial and leave
it there. Taking a minute to do this now will help to prevent hearing damage
or loss in the future. After all, we want you listening for a lifetime.
Used wisely, your new sound equipment will provide a lifetime of fun and en-
joyment. Since hearing damage from loud noise is often undetectable until
it is too late, this Manufacturer and the Electronic Industries Association’s
Consumer Electronics Group recommend you avoid prolonged exposure to
excessive noise.
Introduction
Presentación • Introduction • Einleitung
5
Introduction
Unpacking
Additional Contents
Features
We Want You Listening For A Lifetime

Connections and System Control
Conexiones y Control de sistema • Connexions & Utilisation • Anschlüsse und Systemeinstellungen
6
This list of sound levels is included for your protection.
30 Quiet library, soft whispers
40 Living room, refrigerator, bedroom away from trafc
50 Light trafc, normal conversation, quiet ofce
60 Air conditioner at 20 feet, sewing machine
70 Vacuum cleaner, hair dryer, noisy restaurant
80 Average city trafc, garbage disposals, alarm clock at two feet
The following noises can be dangerous at extended exposure:
90 Subway, motorcycle, truck trafc, lawn mower
100 Garbage truck, chain saw, pneumatic drill
120 Rock band concert in front of speakers, thunderclap
140 Gunshot blast, jet plane
180 Rocket launch pad
Information courtesy of the Deafness Research Foundation.
(1) POWER (ON-OFF)
(2) DC Power input (AC adapter included)
(3) XLR/1/4” COMBO MIC IN
(4) RCA input
(5) 1/4” (6.35 mm) MIC IN
(6) Dual L/R (Stereo) 1/4” (6.35 mm) LINE IN
(7) Balanced XLR outputs
(8) RCA output
(9) PHONES/ LINE OUT
(10) LCD Screen
(11) RECORD LEVEL/ SEARCH
(12) STOP/ BACK
(13) PLAY/ PAUSE
(14) RECORD
(15) SD card slot (SD card included)
(16) USB data port
(17) TIME
(18) FORMAT/ STEREO-MONO
(19) PHONES/ LINE VOLUME
(20) MIC/ LINE switch
(21) INPUT GAIN [- o +] switch
(22) INPUT SELECTION [REAR - FRONT] switch
(23) USB to PC
(24) USB to PC data transfer cable (included/ not pictured)
The iKEY RM3 is a digital rackmountable recorder that allows you to record,
playback, and listen to audio les. XLR, RCA, and 1/4” (6.35 mm) inputs al-
low for virtually any type of sound device to be connected such as a micro-
phone, guitar, bass, keyboard, drum machine or electric instrument. When
nished recording, les can easily be transferred between the RM3 unit and
your computer.
To begin using the iKEY RM3, you have to ensure that it has a working pow-
er supply and that the included SD card (SDHC compatible) is connected.
Connect the power adapter to the DC input (2) located on the left
side of the unit and connect the other end into an electrical outlet.
Overview of RM3 Connections & Controls
Getting Started
Power Supply

The RM3 comes with a 1 GB SD card which
stores the recordings. Before turning on the
unit, ensure the card is inserted into the slot (15)
located on the front of the RM3. To connect the
card, push the card completely in the slot until it
clicks into place.
Note: DO NOT FORCE THE CARD IN. To remove
the card, slightly push the bottom of the card. It
will slide out partially, and then can be pulled out.
On the front of the device is a USB drive slot (16) where a USB
memory stick can be connected. The RM3 can both read les for
playback and record directly to a USB device connected to this
area.
The RM3 unit will only interact with one memory device at a time,
and the USB drive gets priority over the SD card. What this means
is that when a USB memory stick is connected, only les stored on that
device will be viewable. As well, all recordings will be stored on just the USB
drive when it is connected.
When there is no USB drive connected, the RM3 uses the SD card to read
les and store recordings.
Now that the SD card and power source are connected, the unit can be
turned on by setting the POWER (1) button.
After the unit is turned on, a menu appears listing all of the les and folders
on the memory device. Use the RECORD LEVEL/SEARCH (11) jog wheel to
scroll through these folders & les.
Scrolling clockwise will search downwards through the le menu & scroll-
ing counter clockwise will search upwards. Press PLAY/PAUSE (13) when
a folder is highlighted to view its contents. All recordings are stored in the
folder labeled RECORDS in the iKEY menu. Press the STOP/BACK (12) but-
ton to return to the previous folder.
To engage a le, press the PLAY/PAUSE button when it is highlighted in the
le menu (*Note: When connecting a new card no les will be viewable as no
media is yet on the device).
Pressing this button again will pause the playing le. To fast-forward within a
track, scroll the RECORD LEVEL/SEARCH jog wheel clockwise. Conversely,
to rewind, scroll the jog wheel counterclockwise.
To stop a le that is playing and return the unit to the le menu, press the
STOP/BACK (12) button.
(Unit in Play Mode)
SD Card Connection
Insert card the way
it is shown
Using the USB Drive
Turning on the Unit
Navigating the RM3
7
Connections and System Control
Conexiones y Control de sistema • Connexions & Utilisation • Anschlüsse und Systemeinstellungen
Playing Files
Play Mode
File number
SD card usage
File name
Track Display
File format
Track time
Time mode

The full color LCD screen (10) displays the les, folders, recordings, play
mode, and record mode for the RM3 unit.
The following is a list of the inputs and outputs contained on the unit and a
their appropriate connectors.
INPUT (Back)
(Front)
OUTPUT (Back)
(Front)
• Stereo RCA Line In (4) is where you input the signal coming from a line
source via a stereo RCA connection.
• XLR Mic Input (3) is where you connect the signal coming from a micro-
phone source via a 1/4” (6.35mm) input.
• 1/4” (6.35mm) Stereo Line Input (6) is where you input the signal coming
from a stereo line source via a dual 1/4” (6.35mm) connection.
• 1/4” (6.35mm) Mic Input (5) is where you input the signal coming from a
Mic source via a 1/4” (6.35mm) connection.
• Stereo RCA Line Outputs (8) send a stereo RCA signal to an output
source.
• Balanced XLR Outputs (7) send a balanced XLR signal to an output
source.
• 1/4” (6.35mm) Phones/ Line Out (9) sends the signal to headphones or
an output source through an 1/4” (6.35mm) output and has a dedicated
volume control.
*Note: MIC and LINE signals can only be read one at a time when record-
ing. If they are both connected to the unit at the same time, only the MIC
connection will be recorded.
On the front of the RM3 unit are two switches that are set to dene what
type of signal is being input and where it is connected on the unit. This en-
sures that every time a recording is made all other connections do not have
to be removed.
The FRONT-BACK switch is set according to where the signal
to be recorded is connected to the unit, namely the back of the
unit or the front. (FRONT-BACK Switch (22))
Connections and System Control
Conexiones y Control de sistema • Connexions & Utilisation • Anschlüsse und Systemeinstellungen
8
Recording Setup with the RM3
(Input / Output Connections)
Stereo RCA Line Input (4)
XLR / 1/4” Combo Mic Input
1/4” (6.35mm) Stereo Line Inputs (6)
1/4” (6.35mm) Mic Input (5)
Stereo RCA Line Outputs (8)
1/4” (6.35mm) Phones/ Line Out (9)
Balanced XLR Outputs (7)
MIC/LINE & FRONT/BACK Switches

9
Connections and System Control
Conexiones y Control de sistema • Connexions & Utilisation • Anschlüsse und Systemeinstellungen
The MIC-LINE switch represents what type of signal is coming
in to be recorded, and it corresponds to where it is connected
on the unit. If the signal is connected to a Line input then the
switch should be set to LINE, and if it is connected to a Mic
signal the switch should be set to MIC. (MIC-LINE Switch (20))
With the RM3, several different types of recordings can be made. The FOR-
MAT/STEREO-MONO (18) button is used to set what bit rate format to
record as, and whether to record in Stereo or Mono.
*Note: These settings can only be selected when you rst enter record mode,
and cannot be changed once a recording has begun.
To enter record mode, press the RECORD (14) button. Before recording,
push the FORMAT/STEREO-MONO button down to alternate between bit
rate formats.
To switch between Stereo & Mono settings, press and hold the FORMAT/
STEREO-MONO button down in record mode.
*Note: When using a mono signal source, such as a guitar, be sure to set the
unit to MONO mode, otherwise only the left channel will be recorded and
heard upon playback.
(Screen shows unit in record mode)
If a recording is set as stereo (pictured), there will be two bars present in the
STEREO-MONO Signal gauge section. If it is set as mono, there will be one
bar present.
When a signal is too loud, distortion and clipping can occur. However, a signal
that is too low may sound mufed or not be audible at all.
To get the best recordings, you must apply the maximum possible signal that
the unit can accept without overloading. When a signal becomes too loud
for the unit, the Stereo-Mono Signal gauge (shown in record mode) appears
Red.
To nd the max possible recording level follow these steps:
1) Raise the level to where it just begins to overload/ distort/ clip
(appear red).
2) From there slightly lower the level with the Rec Level Jog wheel until
it does not overload (*Note: turning the jog wheel clockwise raises
the signal & counterclockwise lowers the signal level).
Recording Options
(Included bit rate formats are listed as follows)
Bit Rate Format Quality Memory Usage
128kbps (MP3) Lowest Quality ≈ 55 megs/ hour
256kbps (MP3) Medium Quality ≈ 110 megs/ hour
320kbps (MP3)
Good Quality
≈ 138 megs/ hour
44.1kHZ (WAV) Highest Quality ≈ 600 megs/ hour
Setting Recording Levels
SD card usage
File name
STEREO-MONO
SIGNAL GAUGE
Recording level/
Jog wheel marker
File format
Track time
Time mode

The Input Gain switch (21) is also used to get a maximum signal
level. The switch changes the overall level of an incoming signal
between 3 padded levels: –20 dB [-], 0 dB [o] and +10 dB [+]. If
a signal is too low, try to raise it by switching from [-] to [o] or [o]
to [+]. If a signal is too high, try to lower it by switching from [+] to [o] or [o]
to [-].
*Note: If your recording is not being stored correctly, you may have to raise
or lower the signal coming from your source directly if possible.
*Note: Due to limitations in the FAT le system, when a recording le exceeds 2
GB in length, it will continue recording as a separate le.
Once your bit rate format, levels and stereo/mono settings have been made,
you are ready to record. In record mode, simply press the RECORD button to
start recording. A light will ash below the record button to indicate that the
unit is recording.
To pause a recording, press the RECORD button again.
To continue a recording, press the RECORD button once more.
To stop recording, and return to the previous menu, press the STOP/BACK
button (*Note: Files that were recorded by the iKEY M3 are named according
to the format of the le and are numbered according to the sequence in which
they were recorded. For instance, iKEY_001.MP3, iKEY_001.WAV, iKEY_002.
MP3, iKEY_002.WAV).
Files recorded on the SD card can easily be transferred between the RM3 and
your computer using the included USB cable (24). First, ensure your unit is
powered off.
Connect the small end of the USB cable to the USB TO PC (23)
slot on the RM3 unit, and connect the other end to the USB port
on the back of your computer.
*Note: For best results, connect the USB cable to the back of your computer
and do not use a hub.
Connections and System Control
Conexiones y Control de sistema • Connexions & Utilisation • Anschlüsse und Systemeinstellungen
10
Recording a File
Transferring Files Between the RM3
and your Computer
Input Level
Signal Meters Output Result
clipping/ distortion
Solution- Slightly scale back Rec. Level jog wheel so the meter does not appear red
clean
recording
clipping at mid-
recording level
Solution- Raise the Rec. Level jog wheel all the way and lower the input gain until the
signal barely peaks and can be scaled back so it does not appear red
low level
recording
limit
Solution- Turn the Rec. Level jog wheel all the way up and raise the input gain until the
signal barely peaks and can be scaled back

11
Connections and System Control
Conexiones y Control de sistema • Connexions & Utilisation • Anschlüsse und Systemeinstellungen
Once the cable is connected to both the unit and the computer, turn on the
RM3. Wait for the card to be recognized by your computer.
Mac: When an icon appears on your computer, click on it to view the
contents of the card.
PC: Click on the USB device that appears in the My Computer folder.
To copy audio les from the computer to the iKEY RM3, select the les to be
copied and drag them to the icon that appears when the RM3 is connected.
The les associated with the last recording session will be stored as a playlist
entitled lastrec.m3u. They can be opened on the computer simply by clicking
on the playlist icon, or transferred by dragging the playlist icon to the com-
puter.
To copy audio les from the computer to the iKEY RM3, select the les to be
copied and drag them to the icon that appears when the RM3 is connected.
Always be sure to properly disconnect your device from your computer by
following the steps below for your operating system.
Mac: Select the iKEY RM3 icon. Drag-and-drop it into the trash.
Windows: Click the ‘safely remove hardware’ icon in the task bar.
Choose the iKEY RM3 as the device to remove.
(TIME Display) The TIME (17) button lets you select what mode the track time
is displayed as in both play mode and record mode. In either mode, pressing
the TIME button will alternate the track time function between Elapsed and
time Remaining.
*Note: When playing or recording a track over one hour, the time indicator
switches from m:s (minutes seconds) to h:m (hours minutes).
Elapsed represents how much time has gone by in a track, and Remaining
represents the amount of time remaining.
*Note: In record mode, Remaining represents how much recording time is
left on the memory device.
(VOLUME) Use the VOLUME (11) along with the controls on your instrument
to adjust Output level.
(HOLD Mode) The unit is equipped with a HOLD function which freezes all
buttons and the jog wheel from taking action when depressed. To enter this
mode, press and hold the TIME (17) and FORMAT/STEREO-MONO (18) but-
tons simultaneously. The top right of the screen will indicate when the unit is
in hold mode.
To exit HOLD mode, press the TIME and FORMAT buttons simultaneously
again.
Improvements are always being made to our products to increase usabil-
ity and functionality. Occasionally, software updates come out for our iKEY-
AUDIO Series units. Be sure to check the iKEY-AUDIO Web site (http://www.
ikey-audio.com) regularly for updates.
To nd out what software version you have on your unit, turn it on and as it
powers up there will be a number that appears at the top of the LCD screen
(10). This refers to the software version. If the Web site has a software update
listed whose number is higher than the one on your unit, than this means the
software on the site is more current and should be loaded onto your unit.
Safe Removal of Device
Extra Features
Software Updates

12
*Note: Be sure to load only the software listed for your unit specically
There are detailed instructions on how to update your unit’s software located
on the iKEY-AUDIO Web site, however here is a quick guide:
*Note: It is very important to that your unit does not lose power while updat-
ing the software, which can take up to several minutes. A loss of power to
your unit during an update can result in damage to your unit.
1) Ensure that the software update located online is most up to date
version, and that it is not currently running on your unit.
2) Unzip and download the latest software version onto the root
directory of your SD card.
3) Load it onto your unit making sure it is rst powered off and then
turn it on.
4) The software will update automatically.
Channels………………………………………..… 2 (stereo)
Recording Format:.................. MP3: 128, 256, 320 Kbps;
WAV: 44.1 kHz
Recording Media.................................... SD (64 MB-4GB)
SDHC (4 GB-32GB)
Any supported FAT-USB drive
USB compatibility.................................. USB 1.0, 1.1, 2.0
Sampling Rate:......................................... 44.1kHz, 16 Bit
Dynamic Range: ..................................................... 98 dB
THD+N:.................................................................. -91 dB
Freq Response:.......................................... 20Hz – 20KHz
Input Impedance:…………….………….......... Line: 10K Ω
Mic: 1K Ω
Nominal Input Levels:…......... Low Gain: 1V RMS (0 dBV)
Mid Gain: .5V RMS (-6 dBV)
High Gain: .13V RMS (-17 dBV)
Maximum Input Levels:….. Low Gain: 2.5V RMS (+8 dBV)
Mid Gain: .68V RMS (-3 dBV)
High Gain: .25V RMS (-12 dBV)
Output Impedance:……………………....................... 30 Ω
Maximum Output:……... Line (10K Ω): 0.7V RMS (-3 dBV)
Phono (32 Ω): 0.35V RMS (-9 dBV)
Power Source.................................... 1000mA DC adaptor
Weight: 5.29Lbs/2.4kgs
Dimensions (W x H x D): 19” x 1.75” x 9.96”
Dimensions (W x H x D): 483 x 45 x 253 mm
Please register your warranty online at
www.ikey-audio.com
Specications
Especicaciones • Caractéristiques techniques • Technische Daten
Specications

Register your product online at www.ikey-audio.com
to be eligible for great prize giveaways!
If you do not have internet access, ll out the form below and mail it to the appropriate address
listed at the left side of this page.
First and Last Name
Address (Number and Street) Apartment Number
City and State or Province
Country
Zip Code or Postal Code
Email Address
Telephone Number
Date of Birth
Date of Purchase
Purchase Price (Excluding Tax)
City of Purchase
Model Number (Example: CDT-05) Serial Number (Located on the back of most units)
Warranty and Repair:
All GCI products are designed and manufactured to
the highest standards in the industry. With proper
care and maintenance, your product will provide
years of reliable service.
LIMITED WARRANTY
A. GCI warrants its products to be free from defects
in materials and workmanship for One (1) year from
the original purchase date. Exceptions: Laser assem-
blies on CD Players, cartridges, and crossfaders are
covered for 90 days.
B. This limited warranty does not cover damage or
failure caused by abuse, misuse, abnormal use, faulty
installation, improper maintenance or any repairs
other than those proided by an authorized GCI
Service Center.
C. There are no obligations of liability on the part
of GCI for consequential damages arising out of
or in connection with the use or performance of
the product or other indirect damages with respect
to loss of property, revenues, of prot, or costs of
removal, installation, or reinstallation. All implied war-
ranties for GCI, including implied warranties for t-
ness, are limited in duration to One (1) year from the
original date of purchase, unless otherwise mandated
by local statutes.
RETURN/REPAIR
A. In the U.S.A., please call our helpful Customer Ser-
vice Representatives at (732)738-9003, and they will
be happy to give you a Return Authorization Number
(RA#) and the address of an authorized service
center closest to you.
B. After receiving an RA#, include a copy of the
original sales receipt, with defective product and a de-
scription of the defect. Send by insured freight to: GCI
Sound Products Corp, and use the address provided
by your customer service representative. Your RA#
must be written on the outside of the package, or
processing will be delayed indenitely!
C. Service covered under warranty will be paid for
by GCI and returned to you. For non-warrantied
products, GCI will repair your unit after payment is
received. Repair charges do not include return freight.
Freight charges will be added to the repair charges.
D. On warranty service, you pay for shipping to GCI,
we pay for return shipping within the continental
United States. Alaska, Hawaii, Puerto Rico, Canada,
Bahamas, and the Virgin Islands will be charged for
freight.
E. Please allow 2-4 weeks for return of your product.
Under normal circumstances your product will spend
no more than 10 working days at GCI. We are not
responsible for shipping times.
GCI Technologies
1 Mayeld Ave
Edison, NJ 08837 USA
Tel: (732) 346-0061
Fax: (732) 346-0065
IN THE UNITED KINGDOM
In the event that you need service on your GCI
product under warranty, simply write a letter describ-
ing the problem, along with your contact information.
Make sure to enclose a copy of your receipt for proof
of warranty information. A return number is not
required. You will be responsible for shipping charges
to GCI UK, and GCI UK will pay to return the unit to
you if it is considered under warranty.
GCI Sound Products
Unit 44
Brambles Enterprise Centre
Waterlooville P07 7TH, UK
Tel: 087 087 00880
Fax: 087 087 00990
-
EN ESPAÑA
En caso de mal funcionamiento de esta unidad, por
favor contacte con el Servicio de Atención al Cliente
en el teléfono 93 436 37 00 que le asesorará sobre
el procedimiento correcto para solucionarlo. En caso
de ser necesario enviar la unidad para su reparación,
el Servicio de Atención al Cliente le proveerá de
un número de incidencia, así como de la dirección
del Servicio de Asistencia Técnica más cercano a su
residencia.
GCI Technologies S.A.
Caspe, 172 - 1º A
08013 Barcelona, Spain
Tel: 34 93 436 37 00
Fax: 34 93 347 69 61
-
EN FRANCE
En cas de panne, merci de contacter votre reven-
deur. Tout appareil en panne doit y être retourné,
accompagné de sa facture d’achat, de son emballage
d’origine et d’un descriptif de panne. L’appareil sera
expédié au SAV de GCI Technologies France. Tout
produit reçu sans facture sera réparé hors garantie.
L’appareil sera ensuite ré-expédié au revendeur.
GCI Technologies s.a.r.l
2bis, rue Léon Blum
91120 Palaiseau, France
Tél: + 33 1 69 79 97 70
Fax: + 33 1 69 79 97 80
-
IN DEUTSCHLAND
Die allgemeinen gesetzlichen Gewährleistungen
bleiben von den Herstellergarantien unberührt. Der
Garantieanspruch erlischt bei Eingriffen durch den
Käufer oder durch Dritte sowie bei unsachgemässer
Behandlung. Gewährleistungsansprüche sind auss-
chließlich gegenüber Ihrem Fachhändler geltend zu
machen.
GCI Technologies GmbH
Lerchenstraße 14
80995 München, Germany
Tel: 089 - 319 019 8 - 0
Fax: 089 - 319 019 8 - 18
Product Registration
Registro de Producto • Enregistrement du produit • Produktregistrierung
39
/