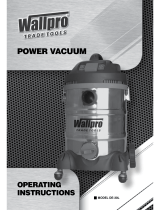
Parkside PNTS 1300 B2 Operating instructions

Category
Vacuum cleaners
Type
Operating instructions
WET & DRY VACUUM CLEANER
Translation of original operation manual
WET & DRY VACUUM CLEANER PNTS 1300 B2
ΣΣΚΟΥΠΑ ΥΓΡΗΣ ΚΑΙ
ΞΗΡΗΣ ΑΝΑΡΡΟΦΗΣΗΣ
Μετάφραση των αυθεντικών οδηγιών λειτουργίας
69502_par_NassTrockensauger_PNTS1300B2_Cover_GB_IE_CY.indd 2 31.10.11 09:09
GB / IE / CY Translation of original operation manual Page 5
GR / CY Μετάφραση των αυθεντικών οδηγιών λειτουργίας Σελίδα 12
Before reading, unfold the page containing the illustrations and familiarise yourself with all functions of the
device.
Πριν ξεκινήσετε την ανάγνωση, ανοίξτε τη σελίδα με τις εικόνες και εξοικειωθείτε με όλες τις λειτουργίες της
συσκευής.
69502_par_NassTrockensauger_PNTS1300B2_Cover_GB_IE_CY.indd 3 31.10.11 09:09
18
15
1 2 3
4
5
6
7
8
9
10
11a
11b
12
14
20
13
16
17
19
15
15
16
17
21
8
7
23
24
22
2
2
10 13
11a
11b
12
12
2
7
1
1
9
13
6
 
Contents













 
 



 
 
 
Application
The appliance is intended for domestic wet
and dry vacuuming in, for example, the
house, work room, car or garage.
Vacuuming of ammable or explosive mate-
rials or those which endanger health is pro-
hibited. The manufacturer will not be held
responsible for injuries resulting from use
which does not comply with the directions,
or from incorrect use.
Symbols used in the
instructions



Precaution symbol (explanation of
precaution instead of exclamation
mark) with information on prevention
of harm / damage.
Notice symbol with information on
how to handle the device properly.
Safety information
Before initial start-up, please
read through these operating
instructions carefully prior to using the
machine. Keep the instructions safe and
pass them on to any subsequent user so
that the information is always available.
Please read the following safety
guidelines in order to avoid risk of
re, electric shock, personal injury
and damage to objects:

Keep the equipment away from chil-
dren and pets. Children should be
supervised to ensure that they do not
play with the appliance.
Children should only be allowed to
use the appliance under supervision.
This appliance is not intended for use
by persons (including children) with
reduced physical, sensory or mental
capabilities, or lack of experience
and knowledge, unless they have
been given supervision or instruction
concerning use of the appliance by a
person responsible for their safety.
  
Never leave a machine which is ready
for operation unattended at the work-
place.
People and animals must not be vacu-
umed with the machine.
Do not vacuum any hot, incandescent,
ammable, explosive materials, or
those which endanger health. This
includes hot ashes, petrol, solvents,
acids or caustic solutions. Personal
injury could occur.
Nozzles and suction tubes must not
reach head level whilst in use. Per-
sonal injury could occur.


Ensure that the mains cable is not
damaged by being pulled over sharp
edges, by jamming, or by pulling on
the cable.
Before each use, check the power sup-
ply lead and the extension cable for
damage and ageing. Do not use the
equipment if the cable is damaged or
worn.Danger of electric shock hazard.
If the power cable for this equipment is
damaged, it must be replaced by the
manufacturer, a customer service agent
of the same or a similarly qualied per-
son in order to prevent hazards.
Switch the machine off and discon-
nect the mains plug:
- when the machine is not in use,
- before the machine is opened up,
- for all maintenance and cleaning
work,
- if the connecting cable is damaged
or tangled up.
Only use replacement parts and
accessories delivered and recom-
mended by our Service Centre (see
addresses page 21). The use of parts
by other manufacturers immediately
renders the guarantee void.
Do not use the cable to pull the plug
out of the socket. Protect the cable
from heat, oil, and sharp edges.
Make sure that the mains voltage cor-
responds with the information on the
rating plate.
Only plug the appliance into a socket
which is safeguarded by at least 13A.
The device must only be connected to
a mains socket via a residual-current
circuit breaker (RCD) with a rated
leakage current of not more than
30 mA.



Ensure that the machine is correctly as-
sembled and the lters are in the correct
position.
Do not use without the lter. This
could damage the machine.
Only have repairs carried out at our
authorised customer service points.
Observe the instructions for cleaning
and maintenance of the machine.
Store the appliance in a dry place and
out of reach of children.
Description of
operation
The wet and dry vacuum cleaner is
equipped with a robust plastic container
for waste collection. The castors make the
appliance very easy to manoeuvre. The
suction ow is switched off by a oat dur-
ing wet vacuuming once the waste tank is
full. The appliance is also equipped with a
blower function.
The following describes the function of the
operating parts.
 
You will nd illustrations for the
machine on the fold-out pages.
Overview

1 Motor housing
2 Carrying handle
3 On / off switch
4 4 attachment ports for accesso-
ries
5 Suction connection
6 Waste container
7 4 feet with castors and acces-
sory ttings
8 Mains cable
9 Locking clips
10 Blower connection
11a Cable holder on carrying handle
11b Cable holder on dirt container
(see also
)

12 3-part vacuum tube
13 Vacuum hose with
14 Handle component

15 Foam lter for wet vacuuming
16 Material lter for dry vacuuming
(already mounted)
17 Paper lter bag for vacuuming ne
dust

18 Floor nozzle with
19 Turnable insert attachment
with brush and rubber lip, for
vacuuming carpets and smooth
surfaces
20 Crevice nozzle
Contents
Unpack the appliance and check that it is
complete:
The appliance is supplied with the motor
head tted (
1). To remove the motor
head, open the securing clips (
9).
1 Motor housing
2 Carrying handle
6 Waste container
7 4 feet with castors and acces-
sory ttings
12 3-part vacuum tube
13 Vacuum hose
15 Foam lter
16 Material lter (already mounted)
17 Paper lter bag
18 Floor nozzle with
20 Crevice nozzle
6 cross-head screws
Dispose of the packaging material properly.
Assembly
Pull out the mains plug.
This will prevent danger of injury
from electric shock.
1. Attach the carrying handle (2)
rmly using the cross-head
screws supplied.




2. Attach the feet (7) and secure the
feet with the Philips head screws
supplied.
3. Insert the lter:
- Foam lter for wet vacuuming
(
15).
  
- Material lter ( 16) for dry
vacuuming
- Paper lter bag for ne dust
(
17)

4. Place the motor housing (1) on
top of the dirt collector (6) and
close it with the clip (9).



5. Connect the vacuum hose (13)
and the accessories.
Switching on/off
Connect the mains plug.

On / off switch (
3) in position “

On / off switch (
3) in position “
Wet vacuuming
In order to wet vacuum, attach the foam
lter (15) onto the lter tray. Only use a
dry lter.
If the waste tank is full, a oat clos-
es the suction opening, and the
vacuum operation is interrupted.
Switch off the machine and empty
the waste tank.
If foam or liquid exits, switch off the
machine immediately.
Dry vacuuming
For dry vacuuming, pull the material lter
(16) over the lter basket.

When vacuuming very ne dust,
you may nd dirt accumulating
more quickly than usual. We there-
fore recommend additional use of
the paper lter bag.

1. Pull the material lter (16) over the
lter basket.

2. Fold down the side aps (21) on the
paper lter bag (17) at the perforation.
3. Fit the paper lter bag (17) with the
short ap upwards over the internal
suction pipe (22) (see arrow
).
The sealing ring (23) at the lter bag
opening must completely surround the
lip on the suction pipe.
Blowing
To blow, plug the suction hose (13) onto
the connection (10) on the motor head.
Cleaning/Maintenance/
Storage
Pull out the mains plug.
This will prevent danger of injury
from electric shock.
Always check the appliance before
use for any obvious faults such as
a defective mains cable, and have
these repaired or replaced.
 






After use, empty the waste tank (
6).
Clean the waste tank with a damp
cloth.
Wash the foam lter (
15) with luke-
warm water and soap, and allow to
dry. If necessary, wash with lukewarm
water and soap and allow to dry.
Beat out the material lter (
16).
Replace the paper lter bag (
17)
when full (see “replacement parts” for
reordering)

- To store, wind the mains cable
(8) around the cable holder
(11a) on the carrying handle (2).
Use the cable holder (11b) to x
the mains plug onto the back of
the equipment.
- Insert the separated vacuum
tubes (12) into the accessory
holder on the appliance feet (7).
- The attachment ports on the
motor part serve as nozzle stor-
age (
4) or on the feets (7).
Store the appliance in a dry place and
out of reach of children.
Warranty
This unit has a guarantee period of 36
months, or 12 months for units used on
a commercial basis or for replacement
units according to the statutory regula-
tions. Damage resulting from normal wear
and tear, overloading or improper use is
excluded from the warranty. Certain parts
such as the lters and attachments are
subject to normal wear and tear and are
excluded from the warranty.
Warranty claims can only be recognised if
the directions in the Operating Instructions
on cleaning and maintenance have been
followed. Damage resulting from material
defects or manufacturing errors will be recti-
ed at no extra charge by replacement or
repair, on condition that the appliance has
not been dismantled and is returned to our
Service Centre with proof of purchase and
guarantee (see addresses page 21).
You can have repairs which are not cov-
ered by the warranty carried out by our
Service Center which will charge you for
this. They will be happy to draw up a cost
estimate for you.
We can only carry out work on machines
which have adequate packaging and post-
age.
 In the case of a warranty claim
or a service, please deliver your machine
to our service address in a clean condi-
tion accompanied by a description of the
problem.



If you have a justied guarantee claim,
please contact our service centre by tele-
phone, which will then advise you on how
the claim will be processed.
Defective units returned to us will be dis-
posed of for free.

  
Disposal/Environmental
protection
Be environmentally friendly. Return the
tool, accessories and packaging to a recy-
cling centre when you have nished with
them.
Machines must not be disposed of
with household refuse.
Take the machine to a recycling point.
The waste plastic and metal parts can be
separated, accurately graded and passed
on for recycling. Contact our Service Cen-
tre for more details.
Defective units returned to us will be dis-
posed of for free.
Technical data
Power consumption of motor .......1300 W
Mains voltage ..............230-240V~, 50 Hz
Safety class ........................................
II
Protection category............................IP24
Suction force..................................15 kPA
Cable length .......................................4 m
Waste tank capacity (gross) ............... 20 l
Usable container volume (water) ........ 12 l
Weight (incl. all accessories) ....approx. 5.0 kg
Technical and visual modications may
be carried out due to further development
without prior notice. All dimensions, infor-
mation and statements provided in these
Operating Instructions are therefore sub-
ject to amendment. Legal claims which are
based on the Operating Instructions can
therefore not be recognised.

 
Trouble shooting
  
Device does not start
Mains voltage is not
present
Check plug socket, cable,
line, plug and fuse, where
appropriate, repair through
electrical specialist
Defective on/off switch
(
3)
Repair through customer
service
Worn carbon brushes
Defective motor
Low or lack of suction
Hose system (
13/14) or
jets (
18/19) blocked
Remove obstructions and
blockages
Suction pipe (
12)
assembled incorrectly
Assemble suction pipe correctly
Container (
6) open
Close container
Container (
6) full
Empty container
Filter (
15/16/17) full or
clogged
Empty, clean or replace lter
Ball on lter basket (
24)
incorrectly positioned (e.g.
due to jerky movements)
Switch off the equipment so the
ball drops then switch on again
Replacement parts
You can order replacement parts directly via our Service Centre (see page 21). Please state
the appliance type when placing an order.
  
15 Foam lter, pack of 3 ................................................................. 30250130
17 Paper lter bags, pack of 5 ........................................................ 30250132
16 Material lter for dry vacuuming .......................................................30250131
20 Crevice nozzle ........................................................................... 72800039
13/14 Vacuum hose ............................................................................ 72800218
18 Floor nozzle ............................................................................... 72800217

 



  .........................12
  ......................14
 .................................................14

 ..................................15
/  ......15
  ..............................15
  ...........................15

//
 ............................................16
 ...............................................16
/
 .....................................17
  .................................17

 .......................................18


 ..............20


Η συσκευή προορίζεται για καθαρι-
σμό υγρών και σκόνης στον ιδιωτικό
τομέα όπως π.χ. στο σπίτι, στο χώρο
για χόμπυ, στο αυτοκίνητο ή στο γκα-
ράζ.   
,   
   .   
     
    
,    .

Σύμβολα κινδύνου με στοιχεία για
την πρόληψη προσωπικών και υλι-
κών ζημιών.
Σύμβολο υποχρέωσης (στη θέση
του συμβόλου έκτακτης ανάγκης
επεξηγείται η αντίστοιχη υποχρέ-
ωση) με στοιχεία για την πρόληψη
ζημιών.
Σύμβολο υπόδειξης με πληροφο-
ρίες για τον καλύτερο χειρισμό της
συσκευής.
 
  
, 
   
     .
      
    
   .
Διαβάστε τις ακόλουθες υποδεί-
ξεις ασφαλείας προς αποφυγή
πυρκαγιάς, ηλεκτροπληξίας, τραυ-
ματισμών ανθρώπων και υλικών
ζημιών:


Να φυλάγετε τη συσκευή μακριά από
παιδιά και κατοικίδια ζώα. Επιτηρείτε τα
παιδιά, για να είστε σίγουροι πως δεν
παίζουν με τη συσκευή.
     
    
.
Η συσκευή αυτή δεν προορίζεται
για τη χρήση από άτομα
(συμπεριλαμβανομένων παιδιών) με


περιορισμένες φυσικές, αισθητικές και
νοητικές ικανότητες ή από άτομα με
έλλειψη εμπειρίας και/ή γνώσης; εκτός
και αν επιτηρούνται από κάποιο άτομο
υπεύθυνο για την ασφάλειά τους ή
λαμβάνουν από αυτό οδηγίες σχετικά
με το χειρισμό της συσκευής.
    
     .
    
     .
  ,
, , 
    .  
   ,
 , , ,
,  .  
.
    
   
     
 .  
.



     
      
   .
Πριν από κάθε χρήση ελέγξτε το καλώ-
διο και τη μπαλαντέζα για βλάβες και
φθορές. Μη χρησιμοποιείτε τη συσκευή,
εάν το καλώδιο είναι ελαττωματικό ή
φθαρμένο.
Σε περίπτωση βλάβης του καλωδίου αυ-
τής της συσκευής, πρέπει, προς αποφυ-
γή κινδύνου, να αντικατασταθεί από τον
κατασκευαστή, το τμήμα του εξυπηρέτη-
σης πελατών, ή παρόμοια εξειδικευμένο
πρόσωπο.
     
 :
-     ,
-    ,
-     
  ,
-     
  .
      
    . 
   ,  
 .
     
     .
     , 
   
16A.
Συνδέετε τη συσκευή, κατά το δυνατόν,
μόνο σε ρευματοδότες με διακόπτη κυ-
κλώματος βλάβης γείωσης (διακόπτη
FI) με ονομαστικό ρεύμα που δεν ξε-
περνά τα 30 mA.




    
    
   .
     . 
   .
  
 ,    
     
(.   21).  
   
     
 .
    
   
    .
    
    
.
     
   .

 
 
Η ηλεκτρική σκούπα υγρού και στεγνού
καθαρισμού είναι εξοπλισμένη με γερό
πλαστικό δοχείο για την συλλογή των
ακαθαρσιών. Οι τροχοί επιτρέπουν τη
μέγιστη δυνατή ευελιξία της συσκευής.
     ,
    
     
  . Επιπροσθέτως
η συσκευή διαθέτει λειτουργία φυσήματος.
     
    .
     
    .


1 Περίβλημα κινητήρα
2 Χειρολαβή μεταφοράς
3 Διακόπτης ενεργοποίησης/απε-
νεργοποίησης
4 Θέσεις για αξεσουάρ
5 Σύνδεση αναρροφητήρα
6 Δοχείο ακαθαρσιών
7 4 πόδια με ρόδες και θέσεις για
αξεσουάρ
8 Καλώδιο σύνδεσης με το δίκτυο
9 Κλιπ σύνδεσης
10 Σύνδεση φυσητήρα
11a Στερέωση καλωδίου στη χειρο-
λαβή
11b Στερέωση καλωδίου στο δοχείο
ακαθαρσιών (βλέπε και
)

12 Σωλήνας αποτελούμενος από
τρία τμήματα
13 Σωλήνας αναρρόφησης με
14 Χειρολαβή

15 Φίλτρο από αφρώδες υλικό για
υγρό καθαρισμό
16 Φίλτρο από ύφασμα για στεγνό
καθαρισμό
17 Χάρτινο φίλτρο για αναρρόφη-
σης λεπτής σκόνης

18 Μπεκ δαπέδου με
19 περιστρεφόμενη κεφαλή
με βούρτσα και λαστιχένιο χείλος
για χαλιά και λείες επιφάνειες
20 Μπεκ αρμών

Ανοίξτε τη συσκευασία και ελέγξτε εάν το
περιεχόμενο είναι πλήρες:
Η συσκευή παραδίδεται με τοποθετημένη
κεφαλή μοτέρ (
1). Για να αφαιρέσετε
την κεφαλή του μοτέρ, ανοίξτε τα κλιπς
(
9).
1 Περίβλημα κινητήρα
2 Χειρολαβή μεταφοράς
6 Δοχείο ακαθαρσιών
7 4 πόδια με ρόδες
12 Σωλήνας αποτελούμενος από
τρία τμήματα
13 Σωλήνας αναρρόφησης
15 Φίλτρο από αφρώδες υλικό
16 Φίλτρο από ύφασμα
17 Χάρτινο φίλτρο
18 Μπεκ δαπέδου
20 Μπεκ αρμών
6 σταυρόβιδες
Η διάθεση του υλικού συσκευασίας στα
απορρίμματα να γίνει με το σωστό τρόπο.



   .Κίν-
δυνος τραυματισμού από ηλεκτρο-
πληξία.
1. Βιδώστε τη χειρολαβή μεταφο-
ράς (2) με τις συμπαραδιδόμε-
νες σταυρόβιδες.




2. Βάλτε τα πόδια (7) και στερεώ-
στε τα με τις συμπαραδιδόμενες
σταυρόβιδες
3. Τοποθετήστε μέσα το φίλτρο.
- Φίλτρο από αφρώδες υλικό για
υγρό καθαρισμό (
15).
- Φίλτρο από ύφασμα (
16)
για στεγνό καθαρισμό
- ΄Χάρτινες σακούλες-φίλτρο για
λεπτή σκόνη (
17).
   
!
4.    (1)
    
 (6)   
   (9).



5. Συνδέστε το σωλήνα (13) αναρ-
ρόφησης και τα εξαρτήματα.
/

    .

Διακόπτης ενεργοποίησης/απενεργοποίη-
σης (
3) στη θέση „“.

Διακόπτης ενεργοποίησης/απενεργοποίη-
σης (
3) στη θέση „
 
Για τον υγρό καθαρισμό βάλτε το φίλτρο από
αφρώδες υλικό (15) στο καλάθι για το φίλ-
τρο. Να χρησιμοποιείτε μόνο στεγνό φίλτρο.
    ,
     
,   
.  
    
.
  
     .
 
Για το στεγνό καθαρισμό περάστε το υφα-
σμάτινο φίλτρο (16) πάνω από το καλάθι
για το φίλτρο.

Κατά την αναρρόφηση πολύ λε-
πτής σκόνης, μπορεί να βουλώσει
το υφασμάτινο φίλτρο γρηγορότε-
ρα από συνήθως. Για το λόγο αυτό
συνιστούμε την πρόσθετη χρήση
χάρτινου φίλτρου.

1. Περάστε το υφασμάτινο φίλτρο (16)
πάνω από το καλάθι για το φίλτρο.

2. Διπλώστε τις πλανές γλώσσες της
σακούλας χάρτινου φίλτρου (17) στο
διάτρητο σημείο προς τα κάτω.

 
3. Περάστε τη σακούλα χάρτινου φίλτρου
(17) με την κοντή γλώσσα προς τα
επάνω πάνω από το στόμιο αναρρό-
φησης που βρίσκεται στο εσωτερικό
(22) (βλέπε βέλος
). Ο σταγανο-
δακτύλιος (23) στο άνοιγμα του φίλτρου
πρέπει να περικλείει πλήρως το βραχί-
ονα στο στόμιο ναρρόφησης.

Για εκφύσηση τοποθετήστε το σωλήνα
αναρρόφησης (13) στη σύνδεση (10)
στην κεφαλή του κινητήρα.
//

   .Κίν-
δυνος τραυματισμού από ηλεκτρο-
πληξία.
    
   
 ,  ..
  
     
.






     
  (
6).
      
.
      
     
  (
15).
Κτυπήστε το υφασμάτινο φίλτρο για να
πέσει η σκόνη (
16). Πλύντε το ενδε-
χομένως με χλιαρό νερό και σαπούνι
και αφήστε το να στεγνώσει.
   
   
(
17) (  
„“).

- Για να φυλάξετε τη συσκευή τυ-
λίξτε το καλώδιο (8) γύρω από
τη στερέωση καλωδίου (11α) στη
χειρολαβή (2). Σταθεροποιήστε
το βύσμα για σύνδεση με το
δίκτυο με τη βοήθεια της στερέ-
ωσης του καλωδίου (11b) στην
πίσω πλευρά της συσκευής.
- Βάλτε τους αποσυναρμολογημέ-
νους (12) σωλήνες στην υποδο-
χή τωναξεσουάρ στα πόδια της
συσκευής (7).
- Για τη φύλαξη των μπεκ εξυπηρε-
τούν οι θέσεις (
4) 0στο τμήμα
του κινητήρα.
    
    .

   , 
  36 .   
    
,   
   12   
  . 
    ,
   , 
   . 
  ..    
,    
     .


     
    
     
.
    
    
 , 
     
  
 .
    
   
   
     (.
  21).
    
     
     
  .  
    
   .
   
,     
    
 .
:   
    
  ,   
     
 .
 -  
 , ,  
,      
.
   
    
     
  .    
    
 .
Τη απόρριψη των ελαττωματικών σας συ-
σκευών που μας στέλνετε την αναλαμβά-
νουμε δωρεάν.
/

Αποσύρετε συσκευή, εξαρτήματα και
συσκευασία με οικολογικό τρόπο ανακύ-
κλωσης.
   
   .
    
 .  
    
      
    . 
   
 (   xx).
Τη απόρριψη των ελαττωματικών σας
συσκευών που μας στέλνετε την αναλαμ-
βάνουμε δωρεάν.
 
    1300 W
  ............... 230-240V~, 50 Hz
  .............................
II
Είδος προστασίας ..............................IP24
Αναρροφητική δύναμη ...................15 kPA
  ................................. 4 m
   ...... 20 l
Ωφέλιμος όγκος δοχείου (Νερό) ..........12 l
 (   ) .........5,0 kg
    
     
  .   ,
      
    
.  ,  
     , 
   .

 

  
Η συσκευή δεν
παίρνει μπροστά
Έλλειψη τάσης δικτύου
Έλεγχος πρίζας, καλωδίων, αγω-
γών , φις και ασφάλειας, ενδεχο-
μένως επισκευή από εξειδικευμέ-
νο ηλεκτρολόγο
Ο διακόπτης ON/OFF (
3)
είναι ελαττωματικός
Επισκευή μέσω της υπηρεσίας
εξυπηρέτησης πελατών
Φθαρμένο καρβουνάκι
Ο κινητήρας είναι ελαττωματικός
Αδύναμη αναρρό-
φηση ή δεν αναρ-
ροφά καθόλου
Σωλήνες (
13/14) ή ακροφύ-
σια (
27/28) βουλωμένα
Καθαρίστε ττα βουλωμένα ή
μπλοκαρισμένα σημεία
Οι σωλήνες αναρρόφησης
(
12) δεν είναι σωστά συναρ-
μολογημένοι
Συναρμολογήστε σωστά τουςσω-
λήνες αναρρόφησης
Ανοικτό δοχείο συλλογής ρύπων
(
6)
Κλείστε το δοχείο
Γεμάτο δοχείο συλλογής ρύπων
(
6)
Αδειάστε το δοχείο
Φίλτρο (
15/16/17) πλήρες ή
βουλωμένο
Αδειάστε το φίλτρο, καθαρίστε το
ή αντικαταστήστε το
Σε λάθος θέση το σφαιρίδιο
στο καλάθι του φίλτρου (
24)
(π.χ. από απότομη κίνηση)
Απενεργοποιήστε τη συσκευή για
να χαμηλώσει το σφαιρίδιο, κατό-
πιν την επανενεργοποιείτε.

          (.
  21).        
  .
 
15 Φίλτρο από αφρώδες υλικό, σετ 5 τεμ ....................................... 30250130
16 Φίλτρο από ύφασμα .................................................................. 30250131
17 Χάρτινο φίλτρο, σετ 5 τεμ. ......................................................... 30250132
20 Μπεκ αρμών .............................................................................. 72800039
13 Σωλήνας αναρρόφησης ............................................................ 72800218
18 Μπεκ δαπέδου .......................................................................... 72800217

Oliver Christ
(Documentation Representative,
υπεύθυνος τεκμηρίωσης)
Translation of the
original EC declara-
tion of conformity
Μετάφραση της πρω-
τότυπης Δήλωσης
συμμόρφωσης CE
We hereby declare that the


Serial number
201110000001-201112096273
Με την παρούσα βεβαιώνουμε ότι η


Αριθμός σειράς
201110000001-201112096273
conforms with the following applicable
relevant version of the EU guidelines:
ανταποκρίνεται στις ακόλουθες Οδηγίες της
ΕΕ στην εκάστοτε ισχύουσα μορφή τους:

In order to guarantee consistency, the
following harmonised standards as well
as national standards and stipulations
have been applied:
   -
,   
   
   :




Grizzly Gartengeräte GmbH & Co. KG
Am Gewerbepark 2
D-64823 Groß-Umstadt 04.01.2012






Exploded Drawing
Επί μέρoυς σχεδιαγράμματα
informative, ενημερωτικό
1
2
3
4
6
5
7
8
9
12
14
15
13
11
10
  • Page 1 1
  • Page 2 2
  • Page 3 3
  • Page 4 4
  • Page 5 5
  • Page 6 6
  • Page 7 7
  • Page 8 8
  • Page 9 9
  • Page 10 10
  • Page 11 11
  • Page 12 12
  • Page 13 13
  • Page 14 14
  • Page 15 15
  • Page 16 16
  • Page 17 17
  • Page 18 18
  • Page 19 19
  • Page 20 20
  • Page 21 21
  • Page 22 22

Parkside PNTS 1300 B2 Operating instructions

Category
Vacuum cleaners
Type
Operating instructions

Ask a question and I''ll find the answer in the document

Finding information in a document is now easier with AI