Page is loading ...

1110-GCLOGD-Instructions
MODEL #: GC-LOGC
PROPANE FIRE RING
Warning & Instruction Booklet
Po Box 4057 • Logan, UT 84323 • 1.800.650.2433 • www.campchef.com
MODEL - GCLOGC
ITEMS NOT SHOWN
QTY 1 - CARRY BAG (GCLOGC-BAG)
12 POUNDS LAVA ROCK
0810-GCLOGC-PARTS
GCLOG BURNER ASM (1)
FP29LG-10
GCLOGC BURNER HOUSING (1)
FIREPIT VALVE W/IGNITER (1)
FP29LG-15
LOW PRESSURE REG WITH 6' HOSE (1)
GCLOG-LPREG
GCLOG VENTURI COVER (1)
FP29LG-14
GCLOGD RING (1)
GCLOGC-1
IGNITER COVER (1)
FP29LG-17
IGNITER ELECTRODE (1)
FP29LG-IGN
FP29LG VALVE COVER (1)
FP29LG-16
VALVE KNOB (1)
BS-3
GCLOGD BASE (1)
GCLOGC-2
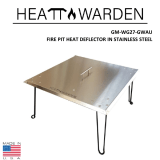
GCLOGD DEFLECTOR (1)
GCLOGC-3
PROPANE TANK RING (1)
FP29LG-21
GCLOG THERMOCOUPLE (1)
GCLOGC-4
PARTS LIST
To activate warranty, register on-line at: www.CampChef.com
The manufacturer warrants stove components (except paint and nish) to be free from defect in materials and workmanship
for 1 year from the date of purchase. All accessories (included with stove or purchased separately) are warranted from defect in
materials and workmanship for 90 days from the original purchasing date. Within these periods, the manufacturer will replace
or repair defective parts deemed unusable from its original intent by making available the parts thereof FOB Logan, UT 84321
Product paint and nish is not warranted. The exterior nish of the product will wear down over time.
Clean the unit after each use to maintain the nish and prolong the life of your product. Wipe away all grease and ashes. Keep
metal products free of moisture, salts, acids and harsh uctuations in temperatures.
Warranty does not cover normal wear of parts or damage caused by misuse, abuse, overheating and alteration. Repairs or
alterations made by anyone other than Camp Chef are not covered in this Warranty. Manufacturer will not be held liable for
any losses due to neglectful operation. Furthermore, this Warranty does not cover damaged caused by natural disasters such as
earthquakes, hurricanes, tornadoes, oods, lightning, res, etc.
Upon the expiration of this warranty all such liability will terminate. No other warranties are expressed or implied.
Keep all original sales receipts. Proof of purchase is required to obtain Warranty services. Prior written approval and a Return
Authorization Number must be obtained and accepted for repair or replacement only. Returns must be shipped prepaid. Collect
shipment or shipments without a Return Authorization Number will not be accepted.
To obtain Warranty services call 1.800.650.2433.
*Warranty applies to the contiguous US states only.
LIMITED WARRANTY
GARANTIE LIMITÉE
Pour activer la garantie, s’inscrire en ligne sur www.campchef.com.
Le fabricant garantit que les composants du feu de camp portatif (à l’exception de la peinture et des nitions) sont exempts de
défauts de matériaux ou de fabrication pendant un an à partir de la date d’achat. Tous les accessoires (compris avec le feu de
camp portatif ou achetés séparément) sont garantis contre tout défaut de matériaux ou de fabrication pendant 90 jours à partir
de la date d’achat initiale. Durant ces périodes, le fabricant s’engage à remplacer ou réparer les pièces défectueuses considérées
comme étant inutilisables par rapport à l’usage auquel elles étaient initialement destinées et qui auront été fournies FAB à
Logan, UT 84321, États-Unis.
La peinture et la nition du produit ne sont pas garanties. La nition extérieure du produit s’use avec le temps.
Nettoyer l’appareil après chaque utilisation an d’en préserver la nition et d’en prolonger la durée de vie. Essuyer les traces
de graisse et les cendres. Protéger les produits métalliques contre l’humidité, les sels, les acides et les fortes uctuations de
température.
La garantie ne couvre pas l’usure normale des pièces ou les dommages causés par une mauvaise utilisation, les abus, la
surchauffe ou les modications. Toute réparation ou modication effectuée par quiconque d’autre que Camp Chef n’est pas
couverte par la présente garantie. Le fabricant ne peut être tenu responsable de toute perte due à une utilisation entachée
de négligence. De plus, la présente garantie ne s’étend pas aux dommages causés par des catastrophes naturelles telles que
tremblements de terre, ouragans, tornades, inondations, foudre, incendie, etc.
La responsabilité du fabricant prend n à l’expiration de la garantie. Il n’existe aucune autre garantie expresse ou implicite.
Conserver toutes les factures d’origine. Une preuve d’achat est requise pour toute réclamation en vertu de la garantie. Obtenir
au préalable une autorisation écrite et un numéro d’autorisation de retour de marchandise. Expédier tout retour port payé. Les
envois en port dû et/ou sans numéro d’autorisation de retour de marchandise ne sont pas acceptés.
Pour obtenir des services sous garantie, appeler le 1 800 650-2433.
*La garantie s’applique aux états américains contigus uniquement.

Improper installation, adjustment,
alteration, service or maintenance can
cause injury or property damage. Read the
installation, operating and maintenance
instructions throughly before installing or
sefrvicing this equipment.
WARNING
If the information in this manual
is not followed exactly, a re
or explosion may result causing
property damage, personal injury
or loss of life.
WHAT TO DO IF YOU SMELL GAS.
• Do not try to light any appliance.
• Do not touch any electrical switch; do not use
any phone in your building.
• Immediately call your gas supplier from
a neighbor’s phone. Follow the gas
supplier’s instructions.
• If you cannot reach your gas supplier, call the
re department. Installation and service must
be performed by a qualied installer, service
agency or gas supplier.
FOR OUTDOOR USE ONLY!
Do not operate the re pit indoors, in a
garage, or in any other enclosed area or under
overhead construction. Do not operate re pit
near ammable materials such as decks, fences,
porches or carports. A minimum clearance range
of 72” inches is recommended. Do not use the
re pit near gasoline or other combustible
liquids or where combustible vapors may be
present.
Children and adults should be alerted to the
hazards of high surface temperatures and should
stay away to avoid burns or clothing ignition.
Young children should be carefully supervised
when they are in the area of the appliance.
Clothing or other ammable materials should
not be hung from the appliance, or placed
on or near the appliance. Any guard or other
protective device removed for servicing the
appliance must be replaced prior to operating
the appliance.
Installation and repair should be done by a
qualied service person The appliance should
be inspected before use and at least annually
by a qualied service person. More frequent
cleaning may be required as necessary. It is
imperative that control compartment, burners
and circulating air passageways of the appliance
be kept clean.
Use caution when assembling and operating re
pit to avoid cuts and scrapes from rough or sharp
edges.
DO NOT move the re pit while it is in use. Allow
the re pit to cool completely before moving or
storing.
When in use, the re pit must be on a level,
stable surface in an area clear of combustible
material. An asphalt surface (blacktop) may not
be acceptable for this purpose. Do not operate
re pit on ammable material such as carpet or a
wood deck. Store the re pit in a dry, protected
location.
This re pit is not intended for and should never
be used as a heater.
DO NOT leave re pit unattended while in use.
Operate the re pit with close supervision.
DO NOT operate around children or animals.
DO NOT bump or tip re pit. If re pit becomes
extremely hot, allow re pit to cool completely
before handling. If you must handle the re pit
while it is hot, always wear protective oven mitts
or heat resistant gloves when handling the re
pit or its components.
DO NOT obstruct ow of combustion air and/or
ventilation air for re pit.
DO NOT wear loose clothing while operating the
re pit. Tie back long hair while operating the
re pit. ALWAYS wear fully covering shoes while
operating the re pit.
Allow re pit and its components to cool
completely before conducting any routine
cleaning or maintenance. Do not move the re
pit when in use. Allow the re pit to cool before
moving or storing.
DO NOT use this appliance if any part has been
under water. Immediately call a qualied service
technician to inspect the appliance and to
replace any part of the control system and any
gas control which has been under water.
An LP cylinder not connected for use should not
be stored in the vicinity of re pit or any other
re pit. Do not store spare LP cylinders within
10 feet of re pit. LP cylinders must be stored
outdoors, out of reach of children. Do not store
a spare LP-gas cylinder under or near this re pit.
Never ll the cylinder beyond 80 percent full.
Failure to follow these instructions exactly could
result in a re causing death or serious injury.
While the re pit is not in use, the gas must
be turned off at the supply cylinder. The re
pit should be shut off and all supply valves (on
piping or on fuel cylinders) should be closed
in the event that the odor of unburned gas is
detected. Do not attempt to use the unit until
any gas leaks are xed. Do not use the re pit
if the burner fails to light or fails to remain
lit. Under such conditions, gas should be shut
off and fuel cylinders should be disconnected.
WARNING
DO NOT use this re pit in a manner other
than its intended purpose. Not intended for
commercial use. Not intended to be installed
or used in or on a recreational vehicle or
oat. Keep a re extinguisher accessible at
all times. The use of alcohol, prescription
or nonprescription drugs may impair the
consumer’s ability to properly assemble or
safely operate this re pit. Solid fuels shall not
be burned in this gas replace.
DANGER
If you smell gas:
1. Shut off gas to the appliance.
2. Extinguish any open ame.
3. If odor continues, keep away from the appliance and
immediately call your gas supplier or re department.
WARNING
Do not store or use gasoline or other liquids with ammable
vapors in the vicinity of this or any other appliance. An LP
cylinder not connected for use shall not be stored in the
vicinity of this or any other appliance.
CARBON MONOXIDE HAZARD
This appliance can produce carbon monoxide which has no odor.
Using it in an enclosed space can kill you.
Never use this appliance in an enclosed space such as a camper,
tent, car or home.
WARNING
For Outdoor Use Only.
ASSEMBLY INSTRUCTIONS -
1. Connect the
top ring to the
re pit using the 3
supplied bolts and
screws as shown in
Figure 1. Note the
brackets should
go on the inside
of the re pit.
2. Arrange the
12 pounds of
lava rock around
the burner. For
a more realistic looking ame arrange the rock to
cover most of the burner. Be careful not to allow
any rock to come between the igniter electrode and
the burner. (See Fig 2)
WARNING
Fig 2

Do not operate under high wind conditions.
All installations are to conform to local codes.
In the absence of local codes, installation
should conform to the National Fuel Gas Code,
ANSIZ223.1/NFPA 54
Fire pit should be installed with the hose
regulator assembly extended at full length of
hose directly away from the burner. When so
congured, placement results in maximum tank
to re pit distance. When re pit is operated,
the hose/regulator and gas tank should be on
a line perpendicular to wind
direction. Placing tank closer
than 48” to the re pit can
overheat the tank and cause
release of propane through
relief openings and can result
in tank re or explosion.
Propane tank must be set
inside of the included tank
support ring. Do not use re
pit if tank is not inside of
support ring or with the tank
in the incorrect position.
CONNECTING THE LP TANK
1. The knob on the LP tank must
be closed. See that the knob is
turned clockwise to a full stop.
2. Check that the control knob
on the re pit is turned off.
3. Remove the protective cap
from the LP tank valve and
coupling nut, if present.
4. Hold the regulator in one
hand and insert the nipple into the valve outlet.
Be sure the nipple is centered in the valve
outlet. The coupler connects to the large outside
threads on the valve outlet
5. Hand tighten
the coupler
clockwise until
it comes to a
full stop. Firmly
tighten by hand
only.
6. Place the tank to
the side or rear of
the re pit. Make
sure the hose does
not touch any
part of the burner
drum housing.
The re pit is to be used only with the 20
pound, vertical standing vapor withdrawal type
tank. This re pit is designed to operate on
LP (Liqueed Propane) gas only. The 20 lb LP
cylinder used with this re pit must conform to
the following requirements:
• Type 1 Connections
• Diameter - 12” (30.5cm)
• Height - 18” (45.7cm)
• Maximum capacity of 20 pounds
The gas cylinder used must include a collar to
protect the cylinder valve. The cylinder supply
system must be arranged for vapor withdrawal.
Follow the instructions stated on gas cylinder
tanks when lling or transporting tanks. Failure
to do so could result in problems relating to
overlling, excessive venting release of gas and
to regulator freezing. Never ll the cylinder
more than 80 percent full.
Do not allow dirt or foreign material to get into
or onto tank connection when it is not attached
to the fuel supply system. Use the protective cap
provided. Place dust cap on cylinder valve outlet
whenever the cylinder is not in use. Only install
the type of dust cap on the cylinder valve outlet
that is provided with the cylinder valve. Other
types of caps or plugs may result in leakage of
propane. Cylinders must be lled before initial
use. All handling, transport, lling and storage
of LP gas cylinders must be in accordance
with NFPA 58 Storage and Handling of Liquid
Petroleum Gasses, or CAN/CSA b149.2 Propane
Installation Code.
Cylinders must be suitably tied down during
transport. Do not place any other items on top
of cylinders at any time.
Cylinders are not to be exposed to excessive
temperatures or high heat. Refer to the data
plate for model identication. Units are factory
equipped for use on only one type of fuel. These
units cannot be, and should not be used on
other types of fuels. Doing so can cause severe
damage to the unit and the installation area and
the added risk of serious injury. Any attempt to
operate this product on fuels for which it is not
designed voids the manufacturer’s warranty.
This unit is not to be utilized with a non-self-
contained LP-gas supply system.
CHECKING FOR LEAKS
1. After all connections are completed, check all
connections and ttings for leaks with a soap
solution.
2. With all valves closed, apply the leak check
solution (50/50 mix of dish washing soap
detergent and water) to all gas carrying
connections and ttings.
3. Open tank valve. Presence of bubbles at areas
of wet solution indicates a gas leak. If leaks are
detected or you smell or hear gas, shut off the
valve and repair the leak or replace the defective
part.
Do not use the re pit until all leaks are
corrected.
Care should be taken to protect the fuel supply
hose from damage from either foot or vehicle
trafc. If the re pit is not in use, the gas must
be turned off at the supply cylinder and the
cylinder should be disconnected from the re pit.
Storage of the re pit indoors is only permissible
if the cylinder is disconnected and removed from
the re pit.
OPERATING INSTRUCTIONS
Lighting Procedures
1. Check all connections for leaks using the
“soapy water” test.
2. Check for any blockage to the venturi tube or
burner. Remove any foreign objects or matter.
3. Be sure the burner control knob is “OFF”.
4. Open the LP cylinder valve ONLY
1-1/2 turns by turning counterclockwise.
5. Push knob in and turn slowly to the high
position. Ignitor will spark and gas will ignite.
Wait 15 seconds after ignition before releasing
knob. If ame does not ignite immediately, turn
the gas valve off and wait 5 minutes before
attempting to relight. If re pit does not light,
check ignition electrode wire. Turn gas off at the
supply cylinder. Check spark gap and make sure
wire is 1/8” from burner port. Make sure rock
isn’t touching the ignitor wire. Turn knob slowly
to high and watch for spark. Once electrode is
working properly relight the appliance. If ame
is extinguished, wait 5 minutes before relighting.
Failure to follow these instructions exactly could
result in re, serious injury or death.
SHUTTING THE FIRE PIT OFF
Turn the control knob at the regulator off by
turning clockwise The burner ame should
then go out. Turn off the LP cylinder valve by
turning the knob clockwise until it stops. Follow
instructions in this manual for proper storage
procedures and the important warnings and
safe guards on pages. When an LP tank is not
connected, and to help prevent dirt or other
foreign particles from clogging the HVR, hang
the end of the HVR hose from the outer ring.
Inspect the ame at the burner to ensure a
proper ame.
To protect
your re
pit from
weather,
always keep
your re
pit covered
while not
in use. The
cover must be removed and stored safely away
from the re pit when the re pit is in use.
CLEANING
Clean the stand of the re pit using hot soapy
water. High temperature spray paint can be used
to touch up any scratches in the paint. Use a wire
brush to remove any loose paint before touching
up. Make sure to dry thoroughly before use.
The rocks can be removed from the re pit and
cleaned using soapy water or sprayed off using a
hose sprayer. The outside of the burner may be
wiped clean using soapy water. A pipe cleaner
can be used to remove any spider webs from the
venturi tube.
(B) Nipple
has to be
centered into
the LP tank
valve
(C) Hold
coupling nut
and regulator
as shown
for proper
connection to
LP tank valve
CAUTION
The gas pressure regulator provided with
this appliance must be used. This regulator
is set for an outlet pressure of 11” H20.
Replacement pressure regulators and hose
assemblies must be those specied by the
re pit manufacturer. See rating sticker on
side of re pit for regulator model number.
The regulator/hose assembly should be
handled carefully to prevent contamination
by foreign objects and dirt. The assembly
should be inspected before use and any dirt
or contamination should be wiped off. The
hose assembly must be replaced prior to the
appliance being used if there is any evidence
of excessive abrasion or wear, or if the hose
is damaged. In order to insure
proper operation, any replacement of the
regulator assembly must be with parts
authorized by manufacturer. Valve/pressure
regulators are factory set to the correct
operating pressures. No attempts should be
made to adjust these settings.
CAUTION
The burner must be inspected before each
use of the appliance. If it is evident that the
burner is damaged it must be replaced before
the appliance is put into use. The burner
must be replaced only by factory authorized
parts as specied by the manufacturer.
CAUTION
The re pit can become very hot while in
use. Do not touch any portion of the re
pit except for the control knob next to
the regulator. It may be necessary to use
protective gloves.
CAUTION
In the connection process, the HVR side
of the connection will seal on the back
check in the valve, resulting in a slight
resistance. The connection requires about
one-half to three quarters additional turn
to complete connection. Any fuel supply
cylinder used must be constructed and
marked in accordance with specications for
propane cylinders of the U.S. Department of
Transportation (DOT)CFR 49 or CAN/CSA B339.
/