Sony DCR-DVD115E User manual

Category
Camcorders
Type
User manual
3-285-367-11(1)
© 2008 Sony Corporation
http://www.sony.net/
Printed on 70% or more recycled paper
using VOC (Volatile Organic Compound)-
free vegetable oil based ink.
Printed in China
Additional information on this product and answers
to frequently asked questions can be found at our
Customer Support Website.
GB
Digital Video Camera Recorder
Operating Guide
DCR-DVD110E/DVD115E/
DVD310E/DVD410E/DVD610E/
DVD710E/DVD810E
Enjoying with Your
Camcorder
11
Getting Started 19
Recording/Playback 34
Editing 50
Utilizing Media 66
Customizing Your
Camcorder
78
Performing with Your
Computer
97
Troubleshooting 101
Additional
Information
114
Quick
Reference
129
2
Read this before operating your camcorder
Before operating the unit, please read this
manual thoroughly, and retain it for future
reference.
To reduce fire or shock hazard, do
not expose the unit to rain or
moisture.
Do not expose the batteries to
excessive heat such as sunshine,
fire or the like.
CAUTION
The use of optical instruments with this product
will increase eye hazard. Use of controls or
adjustments or performance of procedures other
than those specified herein may result in
hazardous radiation exposure.
Replace the battery with the
specified type only. Otherwise, fire
or injury may result.
A moulded plug complying with BS1363 is fitted
to this equipment for your safety and
convenience.
Should the fuse in the plug supplied need to be
replaced, a fuse of the same rating as the supplied
one and approved by ASTA or BSI to BS1362
(i.e., marked with or mark) must be used.
If the plug supplied with this equipment has a
detachable fuse cover, be sure to attach the fuse
cover after you change the fuse. Never use the
plug without the fuse cover. If you should lose the
fuse cover, please contact your nearest Sony
service station.
ATTENTION
The electromagnetic fields at the specific
frequencies may influence the picture and sound
of this unit.
This product has been tested and found compliant
with the limits set out in the EMC Directive for
using connection cables shorter than 3 meters (9.8
feet).
Notice
If static electricity or electromagnetism causes
data transfer to discontinue midway (fail), restart
the application or disconnect and connect the
communication cable (USB, etc.) again.
Disposal of Old Electrical
& Electronic Equipment
(Applicable in the
European Union and other
European countries with
separate collection
systems)
This symbol on the product or on its packaging
indicates that this product shall not be treated as
household waste. Instead it shall be handed over
to the applicable collection point for the recycling
of electrical and electronic equipment. By
ensuring this product is disposed of correctly, you
will help prevent potential negative consequences
for the environment and human health, which
could otherwise be caused by inappropriate waste
handling of this product. The recycling of
materials will help to conserve natural resources.
For more detailed information about recycling of
this product, please contact your local Civic
Office, your household waste disposal service or
the shop where you purchased the product.
WARNING
FOR CUSTOMERS IN THE
UNITED KINGDOM
FOR CUSTOMERS IN EUROPE
3
Applicable Accessory: Remote Commander
(DCR-DVD310E/DVD410E/DVD710E/
DVD810E)
Disposal of waste
batteries (applicable in
the European Union and
other European countries
with separate collection
systems)
This symbol on the battery or on
the packaging indicates that the battery provided
with this product shall not be treated as household
waste. By ensuring these batteries are disposed of
correctly, you will help prevent potentially
negative consequences for the environment and
human health which could otherwise be caused by
inappropriate waste handling of the battery. The
recycling of the materials will help to conserve
natural resources. In case of products that for
safety, performance or data integrity reasons
require a permanent connection with an
incorporated battery, this battery should be
replaced by qualified service staff only. To ensure
that the battery will be treated properly, hand over
the product at end-of-life to the applicable
collection point for the recycling of electrical and
electronic equipment. For all other batteries,
please view the section on how to remove the
battery from the product safely. Hand the battery
over to the applicable collection point for the
recycling of waste batteries.
For more detailed information about recycling of
this product or battery, please contact your local
Civic Office, your household waste disposal
service or the shop where you purchased the
product.
Notice for the customers in the
countries applying EU Directives
The manufacturer of this product is Sony
Corporation, 1-7-1 Konan Minato-ku Tokyo, 108-
0075 Japan. The Authorized Representative for
EMC and product safety is Sony Deutschland
GmbH, Hedelfinger Strasse 61, 70327 Stuttgart,
Germany. For any service or guarantee matters
please refer to the addresses given in separate
service or guarantee documents.
If you have any questions about this product, you
may call:
Sony Customer Information Center
1-800-222-SONY (7669).
The number below is for the FCC related matters
only.
Regulatory Information
For customers in the U.S.A.
Declaration of Conformity
Trade Name: SONY
Model No.: DCR-DVD610E
Responsible Party:Sony Electronics Inc.
Address: 16530 Via Esprillo, San Diego, CA
92127 U.S.A.
Telephone No.: 858-942-2230
This device complies with Part 15 of the FCC
Rules. Operation is subject to the following two
conditions: (1) This device may not cause
harmful interference, and (2) this device must
accept any interference received, including
interference that may cause undesired operation.
Declaration of Conformity
Trade Name: SONY
Model No.: DCR-DVD710E
Responsible Party:Sony Electronics Inc.
Address: 16530 Via Esprillo, San Diego, CA
92127 U.S.A.
Telephone No.: 858-942-2230
This device complies with Part 15 of the FCC
Rules. Operation is subject to the following two
conditions: (1) This device may not cause
harmful interference, and (2) this device must
accept any interference received, including
interference that may cause undesired operation.
Continued ,
4
Read this before operating your camcorder (Continued)
CAUTION
You are cautioned that any changes or
modifications not expressly approved in this
manual could void your authority to operate this
equipment.
Note
This equipment has been tested and found to
comply with the limits for a Class B digital
device, pursuant to Part 15 of the FCC Rules.
These limits are designed to provide reasonable
protection against harmful interference in a
residential installation. This equipment generates,
uses, and can radiate radio frequency energy and,
if not installed and used in accordance with the
instructions, may cause harmful interference to
radio communications.
However, there is no guarantee that interference
will not occur in a particular installation. If this
equipment does cause harmful interference to
radio or television reception, which can be
determined by turning the equipment off and on,
the user is encouraged to try to correct the
interference by one or more of the following
measures:
Reorient or relocate the receiving antenna.
– Increase the separation between the equipment
and receiver.
– Connect the equipment into an outlet on a
circuit different from that to which the receiver
is connected.
– Consult the dealer or an experienced radio/TV
technician for help.
The supplied interface cable must be used with the
equipment in order to comply with the limits for a
digital device pursuant to Subpart B of Part 15 of
FCC Rules.
Battery pack
This device complies with Part 15 of the FCC
Rules. Operation is subject to the following two
conditions:
(1) This device may not cause harmful
interference, and (2) this device must accept any
interference received, including interference that
may cause undesired operation.
Your camcorder is supplied with two
kinds of operations guides.
“Operating Guide” (This manual)
“PMB Guide” for using your camcorder
with a computer connected (stored on the
supplied CD-ROM) (p. 97)
Types of the disc you can use in your
camcorder
You can use the following discs only.
8cm DVD-RW
8cm DVD+RW
8cm DVD-R
8cm DVD+R DL
Use the discs with marks listed below. See
page 12 for details.
For reliability and durability of recording/
playback, we recommend that you use Sony
discs or discs with a
*(for VIDEO
CAMERA) mark for your camcorder.
* Depending on the place you purchase, the disc
has mark.
b Note
Using a disc other than the above may cause the
unsatisfactory recording/playback or you may
not be able to remove the disc from your
camcorder.
Declaration of Conformity
Trade Name: SONY
Model No.: DCR-DVD810E
Responsible Party:Sony Electronics Inc.
Address: 16530 Via Esprillo, San Diego, CA
92127 U.S.A.
Telephone No.: 858-942-2230
This device complies with Part 15 of the FCC
Rules. Operation is subject to the following two
conditions: (1) This device may not cause
harmful interference, and (2) this device must
accept any interference received, including
interference that may cause undesired operation.
Notes on use
5
Types of “Memory Stick” you can use
in your camcorder
For recording movies, it is recommended
that you use a “Memory Stick PRO Duo”
of 512 MB or larger marked with:
(“Memory Stick
PRO Duo”)*
(“Memory Stick
PRO-HG Duo”)
* You can use a “Memory Stick PRO Duo”
marked either with “Mark2” or without.
See page 33 for the recordable time of a
“Memory Stick PRO Duo.”
“Memory Stick PRO Duo”/“Memory Stick
PRO-HG Duo
(This size can be used with your
camcorder.)
“Memory Stick”
(You cannot use it in your camcorder.)
“Memory Stick PRO Duo” and “Memory
Stick PRO-HG Duo” are both referred to
as “Memory Stick PRO Duo” in this
manual.
You cannot use any type of memory card
other than those mentioned above.
“Memory Stick PRO Duo” can be used
only with “Memory Stick PRO”
compatible equipment.
Do not attach a label or the like on a
“Memory Stick PRO Duo” or a Memory
Stick Duo adaptor.
When using a “Memory Stick PRO Duo”
with “Memory Stick” compatible
equipment, be sure to insert the “Memory
Stick PRO Duo” into the Memory Stick
Duo adaptor.
Using the camcorder
Do not hold the camcorder by the
following parts.
The camcorder is not dustproofed,
dripproofed or waterproofed. See “About
handling of your camcorder” (p. 121).
To prevent media from being broken or
recorded images from being lost, do not
do the following when either of the
(Movie)/ (Still) lamps (p. 24) or the
ACCESS/access lamps (p. 30, 32) are on:
to remove the battery pack or AC
Adaptor from the camcorder
to apply mechanical shock or vibration to
the camcorder
to remove the “Memory Stick PRO Duo”
from the camcorder
When connecting your camcorder to
another device with a cable, be sure to
insert the connector plug in the correct
way. Pushing the plug forcibly into the
terminal will damage the terminal and
may result in a malfunction of your
camcorder.
About menu items, LCD panel,
viewfinder, and lens
A menu item that is grayed out is not
available under the current recording or
playback conditions.
The LCD screen and the viewfinder are
manufactured using extremely high-
precision technology, so over 99.99% of
Viewfinder LCD screen
Battery
Continued ,
6
Read this before operating your camcorder (Continued)
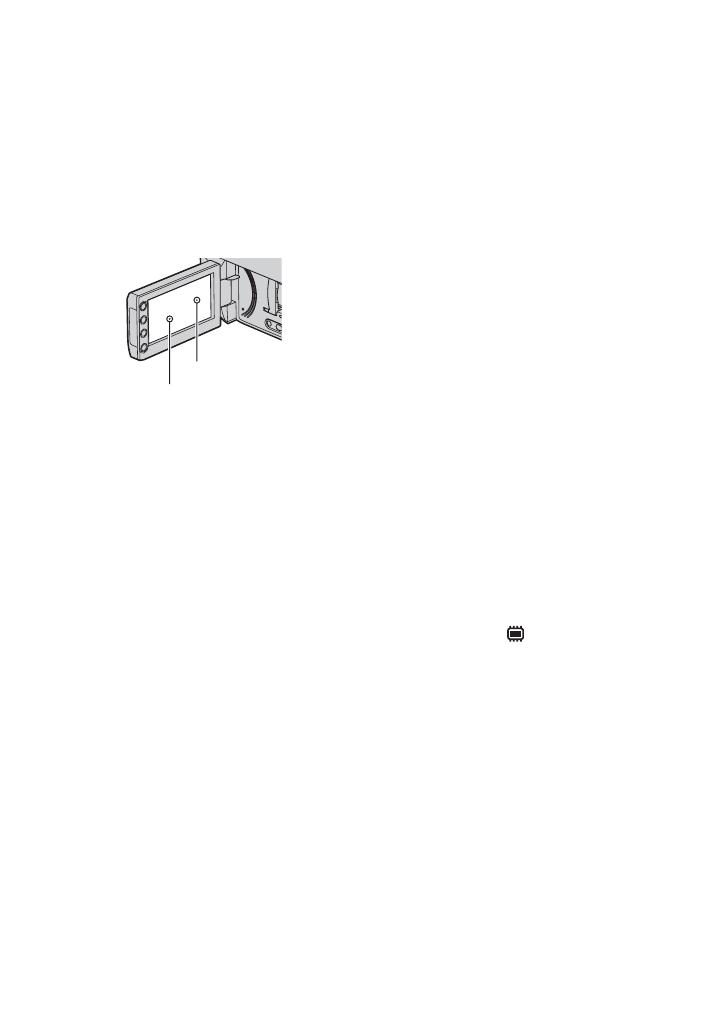
the pixels are effective. However, there
may be some tiny black points and/or
bright points (white, red, blue, or green in
color) that appear constantly on the LCD
screen and the viewfinder. These points
are normal results of the manufacturing
process and do not affect the recording in
any way.
Exposing the LCD screen, the viewfinder,
or the lens to direct sunlight for long
periods of time may cause malfunctions.
• Do not aim at the sun. Doing so might
cause your camcorder to malfunction.
Take images of the sun only in low light
conditions, such as at dusk.
On recording
Before starting to record, test the
recording function to make sure the image
and sound are recorded without any
problems.
DCR-DVD110E/DVD115E/DVD310E/
DVD610E/DVD710E
Use a DVD-RW/DVD+RW for trial
recording.
DCR-DVD410E/DVD810E
Make trial recording on the internal memory.
• Compensation for the contents of
recordings cannot be provided, even if
recording or playback is not possible due
to a malfunction of the camcorder,
recording media, etc.
TV color systems differ depending on the
countries/regions. To view your
recordings on a TV, you need a PAL
system-based TV.
Television programs, films, video tapes,
and other materials may be copyrighted.
Unauthorized recording of such materials
may be contrary to the copyright laws.
If you repeat recording/deleting images
for a long time, fragmentation of data
occurs on the internal memory (DCR-
DVD410E/DVD810E) or a “Memory
Stick PRO Duo.” Images cannot be saved
or recorded. In such a case, save your
images on another type of media first
(p. 55, 62), and then format the media
(p. 72).
About language setting
The on-screen displays in each local
language are used for illustrating the
operating procedures. Change the screen
language before using your camcorder if
necessary (p. 25).
About disposal/transfer (DCR-
DVD410E/DVD810E)
Even if you format the internal memory on
your camcorder (p. 72), data may not be
completely deleted from the internal
memory. When you give or sell your
camcorder to somebody, it is recommended
that you perform [ EMPTY] (p. 77) to
prevent the recovery of your data. In
addition to the above, when you dispose of
the camcorder, it is recommended that you
destroy the actual body of the camcorder.
About the Carl Zeiss lens
Your camcorder is equipped with a Carl
Zeiss lens, which was developed jointly by
Carl Zeiss, in Germany, and Sony
Corporation, and produces superior images.
It adopts the MTF measurement system for
video cameras and offers a quality typical
of a Carl Zeiss lens.
MTF = Modulation Transfer Function. The
number value indicates the amount of light
from a subject coming into the lens.
Black point
White, red, blue or
green point
7
About this manual
The LCD screens and the viewfinder
images and indicators shown in this
manual were taken with a digital still
camera, and may look different from what
you actually see.
Discs in this manual refers to 8cm DVD
discs.
In this manual, the internal memory
(DCR-DVD410E/DVD810E), a disc and
a “Memory Stick PRO Duo” are called the
media.
Unless otherwise specifically indicated,
illustrations in this manual are based on
DCR-DVD810E.
Design and specifications of media and
other accessories are subject to change
without notice.
About the marks used in this manual
The operations available depend on the
media used. The following marks are
used to indicate the type of media you
can use for a particular operation.
Internal Memory
Disc
“Memory Stick PRO Duo”
8
Table of Contents
Read this before operating your
camcorder .................................... 2
Table of Contents ........................... 8
Subject examples and solutions ... 10
Enjoy using various “Media”
according to your needs ............. 11
Media for your camcorder ............ 12
Using your camcorder .................. 14
HOME” and “ OPTION”
- Taking advantage of two types of
menus ......................................... 16
Step 1: Checking supplied items .. 19
Step 2: Charging the battery pack 20
Step 3: Turning the power on, and
setting the date and time ............ 24
Changing the language setting ... 25
Step 4: Making adjustments before
recording .................................... 26
Step 5: Selecting media ............... 28
Step 6: Inserting a disc or a “Memory
Stick PRO Duo” .......................... 30
Recording and playing back with ease
(Easy Handycam operation) ....... 34
Recording ..................................... 38
Zooming ...................................... 40
Recording sound with more
presence (5.1ch surround
recording) (DCR-DVD115E/
DVD310E/DVD410E/DVD710E/
DVD810E) ................................. 40
Starting to record quickly (QUICK
ON) ........................................... 41
Recording in dark places (NightShot
plus) .......................................... 41
Adjusting the exposure for backlit
subjects .................................... 41
Recording in mirror mode ........... 41
Playback ....................................... 43
Searching for scenes with pinpoint
accuracy (Film Roll Index) ........ 45
Searching for desired scenes by a
face (Face Index) ...................... 45
Searching for desired images by
date (Date Index) ...................... 46
Using PB zoom ............................ 46
Playing back a series of still images
(Slide show) .............................. 47
Playing the images on a TV ......... 48
(OTHERS) category ................ 50
Deleting images ............................ 51
Capturing a still image from a movie
(DCR-DVD410E/DVD610E/
DVD710E/DVD810E) ................. 53
Dubbing/copying images to media
within your camcorder ................ 55
Dividing movies ............................ 58
Creating the Playlist ..................... 59
Dubbing movies to VCR or DVD/HDD
recorders .................................... 62
Printing still images (PictBridge
compliant printer) ........................ 64
(MANAGE MEDIA) category .. 66
Making the disc compatible with
playback on other devices
(Finalizing) .................................. 67
Playing a disc on other devices .... 70
Checking media information .........71
Formatting media ......................... 72
Enjoying with Your Camcorder
Getting Started
Recording/Playback
Editing
Utilizing Media
9
Recording additional movies after
finalizing .....................................74
Finding the right disc (DISC SELECT
GUIDE) .......................................75
Repairing the image database file
.....................................................76
Preventing data on the internal
memory from being recovered
(DCR-DVD410E/DVD810E) .......77
What you can do with the
(SETTINGS) category of the
HOME MENU ........................78
Using the HOME MENU .............. 78
List of the (SETTINGS) category
items ......................................... 79
MOVIE SETTINGS .......................80
(Items for recording movies)
PHOTO SETTINGS ......................82
(Items for recording still images)
VIEW IMAGES SET .....................84
(Items to customize the display)
SOUND/DISP SET .......................86
(Items to adjust sound and the screen)
OUTPUT SETTINGS ....................87
(Items for when connecting other devices)
CLOCK/ LANG ..........................88
(Items to set clock and language)
GENERAL SET ............................88
(Other setup items)
Activating functions using the
OPTION MENU ......................90
Using the OPTION MENU ........... 90
Recording items on the OPTION
MENU ....................................... 91
Viewing items on the OPTION
MENU ....................................... 91
Functions set in the OPTION
MENU .........................................92
What you can do with Windows
computer .....................................97
Troubleshooting ..........................101
Warning indicators and messages
...................................................110
Using your camcorder abroad ....114
File/folder structure on the internal
memory (DCR-DVD410E/
DVD810E) and a “Memory Stick
PRO Duo .................................116
Maintenance and precautions .....117
About the disc ........................... 117
About the “Memory Stick” ......... 118
About the “InfoLITHIUM” battery
pack ........................................ 119
About handling of your camcorder
................................................. 121
Specifications ..............................125
Identifying parts and controls ......129
Indicators displayed during recording/
playback ....................................133
Glossary ......................................135
Index ...........................................136
Customizing Your Camcorder
Performing with Your Computer
Troubleshooting
Additional Information
Quick Reference
10
Subject examples and solutions
Shooting
Flowers in close-up
B PORTRAIT...................................... 94
B FOCUS............................................ 92
B TELE MACRO ................................. 92
Focusing on the
dog on the left side
of the screen
B FOCUS............................................ 92
B SPOT FOCUS.................................. 92
Getting a good shot
of a ski slope or
beach
B BACK LIGHT................................... 41
B BEACH............................................ 94
B SNOW ............................................ 94
Checking your golf
swing
B SPORTS ......................................... 94
A child on the stage
under a spot light
B SPOTLIGHT.....................................94
Fireworks with all
its splendor
B FIREWORKS....................................93
B FOCUS ............................................92
A sleeping child
under dim light
B NightShot plus ................................41
B COLOR SLOW SHTR.......................95
11
Enjoying with Your Camcorder
Enjoy using various “Media” according to your
needs
You can select desired media for recording/playback/editing from the internal memory (DCR-
DVD410E/DVD810E), a disc or a “Memory Stick PRO Duo” (p. 28). To set the media for
movies or still images, you can select either [MOVIE MEDIA SET] or [PHOTO MEDIA
SET] (DCR-DVD410E/DVD810E) according to your needs.
Using the [MOVIE DUB] function on the camcorder, you can dub movies recorded on the
internal memory (DCR-DVD410E/DVD810E) or a “Memory Stick PRO Duo” to a disc
without connecting another device (p. 55).
b Notes
You may not be able to dub movie contents depending on the type of your camcorder. For details on the
compatibility of types, see page 55.
Selecting media
Dubbing from one type of media to another
12
Media for your camcorder
With your camcorder, you can record images on either the internal memory (DCR-DVD410E/
DVD810E), an 8cm DVD-RW, DVD+RW, DVD-R or DVD+R DL disc, or a “Memory Stick
PRO Duo.” See page 5 for the types of “Memory Stick” you can use in your camcorder.
When you use a DVD-RW, you can choose the recording format from VIDEO mode or VR
mode.
In this manual, VIDEO mode is indicated as and VR mode as .
VIDEO mode and VR mode Glossary (p. 135)
Recording format for DVD-RW
A recording format that is compatible with most DVD devices, especially after
finalizing.
In VIDEO mode, only the most recent movie can be deleted.
A recording format that enables editing with your camcorder (deleting and rearranging
the order of images).
A finalized disc can be played back in DVD devices that support VR mode.
Refer to the instruction manual of your DVD device to see whether it supports the VR
mode of DVD-RW.
Disc features
Figures in parentheses ( ) indicate reference pages.
Disc types and symbols
DVD-RW DVD+RW DVD-R DVD+R DL
Symbols used in this manual
Both 16:9 (wide) and 4:3 movie can be recorded
on the same disc
(30)
zz zz
Deleting the most recent movie (52) zzz ––
Deleting or editing movie on your camcorder (51)
z ––
Using a disc repeatedly by formatting, even if the
disc becomes full*
(72)
zzz ––
Finalizing required to play on other devices (67)
zz
*1
** zz
Making longer recordings on a side of a disc ––z
* Formatting deletes all images and returns the recording media to its original empty state (p. 72). Even
when using a new disc, format it with your camcorder (p. 30).
** Finalizing is required to play the disc in a DVD drive on a computer. A DVD+RW that is not finalized
may cause the computer to malfunction.
13
Enjoying with Your Camcorder
Figures in the table are the approximate recording time in minutes using the internal memory
(DCR-DVD410E/DVD810E) and on one side of a disc.
The recordable time on the acceptable media varies depending on media type and the [REC
MODE] (p. 80) setting.
Figures in ( ) are the minimum recording time.
* DCR-DVD410E/DVD810E
z Tips
Figures such as 9M and 6M in the table show the average bit rate. M stands for Mbps.
You can check the recordable time with [MEDIA INFO] (p. 71).
When you use a double-sided disc, you can record images on both sides (p. 117).
See page 33 for the recordable time on a “Memory Stick PRO Duo.
Recording time of movies
Media type
9M (HQ) (high quality)
115 (100) 20 (18) 35 (32)
6M (SP) (standard quality)
170 (100) 30 (18) 55 (32)
3M (LP) (long play)
325 (215) 60 (44) 110 (80)
*
Your camcorder uses the VBR (Variable Bit Rate) format to automatically adjust image quality to suit the
recording scene. This technology causes fluctuations in the recording time of media. Movies containing
quickly moving and complex images are recorded at a higher bit rate, and this reduces the overall recording
time.
14
Using your camcorder
1Selecting media (p. 28)
You can select media separately for movies and still images.
In the case of recording on a disc, select the disc that best suits your needs.
Do you want to delete or edit images on your
camcorder?
Yes No
For long recording
Yes No
Do you want to delete images and reuse
the disc?
* Select the recording format and format the disc on your camcorder (p. 30).
zTips
You can select the disc from [DISC SELECT GUIDE] (p. 75).
2Recording images (p. 38)
3Editing/Saving images
The available functions depend on the selected media.
x Dubbing/copying images to another type of media within your camcorder (p. 55)
x Dubbing movies to other devices (p. 62)
x Editing on a computer (p. 97)
Using the supplied application software “Picture Motion Browser,” you can import
images to a computer, and save them on a disc.
15
Enjoying with Your Camcorder
4Viewing on other devices
x Viewing images on a TV (p. 48)
You can view the images recorded and edited on your camcorder on the connected TV.
x Playing the disc on other devices (p. 70)
To play a disc recorded on your camcorder on other devices, you need to finalize the
disc first.
bNotes
The less the recording volume of the disc is, the more it takes time to finalize the disc.
The features of a finalized disc depend on disc type.
Recordings cannot be added
even if there is free space left.
Like commercially sold DVD,
this disc can be played back in
most DVD devices after
finalizing.
The disc can be played back in
a device compatible with the
DVD-RW VR mode.
The disc can be played back without finalizing.
But finalizing is required in some cases.
For details, see page 67.
Unfinalizing allows you to add
movies (p. 74).
Movies can be added without
unfinalizing.
Playback compatibility
Playback compatibility with all DVD devices is not guaranteed. Refer to the instruction manual
supplied with your DVD device or consult your dealer.
16
HOME” and “ OPTION”
- Taking advantage of two types of menus
B Categories and items of the HOME MENU
(CAMERA) category
(VIEW IMAGES) category
(OTHERS) category
(MANAGE MEDIA) category
(SETTINGS) category
*
1
To customize your camcorder (p. 78).
HOME MENU” - the starting point for operations with your
camcorder
(HELP)
Displays a description of the item (p. 17)
Category
Items Page
MOVIE*
1
39
PHOTO*
1
39
Items Page
VISUAL INDEX*
1
43
INDEX*
1
45
INDEX*
1
45
PLAYLIST 59
Items Page
DELETE*
2
51
PHOTO CAPTURE*
3
53
MOVIE DUB*
3
55
PHOTO COPY*
3
56
EDIT 58
PLAYLIST EDIT 59
PRINT 64
USB CONNECT 97
Items Page
MOVIE MEDIA SET*
1
28
PHOTO MEDIA SET*
1
*
3
28
FINALIZE*
1
67
MEDIA INFO 71
MEDIA FORMAT*
1
72
UNFINALIZE 74
DISC SELECT GUIDE 75
REPAIR IMG.DB F. 76
*
1
You can also set these items during Easy
Handycam operation (p. 34). For items
available in the (SETTINGS) category,
see page 79.
*
2
The item is available during Easy Handycam
operation (p. 34) when you select [INT.
MEMORY] (DCR-DVD410E/DVD810E) or
[MEMORY STICK] on [MOVIE MEDIA
SET] (p. 28).
*
3
You may not be able to use this item depending
on your camcorder model.
17
Enjoying with Your Camcorder
1 While pressing the green button,
turn the POWER switch in the
direction of the arrow to turn on
your camcorder.
2 Press (HOME) A (or B).
3 Touch the desired category.
Example: (OTHERS) category
4 Touch the desired item.
Example: [EDIT]
5 Follow the guide on the screen for
further operation.
To hide the HOME MENU screen
Touch .
When you want to know something
about the function of each item on the
HOME MENU - HELP
1 Press (HOME).
The HOME MENU appears.
2 Touch (HELP).
The bottom of (HELP) turns orange.
Using the HOME MENU
(HOME) B
(HOME) A
Continued ,
18
3 Touch the item you want to know
the content.
When you touch an item, its explanation
appears on the screen.
To apply the option, touch [YES],
otherwise, touch [NO].
To deactivate the HELP
Touch (HELP) again in step 2.
Just a touch on the screen during shooting
or playback displays the functions available
at that moment. You will find it easy to
make various settings. See page 90 for
further details.
Using the OPTION MENU
(OPTION)
HOME” and “ OPTION” - Taking advantage of two types of menus
(Continued)
19
Getting Started
Getting Started
Step 1: Checking supplied items
Make sure that you have the following
items supplied with your camcorder.
The number in the parentheses indicates the
number of that item supplied.
AC Adaptor (1) (p. 20)
Power cord (mains lead) (1) (p. 20)
A/V connecting cable (1) (p. 48, 62)
USB cable (1) (p. 64)
Wireless Remote Commander (DCR-
DVD310E/DVD410E/DVD710E/
DVD810E) (1) (p. 132)
A button-type lithium battery is already installed.
Rechargeable battery pack NP-FH40 (1)
(p. 20)
CD-ROM “Handycam Application
Software” (1) (p. 97)
Picture Motion Browser (Software)
–PMB Guide
Operating Guide (This manual) (1)
20
Step 2: Charging the battery pack
You can charge the “InfoLITHIUM”
battery pack (H series) (p. 119) after
attaching it to your camcorder.
b Notes
Your camcorder operates only with
“InfoLITHIUM” battery pack (H series).
1 Turn the POWER switch in the
direction of the arrow to OFF
(CHG) (the default setting).
2 Attach the battery pack by sliding
it in the direction of the arrow
until it clicks.
3 Connect the AC Adaptor to the
DC IN jack of your camcorder.
Open the jack cover, and connect the
DC plug of the AC Adaptor.
Match the v mark on the DC plug with
the v mark on your camcorder.
4 Connect the power cord (mains
lead) to the AC Adaptor and the
wall outlet (wall socket).
The CHG (charge) lamp lights up and
charging starts.
5 The CHG (charge) lamp turns off
when the battery is fully charged.
Disconnect the AC Adaptor from
the DC IN jack.
b Notes
Disconnect the AC Adaptor from the DC IN
jack holding both the camcorder and the DC
plug.
POWER switch
DC IN jack
DC plug
AC Adaptor
Power cord (mains lead)
To the wall outlet
(wall socket)
Jack cover
CHG (charge) lamp
Battery
  • Page 1 1
  • Page 2 2
  • Page 3 3
  • Page 4 4
  • Page 5 5
  • Page 6 6
  • Page 7 7
  • Page 8 8
  • Page 9 9
  • Page 10 10
  • Page 11 11
  • Page 12 12
  • Page 13 13
  • Page 14 14
  • Page 15 15
  • Page 16 16
  • Page 17 17
  • Page 18 18
  • Page 19 19
  • Page 20 20
  • Page 21 21
  • Page 22 22
  • Page 23 23
  • Page 24 24
  • Page 25 25
  • Page 26 26
  • Page 27 27
  • Page 28 28
  • Page 29 29
  • Page 30 30
  • Page 31 31
  • Page 32 32
  • Page 33 33
  • Page 34 34
  • Page 35 35
  • Page 36 36
  • Page 37 37
  • Page 38 38
  • Page 39 39
  • Page 40 40
  • Page 41 41
  • Page 42 42
  • Page 43 43
  • Page 44 44
  • Page 45 45
  • Page 46 46
  • Page 47 47
  • Page 48 48
  • Page 49 49
  • Page 50 50
  • Page 51 51
  • Page 52 52
  • Page 53 53
  • Page 54 54
  • Page 55 55
  • Page 56 56
  • Page 57 57
  • Page 58 58
  • Page 59 59
  • Page 60 60
  • Page 61 61
  • Page 62 62
  • Page 63 63
  • Page 64 64
  • Page 65 65
  • Page 66 66
  • Page 67 67
  • Page 68 68
  • Page 69 69
  • Page 70 70
  • Page 71 71
  • Page 72 72
  • Page 73 73
  • Page 74 74
  • Page 75 75
  • Page 76 76
  • Page 77 77
  • Page 78 78
  • Page 79 79
  • Page 80 80
  • Page 81 81
  • Page 82 82
  • Page 83 83
  • Page 84 84
  • Page 85 85
  • Page 86 86
  • Page 87 87
  • Page 88 88
  • Page 89 89
  • Page 90 90
  • Page 91 91
  • Page 92 92
  • Page 93 93
  • Page 94 94
  • Page 95 95
  • Page 96 96
  • Page 97 97
  • Page 98 98
  • Page 99 99
  • Page 100 100
  • Page 101 101
  • Page 102 102
  • Page 103 103
  • Page 104 104
  • Page 105 105
  • Page 106 106
  • Page 107 107
  • Page 108 108
  • Page 109 109
  • Page 110 110
  • Page 111 111
  • Page 112 112
  • Page 113 113
  • Page 114 114
  • Page 115 115
  • Page 116 116
  • Page 117 117
  • Page 118 118
  • Page 119 119
  • Page 120 120
  • Page 121 121
  • Page 122 122
  • Page 123 123
  • Page 124 124
  • Page 125 125
  • Page 126 126
  • Page 127 127
  • Page 128 128
  • Page 129 129
  • Page 130 130
  • Page 131 131
  • Page 132 132
  • Page 133 133
  • Page 134 134
  • Page 135 135
  • Page 136 136
  • Page 137 137
  • Page 138 138
  • Page 139 139

Sony DCR-DVD115E User manual

Category
Camcorders
Type
User manual

Ask a question and I''ll find the answer in the document

Finding information in a document is now easier with AI