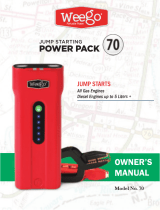
90643

Draper 90643 Operating instructions

  • Hello! I've analyzed the user manual for the Draper Power pack PP12V17Y. This document provides instructions on how to use the power pack for jump-starting vehicles and powering other 12V devices. The manual covers important safety instructions, battery recharging procedures, and details on using the device's features, such as its LED light, USB charging and test button. I am ready to answer any questions you have about this device based on the information contained in this document.
  • What type of battery does this power pack use?
    Can this power pack charge other devices?
    What is the purpose of the test button?
IMPORTANT: Please read these instructions carefully to ensure the safe and effective use of this product and save
these instructions for future reference. This manual has been compiled by Draper Tools and is an integrated part of the
product with which it is enclosed and should be kept with it for future references.
This manual describes the purpose for which the product has been designed and contains all the necessary information
to ensure its correct and safe use. We recommend that this manual is read before any operation or, before performing
any kind of adjustment to the product and prior to any maintenance tasks. By following all the general safety
instructions contained in this manual, it will ensure both product and operator safety, together with longer life of the
product itself.
AlI photographs and drawings in this manual are supplied by Draper Tools to help illustrate the operation of the product.
Whilst every effort has been made to ensure accuracy of information contained in this manual, the Draper Tools policy
of continuous improvement determines the right to make modifications without prior warning.
12V
POWER PACK
90643
1.1 INTRODUCTION:
USER MANUAL FOR:
12V POWER PACK
Stock no. 90643
Part no. PP12V17Y
1.2 REVISIONS:
As our user manuals are continually updated, users should make sure that they use the
very latest version.
Downloads are available from: http://www.drapertools.com/manuals
DRAPER TOOLS LIMITED WEBSITE: drapertools.com
HURSLEY ROAD PRODUCT HELPLINE: +44 (0) 23 8049 4344
CHANDLER’S FORD GENERAL FAX: +44 (0) 23 8026 0784
EASTLEIGH
HAMPSHIRE
SO53 1YF
UK
1.3 UNDERSTANDING THIS MANUALS SAFETY CONTENT:
WARNING! Information that draws attention to the risk of injury or death.
CAUTION! Information that draws attention to the risk of damage to the product or
surroundings.
1.4 COPYRIGHT © NOTICE:
Copyright © Draper Tools Limited.
Permission is granted to reproduce this publication for personal & educational use only.
Commercial copying, redistribution, hiring or lending is prohibited.
No part of this publication may be stored in a retrieval system or transmitted in any other
form or means without written permission from Draper Tools Limited.
In all cases this copyright notice must remain intact.
Date first published March 2019
1. TITLE PAGE
2
2. CONTENTS
3
2.1 CONTENTS
Page content .............................................................................. Page
1 TITLE PAGE
1.1 INTRODUCTION ................................................................................................ 2
1.2 REVISION HISTORY.......................................................................................... 2
1.3 UNDERSTANDING THIS MANUAL ................................................................... 2
1.4 COPYRIGHT NOTICE ........................................................................................ 2
2 CONTENTS
2.1 CONTENTS ........................................................................................................ 3
3 GUARANTEE
3.1 GUARANTEE...................................................................................................... 4
4 INTRODUCTION
4.1 SCOPE................................................................................................................ 5
4.2 SPECIFICATION................................................................................................. 5
4.3 HANDLING & STORAGE.................................................................................... 5
5 HEALTH & SAFETY INFORMATION
5.1 GENERAL SAFETY INSTRUCTIONS ................................................................ 6
5.2 RECHARGEABLE BATTERIES.......................................................................7-8
6 IDENTIFICATION
6.1 IDENTIFICATION................................................................................................ 9
7 UNPACKING & CHECKING
7.1 PACKAGING..................................................................................................... 10
7.2 WHAT’S IN THE BOX ....................................................................................... 10
8 PREPARING THE 12V POWER PACK
8.1 CHARGING THE 12V POWER PACK.............................................................. 11
8.2 CHECKING POWER LEVEL ............................................................................ 11
8.3 RECHARGING THE 12V POWER PACK......................................................... 11
8.4 AC/DC TRANSFORMER CHARGER ............................................................... 12
9 OPERATION INSTRUCTIONS
9.1 JUMP STARTING ............................................................................................. 13
9.2 DISCONNECTING ........................................................................................... 14
9.3 LED LIGHT ....................................................................................................... 14
10 MAINTENANCE
10.1 STORAGE......................................................................................................... 15
11 EXPLANATION OF SYMBOLS
11.1 EXPLANATION OF SYMBOLS......................................................................... 16
12 DISPOSAL
12.1 DISPOSAL ....................................................................................................... 17
DECLARATION OF CONFORMITY............................................................................ ENCLOSED
3.1 GUARANTEE
Draper tools have been carefully tested and inspected before shipment and are guaranteed to
be free from defective materials and workmanship.
Should the tool develop a fault, please return the complete tool to your nearest distributor
or contact Draper Tools Limited, Chandler's Ford, Eastleigh, Hampshire, SO53 1YF.
England.
Telephone Sales Desk: (023) 8049 4333 or Product Helpline (023) 8049 4344.
A proof of purchase must be provided with the tool.
If upon inspection it is found that the fault occurring is due to defective materials or
workmanship, repairs will be carried out free of charge. This guarantee period covering
parts/labour is 12 months from the date of purchase except where tools are hired out when
the guarantee period is 90 days from the date of purchase. This guarantee does not apply
to normal wear and tear, nor does it cover any damage caused by misuse, careless or
unsafe handling, alterations, accidents, or repairs attempted or made by any personnel
other than the authorised Draper warranty repair agent.
Note: If the tool is found not to be within the terms of warranty, repairs and carriage
charges will be quoted and made accordingly.
This guarantee applies in lieu of any other guarantee expressed or implied and variations
of its terms are not authorised.
Your Draper guarantee is not effective unless you can produce upon request a dated
receipt or invoice to verify your proof of purchase within the guarantee period.
Please note that this guarantee is an additional benefit and does not affect your statutory
rights.
Draper Tools Limited.
3. GUARANTEE
4
4. INTRODUCTION
5
4.1 SCOPE
This product is designed for the starting of petrol and diesel engines with flat batteries, it can
also supply 12V DC to power your 12V electrical devices from it’s inbuilt 12V DC output
socket.
4.2 SPECIFICATION
Stock no. .....................................................................................................................90643
Part no. ............................................................................................................. PP12V17Y
Output:
Voltage ................................................................................................................... 12V
Starting (CCA).................................................................................................. 400A
Peak................................................................................................................. 900A
Integral battery:
Type ...................................................................................... Lead acid sealed battery
Voltage ................................................................................................................... 12V
Capacity ............................................................................................................... 17Ah
Charger:
Input
Voltage ...................................................................................................230V~50Hz
Output
Voltage ............................................................................................................... 12V
Amperage ..................................................................................................... 500mA
Construction ......................................................................................................Class II
USB output .................................................................................................................. 5V/1A
Cable length .............................................................................................................750mm
Weight (gross) ..............................................................................................................7.8kg
Max Pressure ............................................................................................................150PSI
4.3 HANDLING & STORAGE
Care must still be taken when handling and lifting. Dropping this machine will have an effect
on its operation and may also result in personal injury. This machine is not a toy and must be
respected.
The environment will have a negative result on its operation if you are not careful. If the
machine is unprotected from dust and debris; components will become clogged:
And if not cleaned and maintained correctly or regularly the machine will not perform
at its best.
6
5. HEALTH & SAFETY INFORMATION
5.1 GENERAL SAFETY INSTRUCTIONS
WARNING: Please read the following instructions carefully, failure to do so could lead to serious
personal injury.
IMPORTANT: Draper Tools Limited recommends that this machine should not be modified or used for
any application other than that for which it was designed. If you are unsure of its relative applications do
not hesitate to contact us in writing and we will advise you.
WARNING - RISK OF EXPLOSIVE GASES
WORKING IN THE VICINITY OF A LEAD-ACID BATTERY IS DANGEROUS, BATTERIES GENERATE
EXPLOSIVE GASES DURING NORMAL BATTERY OPERATION. FOR THIS REASON, IT IS OF
UTMOST IMPORTANCE, IF YOU HAVE ANY DOUBT, THAT EACH TIME BEFORE USING THE
POWER PACK, YOU READ THIS MANUAL AND FOLLOW THE INSTRUCTIONS.
- To reduce risk of battery explosion, follow these instructions and those published by the battery
manufacturer and manufacturer of any equipment you intend to use in the vicinity of the battery.
Review warning marks on all these products and on the engine.
- When working near a lead-acid battery, someone should be within range of your voice, close enough
to come to your aid.
- Have plenty of fresh water and soap nearby in case battery acid contacts skin, clothing or eyes.
- Wear complete eye, hand and clothing protection. Avoid touching eyes when working with batteries.
- If battery acid contacts skin or clothing, wash immediately with soap and water. If acid enters eyes,
immediately flood eye with cool, clean running water for at least 15 minutes and get medical attention
immediately.
- NEVER smoke or allow a spark or flame in vicinity of battery or engine.
- Be extra cautious to reduce risk of dropping a metal tool onto a battery. It could spark or short circuit
the battery or, any other electrical part possibly causing an explosion.
- When working with a lead-acid battery, remove personal metallic items such as rings, bracelets,
necklaces and watches. A lead-acid battery can produce a short-circuit current high enough to weld a
ring, or the like to metal, which may cause severe burns.
- Use the battery charger for charging “lead-acid batteries only”. Do not use for charging dry-cell or
Ni-Cad batteries that are commonly used with home appliances. For example, radios, torches etc.
These batteries may explode and cause injury to persons and damage to property.
- NEVER charge or boost a frozen battery.
- NEVER allow clamps to touch one another or to contact the same piece of metal to prevent arcing.
- Ensure the power pack is switched off prior to connecting/disconnecting of the vehicle battery.
- Do not use the charger in damp or wet conditions.
- Keep out of reach of children.
- Do not submerge in water.
- Do not operate near flammables such as petrol, paraffin, or thinners etc.
If the charger receives a sharp blow or is otherwise damaged in any way, do not disassemble. Have it
checked by a qualified service person. Return to source.
- The battery must be removed from the appliance before it is scrapped.
- The appliance must be disconnected from the supply mains when removing the battery.
- The battery must be disposed of safely.
- This appliance is for use on 12V circuits only.
- Do not use in high temperatures.
- Before connecting the power pack, ensure the main switch is in the ‘off’ position.
- If incorrect polarity is indicated, disconnect immediately and rectify.
- Prior to initial use charge for 24 hours.
- Do not use the power pack while charging.
5. HEALTH & SAFETY INFORMATION
7
5.2 RECHARGEABLE BATTERIES:
- The battery must be removed from the appliance before it is scrapped.
- The appliance must be disconnected from the supply mains when removing the battery.
- The battery must be disposed of safely
- Charge the battery using the specified charger under the charging conditions specified.
Charging the battery under any other conditions may cause the battery to overheat, emit hydrogen
gas, leak, ignite or burst.
- Do not place the battery near a device that may cause sparks (such as a switch or a fuse). The
battery may generate flammable gas when charged, so remember to keep the battery away from fire
to prevent sparks from igniting or causing explosion.
- Do not place or store the battery in a vehicle in hot weather, under direct sunlight, or near a source
of heat. Use and storage of the battery in these conditions may cause battery leakage, fire or
bursting.
- Damage and deterioration of battery characteristics may occur if the battery is dropped.
- Do not charge the battery in the inverted position.
- Do not carry the battery by hanging it from the terminal or the cable, as it may cause damage to the
battery.
- Turn off the switch of the circuit when connecting the battery to a charger or load.
- Batteries tend to lose a part of their capacity due to self-discharge during shipment and storage,
recharge the batteries before you use them and after purchase or long-term storage in order to
restore their full capacity.
- Do not continue discharging to the point where the voltage drops below the recommended discharge
cut-off voltage.
If a storage battery that was discharged below the recommended discharge cut-off voltage is
recharged, the storage battery may generate heat which could deform it or cause condensation to
form moisture from inside the battery.
Discharging below the recommended voltage may also accelerate the deterioration of the battery's
performance characteristics.
- Avoid overdischarge, and charge the battery immediately after discharge.
- Unsatisfactory storage conditions may cause deterioration in battery performance, shorten service
life and could cause rust to form on the terminals.
- Do not allow metallic objects to touch or bridge the terminals especially jewellery. Failure to observe
the precautions may cause the battery to overheat, emit hydrogen gas, leak, ignite or burst.
- Do not throw the battery into fire or heat the battery. The battery may burst or generate a toxic gas if
placed in contact with fire.
- Do not attempt to disassemble, remodel or destroy the battery, as it may cause the battery leakage,
fire or bursting, and could also create sulphuric acid spills from the battery resulting in possible burns
to personnel and damage to the immediate environment.
- Do not continue to charge the battery beyond the time specified in the instructions. If the battery is
not fully charged even after being charged for a longer time than specified, discontinue charging and
remove the battery from the charger. Charging for a longer time than specified may cause the
battery to leak, ignite, or burst.
- Do not discharge the batteries beyond the maximum values indicated on the battery. If the battery is
discharged beyond the maximum values, it may leak, ignite or burst.
- Keep the batteries beyond the reach of children.
- Wear gloves when handling batteries.
5. HEALTH & SAFETY INFORMATION
8
- Do not apply organic solvents such as paint thinner, petrol or liquid detergents to the battery.
If these are brought into contact with the battery case, it may crack, causing leakage.
- The battery contains electrolyte (diluted sulphuric acid) a very toxic substance. If the battery leaks
and the liquid inside spills on the skin or clothing, immediately wash it off with plenty of clean water.
If the liquid splashes into eyes, immediately flush the eyes with plenty of clean water and consult a
doctor. Sulphuric acid will burn skin and in the eyes may cause loss of eyesight.
- Store the battery in a stable position so as to keep the terminals of the battery away from any
metallic or other conductive material (including items that may fall or drop onto the battery).
Protect the battery from rain. If the terminals of the battery come into contact with water, they may
corrode.
As a general rule, keep the battery in an upright position.
When storing the battery, disconnect it from the charger and keep it in a place where the
temperature is low. Do not store in direct sunlight or temperatures exceeding 60°C.
If the battery is stored for a year or longer without being charged, its service life may be shortened.
Store the battery after fully charging it, otherwise its service life may be shortened.
- Use/recharge the battery regularly. The battery gradually deteriorates during storage and
consequently its decreased capacity may be irreversible even after recharging.
Used batteries are recyclable. When returning used batteries, insulate their terminals with
adhesive tape if not the residual electricity in used batteries may cause fire or explosion.
This battery is fully recyclable and should be accepted at any location that excepts common
automotive batteries. Contact your national/local authority or municipal waste centre for details.
BATTERY CHARGERS:
- Before charging, read the instructions.
- For indoor use. Do not expose to rain.
- Disconnect the supply before making or breaking the connections to the battery.
WARNING: Explosive gases. Prevent flames and sparks. Provide adequate ventilation
before charging.
- Do not charge non-rechargeable batteries.
- During charging the battery must be placed in a well ventilated area.
6. IDENTIFICATION
9
 12V DC output.
 Test button.
 Battery status indicator light.
 Battery charge complete indicator light.
 Clamp storage holsters.
 Charging socket.
 Insulated heavy duty cables.
 Heavy duty copper coated
toothed clamps (+/-).
 Carry handle.
 USB output socket.
 LED light.
 LED light switch.







 



7. UNPACKING AND CHECKING
10
7.2 WHAT´S IN THE BOX?
As well as the product; there are several parts not fitted or attached to it.
 AC/DC transformer charger.
 12V DC Adaptor.
 Nozzles x3.
7.1 PACKAGING
Carefully remove the product from the packaging and examine it for any sign of damage
caused during shipping. Lay the contents out and check them. If any part is damaged or
missing, do not attempt to use the tool and contact the Draper Helpline immediately (see
back page for details).
Retain the packaging material at least during the guarantee period: in case the machine
needs to be returned for repair.
Warning! Some of the packaging materials used may be harmful to children, keep them out
of reach from children.
Disposed of any packaging correctly and according to local regulations.
 

11
8.1 CHARGING THE 12V POWER PACK
(FIG.1)
NOTE: Battery must be charged for 24 hours
prior to first use and charged regularly every 2
months.
The Power pack was precharged during production.
However, it is more beneficial to ensure that the
battery is kept at full charge prior to each use. It is
recommended that the power pack should be kept
on charge until it is required for use.
The charging circuit is automatic and will not
overcharge when connected to the charger leads.
When all the battery charging status indicators
 and the battery charged complete indicator
light  are fully illuminated, the power pack is
fully charged.
8.2 CHECKING POWER LEVEL (FIG.2)
To check the power level of your power pack, press
the test button and the battery indicator lights will
illuminate to show the current power level of the
battery. The battery charged complete indicator light
will illuminate when the test button is depressed
and the power pack has a full charge.
8.3 RECHARGING THE 12V POWER
PACK
There are two methods in how to charge your power
pack. The first is automatic charging using the
AC/DC transformer charger which is the
preferred method. The second is through the 12V
DC charger lead . This is not automatic and will
require supervision as the power pack could be
damaged through overcharging.
FIG. 2
FIG. 1
8. PREPARING THE 12V POWER PACK

 
12
8. PREPARING THE 12V POWER PACK
FIG. 3
NOTE: If your 12V Power Pack is completely
discharged, it may take up to 30 hours to be fully
recharged.
8.4 AC/DC TRANSFORMER CHARGER
(FIG.3)
a) Insert the AC/DC transformer charger into
the charging socket  located on the front
panel of the 12V Power Pack.
b) Connect the AC/DC transformer charger into
the AC outlet, the charging light will light on the
front panel of the 12V Power Pack.
c) Allow the 12V Power Pack to charge until the
battery charged complete indicator light
illuminates (you can monitor the
progress by checking the three red battery
charging status indicator lights).
d) Once the 12V Power Pack has charged. Allow to
charge for a further three to six hours (three
hours is acceptable but to ensure maximum
charge efficiency, six hours is preferred).
NOTE: TEST button  must be pressed to check
battery power level and charging lights.
 
9. OPERATING INSTRUCTIONS
13
9.1 JUMP STARTING (FIG.5)
Refer to the General Safety Instructions for
information regarding the handling of lead acid
batteries etc.
For 'Maintenance' type lead acid batteries remove
the cell caps to monitor the electrolyte levels prior to
commencing. The level of the electrolyte should be
up to the indicator on the battery (approx. 5 to 10mm
above the top of the plates). This must be checked
and adjusted.
- NOTE: This is not applicable for 'Maintenance Free'
type batteries.
When topping up the electrolyte use only distilled or
de-ionised water. DO NOT use tap water. It is
advisable to check the electrolyte density (specific
gravity) to make certain the acid to water ratio is
sufficient.
Clean the battery terminals to allow an optimum
conductive connection between the battery and
power pack.
It is advisable to measure the battery voltage for
signs of deep discharge. Discharging the battery to 20% or less of it's full charge capacity is
known as 'deep discharge'. Unless specifically designed for deep discharge cycles this
practice will significantly reduce the life of the battery.
Do not attempt to use the power pack on a vehicle with a deep discharged battery.
The power pack shall not be used on large ampere-hour batteries as this may cause damage
or injury.
- WARNING:
Explosive gases. Prevent flames and sparks. Provide adequate ventilation during use.
Refer to the appliance/vehicle manufacturer's literature for specific instructions on jump
starting.
If it is necessary to disconnect the battery, some information (e.g. radio presets and security
code) may require re-entry. Disconnecting the battery can also trigger the anti-theft
alarm/immobiliser. Contact the manufacturer for detailed information.
All the power packs are equipped with a visible polarity inversion warning. In the event the
positive (+) and negative (-) connections are incorrectly made, e.g. power pack positive (+) red
clamp to battery negative (-) terminal and power pack negative (-) black clamp to battery
positive (+) terminal, this must be rectified immediately to avoid damage or possible injury.
Engine cranking requires a large amount of current. The engine that requires starting must be
in a good mechanical condition as prolonged cranking is not possible. When attempting to
crank vehicles equipped with larger capacity batteries or in severe climates it will be necessary
to pre-charge the vehicle battery for approximately 15 minutes before attempting a jump start.
- NOTE: When starting diesel engines, to prevent damage to the glow plugs which would
otherwise result, pre-heat the plugs before starting the engine.
- NOTE: This appliance will only help jump start a vehicle with a functioning engine and
serviceable battery.
- WARNING: Due to the sensitive nature of vehicle electronics you MUST ensure that you refer
to the vehicle manufacturers handbook BEFORE you use the product, as the jump start
procedure can vary from vehicle to vehicle.
FIG. 5
9. OPERATING INSTRUCTIONS
14
9.2 DISCONNECTING
EXTREMELY IMPORTANT:
Failure to follow the below instructions could result
in the 12V power pack battery exploding.
- When the vehicle has started, remove the negative
(black) clamp within 15 seconds.
- Switch off the on/off switch on the power pack.
- Remove the positive (red) clamp and return both
clamps to their housings on the back of the power
pack.
9.3 LED LIGHT
The LED worklight can be switched on/off by pressing
the “light” button on the control panel.
10. MAINTENANCE
15
10.1 STORAGE
Ensure the clamps are securely attached to the clamping posts, store at room
temperature.
Charge the power pack every 2 months to keep the battery at peak operating condition.
Regular inspection and cleaning reduces the necessity for maintenance operations and will
keep your tool in good working condition. The appliance must be correctly ventilated during
tool operation.
All servicing and maintenance not listed in this manual must be carried out by an approved
Draper service agent (see back cover for contact details).
For more details please refer to your local Draper Stockist.
11. EXPLANATION OF SYMBOLS
16
11.1 EXPLANATION OF SYMBOLS
* WEEE
Do not dispose of Waste
Electrical & Electronic
Equipment in with domestic
rubbish
Conforms to all relevant
safety standards.
* Waste Electrical & Electronic
Equipment.
Class II construction
(Double insulated).
Automatic overload
protection.
Isolating transformer.
Read instruction
manual before use.
Keep out of rain.
Warning:
Explosive material.
Use in a well
ventiliated area.
Keep away from any
flame/fire.
LED worklight will only
operate when fully charged.
This charger contains as
sealed lead-acid battery and
must be disposed of properly.
Warning:
Live electricity.
Pb
12. DISPOSAL
17
12.1 DISPOSAL
- The sealed lead-acid battery in this appliance has a normal working life of many years.
When the battery expires, it should be removed from the appliance for recycling.
- Please contact your local solid waste authority for recycling information.
- CAUTION:
This appliance has a sealed lead acid battery that should be kept at full charge.
Recharge when first received, immediately after each use, and every three months if
not used. Immediately charge when the unit has been incorrectly overdischarged.
Do not operate the unit while charging. Failure to do this may cause the battery life to
be reduced greatly.
- At the end of the machine’s working life, or when it can no longer be repaired, ensure
that it is disposed of according to national regulations.
- Contact your local authority for details of collection schemes in your area.
In all circumstances:
Do not dispose of power tools with domestic waste.
Do not incinerate.
Do not abandon in the environment.
Do not dispose of WEEE*
as unsorted municipal waste.
* Waste Electrical & Electronic Equipment.
NOTES
18
NOTES
19
CONTACT US
+44 (0) 23 8049 4344
+44 (0) 23 8049 4333
Draper Tools Limited, Hursley Road,
Chandler's Ford, Eastleigh, Hampshire. SO53 1YF. U.K.
Helpline:
Sales Desk:
Internet: www.drapertools.com
General Enquiries: (023) 8026 6355
Service/Warranty Repair Agent:
For aftersales servicing or warranty repairs, please contact the
Draper Tools Helpline for details of an agent in your local area.
YOUR DRAPER STOCKIST
©Published by Draper Tools Limited.
No part of this publication may be reproduced, stored in a retrieval system or transmitted in any form or by any means,
electronic, mechanical photocopying, recording or otherwise without prior permission in writing from Draper Tools Ltd.
DBMC0317
/