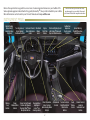
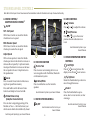
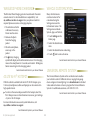
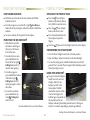
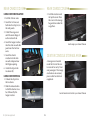
Cadillac XT6 2022 is a sophisticated vehicle equipped with advanced technology to enhance your driving experience. Its keyless access system allows you to unlock doors and open the liftgate with the Remote Keyless Entry transmitter within proximity. The auto engine stop/start system efficiently turns off the engine when at a complete stop, saving fuel. Driver Mode Control lets you adjust steering, suspension, and powertrain settings to suit different driving conditions. Enjoy hands-free calling and voice recognition with the steering wheel controls.
Cadillac XT6 2022 is a sophisticated vehicle equipped with advanced technology to enhance your driving experience. Its keyless access system allows you to unlock doors and open the liftgate with the Remote Keyless Entry transmitter within proximity. The auto engine stop/start system efficiently turns off the engine when at a complete stop, saving fuel. Driver Mode Control lets you adjust steering, suspension, and powertrain settings to suit different driving conditions. Enjoy hands-free calling and voice recognition with the steering wheel controls.


-
 1
1
-
 2
2
-
 3
3
-
 4
4
-
 5
5
-
 6
6
-
 7
7
-
 8
8
-
 9
9
-
 10
10
-
 11
11
-
 12
12
-
 13
13
-
 14
14
-
 15
15
-
 16
16
-
 17
17
-
 18
18
-
 19
19
-
 20
20


Cadillac XT6 2022 is a sophisticated vehicle equipped with advanced technology to enhance your driving experience. Its keyless access system allows you to unlock doors and open the liftgate with the Remote Keyless Entry transmitter within proximity. The auto engine stop/start system efficiently turns off the engine when at a complete stop, saving fuel. Driver Mode Control lets you adjust steering, suspension, and powertrain settings to suit different driving conditions. Enjoy hands-free calling and voice recognition with the steering wheel controls.
Ask a question and I''ll find the answer in the document
Finding information in a document is now easier with AI
Related papers
-
Cadillac 2022 XT5 User guide
-
-
-
-
-
-
-
-
-
Other documents
-
GMC 2022 Acadia User guide
-
Buick 2020 Encore GX User guide
-
Buick Encore GX 2021 User guide
-
-
Chevrolet 2020 Blazer User guide
-
-
-
-
-