5
Unit:mm
INSTALLATION INSTRUCTIONS
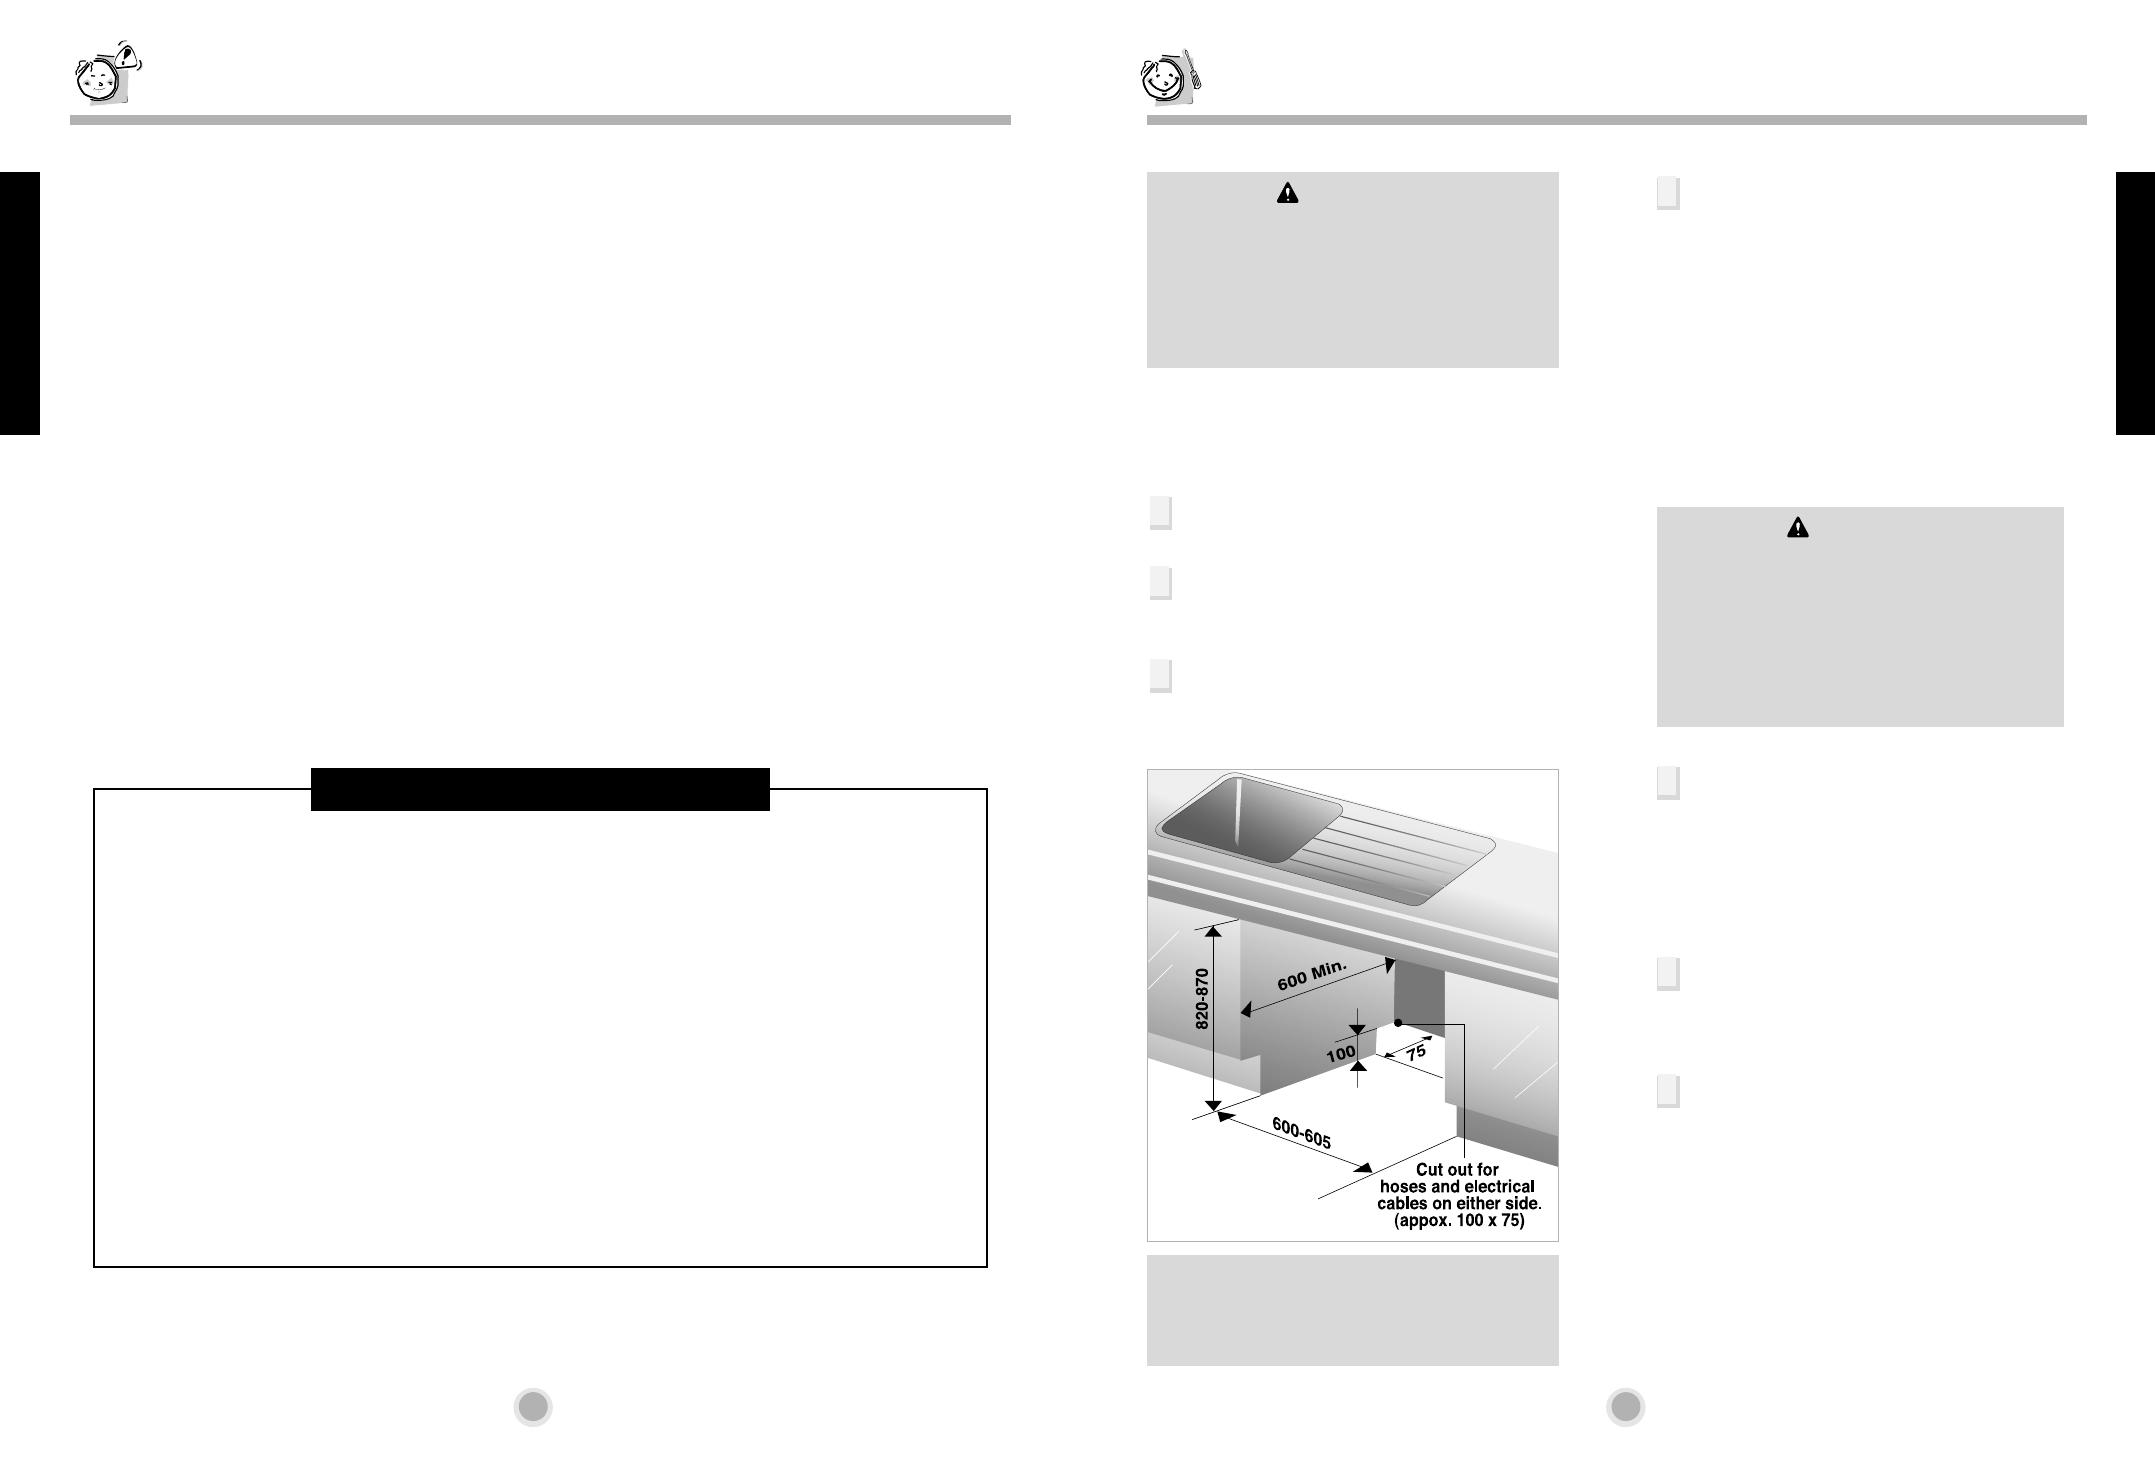
Step 1 :
PREPARE CUPBOARD OPENING
Step 2 :
PREPARE ELECTRICAL WIRING
1
2
3
This appliance must be supplied with
correct rating voltage and hertz as shown
on instruction manual, and connected to
an individual, properly grounded branch
circuit, protected by minimum 15 amp
circuit breaker or time delay fuse.
Wiring must be 2 wires with ground.
The power plug must be in a accessible
location adjacent to and not behind the
dishwasher and within 1.2 meters of the
dishwasher side.(See page 7 Fig.A)
The power plug must be correctly
earthed, if in doubt, have it checked by a
qualified Electrician. No other appliance
should be connected to the same plug
outlet by a double adapter or similar
plug.
CAUTION
For personal safety, remove house fuse
or open circuit breaker before installation.
Do not use an extension cord or adapter
plug with this appliance. Electrical and
grounding connections must comply with
the national electrical code/provincial and
municipal code and/or other local codes.
If bare chipboard is adjacent to or above
the dishwasher, it should be sealed with a
waterproofing paint or sealant to prevent
swelling due to steam.
4
GROUNDING INSTRUCTIONS
This appliance must be grounded. In the event of a malfunction or breakdown,
grounding will reduce the risk of electric shock by providing a path of least
resistance for electric current. This appliance is equipped with a cord having an
equipment-grounding conductor and a grounding plug. The plug must be
plugged into an appropriate outlet that is installed and grounded in accordance
with all local codes and ordinances.
WARNING - Improper connection of the equipment-grounding conductor can
result in a risk of electric shock. Check with a qualified electrician or
service representative if you are in doubt whether the appliance is
properly grounded. Do not modify the plug provided with the
appliance; if it will not fit the outlet have a proper outlet installed by
a qualified electrician.
SAVE THESE INSTRUCTIONS
SAFETY AND CAUTION
Safety and Caution
Installation Instructions
WARNING
Any electrical work required to install this
appliance should be carried out by a
qualified electrician or competent person.
Any plumbing work required to install this
appliance should be carried out by a
qualified plumber or competent person.
1
2
3
4
This dishwasher is designed to fit to the
size shown as below.
Select a location as close to sink as
possible for easy connections to water and
drain lines.
The dishwasher should not be installed
more than 3 meters from sink for proper
drainage.
If dishwasher is to be installed in a corner,
a minimum 5cm of space is required
between the washer and an adjacent
cabinet or a wall.
Child Safety
• Controls may be locked using “Child Lock” mode to prevent from starting dishwasher
accidentally.
• Keep children away from detergents and rinse-aids.
• Do not allow children to operate the dishwasher.
• Young children should be supervised to ensure that they do not play with the appliance.
CAUTION concerning the Power Cord
• Most appliances recommend they be placed upon a dedicated circuit; that is, a single outlet
circuit which powers only that appliance and has no additional outlets or branch circuits.
Check the specification page of this owner's manual to be certain.
• Do not overload wall outlets. Overloaded wall outlets, loose or damaged wall outlets,
extension cords, frayed power cords, or damaged or cracked wire insulation are dangerous.
Any of these conditions could result in electric shock or fire. Periodically examine the cord
of your appliance, and if its appearance indicates damage or deterioration, unplug it,
discontinue use of the appliance, and have the cord replaced with an exact replacement part
by an authorized servicer.
• Protect the power cord from physical or mechanical abuse, such as being twisted, kinked,
pinched, closed in a door, or walked upon. Pay particular attention to plugs, wall outlets, and
the point where the cord exits the appliance.
3828ED7002S 2005.5.11 9:24 AM 페이지4 001 HP LaserJet 5000 Series


