Page is loading ...

R181030
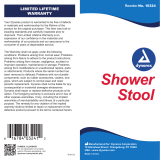
LIMITED LIFETIME WARRANTY
WARNING
Your Dynarex Product is warrantied to be free of defects in
materials and workmanship for the lifetime of the product for the
original purchaser. This item was built to exacting standards and
carefully inspected prior to shipment. This Limited Lifetime
Warranty is an expression of our confidence in the materials and
workmanship of our products and our assurance to the consumer
of years of dependable service.
The Warranty shall not apply under the following conditions:
Problems arising from normal wear; Problems arising from failure
to adhere to the product instructions; Problems arising from
misuse, negligence, accident or improper operation,
maintenance or storage; Problems arising from modifications or
unauthorized repairs, parts or attachments; Products where the
serial number has been removed or defaced; Problems with
non-durable components, such as rubber accessories, casters,
and grips, which are subject to normal wear and need periodic
replacement. Dynarex shall not be liable for any consequential or
incidental damages whatsoever. Dynarex shall repair or replace
defective products at its option. The foregoing warranty is
exclusive and in lieu of other express warranties, if any, including
the implied warranties of merchantability and fitness of a
particular purpose. The remedy for any violation of the implied
warranty shall be limited to repair or replacement of the defective
product pursuant to the terms contained herein.
Drop-Arm
Folding
Commode
SYMBOL GLOSSARY
For an explanation of symbols
used in Dynarex packaging, visit
dynarex.com/symbols.php
WARNING:
Cancer and Reproductive Harm
www.P65Warnings.ca.gov
Manufactured for: Dynarex Corporation
10 Glenshaw Street • Orangeburg, NY 10962
USA • www.dynarex.com
Made in China
1. DO NOT install commode without first reading and
understanding this assembly and instruction sheet. If you can
not understand these instructions, contact a healthcare,
dealer or technical professional before attempting to install.
Otherwise, injury or damage may occur.
2. Inspect all parts for shipping damage before assembly.
If there is shipping damage–DO NOT USE. Contact
dealer/carrier for further instructions.
3. Toilet seat must be in down position before use. Failure to do
so may result in breakage of commode and possible injury.
4. Make certain that the height adjusting snap buttons fully
protrude through the same respective hole of each leg
extension. This will ensure that the leg extensions are
securely locked in position and an even height is achieved.
5. Ensure ALL screws, nuts and/or bolts are tightened.
6. Check the rubber tips on the leg extensions for rips, wear or if
they are missing. Immediately replace any or all if any of
these imperfections exist.
7. All four leg extensions with rubber tips MUST touch the floor
simultaneously at all times.
8. Users with limited physical strength should be supervised or
assisted while using commode.
9. Use the arm supports only for assistance. DO NOT attempt to
use the arms to support full body weight.
Reorder No. 10376

COMMODE ASSEMBLY
ADJUSTING LEG HEIGHT
1. Attach the Bucket Frame to the Armrest Assembly by
depressing the brass push button on the Bucket Frame and
sliding it into the corresponding hole in the Armrest
Assembly. Ensure the push button is fully engaged through
the hole. Make sure the back of the Bucket Frame (the back
of the Bucket Frame has the barcode sticker) corresponds
to the back of the Armrest Assembly (the back of the
Armrest Assembly has the back rest receptacle).
2. Attach the Frame Support Bar to the Armrest Assembly by
depressing the brass push button on the Frame Support Bar
and sliding it into the corresponding hole in the Armrest
Assembly. Ensure the push button is fully engaged through
the hole.
1. Before use, adjust height of each leg to your specific needs,
making sure all legs are at the same height. When desired
height is reached, lock legs into place by aligning buttons
into proper holes.
2. Make sure legs are locked into place by pushing down on or
pulling legs.
INSTRUCTIONS
1. To operate the drop arm, push the lever forward to release
and slowly lower the arm so it rests against the bar at the
bottom of the frame. To return the arm rest to the upright
position, lift the arm up until the lever latch clicks into place.
CAUTION: Do not lean or push down on the arm rest until the
latch has been checked to insure the latch is in place and will
hold weight.
2. Arms should be unlatched and dropped to assist in transfer
onto/off the device.
3. To remove the toilet seat and lid, first remove the lid by
grasping the lid near the clamps and pulling away from the
back rail of the Bucket Frame. Repeat for the seat.
4. Attach the Backrest to the Backrest Receptacles in the
Armrest Assembly by depressing the brass push button on
the Backrest and sliding it into the corresponding hole in the
Backrest receptacles. Ensure the push button is fully
engaged through the hole.
5. Align the Toilet Seat to the opening in the Bucket Frame
and the Toilet Seat clamps to the back rail of the Bucket
Frame. Push down on Toilet Seat until clamps snap firmly
into place. Repeat for the lid.
6. Insert Commode Bucket into the brackets of the Bucket
Frame.
3. Repeat steps 1 and 2 to attach the Bucket Frame and Frame
Support Bar to the other Armrest Assembly.
Bucket
Frame
Armrest
Assembly
Frame
Support
Bar
/