Page is loading ...

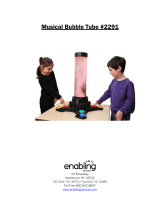
Remote Control Bubble Tube
Catalog No. 2229
50 Broadway
Hawthorne, NY 10532
Tel. 914.747.3070 / Fax 914.747.3480
Toll Free 800.832.8697
www.enablingdevices.com

Changing
Changing Changing
Changing colors and moving bubbles create a st
colors and moving bubbles create a stcolors and moving bubbles create a st
colors and moving bubbles create a striking focal point for any room!
riking focal point for any room!riking focal point for any room!
riking focal point for any room!
Remote control allows you to easily change colors and light patterns up to 15 feet away.
Bubble speed is also adjustable. The Bubble Tube can provide either stimulation or promote
relaxation depending upon the individual and the desired outcome. It also improves visual
development, visual perception, color recognition and communication.
Size: 17"L x 17"W x
29"H. Uses AC Wall Transformer. Weight: 10 lbs.
OPERATION
OPERATIONOPERATION
OPERATION:
Setup:
Setup:Setup:
Setup:
You will first need to place your Bubble Tube in the location where it will be used; these
factors must be present for proper operation. One the Bubble Tube must be placed on a flat
secure level surface, e.g. floor or very sturdy table, do not place the Bubble Tube on any type
of folding table or unstable, un-level surface. The Bubble Tube weighs 30 Lbs. when filled with
approximately 2.25 gallons of (Distilled water). Second the Bubble Tube requires a 120 Volt
wall outlet AC power source. Please Note:
Please Note:Please Note:
Please Note: If placing the Bubble Tube on the floor the power
cord and any extension cords if used should be taped down to prevent any of its users from
tripping on the cords.
Photo No.1
Photo No.1Photo No.1
Photo No.1
Page No.1
Page No.1Page No.1
Page No.1
Water Fill Line

Photo No.2
Photo No.2Photo No.2
Photo No.2
1.
1.1.
1. Now that you have placed your Bubble Tube in its location you will need to fill it with
(Distilled Water)
(Distilled Water) (Distilled Water)
(Distilled Water) Please Do Not Use Tap or Spring Water
Please Do Not Use Tap or Spring WaterPlease Do Not Use Tap or Spring Water
Please Do Not Use Tap or Spring Water, doing so will cause
, doing so will cause , doing so will cause
, doing so will cause
alga
algaalga
algae
ee
e
to form inside the
to form inside the to form inside the
to form inside the Bubble Tube
Bubble TubeBubble Tube
Bubble Tube
and on it
and on itand on it
and on its bubble aerator, causing a
s bubble aerator, causing a s bubble aerator, causing a
s bubble aerator, causing a
diminish in bubbles.
diminish in bubbles.diminish in bubbles.
diminish in bubbles.
There are two caps that must first be removed before filling the
Bubble Tube (See photos 1 & 2.). Lift off the first hard plastic cap; next remove the soft
vinyl rubber sealing cap. You will need approximately 2.25 gallons of Distilled water to
fill the Bubble Tube. Fill the tube up to 1 inch from the bottom of back cap. Do not fill
past this, doing so will cause the water to bubble out of the tube. Once you have
finished filling the Bubble Tube replace the two caps with the soft vinyl cap being put
on first next the hard cap.
Page No.2
Page No.2Page No.2
Page No.2

Photo No.3
Photo No.3Photo No.3
Photo No.3
To turn the Bubble Tube on flip the ON/OFF toggle switch on the base to ON. This will turn on
the bubbles. The included IR remote control will let you tune the lights ON, OFF, change their
color, brightness and how they light, Flash, Strobe, Fade and Smooth. The remote is powered
by a CR2025 Watch battery which is included. Please remote the clear plastic battery tab
before use.
Page No.3
Page No.3Page No.3
Page No.3

Please Note:
Please Note: Please Note:
Please Note: The remote is IR, meaning it is
The remote is IR, meaning it is The remote is IR, meaning it is
The remote is IR, meaning it is infrared just like a TV remote so it works in line of
infrared just like a TV remote so it works in line of infrared just like a TV remote so it works in line of
infrared just like a TV remote so it works in line of
site. On the base of the Bubble Tube you will see a small
site. On the base of the Bubble Tube you will see a small site. On the base of the Bubble Tube you will see a small
site. On the base of the Bubble Tube you will see a small depression with a small black IR
depression with a small black IR depression with a small black IR
depression with a small black IR
receiver. You must aim your remote at this to control the Bubble Tube.
receiver. You must aim your remote at this to control the Bubble Tube.receiver. You must aim your remote at this to control the Bubble Tube.
receiver. You must aim your remote at this to control the Bubble Tube.
Bubble Adjustment:
Bubble Adjustment:Bubble Adjustment:
Bubble Adjustment:
The Bubble Adjustment knob allows you to control the intensity of the bubbles. Turning it clockwise
increases the bubble flow, counter-clockwise decreases the bubble flow.
Draining the Bubble Tube
Draining the Bubble TubeDraining the Bubble Tube
Draining the Bubble Tube:
::
:
If the Bubble Tube needs to be moved or you want to change the water, you will need to drain
the water out. We have included a hand siphon pump to make this job easier. First you will
need to remove the two top covers on the Bubble Tube and have a bucket or container
capable of holding at least 2.5 gallons of water to drain the Bubble Tube into. The bucket or
container must be placed below the Bubble Tube for the siphon to work. Next place the end of
the siphon tube which is on the opposite side of the arrow indicator on the squeezing bulb
(shown in photo below); inside the Bubble Tube. Make sure the tube goes all the way to the
bottom of the Bubble Tube. Place the other end of the siphon tube into your bucket or sink
and start the siphoning by squeezing the bulb until the water starts to flow out of the siphon
tube into the bucket. Once this happens you can stop squeezing on the bulb and let the
Bubble Tube drain out.
Page No.
Page No.Page No.
Page No.4
44
4

Troubleshooting:
Troubleshooting:Troubleshooting:
Troubleshooting:
If the unit is not functioning as it is supposed to:
• Check the AC power cord is plugged in the outlet all the way. Try unplugging the cord and
then re-plug it back in.
• Make sure that the AC wall outlet is working.
• Check all your settings.
• If you have tried ALL of the above contact our Tech Support Department at ext. 320.
For Technical Support:
For Technical Support:For Technical Support:
For Technical Support:
Call our Technical Service Department
Monday through Friday, 9 a.m. to 5 p.m. (EST)
1-800-832-8697
customer_support@enablingdevices.com
Rev
RevRev
Rev
4
44
4/7
/7/7
/7/17
/17/17
/17
Page No.5
Page No.5Page No.5
Page No.5
/