Page is loading ...

PAGE 1
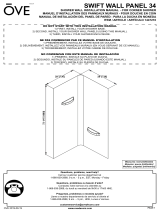
DALIA
INSTALLATION MANUAL FOR SHOWER WALL PANELS
MANUEL D’INSTALLATION POUR PANNEAUX MURAUX
MANUAL DE INSTALACIÓN PARA PANELES DE PARED
DO NOT START WITH THIS INSTALLATION MANUAL
1) FIRST, INSTALL YOUR SHOWER BASE.
2) SECOND, INSTALL YOUR SHOWER WALL PANELS (USING THIS MANUAL).
3) THIRD, INSTALL YOUR SHOWER ENCLOSURE.
NE PAS COMMENCER PAR CE MANUEL D’INSTALLATION
1) INSTALLEZ D’ABORD VOTRE BASE DE DOUCHE.
2) INSTALLEZ ENSUITE VOS PANNEAUX MURAUX (EN VOUS SERVANT DE CE MANUEL).
3) ENFIN, INSTALLEZ VOTRE CABINE DE DOUCHE.
NO COMIENCE CON ESTE MANUAL DE INSTALACIÓN
1) EN PRIMER LUGAR, INSTALAR LA BASE DE LA DUCHA.
2) A CONTINUACIÓN, VOLVER A INSTALAR LOS PANELES DE PARED (QUE UTILIZAN ESTE MANUAL).
3) POR ÚLTIMO, LA INSTALACIÓN DE LA DUCHA.
OVE 2017-08-06
Measures: inch [millimeter]
Mesures: pouce [millimètre]
Medidas: pulgadas [milímetros]
31 1/8”[790]
78 5/8”[1997]
39 3/4”[1010]
1”[25]
Questions, problems, need help?
Call our customer service department at
1-866-839-2888, 9 a.m. - 5 p.m., EST, Monday - Friday
Questions, problèmes ou besoin d’aide?
Contactez notre service à la clientèle au
1-866-839-2888, du lundi au vendredi de 9h00 à 17h00 HNE.
Preguntas, problemas o necesita ayuda?
Llame a nuestro departamento de servicio al cliente al
1-866-839-2888, 9 am. – 5 pm., HDE, Lunes a Viernes.

PAGE 3
SAFETY NOTICE
AVIS DE SÉCURITÉ
AVISOS DE SEGURIDAD
PREPARATION
PRÉPARATION
PREPARACIÓN
NOTICE
• Any modication or alteration from what is specied in this instruction manual will void any and all warranty on this product.
• The distributor is not responsible for any damage to the unit or personal property caused by improper installation. If you disregard
instructional warnings, you will void your warranty and possibly deal with water damage.
• Consult the distributor’s website for any additional information or question on this product’s installation.
AVIS
• Toute modication ou altération apportée aux indications données dans le présent manuel d’instructions annule toute garantie associée
à ce produit.
• Le distributeur n’est pas responsable pour les dommages sur le produit ou sur la personne causés par une installation inadéquate. Si
vous ne tenez pas compte des indications du manuel d’instruction, vous annulerez votre garantie et vous vous exposerez à des dommages
causés par les fuites d’eau.
• Pour de plus amples renseignements sur l’installation du produit ou si vous avez des questions, veuillez consulter le site du distributeur.
ATENCIÓN
• Cualquier modicación o alteración con respecto a lo especicado en este manual de instrucción anulará toda la garantía de este
producto.
• El distribuidor no se hace responsable por cualquier tipo de daño a la unidad o propiedad personal ocasionado por una instalación
inadecuada. Ignorar estas instrucciones anulará la garantía y ocasionará daños potenciales por agua en su hogar.
• Consulte el sitio web del distribuidor para cualquier información adicional o pregunta sobre la instalación de este producto.
You will need at least two people to install this unit properly.
Before beginning assembly of product, make sure all parts are present. Compare parts with package contents list and hardware contents
list. If any part is missing or damaged, do not attempt to assemble the product.
Estimated Assembly Time: Shower (2 h)
2 personnes sont requises pour installer le produit correctement et sécuritairement.
Avant de commencer l’installation du produit, soyez assuré d’avoir toutes les pièces. Comparez les pièces avec les listes fournies. S’il y a
des pièces manquantes ou endommagées, ne tentez pas d’assembler le produit.
Temps de montage estimé: douche (2 h)
Necesitará al menos dos personas para instalar esta unidad de forma adecuada.
Antes de comenzar a ensamblar el producto, asegúrese de tener todas las piezas. Compare las piezas con la lista del contenido del
paquete y la lista de aditamentos. No intente ensamblar el producto si falta alguna pieza o si estas están dañadas.
Tiempo estimado de ensamblaje: Ducha (2 h)

PAGE 4
PART LIST
LISTE DES PIÈCES
LISTA DE PIEZAS
PART #
# DE PIÈCE
PARTE #
DESCRIPTION
DESCRIPTION
DESCRIPCIÓN
QUANTITY
QUANTITÉ
CANTIDAD
CODE
CODE
CÓDIO
A
Wall panel (small)
Panneau mural (petit)
Panel de pared (pequeña)
1 99SAP0007-MW
B
Wall panel (large)
Panneau mural (grand)
Panel de pared (grande)
1 99SAP0008-MW
CC
Wing nut kit
Écrou papillon
Tuerca de mariposa
6+2 99SHW0159-MW
TOOLS REQUIRED (not supplied)
OUTILS REQUIS (non fournis)
HERRAMIENTAS NECESARIAS (no incluido)
Pencil
Crayon
Lápiz
Screwdriver
Tournevis
Destornillador
Drill and drill bits
Perceuse et forets
Taladro con brocas
ø1/8” (3mm) & 1/4” (6mm)
Level
Niveau
Nivel
Measuring Tape
Ruban à mesurer
Cinta medidora
Cutter
Exacto
Cuchilla
Safety glasses
Lunettes de Sécurité
Anteojos de seguridad
Hole saw drill bit
Scie-cloche
Sierra de agujero
Wood furrings
Fourrures en bois
Piel de madera
Wood saw
scie à bois
Sierra de madera
Silicone
Silicone
Silicona
A
B
CC

PAGE 6
773/8”[1965]
2 1/2”[64]
3/4”[19]
#1
A-B-C. Install the recommended wood furring strip boards following the below illustrations precisely. Cut the height of the wood furrings as indicated. Wood
furrings and screws are not supplied. The recommended wood furrings are standard 2x3” and can be found in most home renovation centers. Note that standard
2x3” wood furrings actually measure 2.5”x96”x0.75” (64x2438x19 mm).
A-B-C. Installez les fourrures en bois recommandées en suivant les illustrations ci-dessous. Coupez les fourrures en bois à la hauteur indiquée. Les fourrures
et les vis en bois ne sont pas fournies. Les fourrures de bois recommandées sont des 2x3” standard et peuvent être trouvées dans la plupart des centres de
rénovation domiciliaire. Il est à noter que les 2x3” standard mesurent en fait 2.5”x96”x0.75” (64x2438x19 mm).
A-B-C. Instale las tablas de madera recomendadas siguiendo las ilustraciones de abajo. Cortar las tablas de madera a la altura especicada. No se suministran
pieles ni tornillos de madera. Las pieles de madera recomendadas son estándar 2x3” y se pueden encontrar en la mayoría de los centros de mejoramiento del
hogar. Debe tenerse en cuenta que los 2x3” estándar de madera miden realmente 2.5”x96”x0.75” (64x2438x19 mm).
WALL PANELS INSTALLATION
INSTALLATION DE PANNEAUX MURAUX
INSTALACION DE PANELES MURALES
NOT SUPPLIED!
The wood furrings and screws are not
supplied.
NON FOURNI!
Les fourrures et les vis en bois ne sont
pas fournis
¡NO INCLUIDO!
Pieles y tornillos para madera no se
proporcionan.
The wood furrings rest on
top of the ange.
Les fourrures en bois se
posent au dessus de la
bride.
Los tablones de madera
descansan en la parte
superior de la brida.
Wood furring
Fourrure en bois
Piel de madera
31 3/4”[805]
39 5/8”[1006]
6 5/8”[167]
4 1/4”[210]
773/8”[1965]
B
A
C

PAGE 7
#2
A-B. Drill holes on the right-hand side edge of the wall panel (A). Follow the below illustrations showing the positioning of the holes.
C. Place the 2 wall panels (A & B) together as shown below. Mark the positions of the holes on the wall panel (B).
FRENCH
SPANISH
WALL PANELS INSTALLATION
INSTALLATION DE PANNEAUX MURAUX
INSTALACION DE PANELES MURALES
11 1/8”[282]
2 1/4”[59]
A
A
B
A
A
ø1/4”
6mm
C
B
A

PAGE 9
#4
A. Apply silicone onto the wood furrings. Measure the location of the existing shower plumbing (shower handles and shower head), as exemplied by the
measures W1, W2 and W3 below.
B. Before installing the wall panels (A & B), drill holes at the measured location for the existing plumbing on the wall. Use a hole saw drill bit to neatly cut through
the wall panel.
A. Appliquez du silicone sur les fourrures en bois. Mesurez l’emplacement de la plomberie de douche existante (poignées de douche et pommeau de douche),
comme illustré par les mesures W1, W2 et W3 ci-dessous.
B. Avant d’installer les panneaux muraux (A & B), percez des trous à l’emplacement mesuré pour la tuyauterie existante sur le mur. Utilisez un foret à perçage
pour couper soigneusement le panneau mural.
A. Aplicar silicona en la piel de madera. La medición de la ubicación de la instalación de cañerías de ducha existente (manijas de ducha y cabezal de ducha)
como se muestra en pasos W1, W2 y W3 a continuación.
B. Antes de instalar los paneles de pared (A y B), pozos de perforación en el lugar de medida para la tubería existente en la pared. Usando una sierra de
perforación para perforar cuidadosamente cortar los paneles de yeso.
WALL PANELS INSTALLATION
INSTALLATION DE PANNEAUX MURAUX
INSTALACION DE PANELES MURALES
HELPFUL HINT!
A hole saw drill bit of the proper size
can be rented at your local tool renting
store.
ASTUCE!
Une scie-cloche de taille appropriée
peut être loué dans votre magasin local
de location d’outils.
¡CONSEJO ÚTIL!
Una broca de tamaño apropiado puede
ser alquilada en su tienda de alquiler de
herramientas local.
A B
W2W3
W1
W2
W3
W1
B
A

PAGE 10
#5
A. Apply silicone at the back of the wall panels (A & B), only onto the recessed part of the panels, which will come in contact with the drywalls.
B-C. Firmly push the wall panels (A & B) onto the drywalls. Ensure that the wall panels (A & B) are ush with the shower base edge.
A. Appliquer le silicone à l’arrière des panneaux muraux (A & B) sur la partie concave des panneaux. Elles seules rentreront contact avec les murs de
placoplâtre .
B-C. Poussez fermement les panneaux de paroi (A et B) sur les cloisons sèches. Assurez-vous que les panneaux muraux (A & B) aeurent le rebord la base
de douche.
A. Aplicar silicona a los paneles posteriores de pared (A & B), sólo la parte rebajada de los paneles entrará en contacto con los paneles de yeso.
B-C. Empuje rmemente los paneles de pared (A y B) en el panel de yeso. Asegúrese de que los paneles de pared (A y B) están al ras con la base borde ducha.
WALL PANELS INSTALLATION
INSTALLATION DE PANNEAUX MURAUX
INSTALACION DE PANELES MURALES
CONTINUE THIS INSTALLATION AT STEP#1 OF THE SHOWER ENCLOSURE INSTALLATION
MANUAL
CONTINUER CETTE INSTALLATION À L’ÉTAPE # 1 DU MANUEL D’INSTALLATION DE LA
CABINE DE DOUCHE
CONTINUAR ESTA INSTALACIÓN EN EL PASO # 1 DEL MANUAL DE INSTALACIÓN DE LA
CABINA DE DUCHA
A B
C
B
A
/