Page is loading ...

Specifications:
Bluetooth Tranceiver*:
Frequency Band:! 2.40-2.48GHz
Standard:! Bluetooth 3.0, Class 2
Sensitivity:! -85dBm @ 0.1% BER
TX Power:! 4dBm maximum
USB Interface:
SDP:! USB 2.0 (1.0 and 1.1 compatible)
USB File System:
Supported Formats:! FAT12, FAT16, FAT32
! MBR Primary partition only
Maximum Root Folders:! 250
Maximum Total Folders:! 1750
Maximum Files/Folder:! 250
Maximum Total Files:! 65534
MP3 Decoder:
Maximum Sample Rate:! 48kHz MPEG1, 24kHz MPEG2
! 12kHz MPEG2.5
Minimum Sample Rate:! 32kHz MPEG, 16kHz MPEG2
! 8kHz MPEG2.5
Maximum Data Rate:! 320kb/s MPEG1
! 160kb/s MPEG2, MPEG2.5
Minimum Data Rate:! 32kb/s MPEG1
! 8kb/s MPEG2, MPEG2.5
Environmental:
Temperature:! -40C to 65C ambient (-40F to
! 150F) Operating
! -40C to 125C ambient (-40F to
! 257F) Storage
Humidity:! 10% to 90% non-condensing
*Characterized by component manufacturer
Aurora Design LLC. ©2014-15 Rev 1.3 12/15
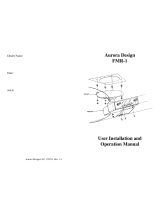
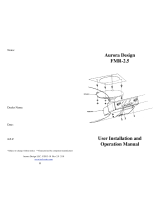
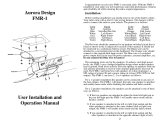
Aurora Design
BTU-1
Bluetooth/USB/MP3 Adapter
User Operation
Manual
!8!

Congratulations on your new Aurora Design BTU-1 Bluetooth/USB/
MP3 adapter. Combined with an FMR-1 converted radio, you can enjoy
21
st
century technology in your classic vehicle!
Setup: Before installing your radio back into your vehicle, you may
wish to plug the supplied hands-free microphone or optional illuminated
pushbutton into the appropriate jacks on the radio.
The microphone is only required if you want to support hands-free calls
and Voice Command. If not, the microphone does not need to be attached.
When not attached, the BTU-1 will not broadcast that it supports these
functions and your phone will operate as normal. The microphone can be
placed in a convenient location in the vehicle, typically along the front
edge of the headliner near the rear view mirror or along the bottom edge of
the dashboard. The attached cable is 9.8’ (3M) long and can be routed as
required, typically behind the A pillar cover for headliner mounting.
Excess cable can be coiled and tied off.
The pushbutton assembly is not required when used with an FMR-1
converted radio as the existing radio controls can be used to fully control
the BTU-1. The radio may or may not have a blue status LED added in the
dial for BTU-1 status. The pushbutton assembly can still be used with an
FMR-1 converted radio if desired, and must be used with all other
installations. The pushbutton requires a 1/2” (12.7mm) hole and should be
mounted somewhere convenient such as the bottom edge of the dashboard.
The pushbutton is illuminated with a red status LED that should be made
visible for easiest operation. The attached cable is 3.3’ (1M) long and can
be routed as required. Excess cable can be coiled and tied off.
Basic Operation: Operation of the BTU-1 is extremely simple yet
powerful. The BTU-1, when combined with an FMR-1 AM/FM receiver
form a fully integrated AM/FM/Bluetooth/USB/MP3 solution.
Communication over a proprietary com-link keeps the two modules in
perfect sync. No external cables, plugs or switches are required. Full
operation is provided by the existing controls on the radio. When
streaming music or handling a phone call, the FMR-1 status LED will
change color to indicate Bluetooth/USB operation. (see FMR-1 manual for
more information on status LED) When you stop streaming music or end a
call, the BTU-1 will put the FMR-1 back into normal operation.
Everything is handled automatically. When not combined with an FMR-1,
an optional illuminated pushbutton assembly is available for the BTU-1.
Since the BTU-1 contains both Bluetooth and USB interfaces, control
of the module, either through an FMR-1 or with the optional pushbutton,
focuses on one interface at a time. Just as with a computer, the application
that currently has focus receives the inputs from the keyboard and mouse,
so do the Bluetooth and USB interfaces on the BTU-1. If only one
interface is active, for example Bluetooth connected and no USB drive
attached, the controls will affect the Bluetooth interface. Likewise if a
USB drive is attached and no Bluetooth device is connected, the controls
US Certification:
This equipment has been tested and found to comply with the limits for a
Class B digital device, pursuant to part 15 of the FCC Rules. These limits
are designed to provide reasonable protection against harmful interference
in a residential installation. This equipment generates, uses and can radiate
radio frequency energy, and if not installed and used in accordance with
the instructions, may cause harmful interference to radio communications.
However, there is no guarantee that interference will not occur in a
particular installation. If this equipment does cause harmful interference to
radio or television reception, which can be determined by turning the
equipment off and on, the user is encouraged to try to correct the
interference by one or more of the following measures:
•
Reorient or relocate the receiving antenna.
•
Increase the separation between the equipment and receiver.
•
Consult the dealer or an experienced radio/TV technician for help.
Canadian Certification:
This device complies with Industry Canada license-exempt RS
standard(s). Operation is subject to the following two conditions: (1) this
device may not cause interference, and (2) this device must accept any
interference, including interference that may cause undesired operation of
the device.
Under Industry Canada regulations, this radio transmitter may only
operate using an antenna of a type and maximum (or lesser) gain approved
for the transmitter by Industry Canada. To reduce potential radio
interference to other users, the antenna type and its gain should be so
chosen that the equivalent isotropically radiated power (e.i.r.p.) is not
more than that necessary for successful communication.
European Certification:
The Bluetooth module used in this device complies with the essential
requirements of the R&TTE 1999/EC, the EMC Directive 2004/108/EC
and the low-voltage Directive 2006/95/EC.
Aurora Design LLC. does not assume any responsibility for personal
injury or property damage incurred due to hazardous driving as a result of
interaction with the BTU-1 or other Bluetooth devices.
BE SAFE! Never text while driving or be distracted by the radio.
!2! 7

Suggested USB File Layout
Troubleshooting:
Poor Range: Make sure nothing is obstructing the dial face of the radio,
or the openings along the bottom side of the radio chassis. Try moving
your Bluetooth device to a different location.
No Sound: For Bluetooth, make sure the BTU-1 is paired and connected
to your device. Also make sure the BTU-1 is selected as the audio device
for streaming audio and hands-free operation on your device following
the manufacturers instructions. Verify the audio levels are set properly
on the Bluetooth device.
For USB, verify that the USB drive is formatted correctly and contains
valid mp3 audio files using the .mp3 extension.
Long Delays: Do not place many non-audio files on the USB drive. This
will slow down indexing the drive.
If the USB-1 is set to sequential playback and you skip songs/folders
while the first song is playing, it may take a while for the next song to
start playing if the indexing process has not yet completed.
The drive may have a corrupted file table. Reformat the drive as FAT16
or FAT32 and recopy your files onto the drive.
will affect the USB interface. In the case where both a Bluetooth device is
connected and a USB drive is attached, the one that is currently active will
have focus from the controls. If neither interface is currently active, the
BTU-1 will focus control on the USB interface by default. In this case to
change focus to the Bluetooth device, momentarily remove the USB drive
or start playback using the menus on the Bluetooth device.
The BTU-1 will always return to the last mode it was in when the
radio was turned off assuming the Bluetooth or USB devices are still
present. For example, if the BTU-1 was playing back from the Bluetooth
or USB when the radio was powered off, it will return to playing back
from where it left off when the radio is turned back on. Additionally, if a
USB drive is inserted after the the radio is turned on, the BTU-1 will start
playback of the USB drive unless the Bluetooth interface is currently
active.
Bluetooth Pairing: To pair a new device, twist the volume control
back and forth twice towards the direction of higher volume. (this is the
same action that is used with the tone control to access the virtual fader
function) or push and hold the optional pushbutton. The optional front
panel status LED or the optional pushbutton LED will flash and a
confirmation tone will be heard in the radio. The BTU-1 will then go into
pairing mode for approximately 90 seconds or until a device is paired.
While in pairing, the BTU-1 will display as Aurora Design BTU-x.x in the
Bluetooth section of your device. (x.x represents the version) Select the
BTU-1 to connect. (refer to the owners manual for your Bluetooth device
for information on pairing)
Bluetooth Connecting: The BTU-1 will automatically attempt to
reconnect to the last connected Bluetooth device. If this device is not
within range, the BTU-1 will then attempt to reconnect to any of the
recently connected devices. This is handy when the user has multiple
Bluetooth devices, or several people use the radio. If any paired device is
within range when the radio is powered on, the BTU-1 will reconnect and
return to its last mode. The optional front panel LED or the optional
pushbutton LED will illuminate to signify a Bluetooth device is connected.
A confirmation tone will also be heard in the radio when a Bluetooth
device successfully connects.
Bluetooth Audio Levels: The BTU-1 sends commands to the
connected Bluetooth device to adjust the playback audio levels, but many
devices require that the user make these settings manually. Usually the
playback levels for audio streaming, phone calls and Voice Command are
all stored separately so must be adjusted separately. The first time you
stream audio, take a phone call, or use the Voice Command feature, use the
volume buttons or volume slider menu on the device to adjust the audio
level. This only needs to be performed once on the device as these settings
are permanently saved in the device.
!6! 3

Bluetooth Voice Command: The Bluetooth Voice Command feature
allows the user to control their compatible Bluetooth device through voice
commands. The Voice Command feature is accessible in all radio modes. It
is designed to work with Apple Siri
®
, Google Voice
®
and Microsoft
Cortana
®
and other Bluetooth voice interfaces. To initiate a Voice
Command, twist the volume control back and forth twice towards the
direction of higher volume or push and hold the optional pushbutto. (this is
the same motion that was used to open up pairing) Wait for the
confirmation tone from the Bluetooth device and then speak the command.
For example you can say things like “call home” or “play Bruce
Springsteen”. Check with the manual for your Bluetooth device for further
information on its support for voice commands.
Bluetooth/USB Streaming Audio: To start playing music from
either the Bluetooth or USB interface, twist the volume control back and
forth twice towards the direction of lower volume or push and hold the
optional push button for about 1 second. (you can also use the menus on
your Bluetooth device to control the audio) Audio will start playing from
the device that has focus as explained above. To toggle between pause and
play, repeat the procedure above. When the audio is paused, the FMR-1
status LED will blink slowly. If the audio is paused for more than about 10
seconds, the BTU-1 will release the FMR-1 and it will switch back to
normal radio operation. If playback is started again, it will continue from
where it left off.
For the USB interface, if the BTU-1 remains in pause for more than 10
minutes, when playback is resumed, the USB will start playing the last
song from the beginning rather than from where it left off. Additionally to
change the operating mode of the USB interface between random and
sequential playback, start by placing the USB interface in pause as
described above. To select random playback, twist the tuning control
towards the high frequency end of the dial or quickly press the optional
pushbutton once. A single beep tone will confirm the setting. To select
sequential playback, twist the tuning control towards the low frequency
end of the dial or quickly press the optional pushbutton twice. A double
beep tone will be heard to confirm the setting. When playback is resumed,
the current song will start playing over from the beginning.
To skip to the next song, twist the tuning control towards the high
frequency end of the dial or quickly press the optional pushbutton once.
Additionally on a signal seeking radio such as the Delco Wonderbar
®
,
Ford Town & Country
®
or Chrysler ElectroTouch
®
, you can press the seek
button. To skip to the previous song, twist the tuning control towards the
low frequency end of the dial or quickly press the optional pushbutton
twice. (Hint: when twisting the tuning control, twist it in the desired
direction and then back to the starting point. This way the tuner always
remains in the same position)
In sequential mode, to skip to the next folder, double twist the tuning
control on the radio towards the high frequency end of the dial, or double
press the seek bar on a signal seeking radio. To skip to the previous folder,
double twist the tuning control towards the low frequency end of the dial.
To reset to the first song, triple twist the tuning control towards the low
frequency end of the dial.
Hands-free Phone: When a phone call comes in, the FMR-1 will
mute the radio and ring through. To accept the call, twist the tuning control
towards the high frequency end of the dial or quickly press the optional
pushbutton once or press the seek button on signal seeking radios. To
reject or end a call, twist the tuning control towards the low frequency end
of the dial or quickly press the optional pushbutton twice or press the seek
button again.
To place a call on hold (muted), twist the volume control back and
forth twice towards the direction of lower volume or push and hold the
optional push button for about 1 second. (you can also use the menus on
your Bluetooth device to control the audio) A repeating confirmation tone
will be heard on the radio while the call is muted. To toggle between mute
and unmuted, repeat the instructions above. When the audio is muted, the
FMR-1 status LED will blink slowly.
The Bluetooth device can also be controlled using its own menus.
(follow manufactures instructions on controlling your device)
Due to differences in Bluetooth devices and their operating systems, the
BTU-1 may not operate with all Bluetooth devices.
USB File Structure: The USB drive must be formatted in FAT12,
FAT16 or FAT32 format using a MBR Primary partition. The name of the
drives can be anything, so you may want to name them after the type of
audio on them, i.e. Rock and Roll, Easy listening, Audio Books, etc.
Audio files must be in standard mp3 format and file names must use
the .mp3 extension. Files not conforming to this specification will be
ignored.
Each folder, including the root, can contain up to 250 files and an
unlimited number of folders. (1750 folders and 65534 files maximum) In
this manner the root folders could use the artist names with the subfolders
named for each album, or the root folders could be name for music genres,
etc.
Since indexing the drive takes a bit of time, the USB-1 will start playing
a song while indexing. Non-audio files will slow the indexing process
down and should be avoided. If the drive must be used for non-audio files,
the audio files can go into a folder named ~Music~. The USB-1 will then
only look in this folder, speeding up the indexing process.
The USB-1 will place two files named ~AD_USB0/1.TXT at the root
level. These files are used by the USB-1 for housekeeping and should not
be modified.
!4! 5
1/4